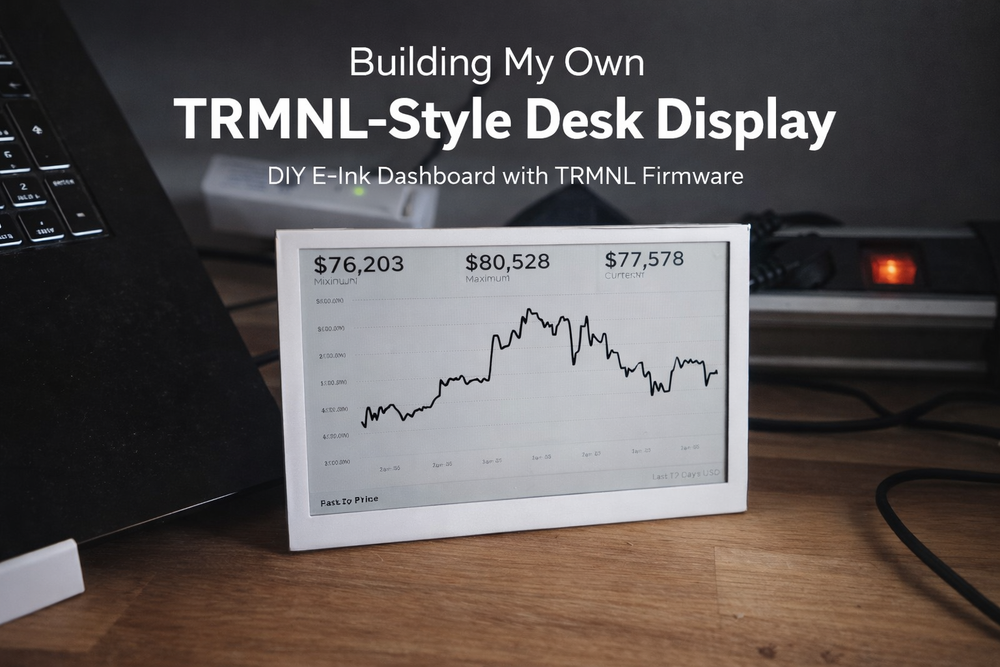
Building My Own TRMNL-Style Desk Display
I like having information at a glance. Not on my phone, not buried in tabs, but physically present on my desk.
Bitcoin price. Weather. Calendar week. A few fun facts. Things that quietly update while I work.
That was the motivation.
I discovered TRMNL and loved the concept immediately, but instead of buying a finished device, I wanted full control: my own hardware, my own firmware tweaks, and my own backend. I wanted to understand why it works, not just that it works.
So I built my own TRMNL-style screen from scratch using a 7.5″ Waveshare ePaper display, the official TRMNL firmware, and a self-hosted Laravel server running in Docker Compose.
This article documents the full journey: hardware choices, firmware compilation, flashing, backend setup, configuration, and—most importantly—the fix for a nasty B/W/R display refresh issue that caused visible stripes until I patched the panel refresh logic.
If you want to rebuild this yourself, you can.
Why ePaper on the desk still makes sense
n ePaper display is slow, monochrome, and completely silent. That sounds like a disadvantage—until you realize that’s exactly what you want for passive information.
No notifications. No distractions. No glowing pixels.
The display refreshes every few minutes, pulls fresh data from my server, and then just exists. Bitcoin moves, the weather changes, the calendar week rolls over—and I never have to think about it.
Power usage is negligible. Once the image is drawn, the display consumes almost nothing.
My Hardware selection
I chose a 7.5″ Waveshare ePaper display, available in both BW and B/W/R (black/white/red) variants.
You can use both. But I’ll be blunt:
- BW displays are forgiving, easy, and robust
- B/W/R displays look nicer, but are much more sensitive to initialization and refresh order
That difference becomes important later.
The display is driven by an ESP32-based Waveshare ePaper Driver Board, which simplifies wiring dramatically. If you try to wire a raw ESP32 DevKit yourself, you must get SPI timing, BUSY pin handling, and voltage levels exactly right—or you’ll chase ghosts for hours.
For power, don’t cheap out. ePaper displays draw short but real current spikes during refresh. A weak USB supply can cause random artifacts that look like firmware bugs but aren’t.
At this point you can already add affiliate links for:
- the 7.5″ Waveshare display inkl HAT
- An ESP32 DevKit (I will recommen the one from WaveShare)
- a stable 5V power supply
Firmware: TRMNL as a base, not a black box
I used the official TRMNL firmware as a starting point. That’s important: I didn’t reinvent the wheel. I extended it.
The firmware is built with PlatformIO, which means setup is straightforward if you already work with embedded systems:
git clone https://github.com/usetrmnl/trmnl-firmware
cd trmnl-firmware
pio run
pio run -t upload
Serial output is invaluable during first boot:
pio device monitor -b 115200At this stage, the device boots, connects to Wi-Fi, and starts talking to… nothing yet. That’s where configuration comes in.
Pointing the device to your own server
The firmware contains a configuration header (usually config.h ). This is where the device learns where “home” is.
In my case, that’s my own Laravel backend:
#define API_BASE_URL "http://trmnl.yourdomain.com"Use an IP address or DNS name the device can actually reach. So what url you need to set? Let's first setup the Server.
The server side: I use TRMNL BYOS Laravel
At first I thought I’d just spin up a Laravel app and expose a /screen endpoint. That works for experiments, but it’s not the smooth way to do this long-term. TRMNL already has a BYOS ecosystem — and there’s a Laravel-based BYOS server that’s basically the sweet spot if you like PHP and want something you can run in Docker without turning your weekend into a framework project. GitHub+1
The project is called usetrmnl/byos_laravel. It’s a self-hostable TRMNL server built in Laravel with device management, screen generation, and support for “Recipes” (community screen definitions / layouts) — so you’re not starting from zero. GitHub+1
The important mental model is: the device doesn’t talk to “your custom endpoints”. It talks to a TRMNL-compatible server, and BYOS Laravel is that server. You get a dashboard, device onboarding, and a structured way to generate screens without constantly touching firmware. GitHub+1
Running it (Docker Compose, the boring reliable way)
BYOS Laravel comes with a production-ready Docker Compose setup in the repo, so you don’t need to design your own container stack. You basically clone it and bring it up. GitHub+1
Conceptually, the flow is:
git clone https://github.com/usetrmnl/byos_laravel
cd byos_laravel

# follow the repo's docker/prod setup
docker compose up -d
Once it’s up, you’ll access the dashboard in the browser and do the “human part” of the setup there: registering the device, checking connectivity, and selecting/creating what the device should display. One BYOS Laravel user guide I found referenced a default dashboard URL like http://localhost:4567/dashboard in a typical local run, but your exact port depends on the compose file / your reverse proxy.
If you already run a reverse proxy (Traefik / nginx proxy manager / Caddy), this is where you map it to something like:
https://trmnl.yourdomain.com
…and from then on you stop thinking about container ports at all.
Pointing the TRMNL firmware at BYOS Laravel
This is the part people sometimes overcomplicate: the firmware simply needs to know the base URL of your BYOS server.
In your firmware config.h, you set the server/base URL to your BYOS Laravel host (as you seen above).
And that’s it. From that moment, the device is no longer tied to any cloud dependency — it’s “BYOS mode”: Buy/Build your device, then point it at your own server.
The problem: stripes on the B/W/R display
Everything worked.
Except it didn’t.
On the B/W/R 7.5″ panel, I started seeing horizontal striping and scanline artifacts. The image data itself was correct. The logic was correct. And yet, the display looked broken.
This is the moment where most people blame:
- the panel
- the SPI bus
- cosmic radiation
In reality, the issue was much simpler—and much more subtle.
The real cause: incorrect pane refresh sequencing
The 7.5″ B/W/R display internally uses multiple memory planes (often referred to as panels or panes). Writing image data and refreshing the display are not the same thing.
My original code refreshed the display too early—before the full pane was written. On BW panels this often “works anyway”. On B/W/R panels, it absolutely does not.
The fix was to explicitly control which panel is written, and when it is refreshed.
Conceptually, the correct flow looks like this:
- Clear or initialize the display properly
- Write all black/white data to
PANEL_0 - Refresh
PANEL_0 - Write red layer data to
PANEL_1(if used) - Refresh
PANEL_1 - Finalize the update
In pseudocode:
selectPane(PANEL_0);
writeBlackWhiteBuffer();
refreshPane(PANEL_0);

selectPane(PANEL_1);
writeRedBuffer();
refreshPane(PANEL_1);
Once I moved the refresh logic out of the middle of the write cycle, the stripes disappeared completely. So You can find my PR here: https://github.com/usetrmnl/trmnl-firmware/pull/272
One more hard truth about B/W/R panels
Partial refresh is tempting. It’s also dangerous. B/W/R panels accumulate ghosting over time if you only do partial updates. My solution was simple and effective:
- Full clear on boot
- Partial updates for normal operation
- Full clear every N updates (e.g. every 10–15 cycles)
That single decision eliminated long-term drift and visual degradation.
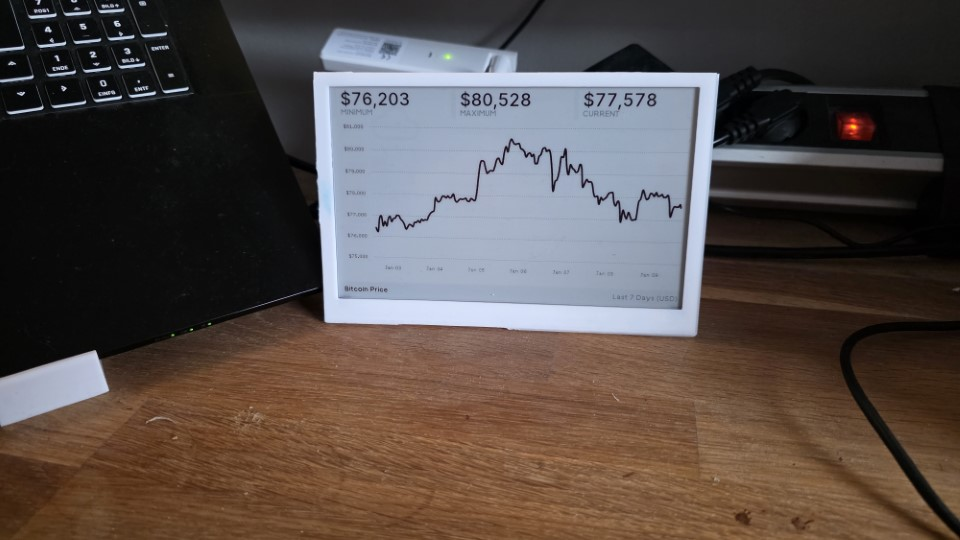
The result
I now have a silent, low-power desk display that:
- shows live Bitcoin prices
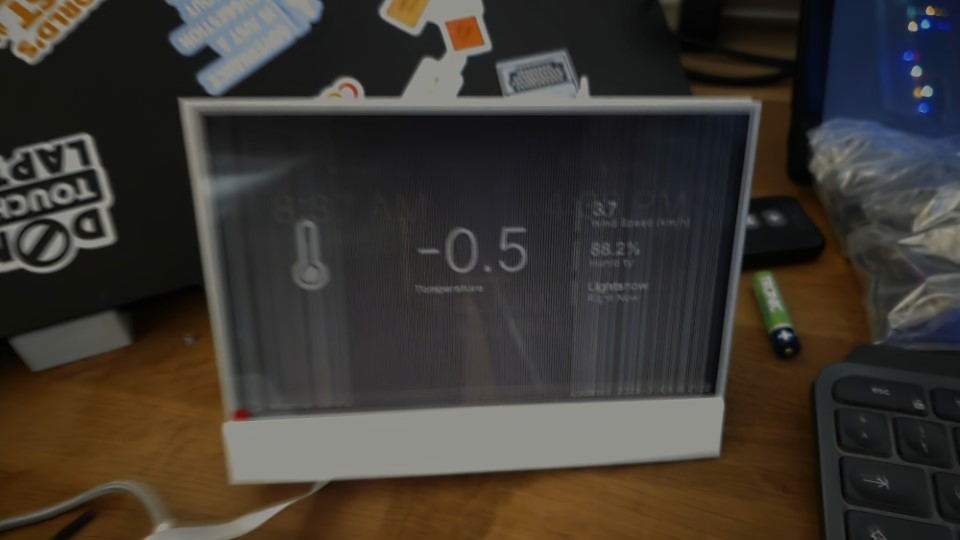
- displays weather and calendar week
- rotates small fun facts
- runs entirely on my infrastructure
- Extendable
No cloud dependency. No vendor lock-in. No unexplained behavior.Just a screen that does exactly what I want.
Final thoughts
This project looks simple from the outside. It isn’t.
But it’s deeply satisfying, especially once you understand where the sharp edges are.
If you:
- respect the hardware
- control refresh timing explicitly
- keep the backend boring
…the setup is rock solid.
If you want, next steps could include:
- OTA firmware updates
- multiple screen layouts per device
- device registration & authentication
- image caching & delta updates
But even in its current form, it’s already doing exactly what I built it for:
quietly showing me what matters, without demanding attention.