Authentication without password in Azure AD
Now that passwordless authentication is generally available (announced by MS at it's ignite in 2021), organizations can roll out passwordless across hybrid environments with confidence. Microsoft has been working hard to provide a familiar and simple to use experience that works with a wide range of devices and services.
This is a hughe security improvement so that you could not loose your password again, or must note them down below the keyboard or s.th. You could then use any Token like SMS, FIDO2 Keys, Windows Hello and the MIcrosoft authenticator app. So you must not invest into expensive hardware, you could use your phone. This article keep the focus on how to enable passwordless authentication in your Azure AD and how to configure your authenticator for this.
First requirement: Combined registration experience
You must enable the ‘combined registration’ experience in Azure AD first to use passwordless authentication. Combined registration brings together the registration experience for Azure MFA and self-service password reset. Meanwhile all new Azure AD tenants are automatically will be configured for multifactor authentication. Maybe it is enabled by default on your tenant.
Enable combined registration in Azure AD
You can enable combined registration by logging in to Azure AD using a global administrator account.
- Log in to Azure AD here.
- Click Azure Active Directory under Favorites on the left of the portal window.
- In the Azure AD pane, scroll down the list of options on the left, and click Security under Manage.
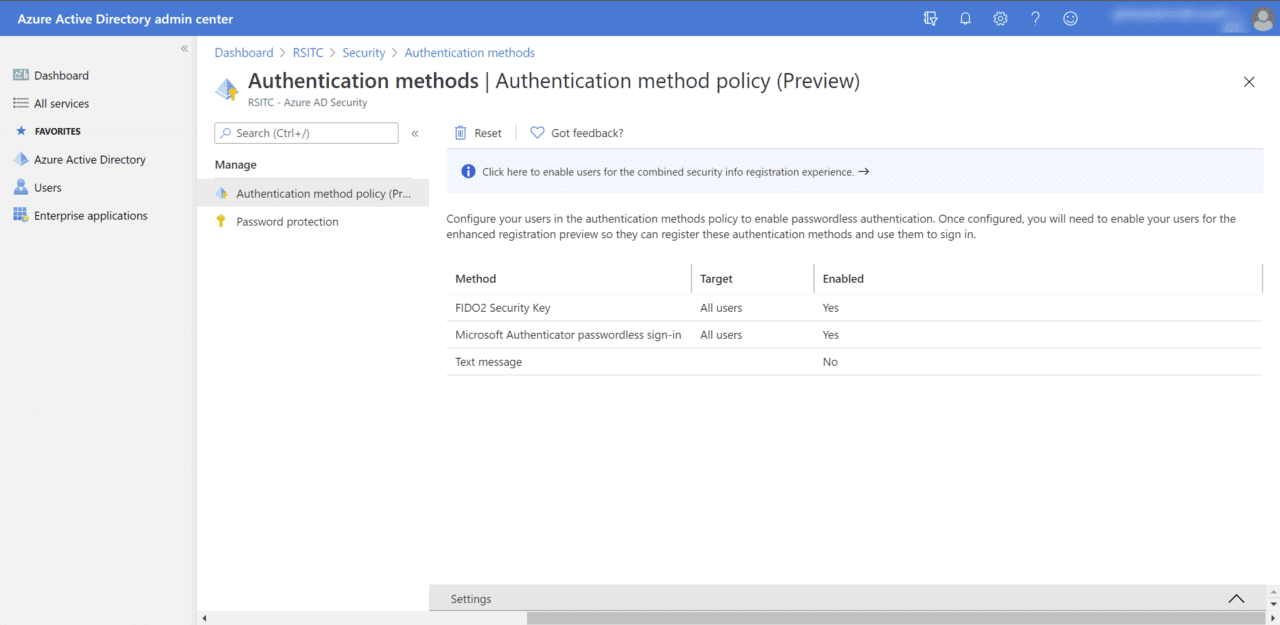
- In the Security pane, click Authentication methods below Manage in the list of options on the left.
- At the top of the Authentication methods pane, click ‘Click here to enable users for the combined security info registration experience’.
- In the User feature previews pane, set Users can use the combined security information registration experience to All and then click Save.

Optionally, you can click Selected and then pick a group of users instead of enabling combined registration for all users in the directory.
Self-register Microsoft Authenticator
Users must register the Microsoft Authenticator app as an authentication method before they can use passwordless sign-in. If users have already registered Microsoft Authenticator for use with multifactor authenticator, they won’t need to reregister the app for use with passwordless sign-in.
You can enable multifactor authentication for users, either individually or in bulk, in the Microsoft 365 admin portal. For detailed instructions on how to set up multifactor authentication, see Enable Multi-Factor Authentication for Office 365 Users on Petri. Regardless of whether users are setup for passwordless sign-in, multifactor authentication should still be enabled and enforced to protect passwords.
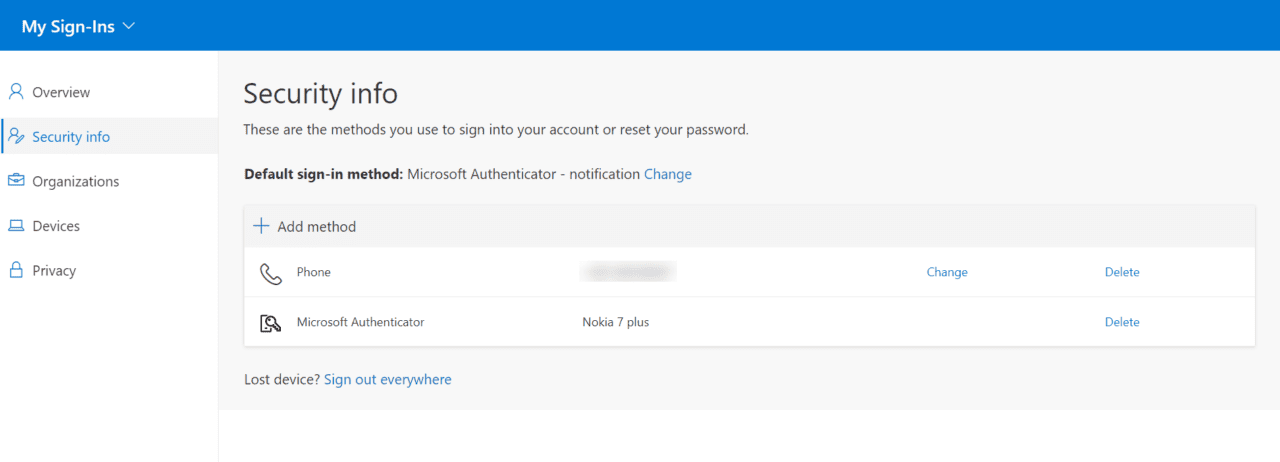
If users need to add Microsoft Authenticator as an authentication method, they can do it here on the My Sign-ins page. Users will need to click Security info in the list of options on the left, click + Add method on the Security info screen, and then follow the on-screen instructions. Users can also choose ‘Microsoft Authenticator – notification’ as the default sign-in method.
Set up passwordless sign-in for the Microsoft Authenticator app
Now that all the prerequisites are in place, you can enable passwordless sign-in for users in your Azure AD tenant.
- Back in the Azure AD portal, switch to Authentication methods on the Security
- Click Microsoft Authenticator in the list of methods.
- In the Settings pane at the bottom of the portal window, set ENABLE to Yes and TARGET to All users.
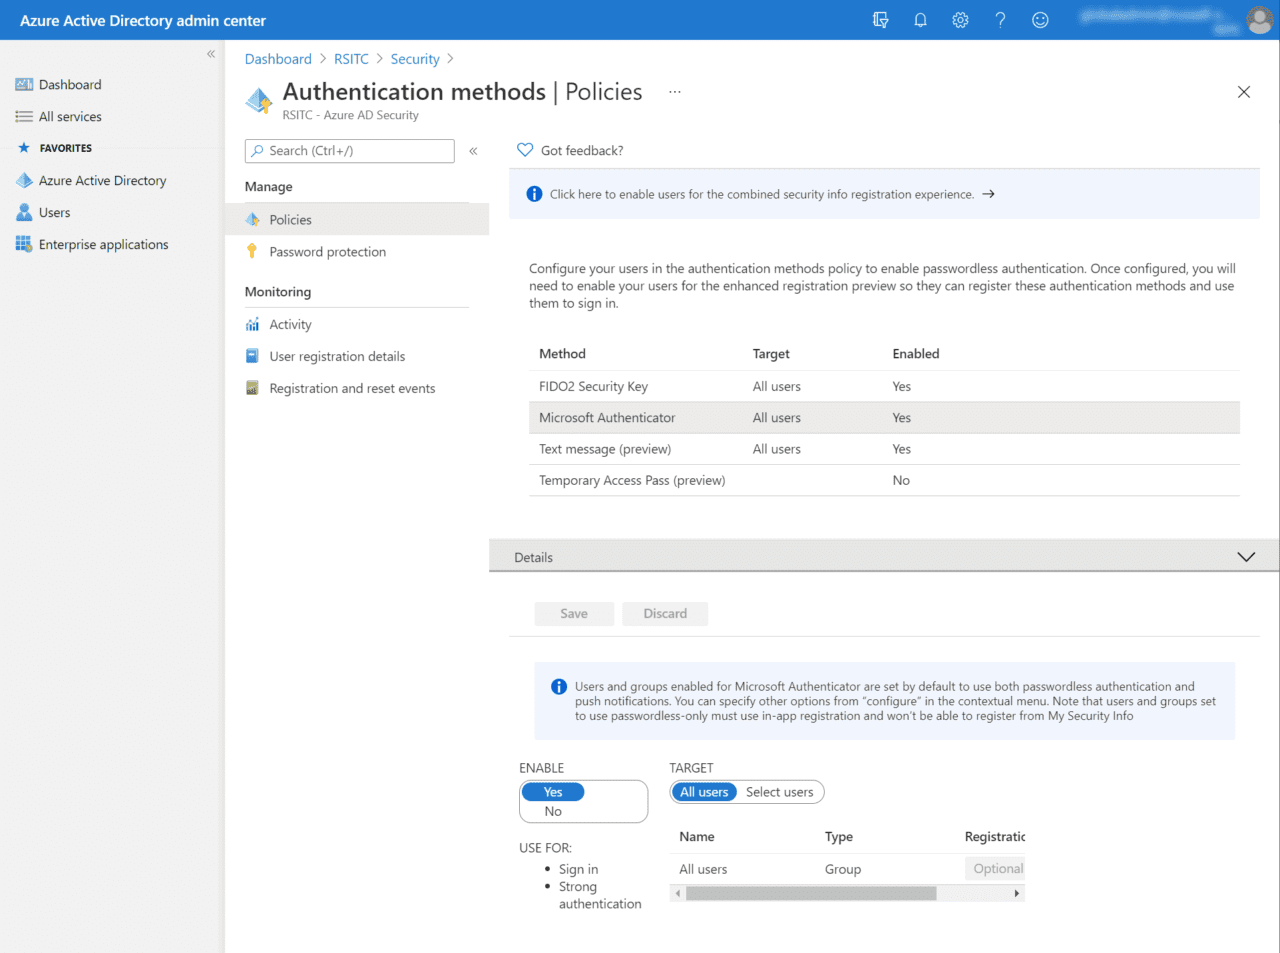
Alternatively, you can set TARGET to Select users and enable passwordless sign-in for a group instead of all users in the directory.
- Once you’re done, click Save.
Configure passwordless sign-in on a handset using Microsoft Authenticator
Once your Azure AD tenant is set up for passwordless sign-in, users must set up the feature using the Microsoft Authenticator app. It’s worth noting that passwordless sign-in via the Microsoft Authenticator app can only be configured for one account at a time on a device.
- Open the Microsoft Authenticator app on the handset.
- Select the account you want to configure in the list of accounts.
- Now click Set up phone sign-in (Sign in without a password) on the account screen.
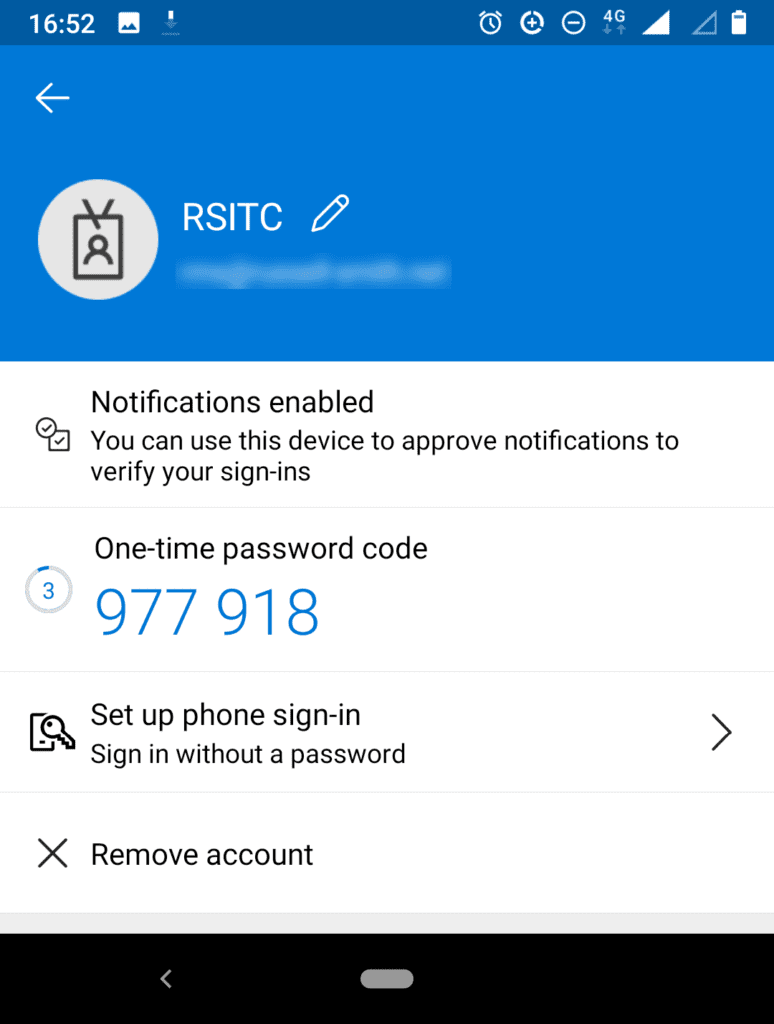
- If you haven’t already done so, the device must be registered with Azure AD. Follow the instructions on screen to register your device.
- Now on the Sign-in with your phone screen, click CONTINUE.
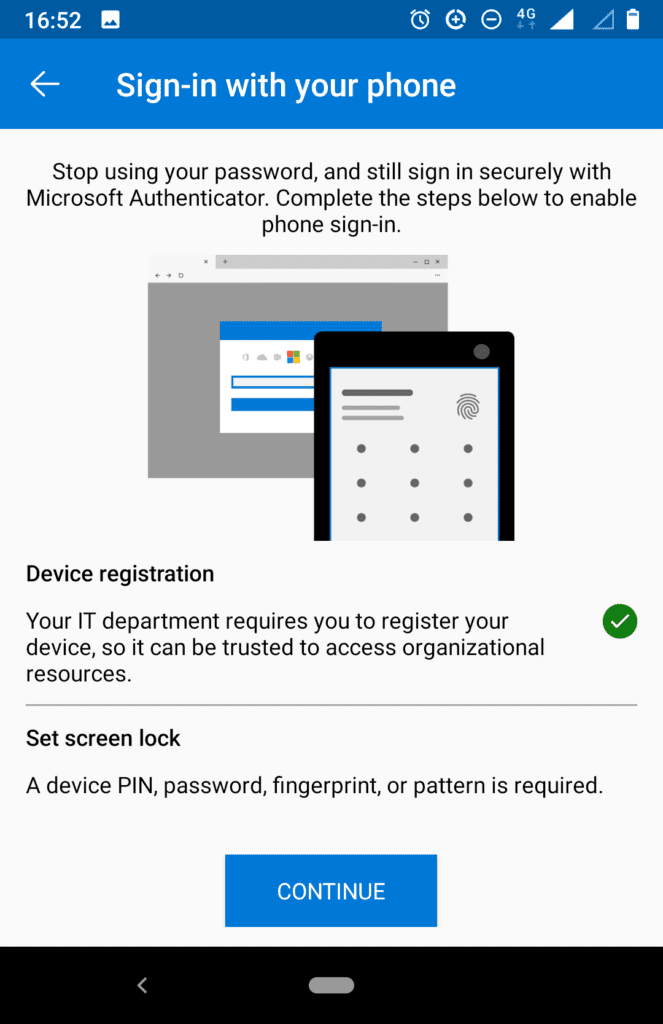
Passwordless sign-in should now be enabled for the account. You can click the account again in the list of accounts to check that ‘Passwordless enabled’ is displayed on the account screen.
End user experience
Once passwordless authentication is enabled in your tenant, users have the option to switch when it’s convenient for them. Users can also set up their work or school account directly in the Microsoft Authenticator app, although it works best if users have at least one multifactor authentication factor registered in advance or have a Temporary Access Pass. Temporary Access Pass is a new feature, currently in public preview, that provides a time-limited code for setting up and recovering passwordless credentials.
Improvements all round to passwordless authentication
Now it’s hit general availability, there are lots of improvements to passwordless authentication that were missing at the start of the preview in July 2019. Admins can now see and delete passwordless methods on the User blade in the Azure admin center. Registration and usage information for all authentication methods are also visible in the Authentication methods activity blade.

And finally, Windows Hello for Business is brought more closely into authentication methods management. Users and admins can see Windows Hello for Business-capable devices at the security info registration portal and the Azure portal User blade. Windows Hello for Business registration and usage is also captured in reporting.


