How to master the Excel import in .Net
Source code available at Github. Look at the end of the article
This article will explore the step-by-step process of uploading an Excel file and saving its data into the database using ASP.NET Core Web API. We'll leverage the NPOI library and Entity Framework Core to achieve this functionality.
Install Required Libraries
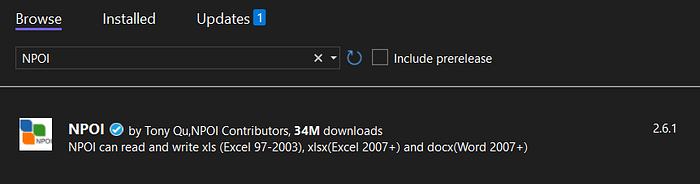
First, we have to install the NPOI library from NuGet Package Manager:
Next, we will install the Entity Framework Core as well. We will use the Entity Framework Core Sqlite to simplify the process. We can also use another provider, such as SqlServer or PostgreSQL.
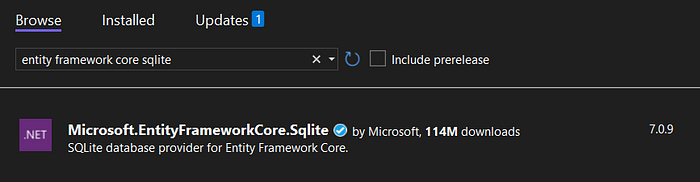
If you are using .NET 6.0, make sure to select the 6.x.x (6.0.20) version of the Entity Framework.
Create the Entity Model
We will use the entity model, representing the data structure we want to store in the database.
namespace UploadExcel.WebApi;

public class Product
{
    public Guid Id { get; set; }
    public string Name { get; set; }
    public int Quantity { get; set; }
    public decimal Price { get; set; }
    public bool IsActive { get; set; }
    public DateTime ExpiryDate { get; set; }
}
The Product class has properties with the most-used data types (string, int, decimal, bool, DateTime).
Create the Data Context
Also, we create a database context that inherits from Entity Framework Core's DbContext class. This context will handle the communication with the database.
using Microsoft.EntityFrameworkCore;

namespace UploadExcel.WebApi;

public class DataContext : DbContext
{
   public DataContext(DbContextOptions<DataContext> opt) : base(opt)
   {
   }

    public DbSet<Product> Products { get; set; }
}
Create the Request Model
Next, we create a request model representing the Excel file's data structure. This class shares all the properties of the Product class except for the Id property, which will be automatically generated.
namespace UploadExcel.WebApi;

public class ProductRequest
{
    public string Name { get; set; }
    public int Quantity { get; set; }
    public decimal Price { get; set; }
    public bool IsActive { get; set; }
    public DateTime ExpiryDate { get; set; }
}
The ExcelHelper Class
The ExcelHelper class is a custom class that provides a helper method to read data from Excel files and convert it into a list of objects.
using NPOI.SS.UserModel;
using NPOI.XSSF.UserModel;

namespace UploadExcel.WebApi;

public static class ExcelHelper
{
    public static List<T> Import<T>(string filePath) where T : new()
    {
        XSSFWorkbook workbook;
        using (var stream = new FileStream(filePath, FileMode.Open, FileAccess.Read))
        {
            workbook = new XSSFWorkbook(stream);
        }

        var sheet = workbook.GetSheetAt(0);

        var rowHeader = sheet.GetRow(0);
        var colIndexList = new Dictionary<string, int>();
        foreach (var cell in rowHeader.Cells)
        {
            var colName = cell.StringCellValue;
            colIndexList.Add(colName, cell.ColumnIndex);
        }

        var listResult = new List<T>();
        var currentRow = 1;
        while (currentRow <= sheet.LastRowNum)
        {
            var row = sheet.GetRow(currentRow);
            if (row == null) break;

            var obj = new T();

            foreach (var property in typeof(T).GetProperties())
            {
                if (!colIndexList.ContainsKey(property.Name))
                    throw new Exception($"Column {property.Name} not found.");

                var colIndex = colIndexList[property.Name];
                var cell = row.GetCell(colIndex);

                if (cell == null)
                {
                    property.SetValue(obj, null);
                }
                else if (property.PropertyType == typeof(string))
                {
                    cell.SetCellType(CellType.String);
                    property.SetValue(obj, cell.StringCellValue);
                }
                else if (property.PropertyType == typeof(int))
                {
                    cell.SetCellType(CellType.Numeric);
                    property.SetValue(obj, Convert.ToInt32(cell.NumericCellValue));
                }
                else if (property.PropertyType == typeof(decimal))
                {
                    cell.SetCellType(CellType.Numeric);
                    property.SetValue(obj, Convert.ToDecimal(cell.NumericCellValue));
                }
                else if (property.PropertyType == typeof(DateTime))
                {
                    property.SetValue(obj, cell.DateCellValue);
                }
                else if (property.PropertyType == typeof(bool))
                {
                    cell.SetCellType(CellType.Boolean);
                    property.SetValue(obj, cell.BooleanCellValue);
                }
                else
                {
                    property.SetValue(obj, Convert.ChangeType(cell.StringCellValue, property.PropertyType));
                }
            }

            listResult.Add(obj);
            currentRow++;
        }

        return listResult;
    }
}
Create the ProductController
Next, we have to create the ProductController class.
The ProductController class has two injected parameters, an instance of DataContext and IWebHostEnvironment. DataContext is responsible for communicating with the database, and IWebHostEnvironment holds information related to the web host environment.
The ProductController class has one action method Upload() which accepts a file containing data about product requests. The file is saved to the uploads folder, and then the data from the Excel sheet is loaded using the ExcelHelper.Import<ProductRequest>(filePath) method. The data is then saved to the database using the entity framework.
using Microsoft.AspNetCore.Mvc;

namespace ExcelImporter.WebApi.Controllers;

/// <summary>
/// Controller to interact with the product data.
/// </summary>
[ApiController]
[Route("products")]
public class ProductController : ControllerBase
{
    private readonly DataContext _context;
    private readonly IWebHostEnvironment _webHostEnvironment;

    public ProductController(DataContext context, IWebHostEnvironment webHostEnvironment)
    {
        _context = context;
        _webHostEnvironment = webHostEnvironment;
    }


    /// <summary>
    /// Uploadendpoint to get the desired exxcel file.
    /// </summary>
    /// <param name="ct"></param>
    /// <returns></returns>
    [HttpPost("upload")]
    [DisableRequestSizeLimit] // Allow any size (only for demo purpose)
    public async Task<ActionResult> Upload(CancellationToken ct)
    {
        if (Request.Form.Files.Count == 0) return NoContent();

        var file = Request.Form.Files[0];
        var filePath = SaveFile(file);

        // load product requests from excel file
        var productRequests = ExcelHelper.Import<ProductRequest>(filePath);
        var products = new List<Product>();
        Object lockMe = new Object();
        // save product requests to database
        Parallel.ForEach(productRequests, productRequest =>
        {
            var product = new Product
            {
                Id = Guid.NewGuid(),
                Name = productRequest.Name,
                Quantity = productRequest.Quantity,
                Price = productRequest.Price,
                IsActive = productRequest.IsActive,
                ExpiryDate = productRequest.ExpiryDate
            };
            lock (lockMe)
            {
                products.Add(product);
            }
        });

        await _context.AddAsync(products, ct);
        await _context.SaveChangesAsync(ct);

        return Ok();
    }

    /// <summary>
    /// Save the file into the root folder.
    /// </summary>
    /// <param name="file"></param>
    /// <returns></returns>
    private string SaveFile(IFormFile file)
    {
        if (file.Length == 0)
        {
            throw new BadHttpRequestException("File is empty.");
        }

        var extension = Path.GetExtension(file.FileName);

        var webRootPath = _webHostEnvironment.WebRootPath;
        if (string.IsNullOrWhiteSpace(webRootPath))
        {
            webRootPath = Path.Combine(Directory.GetCurrentDirectory(), "wwwroot");
        }

        var folderPath = Path.Combine(webRootPath, "uploads");
        if (!Directory.Exists(folderPath))
        {
            Directory.CreateDirectory(folderPath);
        }

        var fileName = $"{Guid.NewGuid()}.{extension}";
        var filePath = Path.Combine(folderPath, fileName);
        using var stream = new FileStream(filePath, FileMode.Create);
        file.CopyTo(stream);

        return filePath;
    }
}
The Program.cs
Modify the Program.cs to register the DataContext class and initializes the database:
using Microsoft.EntityFrameworkCore;
using UploadExcel.WebApi;

var builder = WebApplication.CreateBuilder(args);

builder.Services.AddDbContext<DataContext>(opt => opt.UseSqlite("Data Source=data.db"));

builder.Services.AddControllers();
builder.Services.AddEndpointsApiExplorer();
builder.Services.AddSwaggerGen();

var app = builder.Build();

if (app.Environment.IsDevelopment())
{
    app.UseSwagger();
    app.UseSwaggerUI();
}

var context = app.Services.CreateScope().ServiceProvider.GetRequiredService<DataContext>();
context.Database.EnsureCreated();

app.UseHttpsRedirection();
app.MapControllers();
app.Run();
Prepare the Excel File
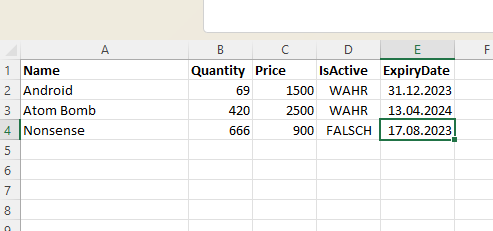
The first row of the Excel file is the “column” of the product data we want to upload. The Excel file data will look like this:
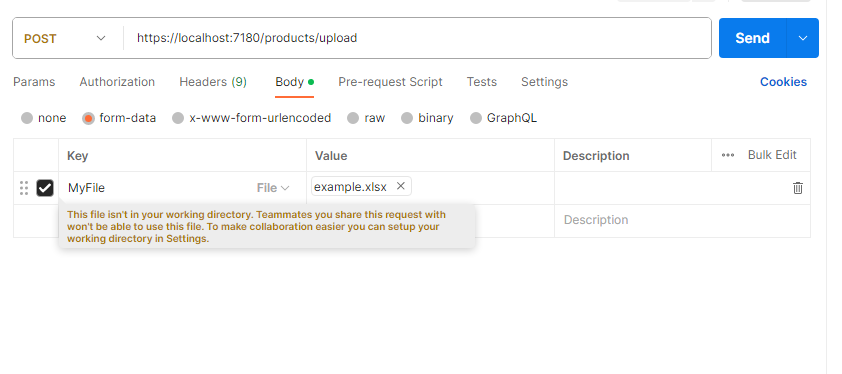
Use Postman to Test
We use Postman to do the testing. To do this, follow the steps below:
- Set the HTTP method to POST
- Set the URL to https://localhost:PORT/products/upload
- Set the request body type to form-data
- Set the Key column to File
- Select the Excel file on the Value column
Use Axios from the Web App
Here is an example code on how to upload a file using the Axios library from the React JS web application:
const [excelFile, setExcelFile] = React.useState(null);

const requestHeaders = {
  headers: {
    'Content-Type': 'multipart/form-data'
  }
};

const handleUpload = async () => {
  const formData = new FormData();
  formData.append('file', excelFile);
  await axios.post('/products/upload', formData, requestHeaders);
};

return (
  <input type="file" onChange={(e) => setExcelFile(e.target.files[0])} />
  <button onclick={handleUpload}>Upload</button>
);
Conclusion
In conclusion, this article has provided a comprehensive guide to the step-by-step process of uploading an Excel file and saving its data into a database using ASP.NET Core Web API. By leveraging the NPOI library for Excel manipulation and Entity Framework Core for database interaction, a functional solution has been developed for handling Excel data uploads.
The complete Source code will be available at