Generating Random Data for SQL
Earlier in my developer career I used a tool like datageneration plan from Microsoft. So it generates me a huge set of data. But unfortunaley it is not available anymore.
Using Python
So I'm c# developer it's in my DNA, but to build this in .net is very time-consuming and I google a little bit around (es and I asked chatgpt for a nice solution) I came up with a fake library called Faker.
So I did have some execution experience with Python, but not so far, I take you with me on my journey.
Create a development environment
First of all, I don't want to install the complete set of a python env on my host system. So I use a small Docker definition for this
# The Baseimage
FROM python:3.8

# Set the internal workingdirectory
WORKDIR /app

# Copy the required dependenycies into the workingdirectory
COPY requirements.txt .

# Install the requirement
RUN pip install --no-cache-dir -r requirements.txt

# Copy the script to execute into the target directory
COPY script.py .

# Execute the script
CMD ["python", "./script.py"]
Now, while defining the docker environment, we must create the script and the dependency file. First of all the dependency file. This will include the required library to install, in my example the fake library
Faker==8.18.0Next, the script creates the initial script that imports the faker library and creates an instance. I also added two languages into the constructor, so that I can generate German and English data.
from faker import Faker
from collections import OrderedDict

import random

# define the locales to use
locales = OrderedDict([
    ('en-US', 1),
    ('de-DE', 2)
])

# Create faker instance
fake = Faker(locales);

fake.locales

# Print random first name
print(fake.first_name());
So in fact, It will instantiate a fake instance, next I put the locales into it (as a pool to generate the data language). Then I generate one Firstname example output.
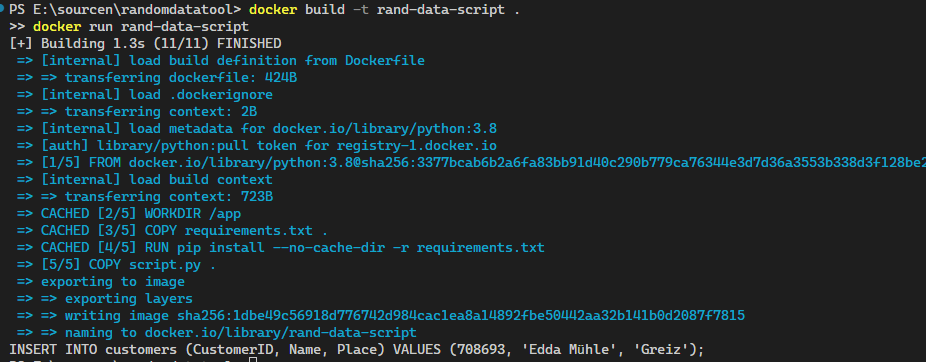
Now it's time to create the docker image and run it with these commands
docker build -t rand-data-script .
docker run rand-data-script
This is my result:

That was quite simple hm? So next I create several sql data as insert statement
Generate the Insert statement
In my example I got the following structure
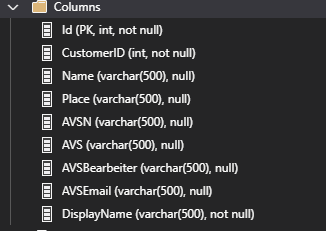
So the important columns to use it is for me the CustomerID, Name, and Place.
I adjust now a Script to generate one SQL command this is the result
from faker import Faker
from collections import OrderedDict

import random

# define the locales to use
locales = OrderedDict([
    ('en-US', 1),
    ('de-DE', 2)
])

# Create faker instance
fake = Faker(locales);

## Define a function to generate the data
def generate_data():
    customer_id = random.randint(100000, 999999)
    name = fake.name()
    place = fake.city()
    return customer_id, name, place

# Generate one entry
customer_id, name, place = generate_data()

insert_statement = f"INSERT INTO customers (CustomerID, Name, Place) VALUES ({customer_id}, '{name}', '{place}');"


print(insert_statement);
In this, I defined a function to generate one data tuple that will result in the random customerID, the random name, and the random place.
This function will be called once and the result will be placed into the string that will be printed into the console
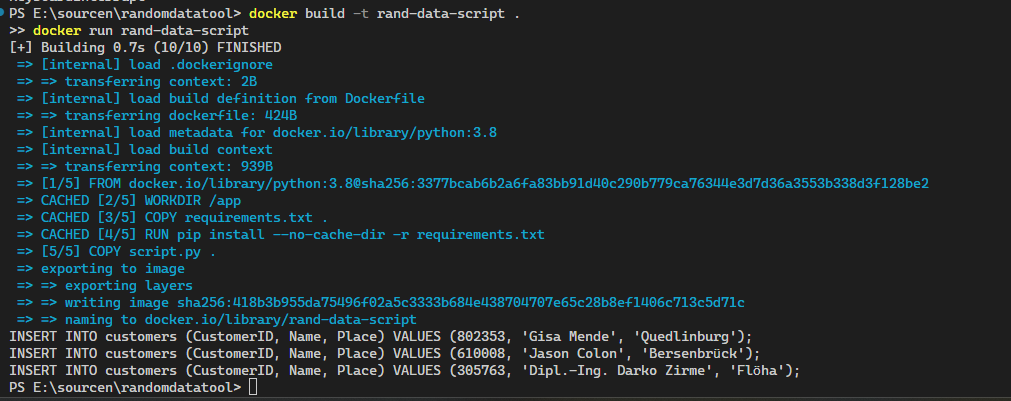
This is the result:
Generating multiple insert statements
Now one entry is not enough, I will now generate more than one todo and I will use a for loop. After adjusting the script the result is this:
from faker import Faker
from collections import OrderedDict

import random

# define the locales to use
locales = OrderedDict([
    ('en-US', 1),
    ('de-DE', 2)
])

# Create faker instance
fake = Faker(locales);

## Define a function to generate the data
def generate_data():
    customer_id = random.randint(100000, 999999)
    name = fake.name()
    place = fake.city()
    return customer_id, name, place

# Generate one entry
customer_id, name, place = generate_data()

# Generate an array
insert_statements = []
for _ in range(1000000):
  customer_id, name, place = generate_data()
  insert_statement = f"INSERT INTO customers (CustomerID, Name, Place) VALUES ({customer_id}, '{name}', '{place}');"
  insert_statements.append(insert_statement)

# Print the first three rows
for i in range(3):
    print(insert_statements[i])
Thie will loop several times and generating massive data. After it finished it will promt the first three elements out. This is my result
Storing the data directly into the SQL Server
In my case, I don't want to copy and paste the insert statements into the SQL Management studio and execute this. Instead, I will store the data directly into the table. For that, I adjusted the script to use the Azure SQL connection string and let the script write the data into the table. Here is my modified script
from faker import Faker
from collections import OrderedDict
import random
import pyodbc

# define the locales to use
locales = OrderedDict([
    ('en-US', 1),
    ('de-DE', 2)
])
server = 'your-server.database.windows.net'
database = 'your-database'
username = 'your-username'
password = 'your-password'
driver = '{ODBC Driver 17 for SQL Server}'

# Erstelle die Verbindungszeichenkette
connection_string = f"DRIVER={driver};SERVER={server};DATABASE={database};UID={username};PWD={password}"


# Create faker instance
fake = Faker(locales);

## Define a function to generate the data
def generate_data():
    customer_id = random.randint(100000, 999999)
    name = fake.name()
    place = fake.city()
    return customer_id, name, place

# Generate one entry
customer_id, name, place = generate_data()


# Verbindung herstellen
conn = pyodbc.connect(connection_string)
cursor = conn.cursor()


# Generate an array
insert_statements = []
for _ in range(10):
  customer_id, name, place = generate_data()
  insert_statement = f"INSERT INTO customers (CustomerID, Name, Place) VALUES ({customer_id}, N'{name}', N'{place}')"
  cursor.execute(insert_statement)


# Änderungen speichern und Verbindung schließen
conn.commit()
conn.close()
So in fact these modification needs to adjust the docker file because there is no odbc driver installed or any toolkit that supports database connectivity. Here is my refreshed docker file
# using antoher base image
FROM python:3.8-slim

WORKDIR /app

# install the required files and import odbcinst.ini
ADD odbcinst.ini /etc/odbcinst.ini
RUN apt-get update
RUN apt-get install gcc -y
RUN apt-get install -y tdsodbc unixodbc-dev
# RUN apt install unixodbc-bin -y
RUN apt-get clean -y
RUN apt-get install -y --no-install-recommends \
        unixodbc \
        gnupg \
        curl \
    && curl https://packages.microsoft.com/keys/microsoft.asc | apt-key add - \
    && curl https://packages.microsoft.com/config/debian/10/prod.list > /etc/apt/sources.list.d/mssql-release.list \
    && apt-get update \
    && ACCEPT_EULA=Y apt-get install -y --no-install-recommends msodbcsql17 \
    && rm -rf /var/lib/apt/lists/*

COPY requirements.txt .

RUN pip install --no-cache-dir -r requirements.txt

COPY script.py .

CMD ["python", "./script.py"]
Now you need one additional file the odbcinst.ini with the following content
[FreeTDS]Description=FreeTDS Driver Driver=/usr/lib/x86_64-linux-gnu/odbc/libtdsodbc.so Setup=/usr/lib/x86_64-linux-gnu/odbc/libtdsS.soNow you can execute the script and the result will look like this
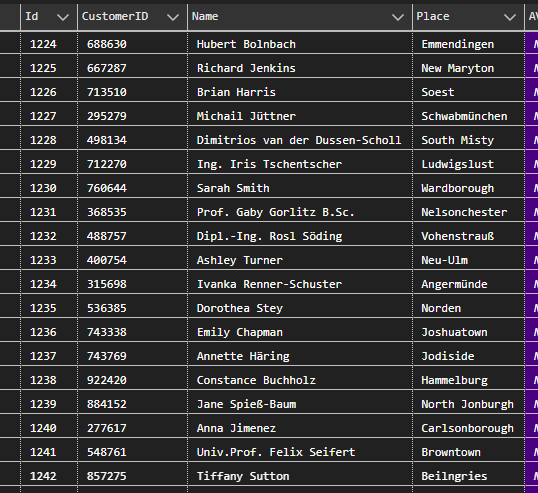
Nice one :) So I generated about one million data within a couple of minutes (depending on your internet connection) :)
Conclusion
In conclusion, this blog post illustrates the evolution of my approach to data generation in the context of software development. Starting with a Microsoft tool for data generation, I transitioned to using Python and the Faker library, ultimately creating a robust solution for generating massive amounts of test data.
The final result showcased the successful generation and storage of one million test data entries within a relatively short time frame, highlighting the effectiveness of the developed solution. Overall, my journey presented in the text reflects my problem-solving skills, adaptability, and proficiency in utilizing.