How I used my 3D Printer to create replacement parts for my refrigerator
My refrigerator features a lip piece designed to channel condensation water away through a drainage outlet. This piece is typically secured in place by a glass plate. However, one of the joints holding this lip piece in position has broken, causing the drainage system to malfunction.
As a result, condensation water is unable to flow out properly. Instead, the water accumulates in a single area within the refrigerator. Over time, this stagnant water freezes, forming ice. The growing ice layer lifts the lip piece further, exacerbating the issue and disrupting the refrigerator’s drainage mechanism entirely. This eventually leads to creating a large ice plate (not for skating purposes;)) at the bottom of the refrigerator, which can affect its overall performance and efficiency.
The issue requires a solution to securely fix or replace the broken joint, restoring proper water drainage and preventing ice buildup.
I own a 3d Printer from Bambulab (Modell A1). So why not use this to print a replacement part for this or a feature part? I'll take you to my journey how I create the repalcement part.
Step 1: Taking pictures with a ruler
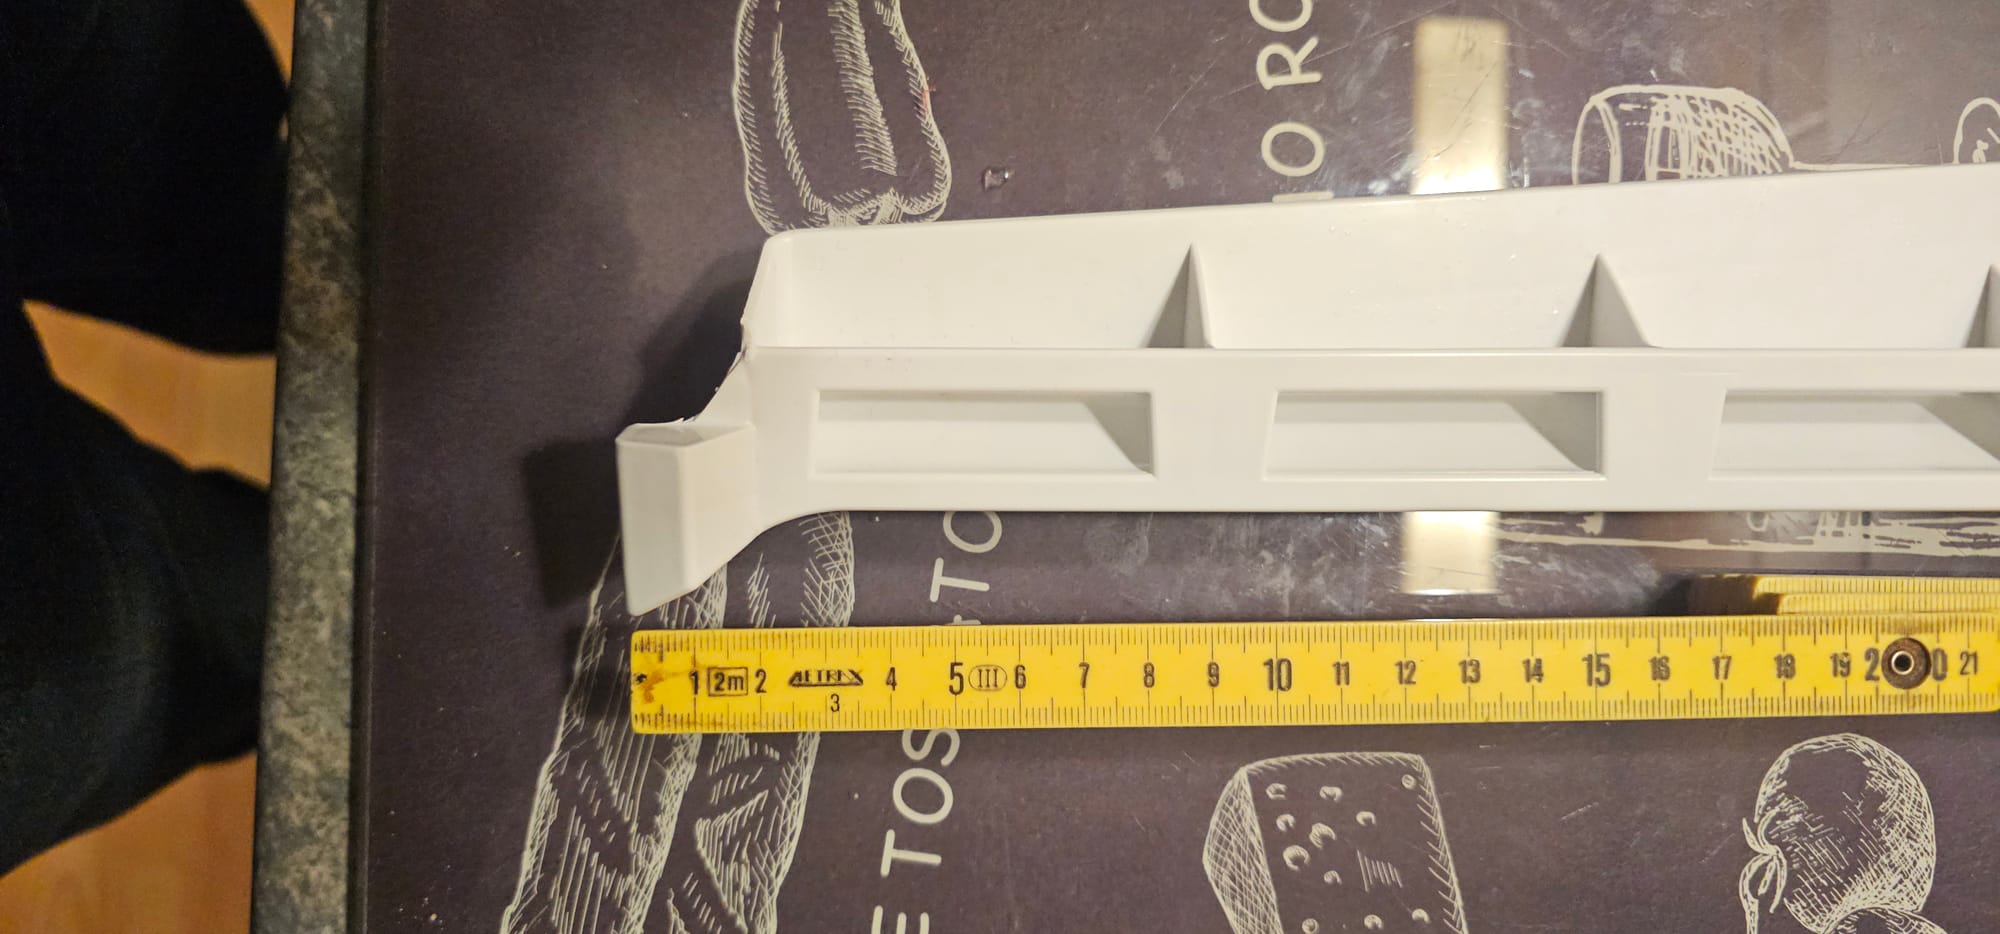
First, I needed to get the exact measurements for my parts, so I created some pictures that I can use as references. Beside the broken part, I lay down a ruler so I can look at it to get the required measurements. In total, I took about 10 pictures, here are some of them. First of all from the top, here you will see the missing holder part (broken one)

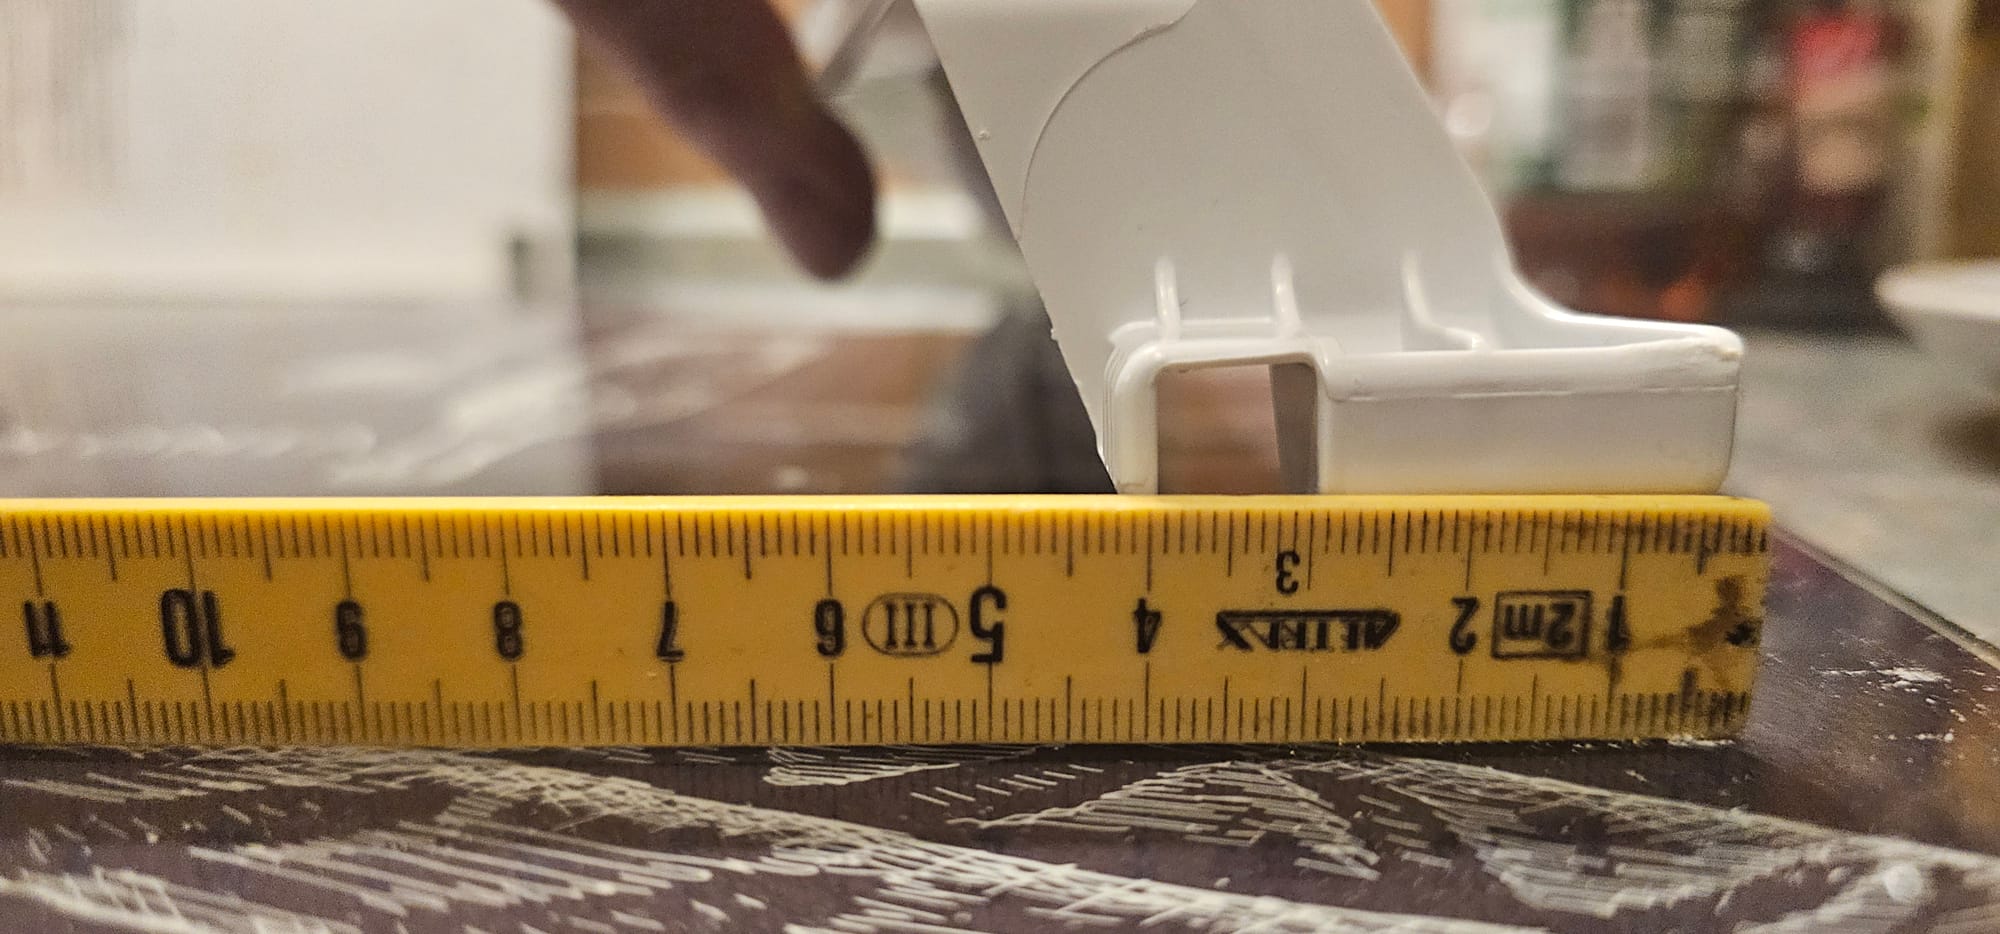
And from the side, where the holder is intact. That is now missing at the other side.

Now to the next step
Step 2: Thinking about the solution
Before I start creating the model, the first thing is to think about a solution. When I tried to print the whole thing in one place (for replacement), I faced the problem that the printing plate from the printer was not large enough. A replacement part for the holder must be glued, but that will get messy, and I think it will be unreplaceable in the future.
Instead, I thought to use the trapeze holes to create a featured holder. This can be replaced every time, and I can then make some adjustments. And if I must replace the other side, It can be printed again for this ;).
Here a little paint sketch

The double red strikes are the holder and the horizontal line symbols the holding plate.
So to get the exact measurements I need some helping lines, for that I loaded some images into InkScape. In that I can add some helping lines (blue ones) to get the exact point on the rulers and the measurements from that.

to get a model to print, we need a CAD system.
Step 3: Constructing the model
I will use Fusion360 (it's free for personal use, really!). It's very intuitive and you can construct very easy some models. You are free to use alternative ones like openscad or so. It doen't matter.
At first I create a new sketch. Sketches are the first place to construct the outline of one particular think. The first step in the sketch is to build a trapeze with the measurements from the images.

This will fit into the trapeze hole. Next I construct the holding joint, in that will slide in the glass later on.

At this time, you must use your imagination power!
Trust me, those are the exact sizings that will be met. So, actually, I got the same sizes, but this won't help me. Because the trapeze will be held in the whole, and the holding joint will printed as a block. So I decided to add some borders to it. For that, there exists a tool in Fusion 360

With this, I can add a 1 mm border to all sizes. So that is my result now.

Yep, that looks nice. It's time to create a nice object from it. The magic is that you must extrude (positive and negative) the planes.
I start with the Trapeze.

Next, I will exude the holding joint; this is two steps. At first, I exude the back plate, and the next step is to extrude the holding plates. So that is my result.

Perfect, but now I must ensure that the device will fit and hold in place. For that, I added some boarders to the trapezoid. This will be negatively extruded so that it will get a nice outline into the back. The final result is this for now.

Step 4: Print
Now, it's time to print out the model. Fusion 360 has a built-in functionality that allows you to create a 3mf or stl file.
Just go to Tools-> Create

Now select all objects in your area, select the format to export (in my case, 3MF; you can also export an STL), and hit "OK."

After exporting this, you can load it into your slicer tool. In my case it's Bamboolab. After slicing it, you will se that there will generate some support structures, because there are some hanging parts.

Next, I print the object, and sometime later (about 11 min), It will be ready for the first try.
Step 5: First use
After a little bit of adjusting and pressing it into the hole, it snapped in into the part

So now, at the moment of truth, I inserted it into the fridge (sorry for the bad resolution).

But It seems to fit right into the place. Now, the test with the glass. It slides smoothly into the holder, and it fits very well.

Cool now, the lid will be held down, and the condensation water will run off.
Conclusion
This project has been a fantastic example of how technology and creativity can come together to solve everyday problems. Using my 3D printer and Fusion 360, I designed and produced a custom replacement part that not only fixed my refrigerator but also offered an improved, modular solution for potential future issues.
The process of measuring, designing, printing, and testing was both challenging and rewarding. It highlighted the value of modern tools like CAD software and 3D printers in addressing minor but impactful household repairs. What started as a frustrating inconvenience became an exciting DIY journey, leaving me with a sense of accomplishment and a functional refrigerator.
If you're facing similar challenges, I encourage you to explore creative solutions using the tools you have. You might just be surprised at what you can achieve!
