How I pimp my PowerShell
Every developer uses the shell, but why use the old-fashioned style of the shell.
I prefer to use PowerShell, of course, you can use bash and other terminals instead. But this article is written for this (it can be also applied to another shell too).
My goals
To the fact, that I use git repos, I want to know the following information about the current directory:
- On which Origin I am working
- in which branch I am working on
- Are there actual changes
- Is there s.th. to push
So actually I want this Information in my (Power)Shell CMD.
Using Oh My Posh
Oh my Posh is a pendant to oh my bash. It is an extension for your shell that will gather some information about what you will need. It’s configurable and also themeable. So that you can design your shell (later) on your needs.
So first of all, I must install the shell itself:# Windows
After that you have successfully installed you can immediately execute oh-my-posh.exe

Yes, you look right, it’s a binary executable. But now worry about it, we now integrate it now in your shell
Integrating it into your existing shell
So the executable is nice to have, but we want the information just in time while we open up the cmd line and on every single prompt.
So let’s integrate it into your (Power)Shell. Luckily you can use in the Shell a profile to integrate custom scripts, so we open up the profile in vs code withcode $PROFILE
In some cases, there does not exist any profile, so it will create one. with the name Microsoft.PowerShell_Profile.ps1 . Maybe some profile contains some content, in this case, you can attach the next lines below the existing scripts (if you don’t care about the order of executions).
First of all, you must import the required PowerShell Modules for oh-my-posh:Import-Module oh-my-posh
When you will ensure that you install the module before it will be imported, you can use this at the top of the profileif ((Get-Module -ListAvailable -Name oh-my-posh) -eq $null) {Install-Module oh-my-posh -Scope CurrentUser -AllowPrerelease}
Now now you can add the command that must be executed before each command line will be shown up, let’s use the default one, to see quick resultsoh-my-posh --init --shell pwsh --config ~/jandedobbeleer.omp.json | Invoke-Expression
This command will execute oh-my-posh and uses the default config “jandedobbeleer.omp.json”.
Now execute . $PROFILE to reload the profile itself, to take effect.
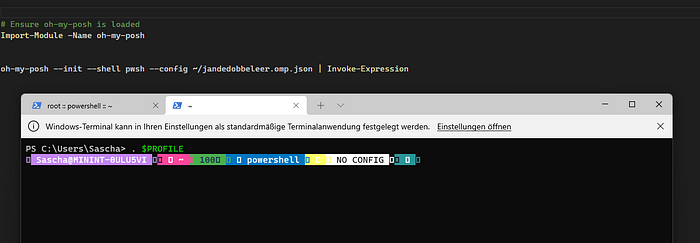
So far so good, but the shell is very…yeah … ugly. Because there are some squares in it and that looks very unfriendly.
This is because you use a font, that does not support any symbols that oh-my-posh uses. To solve this, I use Caskaydia Cove from Nerdfonts. This font collection uses the “free” font spaces and fills them up with some fonts from Fontawesome, Devicons, and so on. For more information about please go to the page.
After assigning the new font, and a quick restart of the shell, you get the new look like this

Set custom configuration
Now the default prompt has some information that we don't want. So let’s customize this to our needs (defined above). Modify the cmd in your profile to use a custom configuration file:oh-my-posh --init --shell pwsh --config $HOME/ohmyposh/myconfig.omp.json | Invoke-Expression
Now let’s open up the config code $HOME/ohmyposh/myconfig.omp.json and past the default config into it:
After a reload of the config, . $PROFILE you will be prompted with a minimal shell.

Customize the cmd line
The first thing we customize is the shell itself. So I want the current time, the current directory first. This will do in the segments area in the JSON configuration file. So each information will be a segment. Let’s add:
- The current time
- The current folder
So I added a segment for the current time (and formatting of these)
After this I added this segment to display the current folder:
Now it will look like this:

Add git Information
To add the git information you will add the git segment for this:
This contains some custom formatting. In general, the segment will display the changes with the following representation.
+Added~Modified-Deleted?Untracked
This will be displayed as follow:

It will now display that the folder has open edits. 4 new Files that must be added and 8 Files that will be deleted.
After this, you have all information you will need. You can also add more segments, have a look at the existing segment definitions here.
Expert level: Tooltips
So maybe if you like to add more and more segments, your command will get messy. In that case, you can use Tooltips instead.
To enable them you must add Enable-PoshTooltips after the oh-my-posh command. That will rebuild the tooltip collection.
Tooltips will display the extension depending on your typed command. Here is an example for git
To add a tooltip you must add it into the tooltips area in the configuration.
So for git, it will look like this:"tooltips":
so a tooltip uses the properties from the segment definition like above, but it will extend the Properties
- tips
- leading_diamond
- trailing_diamond
In tipsyou can enlist the keywords to act on. So if you enter gi followed by a space, it will execute (shown) the tooltip information. It then displays the information as given in the template. I customized the tooltip for git like this

Final Configuration
For everybody who will use a copy past friendly version, you can use this gist