# Sascha's Blog
> A blog about specific insights into IT topics and also gives you some best practice about developing and some hints for better programming.
Public Ghost content for AI and LLM tooling. This file includes a bounded export of public pages first, then recent public posts.
Append `.md` to any post or page URL to get the content in Markdown (for example, `/example-post.md`).
## Pages
### Disclaimer for Sascha's Blog
URL: https://blog.bajonczak.com/disclaimer/
Last updated: 2022-10-18T08:46:25.000Z
If you require any more information or have any questions about our site's disclaimer, please feel free to contact us by email at xbeejayx@hotmail.com
## Disclaimers for Sascha's Blog
All the information on this website - https://blog.bajonczak.com/ - is published in good faith and for general information purpose only. Sascha's Blog does not make any warranties about the completeness, reliability and accuracy of this information. Any action you take upon the information you find on this website (Sascha's Blog), is strictly at your own risk. Sascha's Blog will not be liable for any losses and/or damages in connection with the use of our website. Our Disclaimer was generated with the help of the [Disclaimer Generator](https://www.privacypolicyonline.com/disclaimer-generator/?ref=blog.bajonczak.com).
From our website, you can visit other websites by following hyperlinks to such external sites. While we strive to provide only quality links to useful and ethical websites, we have no control over the content and nature of these sites. These links to other websites do not imply a recommendation for all the content found on these sites. Site owners and content may change without notice and may occur before we have the opportunity to remove a link which may have gone 'bad'.
Please be also aware that when you leave our website, other sites may have different privacy policies and terms which are beyond our control. Please be sure to check the Privacy Policies of these sites as well as their "Terms of Service" before engaging in any business or uploading any information.
## Consent
By using our website, you hereby consent to our disclaimer and agree to its terms.
## Update
Should we update, amend or make any changes to this document, those changes will be prominently posted here.
### Privacy Policy
URL: https://blog.bajonczak.com/privacy-policy/
Last updated: 2022-10-18T08:47:33.000Z
At Sascha's Blog, accessible from https://blog.bajonczak.com/, one of our main priorities is the privacy of our visitors. This Privacy Policy document contains types of information that is collected and recorded by Sascha's Blog and how we use it.
If you have additional questions or require more information about our Privacy Policy, do not hesitate to contact us.
## Log Files
Sascha's Blog follows a standard procedure of using log files. These files log visitors when they visit websites. All hosting companies do this and a part of hosting services' analytics. The information collected by log files include internet protocol (IP) addresses, browser type, Internet Service Provider (ISP), date and time stamp, referring/exit pages, and possibly the number of clicks. These are not linked to any information that is personally identifiable. The purpose of the information is for analyzing trends, administering the site, tracking users' movement on the website, and gathering demographic information. Our Privacy Policy was created with the help of the [Privacy Policy Generator](https://www.privacypolicyonline.com/privacy-policy-generator/?ref=blog.bajonczak.com).
## Cookies and Web Beacons
Like any other website, Sascha's Blog uses 'cookies'. These cookies are used to store information including visitors' preferences, and the pages on the website that the visitor accessed or visited. The information is used to optimize the users' experience by customizing our web page content based on visitors' browser type and/or other information.
For more general information on cookies, please read [the "Cookies" article from the Privacy Policy Generator](https://www.privacypolicyonline.com/what-are-cookies/?ref=blog.bajonczak.com).
## Google DoubleClick DART Cookie
Google is one of a third-party vendor on our site. It also uses cookies, known as DART cookies, to serve ads to our site visitors based upon their visit to www.website.com and other sites on the internet. However, visitors may choose to decline the use of DART cookies by visiting the Google ad and content network Privacy Policy at the following URL – [https://policies.google.com/technologies/ads](https://policies.google.com/technologies/ads?ref=blog.bajonczak.com)
## Our Advertising Partners
Some of advertisers on our site may use cookies and web beacons. Our advertising partners are listed below. Each of our advertising partners has their own Privacy Policy for their policies on user data. For easier access, we hyperlinked to their Privacy Policies below.
Google
[https://policies.google.com/technologies/ads](https://policies.google.com/technologies/ads?ref=blog.bajonczak.com)
## Privacy Policies
You may consult this list to find the Privacy Policy for each of the advertising partners of Sascha's Blog.
Third-party ad servers or ad networks uses technologies like cookies, JavaScript, or Web Beacons that are used in their respective advertisements and links that appear on Sascha's Blog, which are sent directly to users' browser. They automatically receive your IP address when this occurs. These technologies are used to measure the effectiveness of their advertising campaigns and/or to personalize the advertising content that you see on websites that you visit.
Note that Sascha's Blog has no access to or control over these cookies that are used by third-party advertisers.
## Third Party Privacy Policies
Sascha's Blog's Privacy Policy does not apply to other advertisers or websites. Thus, we are advising you to consult the respective Privacy Policies of these third-party ad servers for more detailed information. It may include their practices and instructions about how to opt-out of certain options.
You can choose to disable cookies through your individual browser options. To know more detailed information about cookie management with specific web browsers, it can be found at the browsers' respective websites. What Are Cookies?
## Children's Information
Another part of our priority is adding protection for children while using the internet. We encourage parents and guardians to observe, participate in, and/or monitor and guide their online activity.
Sascha's Blog does not knowingly collect any Personal Identifiable Information from children under the age of 13\. If you think that your child provided this kind of information on our website, we strongly encourage you to contact us immediately and we will do our best efforts to promptly remove such information from our records.
## Online Privacy Policy Only
This Privacy Policy applies only to our online activities and is valid for visitors to our website with regards to the information that they shared and/or collect in Sascha's Blog. This policy is not applicable to any information collected offline or via channels other than this website.
## Consent
By using our website, you hereby consent to our Privacy Policy and agree to its Terms and Conditions.
### Terms and Conditions
URL: https://blog.bajonczak.com/terms-and-conditions/
Last updated: 2022-10-18T08:49:06.000Z
Welcome to Sascha's Blog!
These terms and conditions outline the rules and regulations for the use of Sascha's Blog's Website, located at https://blog.bajonczak.com.
By accessing this website we assume you accept these terms and conditions. Do not continue to use Sascha's Blog if you do not agree to take all of the terms and conditions stated on this page.
The following terminology applies to these Terms and Conditions, Privacy Statement and Disclaimer Notice and all Agreements: "Client", "You" and "Your" refers to you, the person log on this website and compliant to the Company’s terms and conditions. "The Company", "Ourselves", "We", "Our" and "Us", refers to our Company. "Party", "Parties", or "Us", refers to both the Client and ourselves. All terms refer to the offer, acceptance and consideration of payment necessary to undertake the process of our assistance to the Client in the most appropriate manner for the express purpose of meeting the Client’s needs in respect of provision of the Company’s stated services, in accordance with and subject to, prevailing law of Netherlands. Any use of the above terminology or other words in the singular, plural, capitalization and/or he/she or they, are taken as interchangeable and therefore as referring to same. Our Terms and Conditions were created with the help of the [Terms & Conditions Generator](https://www.privacypolicyonline.com/terms-conditions-generator/?ref=blog.bajonczak.com).
### **Cookies**
We employ the use of cookies. By accessing Sascha's Blog, you agreed to use cookies in agreement with the Sascha's Blog's Privacy Policy.
Most interactive websites use cookies to let us retrieve the user’s details for each visit. Cookies are used by our website to enable the functionality of certain areas to make it easier for people visiting our website. Some of our affiliate/advertising partners may also use cookies.
### **License**
Unless otherwise stated, Sascha's Blog and/or its licensors own the intellectual property rights for all material on Sascha's Blog. All intellectual property rights are reserved. You may access this from Sascha's Blog for your own personal use subjected to restrictions set in these terms and conditions.
You must not:
- Republish material from Sascha's Blog
- Sell, rent or sub-license material from Sascha's Blog
- Reproduce, duplicate or copy material from Sascha's Blog
- Redistribute content from Sascha's Blog
This Agreement shall begin on the date hereof.
Parts of this website offer an opportunity for users to post and exchange opinions and information in certain areas of the website. Sascha's Blog does not filter, edit, publish or review Comments prior to their presence on the website. Comments do not reflect the views and opinions of Sascha's Blog,its agents and/or affiliates. Comments reflect the views and opinions of the person who post their views and opinions. To the extent permitted by applicable laws, Sascha's Blog shall not be liable for the Comments or for any liability, damages or expenses caused and/or suffered as a result of any use of and/or posting of and/or appearance of the Comments on this website.
Sascha's Blog reserves the right to monitor all Comments and to remove any Comments which can be considered inappropriate, offensive or causes breach of these Terms and Conditions.
You warrant and represent that:
- You are entitled to post the Comments on our website and have all necessary licenses and consents to do so;
- The Comments do not invade any intellectual property right, including without limitation copyright, patent or trademark of any third party;
- The Comments do not contain any defamatory, libelous, offensive, indecent or otherwise unlawful material which is an invasion of privacy
- The Comments will not be used to solicit or promote business or custom or present commercial activities or unlawful activity.
You hereby grant Sascha's Blog a non-exclusive license to use, reproduce, edit and authorize others to use, reproduce and edit any of your Comments in any and all forms, formats or media.
### **Hyperlinking to our Content**
The following organizations may link to our Website without prior written approval:
- Government agencies;
- Search engines;
- News organizations;
- Online directory distributors may link to our Website in the same manner as they hyperlink to the Websites of other listed businesses; and
- System wide Accredited Businesses except soliciting non-profit organizations, charity shopping malls, and charity fundraising groups which may not hyperlink to our Web site.
These organizations may link to our home page, to publications or to other Website information so long as the link: (a) is not in any way deceptive; (b) does not falsely imply sponsorship, endorsement or approval of the linking party and its products and/or services; and (c) fits within the context of the linking party’s site.
We may consider and approve other link requests from the following types of organizations:
- commonly-known consumer and/or business information sources;
- dot.com community sites;
- associations or other groups representing charities;
- online directory distributors;
- internet portals;
- accounting, law and consulting firms; and
- educational institutions and trade associations.
We will approve link requests from these organizations if we decide that: (a) the link would not make us look unfavorably to ourselves or to our accredited businesses; (b) the organization does not have any negative records with us; (c) the benefit to us from the visibility of the hyperlink compensates the absence of Sascha's Blog; and (d) the link is in the context of general resource information.
These organizations may link to our home page so long as the link: (a) is not in any way deceptive; (b) does not falsely imply sponsorship, endorsement or approval of the linking party and its products or services; and (c) fits within the context of the linking party’s site.
If you are one of the organizations listed in paragraph 2 above and are interested in linking to our website, you must inform us by sending an e-mail to Sascha's Blog. Please include your name, your organization name, contact information as well as the URL of your site, a list of any URLs from which you intend to link to our Website, and a list of the URLs on our site to which you would like to link. Wait 2-3 weeks for a response.
Approved organizations may hyperlink to our Website as follows:
- By use of our corporate name; or
- By use of the uniform resource locator being linked to; or
- By use of any other description of our Website being linked to that makes sense within the context and format of content on the linking party’s site.
No use of Sascha's Blog's logo or other artwork will be allowed for linking absent a trademark license agreement.
### **iFrames**
Without prior approval and written permission, you may not create frames around our Webpages that alter in any way the visual presentation or appearance of our Website.
### **Content Liability**
We shall not be hold responsible for any content that appears on your Website. You agree to protect and defend us against all claims that is rising on your Website. No link(s) should appear on any Website that may be interpreted as libelous, obscene or criminal, or which infringes, otherwise violates, or advocates the infringement or other violation of, any third party rights.
### **Reservation of Rights**
We reserve the right to request that you remove all links or any particular link to our Website. You approve to immediately remove all links to our Website upon request. We also reserve the right to amen these terms and conditions and it’s linking policy at any time. By continuously linking to our Website, you agree to be bound to and follow these linking terms and conditions.
### **Removal of links from our website**
If you find any link on our Website that is offensive for any reason, you are free to contact and inform us any moment. We will consider requests to remove links but we are not obligated to or so or to respond to you directly.
We do not ensure that the information on this website is correct, we do not warrant its completeness or accuracy; nor do we promise to ensure that the website remains available or that the material on the website is kept up to date.
### **Disclaimer**
To the maximum extent permitted by applicable law, we exclude all representations, warranties and conditions relating to our website and the use of this website. Nothing in this disclaimer will:
- limit or exclude our or your liability for death or personal injury;
- limit or exclude our or your liability for fraud or fraudulent misrepresentation;
- limit any of our or your liabilities in any way that is not permitted under applicable law; or
- exclude any of our or your liabilities that may not be excluded under applicable law.
The limitations and prohibitions of liability set in this Section and elsewhere in this disclaimer: (a) are subject to the preceding paragraph; and (b) govern all liabilities arising under the disclaimer, including liabilities arising in contract, in tort and for breach of statutory duty.
As long as the website and the information and services on the website are provided free of charge, we will not be liable for any loss or damage of any nature.
### Impressum
URL: https://blog.bajonczak.com/impressum/
Last updated: 2022-10-21T13:11:31.000Z
Angaben gemäß § 5 TMG
Sascha Bajonczak
Ostpreußenstr 235c
44866-Bochum
**Vertreten durch:**
Sascha Bajonczak
**Kontakt:**
E-Mail: xbeejayx\[at\]hotmail\[dot\]com
**Verantwortlich für den Inhalt nach § 55 Abs. 2 RStV:**
Sascha Bajonczak
Ostpreußenstr 235c
44866 Bochum
**Haftungsausschluss:**
**Haftung für Inhalte**
Die Inhalte unserer Seiten wurden mit größter Sorgfalt erstellt. Für die Richtigkeit, Vollständigkeit und Aktualität der Inhalte können wir jedoch keine Gewähr übernehmen. Als Diensteanbieter sind wir gemäß § 7 Abs.1 TMG für eigene Inhalte auf diesen Seiten nach den allgemeinen Gesetzen verantwortlich. Nach §§ 8 bis 10 TMG sind wir als Diensteanbieter jedoch nicht verpflichtet, übermittelte oder gespeicherte fremde Informationen zu überwachen oder nach Umständen zu forschen, die auf eine rechtswidrige Tätigkeit hinweisen. Verpflichtungen zur Entfernung oder Sperrung der Nutzung von Informationen nach den allgemeinen Gesetzen bleiben hiervon unberührt. Eine diesbezügliche Haftung ist jedoch erst ab dem Zeitpunkt der Kenntnis einer konkreten Rechtsverletzung möglich. Bei Bekanntwerden von entsprechenden Rechtsverletzungen werden wir diese Inhalte umgehend entfernen.
**Haftung für Links**
Unser Angebot enthält Links zu externen Webseiten Dritter, auf deren Inhalte wir keinen Einfluss haben. Deshalb können wir für diese fremden Inhalte auch keine Gewähr übernehmen. Für die Inhalte der verlinkten Seiten ist stets der jeweilige Anbieter oder Betreiber der Seiten verantwortlich. Die verlinkten Seiten wurden zum Zeitpunkt der Verlinkung auf mögliche Rechtsverstöße überprüft. Rechtswidrige Inhalte waren zum Zeitpunkt der Verlinkung nicht erkennbar. Eine permanente inhaltliche Kontrolle der verlinkten Seiten ist jedoch ohne konkrete Anhaltspunkte einer Rechtsverletzung nicht zumutbar. Bei Bekanntwerden von Rechtsverletzungen werden wir derartige Links umgehend entfernen.
**Urheberrecht**
Die durch die Seitenbetreiber erstellten Inhalte und Werke auf diesen Seiten unterliegen dem deutschen Urheberrecht. Die Vervielfältigung, Bearbeitung, Verbreitung und jede Art der Verwertung außerhalb der Grenzen des Urheberrechtes bedürfen der schriftlichen Zustimmung des jeweiligen Autors bzw. Erstellers. Downloads und Kopien dieser Seite sind nur für den privaten, nicht kommerziellen Gebrauch gestattet. Soweit die Inhalte auf dieser Seite nicht vom Betreiber erstellt wurden, werden die Urheberrechte Dritter beachtet. Insbesondere werden Inhalte Dritter als solche gekennzeichnet. Sollten Sie trotzdem auf eine Urheberrechtsverletzung aufmerksam werden, bitten wir um einen entsprechenden Hinweis. Bei Bekanntwerden von Rechtsverletzungen werden wir derartige Inhalte umgehend entfernen.
**Datenschutz**
Die Nutzung unserer Webseite ist in der Regel ohne Angabe personenbezogener Daten möglich. Soweit auf unseren Seiten personenbezogene Daten (beispielsweise Name, Anschrift oder eMail-Adressen) erhoben werden, erfolgt dies, soweit möglich, stets auf freiwilliger Basis. Diese Daten werden ohne Ihre ausdrückliche Zustimmung nicht an Dritte weitergegeben.
Wir weisen darauf hin, dass die Datenübertragung im Internet (z.B. bei der Kommunikation per E-Mail) Sicherheitslücken aufweisen kann. Ein lückenloser Schutz der Daten vor dem Zugriff durch Dritte ist nicht möglich.
Der Nutzung von im Rahmen der Impressumspflicht veröffentlichten Kontaktdaten durch Dritte zur Übersendung von nicht ausdrücklich angeforderter Werbung und Informationsmaterialien wird hiermit ausdrücklich widersprochen. Die Betreiber der Seiten behalten sich ausdrücklich rechtliche Schritte im Falle der unverlangten Zusendung von Werbeinformationen, etwa durch Spam-Mails, vor.
**Google Analytics**
Diese Website benutzt Google Analytics, einen Webanalysedienst der Google Inc. (''Google''). Google Analytics verwendet sog. ''Cookies'', Textdateien, die auf Ihrem Computer gespeichert werden und die eine Analyse der Benutzung der Website durch Sie ermöglicht. Die durch den Cookie erzeugten Informationen über Ihre Benutzung dieser Website (einschließlich Ihrer IP-Adresse) wird an einen Server von Google in den USA übertragen und dort gespeichert. Google wird diese Informationen benutzen, um Ihre Nutzung der Website auszuwerten, um Reports über die Websiteaktivitäten für die Websitebetreiber zusammenzustellen und um weitere mit der Websitenutzung und der Internetnutzung verbundene Dienstleistungen zu erbringen. Auch wird Google diese Informationen gegebenenfalls an Dritte übertragen, sofern dies gesetzlich vorgeschrieben oder soweit Dritte diese Daten im Auftrag von Google verarbeiten. Google wird in keinem Fall Ihre IP-Adresse mit anderen Daten der Google in Verbindung bringen. Sie können die Installation der Cookies durch eine entsprechende Einstellung Ihrer Browser Software verhindern; wir weisen Sie jedoch darauf hin, dass Sie in diesem Fall gegebenenfalls nicht sämtliche Funktionen dieser Website voll umfänglich nutzen können. Durch die Nutzung dieser Website erklären Sie sich mit der Bearbeitung der über Sie erhobenen Daten durch Google in der zuvor beschriebenen Art und Weise und zu dem zuvor benannten Zweck einverstanden.
**Google AdSense**
Diese Website benutzt Google Adsense, einen Webanzeigendienst der Google Inc., USA (''Google''). Google Adsense verwendet sog. ''Cookies'' (Textdateien), die auf Ihrem Computer gespeichert werden und die eine Analyse der Benutzung der Website durch Sie ermöglicht. Google Adsense verwendet auch sog. ''Web Beacons'' (kleine unsichtbare Grafiken) zur Sammlung von Informationen. Durch die Verwendung des Web Beacons können einfache Aktionen wie der Besucherverkehr auf der Webseite aufgezeichnet und gesammelt werden. Die durch den Cookie und/oder Web Beacon erzeugten Informationen über Ihre Benutzung dieser Website (einschließlich Ihrer IP-Adresse) werden an einen Server von Google in den USA übertragen und dort gespeichert. Google wird diese Informationen benutzen, um Ihre Nutzung der Website im Hinblick auf die Anzeigen auszuwerten, um Reports über die Websiteaktivitäten und Anzeigen für die Websitebetreiber zusammenzustellen und um weitere mit der Websitenutzung und der Internetnutzung verbundene Dienstleistungen zu erbringen. Auch wird Google diese Informationen gegebenenfalls an Dritte übertragen, sofern dies gesetzlich vorgeschrieben oder soweit Dritte diese Daten im Auftrag von Google verarbeiten. Google wird in keinem Fall Ihre IP-Adresse mit anderen Daten der Google in Verbindung bringen. Das Speichern von Cookies auf Ihrer Festplatte und die Anzeige von Web Beacons können Sie verhindern, indem Sie in Ihren Browser-Einstellungen ''keine Cookies akzeptieren'' wählen (Im MS Internet-Explorer unter ''Extras > Internetoptionen > Datenschutz > Einstellung''; im Firefox unter ''Extras > Einstellungen > Datenschutz > Cookies''); wir weisen Sie jedoch darauf hin, dass Sie in diesem Fall gegebenenfalls nicht sämtliche Funktionen dieser Website voll umfänglich nutzen können. Durch die Nutzung dieser Website erklären Sie sich mit der Bearbeitung der über Sie erhobenen Daten durch Google in der zuvor beschriebenen Art und Weise und zu dem zuvor benannten Zweck einverstanden.
Impressum vom [Impressum Generator](https://www.impressum-generator.de/?ref=blog.bajonczak.com) der [Kanzlei Hasselbach, Frankfurt](https://www.kanzlei-hasselbach.de/standorte/frankfurt/?ref=blog.bajonczak.com)
### Git Cheat Sheet
URL: https://blog.bajonczak.com/git-cheat-sheet/
Last updated: 2023-01-29T13:44:39.000Z
Git ist one of the most popular source versioning control, also it is free. I will offer you as a free member to access to this cheat sheet.
This cheat sheet will be a nice handout for you, especcially when you are new in git.
_This page is for subscribers only._
### PDF Checklist: Microsoft 365 eSignature Tenant Readiness Checklist
URL: https://blog.bajonczak.com/microsoft-365-esignature-tenant-readiness-checklist/
Last updated: 2026-07-09T11:15:45.000Z
_This page is for subscribers only._
### Microsoft 365 eSignature Comparison Table
URL: https://blog.bajonczak.com/microsoft-365-esignature-comparison-table/
Last updated: 2026-07-09T11:15:52.000Z
_This page is for subscribers only._
### Microsoft 365 eSignature Governance Template
URL: https://blog.bajonczak.com/microsoft-365-esignature-governance-template/
Last updated: 2026-07-09T11:15:59.000Z
_This page is for subscribers only._
### Microsoft Places setup checklist: buildings, floors, rooms, desks, and privacy
URL: https://blog.bajonczak.com/microsoft-places-setup-checklist/
Last updated: 2026-07-09T16:30:42.000Z
A practical Microsoft Places rollout checklist for buildings, floors, sections, rooms, desk pools, individual desks, facilities data, privacy, pilot validation, and scale-out.
_This page is for subscribers only._
### Technical field notes: Home Assistant, SAP, Microsoft 365, ESP and homelab
URL: https://blog.bajonczak.com/technical-field-notes/
Last updated: 2026-08-13T03:44:08.000Z
I write a lot of notes while building things: small Home Assistant fixes, ESP experiments, Microsoft 365 integration work, SAP oddities, Grafana setups, and the occasional hardware review.
This page is not meant to be a full archive. It is the short version: the posts that have actually helped people before, grouped by topic, so you do not have to dig through the whole blog.
If you are here for one specific problem, start with the closest section below. Most of these articles came from something I had to solve myself, not from a content calendar.
## MCP, UI automation and small tools
### [MCP server for shadcn/ui automation](https://blog.bajonczak.com/mcp-server-shadcn-ui-automation/)
The one I would start with if you are building developer tooling around MCP and UI components.
## Home Assistant and smart home
### [Shelly Wall Display with Home Assistant](https://blog.bajonczak.com/first-steps-with-the-shelly-wall-display-and-adding-homeassistant-functionality/)
A practical setup note, including the parts that are only obvious after mounting and trying it.
### [Home Assistant e-ink information panel](https://blog.bajonczak.com/creating-an-information-panel/)
A small dashboard project that still answers a very concrete search intent.
### [Teams status in Home Assistant](https://blog.bajonczak.com/how-i-display-my-team-status-in-homeassistant/)
Useful if your home setup and work tooling overlap a bit too much.
### [WLED sunrise routine for stair lights](https://blog.bajonczak.com/creating-sunrise-routine-in-homeassistant-for-my-stair-light-with-wled/)
A small automation with a visible everyday result.
## JavaScript, npm and developer workflow
### [Versioning in npm](https://blog.bajonczak.com/versioning-in-npm/)
Semver, npm versioning and the little traps around package releases.
### [Edit files with Visual Studio Code over SSH](https://blog.bajonczak.com/how-to-edit-files-with-visual-studio-via-ssh/)
A practical remote-editing note for servers and homelab work.
## SAP, Microsoft 365 and enterprise integration
### [Fetching data from SAP SuccessFactors via OData and OAuth](https://blog.bajonczak.com/fetching-data-from-sap-successfactors-via-odata-and-oauth/)
One of the articles people actually searched for: auth, OData and SuccessFactors without pretending it is nicer than it is.
### [Syncing users between SAP and Entra ID](https://blog.bajonczak.com/how-to-syncing-users-between-sap-and-entra-id/)
A useful companion topic for identity and HR master data flows.
### [Index Confluence with Azure AI Search](https://blog.bajonczak.com/how-to-index-confluence-with-azure-ai-search/)
Search, connectors and the reality of getting enterprise content into a useful index.
### [Azure B2C logout across services](https://blog.bajonczak.com/how-to-logout-from-azure-b2c-on-all-services-correctly/)
Logout sounds boring until you have several services and sessions involved.
## Homelab, Grafana and networking
### [Provision Grafana datasources](https://blog.bajonczak.com/how-to-provsioning-datasources-in-grafana/)
Yes, the slug has the typo. The topic still had search demand.
### [Provision Grafana dashboards](https://blog.bajonczak.com/how-to-provisioning-dashboards-in-grafana/)
The dashboard side of the same Grafana setup story.
### [Homeserver setup with Traefik](https://blog.bajonczak.com/how-i-setup-my-homeserver-with-traefik/)
Reverse proxy, services and the kind of setup that grows slowly over time.
### [Route media traffic over Mullvad VPN with OPNsense](https://blog.bajonczak.com/watching-youtube-anonymously-how-i-route-media-traffic-over-mullvad-vpn-with-opnsense/)
A more specific networking note with a surprisingly clear query pattern.
## ESP and hardware tinkering
### [Flash an ESP01 device](https://blog.bajonczak.com/how-to-flash-an-esp01-device/)
Old-school tinkering content, but people searched for it.
### [Measure voltage with an ESP controller](https://blog.bajonczak.com/measure-voltage-with-an-esp-controller/)
A simple electronics problem that keeps coming back in small projects.
## Gear reviews that had search demand
### [Logitech MX Master 3S review](https://blog.bajonczak.com/review-logitech-mx-master-3s/)
This one had huge impressions. It should only stay if it keeps a real, personal angle.
### [Hollyland Lark M2 review](https://blog.bajonczak.com/product-review-hollyland-lark-m2-wireless-lavalier-microphone/)
Also high-impression review content. Worth keeping if it is clearly hands-on and not affiliate fluff.
## What I would read first
If I had to pick only a few starting points, I would use these: the shadcn MCP article for current developer tooling, the Shelly Wall Display article for smart home work, the SuccessFactors OAuth article for enterprise integration, and the ESP01 flashing note for hardware tinkering.
The rest is intentionally kept as notes from the field. Some posts are polished, some are rougher, but the useful ones usually came from a real problem first.
## Posts
### AI Usage Monitor: The Little Desk Gadget I Built for Claude and Codex
URL: https://blog.bajonczak.com/ai-usage-monitor-a-small-desk-display-for-my-claude-and-codex-quotas/
Last updated: 2026-10-11T07:35:37.000Z
I use a lot of coding tools. Copilot is usually open in my editor, and Claude and Codex are often involved when I work on larger changes, debugging, or one of those ideas that starts with “this should only take an hour”.
The annoying part is keeping an eye on the quotas. The information is usually somewhere in a web dashboard, or I only notice it when a tool tells me that I have used too much. Nothing dramatic, but annoying enough to make me build a small screen for it.
That is how my AI Usage Monitor started.
It sits on my desk and shows the remaining Claude and Codex usage at a glance. The inner ring is the current 5-hour or session quota. The outer ring shows the weekly quota. The display uses remaining percentages, so something like `5H 46% FREE` tells me immediately where I stand. I do not have to convert a “used” value in my head first.

*The monitor switching between its different views. I made this short preview from the video I recorded while testing it.*
## The hardware
The project is built around the Waveshare ESP32-S3 Touch AMOLED 1.43-inch round display. It has a 466 × 466 pixel panel, which is plenty for readable labels, smooth rings, and a few small animated characters while keeping the device small enough for a desk.
The board gives me the main parts I need in one package:
- ESP32-S3
- 1.43-inch round AMOLED display
- 466 × 466 resolution
- Wi-Fi
- FT3168 touch controller
- QMI8658C motion sensor
- PSRAM for the larger rendering buffers
The motion sensor is more useful than I expected. When I turn the device, the screen can follow the movement and rotate automatically. That makes it feel more like a little standalone gadget and less like a development board with a screen attached to it.
The touch input is there as well, although this project is mainly about the information that is visible without touching anything. The round screen was one of the reasons I picked this hardware. It gives the monitor a different look from another small rectangular dashboard, but it also means that every label has to fit properly.

*The current physical version is a simple white printed enclosure with a small stand and the USB cable running through the base.*
If you want to use the same display, I have added the hardware link below. It is an affiliate link, so I may receive a commission if you buy through it, at no extra cost to you.
## Home Assistant does the heavy lifting
The ESP32 does not log in to Claude or Codex. I did not want account credentials sitting on a tiny device on my desk. Home Assistant already has the relevant sensors, so it made sense to use that as the middle layer.
An automation reads the usage values, converts them into remaining percentages, and publishes a retained JSON message over MQTT. The topic is `ai-monitor/state`. Home Assistant sends an update every five minutes and also publishes the current state when it starts.
The retained message is handy. When the monitor reconnects to Wi-Fi, it can get the last known values straight away instead of waiting for the next scheduled update.
The payload is deliberately simple:
```json
{
"claude": {
"session_remaining": 72,
"weekly_remaining": 57
},
"codex": {
"session_remaining": 46,
"weekly_remaining": 35
}
}
```
The original integrations still provide the actual quota data. The monitor only receives it and displays it. That keeps the firmware easier to understand and means the device does not need any Claude or Codex authentication.
Before the first MQTT message arrives, the firmware shows demo values. That saves a lot of time while working on the interface because I can test the screen without starting the whole Home Assistant setup.
## A small screen still needs some work
The firmware is written with PlatformIO and Arduino. The interface uses LVGL 9\. MQTT is handled with PubSubClient and ArduinoJson takes care of the payload.
Drawing a nice-looking 466 × 466 display is a little more involved than putting a few labels on a screen. The project uses PSRAM for the LVGL image, the rotated frame, and the mascot layer. The ring backgrounds are cached there too. Switching between Claude and Codex does not need to rebuild all those pixels every time.
The rotation path runs at up to 30 FPS, while the QMI8658C is read in a separate sensor task. When I move the monitor, the mascot animation pauses for a moment so the rotation stays responsive. It is a tiny detail, but the whole thing feels better when the screen does not fight against the movement.
## Why the mascots?
A screen with two coloured rings and four percentages can look a bit too much like a monitoring dashboard. I wanted something with a little more character.
The Claude view has a small orange coding character. The Codex view uses a panda and dragon style character inspired by the Jadebyte look. Both have three small animation frames, including a blink.
They do not get in the way of the numbers. The provider name, 5-hour value, weekly value, reset information, and connection status are still the important parts. The mascots just make the device nicer to look at when it is sitting beside my keyboard all day.


*The two live views on the hardware. The Claude screen uses the orange mascot, while the Codex view uses the small jade-coloured panda-dragon character.*
The animation frames are packed into the firmware rather than decoded from PNG files on the ESP32\. The active 120 × 120 ARGB8888 frame is stored in PSRAM and layered over the RGB565 display canvas through LVGL.
## The project is still in progress
Could I show the same data in a Home Assistant dashboard or a browser tab? Of course. I already have those options.
The point of this project is that I do not want to open another application just to answer one small question. A quick look at the desk tells me whether I have plenty of quota left, whether a longer task might be a bad idea, or whether a reset is coming soon.
It is also a nice excuse to play with a board that combines a round AMOLED display, touch, motion sensing, Wi-Fi, MQTT, LVGL, and PSRAM in a very small package.
This is still a work in progress, though. The firmware has not yet been fully flash-tested on the real hardware. The layout and code are built around the target display, but the final test still needs to check the display, touch, automatic rotation, Wi-Fi, and MQTT updates together. That is usually the point where the hardware finds one more surprise.
The enclosure is now available on MakerWorld: [Claude and Codex AI Usage Monitor](https://makerworld.com/de/models/3422571-claude-and-codex-ai-usage-monitor?ref=blog.bajonczak.com). I will keep refining the physical version and the firmware as I use it more.
The source code is available on [GitHub](https://github.com/SBajonczak/ai-usage-monitor-pio?ref=blog.bajonczak.com). It includes the PlatformIO configuration, LVGL interface, MQTT handling, Home Assistant example automation, mascot frames, and a demo payload.
The [Waveshare ESP32-S3 Touch AMOLED display is available here](https://link.amazon/B0iZ42iy?ref=blog.bajonczak.com). This is an affiliate link. I may receive a commission from qualifying purchases, without any additional cost for you.
For now, the monitor is doing what I wanted: it sits beside my keyboard, keeps Claude and Codex usage visible, and gives me another small hardware project to tinker with.
## Links
- [AI Usage Monitor on GitHub](https://github.com/SBajonczak/ai-usage-monitor-pio?ref=blog.bajonczak.com)
- [MakerWorld enclosure](https://makerworld.com/de/models/3422571-claude-and-codex-ai-usage-monitor?ref=blog.bajonczak.com)
- [Waveshare ESP32-S3 Touch AMOLED 1.43-inch display](https://link.amazon/B0iZ42iy?ref=blog.bajonczak.com) (affiliate link)
### When a company disappears: how to archive SharePoint, OneDrive and file shares after a takeover
URL: https://blog.bajonczak.com/archiving-data-after-company-dissolution-and-holding-company-takeover/
Last updated: 2026-09-22T10:30:38.000Z
When a company is taken over by a holding company, the IT department often focuses on the obvious things first: users, domains, mailboxes, licenses, applications and billing.
The old company may already be gone a few weeks later. The legal entity is dissolved, its SharePoint tenant is cleaned up and the last administrator is moved to another role. Then somebody asks for an invoice from eight years ago, an old customer contract or the project documentation for an audit.
That is the moment when the real question appears:
**Where is the data of the old company, who can access it, and can the holding company prove that it has not been changed?**
This is not a normal migration project. It is a controlled handover of records from one legal and organisational context into another one.
The focus of this article is SharePoint, OneDrive, file shares and local files. SAP and SQL are deliberately left out for now. The same principles apply there, but the technical archive process is different.
## The first mistake: treating the takeover like a normal file migration
A normal migration asks questions such as:
- Which data do we still need?
- Which sites and folders should move?
- Which users need access?
- How much storage will it cost?
An archive project after a dissolution needs additional questions:
- Which legal entity created the records?
- Which obligations survive the dissolution?
- Which retention period applies to each type of data?
- Who is now the records owner?
- Which people from the holding company may access the records?
- Can the holding company show that the archive is complete?
- What happens if an auditor asks for access ten years from now?
- What happens if the original tenant, domain or identity system no longer exists?
This is why I would not simply copy everything into a new SharePoint site called `Old Company Archive` and declare the project finished. That may be a useful storage step, but it is not yet a defensible archive.
## The legal entity may disappear, but the records do not
The holding company becomes the custodian of the data. It does not automatically become the original author of every document or the owner of every decision recorded in those documents.
That distinction matters. An old contract should still show which company signed it. An invoice should preserve its original context. A project decision should not appear as if it had been created by the holding company after the takeover.
The archive should therefore preserve at least:
- the original legal entity
- the business process or project
- the original source system
- creation and modification dates
- the final version or document package
- the person or role responsible at the time
- the new records owner in the holding company
- the applicable retention rule
- the date on which the retention period started
- the access history and any later disposition decision
This is where metadata is more important than a clever folder structure.
## Ten years is not one universal retention period
In practice, people often say: “Keep the data for ten years.” That is a reasonable starting point for planning, but it is not a complete retention policy.
Different documents can have different clocks. The period may start at the end of a financial year, at the end of a contract, at the completion of a project or when a legal dispute is closed. Some documents may need to be kept longer. Other documents may have to be deleted earlier because there is no legal or business reason to retain the personal data.
For German tax and accounting records, the German Fiscal Code contains specific periods. For example, §147 AO currently distinguishes ten years for certain books and records, eight years for booking documents and six years for other documents listed there.\[5\] Commercial records are also covered by §257 HGB, including requirements around orderly storage and readability.\[6\]
That does **not** mean that every SharePoint file must be kept for ten years. It means the company needs a retention matrix that maps business record types to the legal or business rule that applies.
A sensible matrix contains at least:
| Record type | Typical source | Retention trigger | Retention period | Owner | Access group |
| ------------------------------- | -------------------------------- | ---------------------------------- | ------------------------------------- | ------------------------- | ----------------------------------- |
| Invoices and accounting records | SharePoint, file share, export | End of financial year | According to tax and commercial rules | Finance | Finance audit group |
| Customer contracts | SharePoint | Contract end or legal hold release | Contract-specific | Legal or sales operations | Legal and audit |
| Project documentation | SharePoint or file share | Project closure | Risk and business-specific | Project owner | Audit and responsible business unit |
| HR records | OneDrive, SharePoint or HR files | Employment or legal trigger | HR-specific | HR | Restricted HR audit group |
| General working files | OneDrive or personal share | End of business need | Usually shorter | Business owner | Limited or no archive access |
This table is not a legal opinion. It is the control mechanism that makes the legal review and the technical implementation possible.
## What is the archive in this scenario?
An archive is not just a place where old files are moved. For a dissolved company, it should provide four things:
1. **Continuity:** the information remains available even though the original company, tenant or employees no longer exist.
2. **Context:** the holding company can explain what the record is and where it came from.
3. **Integrity:** the archived version cannot be silently changed or deleted.
4. **Controlled access:** authorised auditors, legal staff and responsible administrators can retrieve the information without giving everybody access to the entire history.
The word **independent** is important here. Independence does not necessarily mean that the archive must be hosted by a different vendor. It means that the archive should not depend entirely on the same user account, administrator, production site and deletion process as the original working environment.
If the former tenant is deleted, the archive should still exist. If a former global administrator account is compromised, the archive should not automatically be editable. If the holding company changes its domain, the records should still be searchable and readable.
## SharePoint and Microsoft Purview
SharePoint is often the best source and sometimes a suitable archive platform, especially when the records need to remain searchable and connected to their metadata.
Microsoft Purview Records Management supports retention labels, file plans, record declaration, disposition reviews and retention settings for documents and other content.\[1\] SharePoint and OneDrive content can be covered by retention policies or retention labels, including content in archived SharePoint sites.\[2\]
This is useful when the holding company wants to keep the data in Microsoft 365 and manage it with the same compliance tools. Microsoft 365 Archive can move inactive SharePoint sites into a lower-cost archive tier while keeping metadata, permissions and compliance features available.\[3\]
There is, however, an important limitation in the takeover scenario: keeping data in the same tenant is not the same as creating an independent archive. The archive still depends on the Microsoft 365 tenant, its licensing, its administrative model and its configuration.
SharePoint with Purview is a good choice when:
- the data must remain searchable
- the holding company already has a mature Microsoft 365 governance model
- the original site structure and metadata are still useful
- controlled access by legal, finance and audit teams is required
- the tenant will remain available for the full retention period
I would document the tenant dependency explicitly. It is not a reason to reject SharePoint. It is a reason to add another protection layer when the records are especially critical.
## OneDrive is not a company archive
OneDrive is a personal working area. It is useful for drafts and for documents owned by an individual. It is a poor default destination for the long-term archive of a dissolved company.
The problem is not only storage. The problem is ownership and completeness.
- Which files are business records and which are personal working files?
- What happens when the user account is deleted?
- Who knows the contents of the personal OneDrive?
- Were files shared externally?
- Are there several final versions?
- Can the holding company explain why this particular OneDrive was complete?
Retention can apply to OneDrive content.\[2\] That is helpful, but retention alone does not turn a personal workspace into a well-governed company archive.
My recommendation is simple: treat OneDrive as a source that must be assessed. Move relevant business records into a controlled SharePoint location or an archive repository. Keep the original context in the metadata, but do not leave the long-term responsibility attached to one former employee.
## File shares and local files
Classic file shares and local folders are often where the forgotten records are found. They may contain scanned contracts, exports, old project documents and files that never made it into SharePoint.
A file share can be part of the solution, but an ordinary folder is not automatically an archive. Typical weaknesses include:
- inherited permissions that nobody understands anymore
- files overwritten without a reliable version history
- missing business metadata
- no clear retention start date
- weak or incomplete audit logs
- local copies that are not included in the central inventory
- backups that exist, but cannot prove which version was authoritative
For local files, I would first build an inventory and create a controlled export. The export should include the files, source path, owner if known, timestamps, classification, checksum and transfer log. After verification, the archive copy should be protected against changes.
A file share can remain useful as a source or as a controlled access layer. I would not use it as the only long-term protection for critical records unless immutability, access separation and auditability are technically enforced.
## Azure Blob Storage as an independent archive layer
Azure Blob Storage with Immutable Storage is a strong option when the holding company wants to separate the archive from the former production environment.
Azure supports WORM storage, which means that data can be protected from modification and deletion for a defined period. It also supports legal holds that remain active until explicitly cleared.\[4\]
A typical takeover process could look like this:
```text
Former company data
SharePoint / OneDrive / file share / local files
|
| inventory, classify, export, checksum
v
Archive package
files + metadata + source identity + transfer log
|
| separate archive roles and immutable policy
v
Azure Blob Immutable Storage
|
| controlled retrieval and audit evidence
v
Holding company audit access
```
This design gives the holding company a clearer separation between production and archive. It also makes it easier to explain who can read the records and who is prevented from changing them.
WORM is not magic, though. Before locking a retention policy, the organisation must test the retention periods, data formats, access model and deletion process. Microsoft distinguishes testable unlocked policies from locked policies. A policy should not be presented as a finished compliance control until the configuration has been reviewed and locked where required.\[4\]
## The archive handover process
I would run the handover in controlled stages.
### 1\. Freeze the source systems
Before the old company is dissolved, define a cut-off date. After that date, changes to the source data must either be blocked or recorded as part of the handover process.
Do not delete the old tenant or disable all administrative access before the export and verification are complete.
### 2\. Build the inventory
List SharePoint sites, OneDrive accounts, file shares, local folders, external shares and known exports. Record the owner, data category, size, last activity and expected retention class.
This inventory is also the first completeness check. Without it, nobody can later say whether the archive contains all relevant sources.
### 3\. Classify and remove obvious non-records
Temporary files, caches, duplicate downloads and personal material should not be pushed into a ten-year archive without review. Data minimisation still matters after a takeover. The GDPR principle of storage limitation does not disappear because a company has been dissolved.\[7\]
### 4\. Create archive packages
For each business unit or record class, create a package containing:
- the original files
- metadata and source references
- the original legal entity
- the responsible business owner
- retention category and trigger date
- checksums
- export and transfer logs
- legal hold information, if applicable
### 5\. Obtain the approvals
The business owner confirms completeness. Legal or records management confirms the retention rule. The data protection officer advises on personal data, access and deletion requirements. IT confirms the technical transfer and protection. The holding company formally accepts custody.
The data protection officer does not replace the records owner. Their role is to advise and monitor privacy compliance, not to certify that every business record is complete.
### 6\. Transfer and verify
After transfer, compare checksums, open representative files, test search and test export. For long-term storage, include older file formats in the test set. A file that exists but cannot be opened ten years later is not a useful archive.
### 7\. Lock and document
Once the checks are complete, activate the intended retention and immutability controls. Save the configuration, policy version, approvers, timestamps and test results with the archive documentation.
## How auditors get access later
Auditor access should be designed before the original company disappears. The goal is not to give an auditor permanent access to the entire archive. The goal is to provide controlled, repeatable and documented access.
A practical model is:
1. The audit request gets a case or ticket number.
2. The responsible holding-company owner validates the scope.
3. Legal, compliance or data protection reviews whether the request is permitted.
4. A restricted audit group receives time-limited read access or a controlled export.
5. Every search, download and administrative action is logged.
6. The access is removed after the audit.
7. The request, approval, export and access log are retained as audit evidence.
The auditor should be able to see the relevant record and enough context to understand it. They do not automatically need access to unrelated personnel files or the complete archive of the dissolved company.
This is also where identities matter. A group named `OldCompany-Audit` is not enough. Document who can approve membership, who can use the group, how long access lasts and what happens when somebody changes role.
## What the data protection officer should check
The data protection officer should be involved before the archive is built, not after the first audit request.
The review should cover:
- the purpose and legal basis for keeping the data
- data minimisation and exclusion of irrelevant personal files
- access groups and least privilege
- special categories of personal data
- former employee and customer data
- processors and cloud locations
- cross-border access by the holding company
- retention and deletion rules
- legal holds and exceptions
- audit logging and access transparency
- whether a data protection impact assessment is required
The archive may need to preserve data for a legal obligation, but that does not justify unrestricted access. Long retention and broad access are two separate decisions.
## Audit checklist for the takeover archive
A useful audit process follows the complete chain, not just a few portal screenshots.
**Scope:** Which legal entity, systems, business units and years are included?
**Completeness:** Can the holding company prove that SharePoint, OneDrive, file shares and local source folders were inventoried?
**Integrity:** Are checksums, immutable policies or equivalent controls in place?
**Context:** Does every archive package identify the original company, source system and retention rule?
**Access:** Can the company show who may access the records and how temporary audit access is approved?
**Retrieval:** Can a sample record be found, opened, exported and explained?
**Retention:** Is the start of the retention period documented and are different record categories handled differently?
**Disposition:** Is deletion reviewed and documented when the period expires? Is a legal hold able to stop deletion?
**Continuity:** Would the archive still be available if the old tenant, domain or administrator account were removed?
The best test is a realistic one: ask a person who was not involved in the migration to find an old record using only the documentation and the audit process. If they cannot do that, the archive is not ready.
## What I would not recommend
- deleting the former tenant before the archive is verified
- copying everything into one new SharePoint folder without classification
- keeping the archive in one former employee's OneDrive
- treating a backup as proof of retention and integrity
- keeping all personal data forever “just in case”
- using one global administrator account for archive access and deletion
- locking WORM policies before testing retrieval and retention dates
- allowing permanent anonymous or public links for auditor access
- giving auditors unrestricted access to the complete archive
- relying on screenshots instead of access logs, export records and test results
## My practical conclusion
When a company is dissolved and taken over by a holding company, the archive becomes part of the successor's long-term responsibility. The original legal entity may disappear, but its contracts, accounting records, project history and evidence do not disappear with it.
For active work, SharePoint remains a strong platform. Purview can provide retention labels, records management and disposition controls. Microsoft 365 Archive can help with inactive SharePoint sites, but it remains inside the Microsoft 365 dependency model.
OneDrive should be treated as a source, not as the company archive. File shares and local folders need an inventory and a controlled transfer. For the most critical records, an independent archive layer with Azure Blob Immutable Storage can add the separation and technical protection that a simple SharePoint copy does not provide.
The important thing is not the product name. The archive needs a clear owner, a documented retention matrix, a controlled handover, restricted auditor access, technical integrity protection and a process that can still be understood ten years later.
That is the difference between storing old files and actually archiving the history of a company.
## Sources
\[1\] https://learn.microsoft.com/en-us/purview/records-management \[2\] https://learn.microsoft.com/en-us/purview/retention-policies-sharepoint \[3\] https://learn.microsoft.com/en-us/microsoft-365/archive/archive-overview?view=o365-worldwide \[4\] https://learn.microsoft.com/en-us/azure/storage/blobs/immutable-storage-overview \[5\] https://www.gesetze-im-internet.de/ao\_1977/\_\_147.html \[6\] https://www.gesetze-im-internet.de/hgb/\_\_257.html \[7\] https://eur-lex.europa.eu/legal-content/EN/TXT/HTML/?uri=CELEX:02016R0679-20160504
### "AI generated" is the wrong question
URL: https://blog.bajonczak.com/ai-generated-is-the-wrong-question/
Last updated: 2026-08-13T04:43:45.000Z
#### I keep coming back to one question:
Why do we keep trying to answer AI involvement with a yes/no label?
Most discussions around AI content still end up somewhere around this:
```text
AI generated: true
```
or:
```text
AI generated: false
```
That looks simple. It is also not very helpful.
Because the moment you look at how real content is created, the binary label breaks down.
If I have a technical idea, bring in my own experience, define the direction, collect the facts, and then use an AI system to help with structure and wording, that is one kind of workflow.
If a system takes a short prompt and automatically generates thousands of articles, that is a very different workflow.
Both could get the same lazy label: "AI generated".
That is the part that bothers me.
## The interesting question is not whether AI was involved
For me, the better question is:
Who contributed what?
That sounds like a small wording change, but it changes the whole discussion.
I do not really care if somebody used AI for grammar, translation, structure, brainstorming, or even drafting. I care much more about whether the human had the idea, whether the facts were checked, whether the AI output was reviewed, and whether the publisher can explain the workflow.
There is a big difference between these cases:
- A human writes a post and uses AI for wording improvements.
- A human provides the idea, facts, and opinion, while AI helps turn it into a readable draft.
- Several AI systems perform research, drafting, translation, and summarization.
- AI generates the whole thing from a short instruction.
- AI drafts something, but a human fact-checks, edits, and approves it.
Putting all of that into one box is just too coarse.
That was the starting point for HACP.
## What HACP is
HACP stands for Human-AI Contribution Provenance.
It is an experimental draft specification for describing how humans and AI systems contributed to digital content.
The repository is here:
[https://github.com/SBajonczak/hacp-spec](https://github.com/SBajonczak/hacp-spec?ref=blog.bajonczak.com)
There is also a reference viewer here:
[https://github.com/SBajonczak/hacp-viewer](https://github.com/SBajonczak/hacp-viewer?ref=blog.bajonczak.com)
The viewer can render HACP workflows as a graph, timeline, or compact view. That part matters to me because provenance should not only be something machines can parse. A normal person should also be able to look at it and understand roughly what happened.
Important disclaimer: HACP is not an established standard. It is a draft. Version 0.2 exists, with a JSON Schema, examples, and a reference viewer. That is it for now.
No big claims.
No "future of the web" nonsense.
It is an open experiment.
## HACP is not an AI detector
This is probably the most important distinction.
HACP does not try to guess whether something "sounds like AI".
It does not analyze writing style.
It does not produce an AI probability score.
It does not say:
```text
This article is 73% AI.
```
I do not think that is a good direction anyway. At least not for this problem.
HACP is about declared provenance. It describes what the issuer says happened during the creation workflow.
That means a normal HACP manifest is not proof by itself. It is a provenance statement.
If I publish a manifest saying that I wrote the concept and AI helped with wording, that is my declaration. It may be honest, but the manifest alone does not cryptographically prove it.
That distinction is important.
Later, there could be attestations. For example:
- an AI provider confirms that a specific workflow step happened,
- a publisher confirms that a human reviewed and approved the content,
- C2PA or a similar provenance infrastructure handles signatures, content binding, identity, and verification.
But HACP v0.2 does not magically verify those claims.
And it should not pretend to.
## The basic model
The current draft is built around a few simple pieces:
1. `systems`
2. `workflow`
3. `contributions`
4. `influence`
5. `dependsOn`
A system describes an AI provider or model that was involved.
A workflow contains the steps.
A contribution says what the actor did.
Influence describes how much that actor shaped the specific step.
And `dependsOn` describes which steps rely on earlier steps.
A small example looks like this:
```json
{
"specVersion": "0.2",
"summary": {
"aiInvolvement": "collaborative"
},
"systems": [
{
"id": "sys-ai-writing",
"provider": {
"name": "Example AI Provider"
},
"model": {
"name": "Example Writing Model"
}
}
],
"workflow": [
{
"id": "step-1",
"sequence": 1,
"actor": {
"type": "human",
"role": "author"
},
"contributions": [
"concept",
"expertise",
"facts",
"creative-direction"
],
"influence": "primary"
},
{
"id": "step-2",
"sequence": 2,
"dependsOn": [
"step-1"
],
"actor": {
"type": "ai",
"systemId": "sys-ai-writing"
},
"contributions": [
"structure",
"drafting",
"wording",
"editing"
],
"influence": "substantial"
},
{
"id": "step-3",
"sequence": 3,
"dependsOn": [
"step-2"
],
"actor": {
"type": "human",
"role": "author"
},
"contributions": [
"fact-checking",
"review",
"approval"
],
"influence": "primary"
}
]
}
```
That is already more useful than `AI generated: true`.
You can see the human concept, the AI assistance, and the final human review. You can also see that the AI step depended on the human step, and the final approval depended on the AI-assisted draft.
It is not perfect. But it is much closer to how real content gets made.
## Why influence is not a percentage
One thing I deliberately avoided is percentage scoring.
Something like this looks precise:
```text
Human: 37%
AI: 63%
```
But in many workflows that number would be fake precision.
How do you measure that?
By word count? Then an AI that rewrites a human idea into cleaner prose gets a high score, even if the original thinking came from the human.
By time spent? Then a slow human gets more "authorship" than a fast one.
By semantic importance? Good luck measuring that consistently.
So HACP v0.2 uses qualitative influence values:
- `minor`
- `supporting`
- `substantial`
- `primary`
That is less mathematically satisfying, but probably more honest.
The value describes the influence on a workflow step. It is not a legal statement about copyright. It is not a precise measurement of intellectual ownership. It is a way to describe the shape of the workflow without pretending that we can calculate authorship like a spreadsheet.
## More than one AI system
Another thing I wanted to support from the beginning: multiple AI providers.
A real workflow might look like this:
```text
Human → Claude → OpenAI → DeepL → Human
```
One system might help with research. Another might draft. Another might translate. The human might then fact-check, rewrite parts, and approve the final version.
If we only write "AI was used", all of that disappears.
HACP allows each AI step to reference a system. That means the manifest can say which provider and model were involved, at least when that information is known.
That last part matters.
If the model is known, put it in.
If it is not reliably known, do not invent it.
A placeholder is better than a fake provenance claim.
## Where C2PA fits in
HACP is not meant to replace C2PA.
I see the two things solving different parts of the problem.
C2PA and similar provenance infrastructure are about trust mechanics:
- signatures,
- content binding,
- signer identity,
- verification,
- trust chains.
HACP is about contribution semantics:
- who contributed,
- what they contributed,
- which actor was human or AI,
- how the workflow was ordered,
- which steps depended on each other,
- how influential each actor was in a step.
So the idea is not "HACP instead of C2PA".
The idea is more like:
C2PA can help prove that a signed provenance package belongs to a piece of content.
HACP can describe the human and AI contribution workflow inside that provenance data.
At least that is the direction I am exploring.
Again: not implemented as a verified C2PA integration today. The current draft only describes how the semantics could fit together.
## Why I published it
I am not a standards body.
I am not a big AI provider.
But I had the idea, and it kept making sense to me. So I decided to do the practical thing and put something real on GitHub.
That means:
- a draft specification,
- a JSON Schema,
- example manifests,
- a reference viewer,
- and enough structure that other people can tell me where it is wrong.
Maybe the idea is useful.
Maybe it is missing something obvious.
Maybe the vocabulary is too small, or the trust model needs to be shaped differently, or the workflow model needs better support for partial documents.
That is exactly why I do not want this to sit in a private notes file.
If the idea is weak, it should break in public.
If it is useful, real use cases will make it better.
## Dogfooding this article
This article itself is a HACP example.
The concept, direction, facts, and decision to publish come from me.
AI helped with structure, drafting, wording, and editing.
That workflow is exactly the kind of thing I want HACP to express.
Not because the AI involvement is shameful.
Not because the human involvement needs to be defended.
But because the binary label loses the interesting part.
This article is not simply "AI generated".
It is also not "AI free".
It is a human-led article with AI assistance in the writing process and human review before publication.
That is the messy middle where a lot of modern content already lives.
We should have better metadata for it.
## Current status
The HACP spec is currently an experimental v0.2 draft.
You can find it here:
[https://github.com/SBajonczak/hacp-spec](https://github.com/SBajonczak/hacp-spec?ref=blog.bajonczak.com)
The reference viewer is here:
[https://github.com/SBajonczak/hacp-viewer](https://github.com/SBajonczak/hacp-viewer?ref=blog.bajonczak.com)
The viewer currently focuses on making HACP manifests readable as graph, timeline, and compact views.
There is no public live demo URL I can point to right now, so I will not invent one. If that changes, I can add it later.
## What I want feedback on
The parts I am most interested in are practical ones:
- Is the contribution vocabulary useful enough?
- Are the influence values understandable?
- Does the workflow model handle real human-AI collaboration?
- How should attestations work without making the simple case too complex?
- Where should HACP stop and where should C2PA or another trust layer begin?
I am especially interested in real workflows.
Blog posts are one example. But the same question appears in documentation, research notes, marketing pages, product descriptions, support articles, images, videos, code, and probably a lot of internal enterprise content.
The important part is not to punish AI usage.
The important part is to describe it properly.
I do not know if HACP will ever become more than this experiment.
But I think the question is worth discussing in the open.
---
**HACP provenance:** This article uses a declared HACP v0.2 manifest in the Ghost head code injection. It is not cryptographically verified and does not claim provider or C2PA attestation.
### SEO and GEO: best practices for being found in search and cited by AI
URL: https://blog.bajonczak.com/seo-and-geo-best-practices-search-ai-citations/
Last updated: 2026-07-21T08:59:27.000Z
AI search did not kill SEO. At least not in the way many LinkedIn posts make it sound.
The real problem is simpler: if Google, Bing, ChatGPT Search, Perplexity, or Copilot cannot understand what your page is about, they will either ignore it or summarize it badly. For a small technical blog like mine, that matters. I do not have a content team. I need every useful article to be crawlable, understandable, and quotable.
GEO, short for Generative Engine Optimization, adds a second job: make the same content usable as evidence inside generated answers. The click is no longer the only win. Sometimes the win is being named as the source behind the answer, and sometimes that citation is the first time a reader sees your name.
## SEO and GEO in one sentence
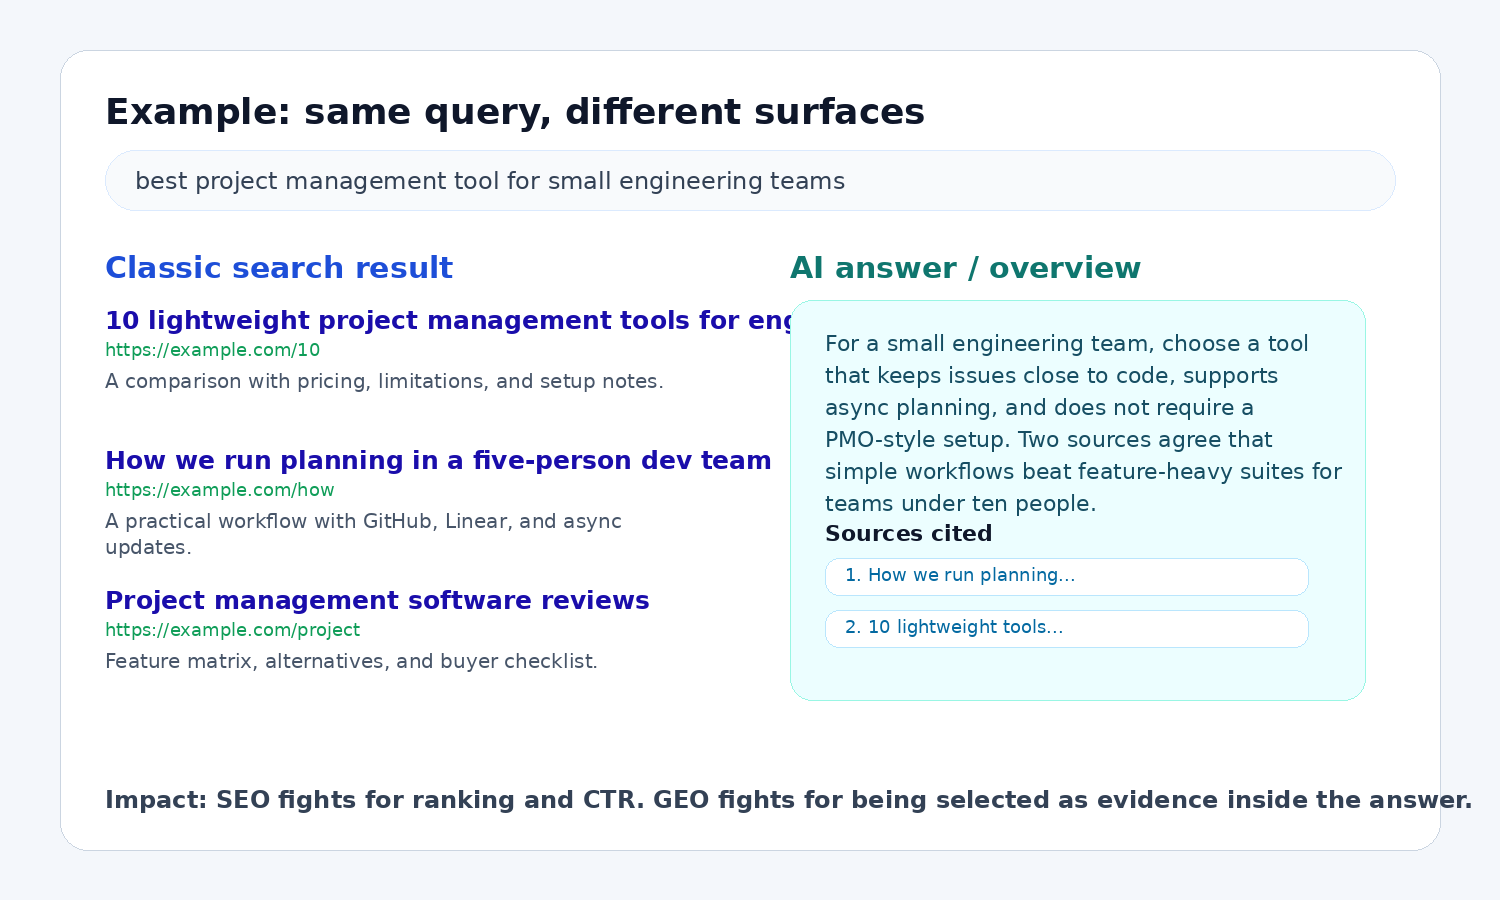
SEO is still the part that gets the page discovered. GEO is the part that makes sure an answer engine can use the page without guessing.
That difference sounds small until you look at the user journey. A classic search result page asks the user to choose a blue link. An AI answer often gives the user a first draft of the answer immediately, then shows citations or source cards. If your page is not structured well enough to be extracted, it may still rank somewhere, but it will be less likely to shape the generated answer.
## What good SEO still requires
The boring SEO work did not become obsolete. If anything, AI search makes the basics less negotiable. I know that sounds unexciting, but most visibility problems still start with crawling, intent, weak structure, or content that says too much without answering the question.
### 1\. Make pages crawlable and indexable
Search engines and AI search systems cannot cite what they cannot fetch. Check the basics before writing another content calendar:
- important pages return `200`, not soft `404` or redirect chains
- canonical tags point to the real canonical URL
- XML sitemaps include the pages you care about
- robots.txt does not block useful content by accident
- JavaScript does not hide the main content from crawlers
A comparison article blocked by robots.txt may still get shared on social media, but it will not reliably appear in search or AI citations. At that point you have written something useful and then told the machines not to read it.
### 2\. Match intent, not just keywords
Classic keyword targeting often stops at "what phrase has volume?" Better SEO asks what the searcher wants to do next.
For example, the keyword "SharePoint eSignature" can mean several things:
- "What is it?"
- "How do I enable it?"
- "What does it cost?"
- "How does it compare with Adobe Sign?"
- "Why does it not work in my tenant?"
Those should not all be one giant article. They are different intents. A hub page can introduce the topic, then link to specific pages for setup, licensing, comparison, and troubleshooting.
Splitting intent cleanly usually improves internal links, snippet relevance, and conversion. It also gives AI systems sharper source material: a troubleshooting answer can cite the troubleshooting page instead of pulling weak advice from a generic overview.
### 3\. Put the answer near the top
A useful page does not make the reader wait six paragraphs for the answer. Start with the practical conclusion, then add detail.
Bad opening:
> In today's digital landscape, search visibility is a crucial factor for business success.
Better opening:
> GEO does not replace SEO. It extends it. You still need crawlable, helpful pages, but you also need content that AI systems can quote, verify, and connect to named entities.
Direct openings work better for featured snippets, AI summaries, and impatient humans. I am very much in that last group.
### 4\. Use structured data where it fits
Structured data does not magically rank a weak page. It does help machines understand what a page represents.
Useful schema types for many blogs and business sites include:
- `Article` or `BlogPosting` for editorial content
- `FAQPage` where the FAQ is visible on the page and genuinely useful
- `HowTo` where the page contains real step-by-step instructions
- `Product`, `Review`, or `Offer` for ecommerce pages where the markup matches the visible content
- `Organization` and `Person` to clarify the publisher and author
If an article has author, publication date, headline, image, and FAQ markup, search engines get cleaner machine-readable context. AI systems still judge the text itself, but at least they have fewer reasons to guess who wrote it and what the page is about.
### 5\. Build topical authority with internal links
One article rarely proves expertise. A cluster does.
A practical structure:
- hub page: "Microsoft 365 eSignature guide"
- support page: setup instructions
- support page: licensing and limitations
- support page: comparison with Adobe Sign and DocuSign
- support page: troubleshooting
- support page: governance and audit trail
The hub captures broad intent. The support pages capture specific intent. Internal links tell search engines which page owns which question, and AI answer engines get a cleaner map instead of one overstuffed article trying to do everything.
### 6\. Show real experience
Generic text is cheap now. Experience is harder to fake, and this is where small sites can still compete. A short post with real screenshots and one honest caveat is often more useful than a polished 2,000-word overview that could have been written without opening the product.
Use screenshots, configuration notes, before-and-after examples, limitations, failed attempts, pricing caveats, test data, and real decision criteria. If you have not tested something, say so. If you have tested it, show what you saw.
A hands-on setup guide with screenshots and exact error messages is more useful than another generic "benefits of X" article. It is also easier to cite because it contains specific, attributable evidence.
## What GEO adds on top
GEO is not a bag of tricks for fooling AI. The useful version is simpler: write and structure content so answer engines can extract the right facts without flattening the meaning.
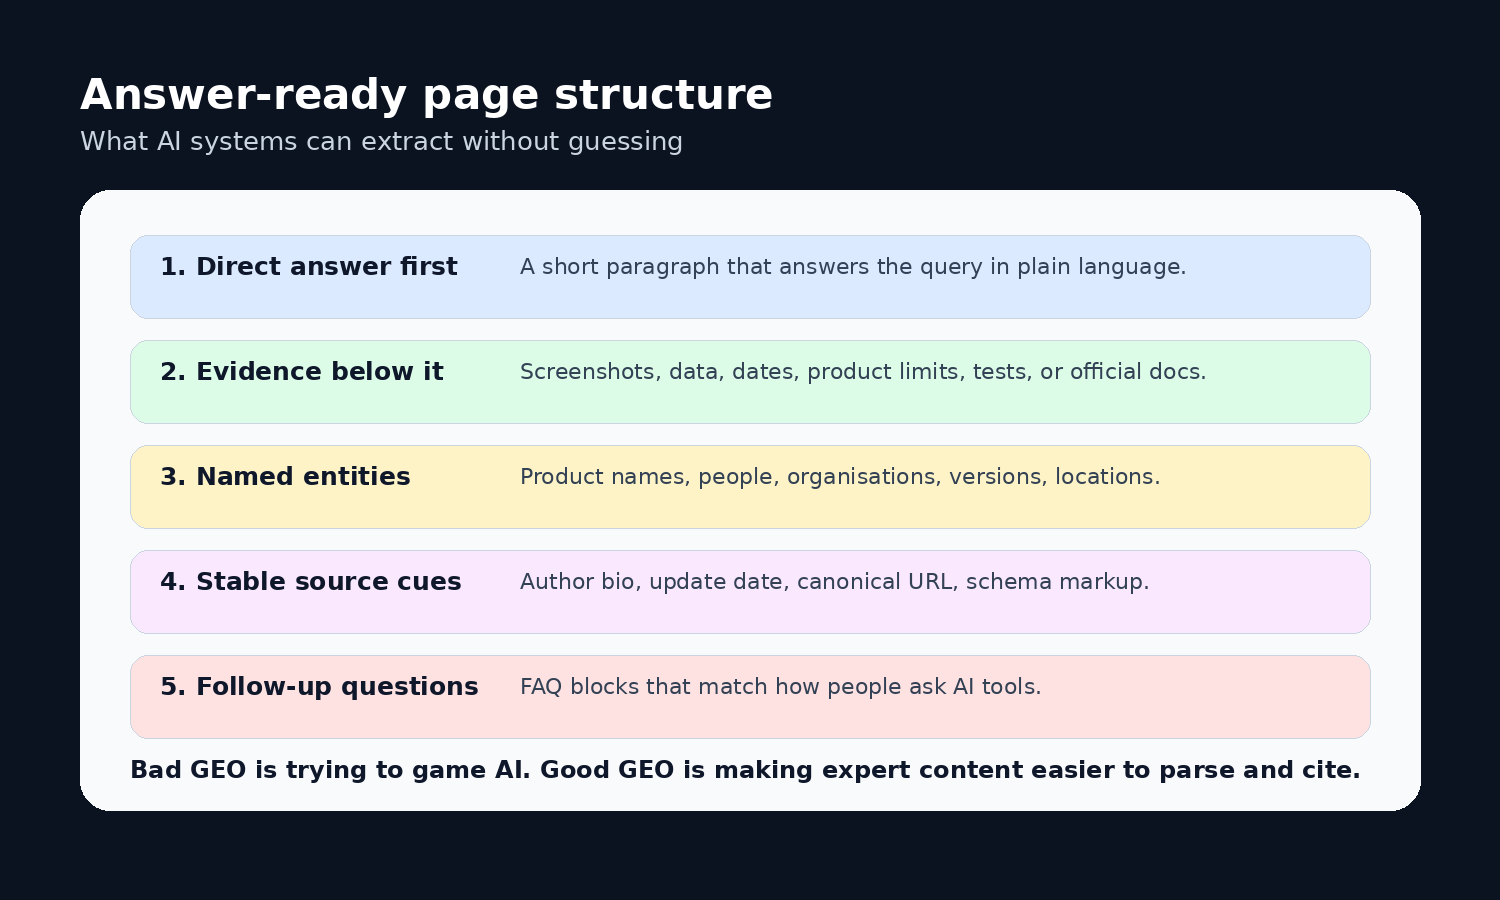
### 1\. Write answer blocks
Add compact answer blocks under important headings. A good answer block is two to four sentences and can stand on its own.
Example:
> GEO is the practice of making content easier for generative answer engines to understand, summarize, and cite. It builds on SEO basics such as crawlability, helpful content, structured data, and authority. The extra work is in clarity: direct answers, named entities, evidence, citations, and content sections that map to real questions.
Answer blocks make extraction less messy. Without them, an AI system may stitch together a summary from scattered paragraphs and lose the nuance you actually cared about.
### 2\. Make entities explicit
AI systems reason heavily over entities: products, people, companies, locations, standards, dates, tools, and relationships between them.
Weak phrasing:
> The tool can be connected to the system for automation.
Better phrasing:
> Microsoft Power Automate can connect SharePoint document libraries with Microsoft 365 eSignature workflows, subject to tenant availability and licensing.
Explicit entities make your content easier to match with a user's question. They also reduce the chance that an AI summary turns "the tool" and "the system" into the wrong products.
### 3\. Add evidence that can be cited
AI answers are more useful when they can point back to proof. Give them proof.
Good evidence includes:
- screenshots of settings, reports, or search results
- tables with dates, limits, prices, or feature differences
- examples with inputs and outputs
- links to official documentation
- clearly labelled opinions separated from facts
Concrete evidence gives the page something worth citing. It also helps when users click through, because the page has substance beyond the answer summary.
### 4\. Cover follow-up questions
People ask AI tools conversational questions. Your page should answer the follow-ups a human would naturally ask.
For this article, the follow-ups are obvious:
- Is GEO replacing SEO?
- Do I need a separate GEO strategy?
- Should I allow AI crawlers?
- Does schema markup help with AI answers?
- How do I measure GEO impact?
A short FAQ section is not just an SEO trick. It is a map of the conversation around the topic.
Follow-up sections help long-tail search, internal site search, and AI extraction. More importantly, they match how people actually research: one answer usually creates the next question.
### 5\. Control crawler access deliberately
Robots.txt is now more strategic. Googlebot, Bingbot, OAI-SearchBot, GPTBot, PerplexityBot, and other agents do not all mean the same thing. Some crawl for search indexing, some for answer retrieval, some for model training, and policies change.
The practical rule: decide what you want to allow, document it, and verify it in logs.
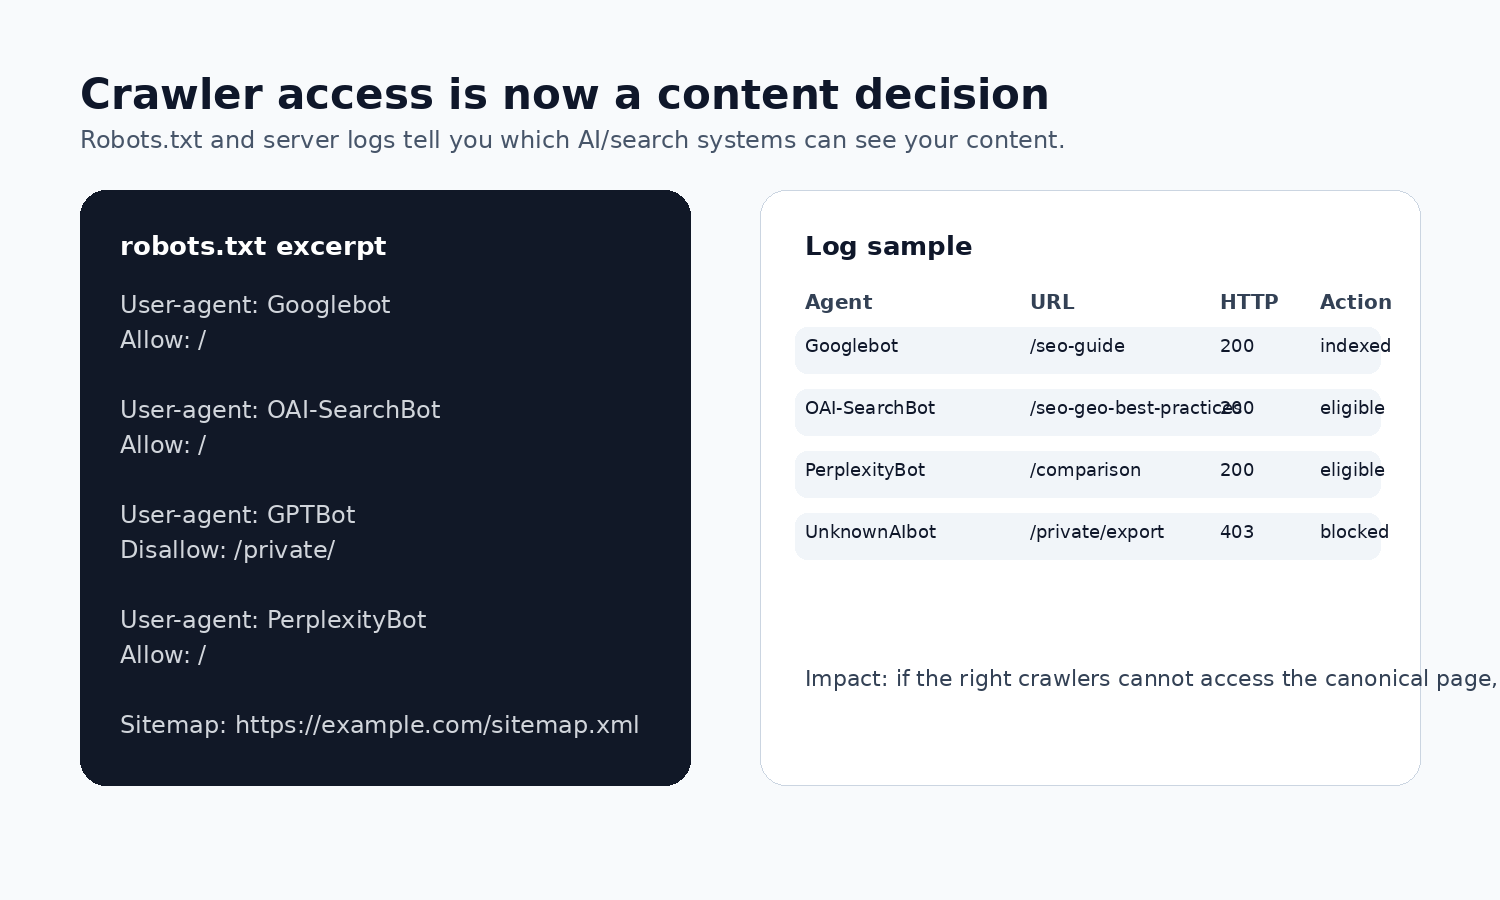
Blocking every AI-related crawler may protect content from some uses, but it can also reduce visibility in AI search products. Allowing everything may expose pages you did not intend to promote. Treat this like a publishing decision, not a copy-paste robots.txt snippet from someone on LinkedIn.
### 6\. Keep facts fresh and dated
AI systems can surface old content confidently. That is dangerous when your page covers pricing, licensing, APIs, or product limitations.
Add visible update dates. Keep outdated screenshots labelled. Add "tested with" notes where it matters.
Example:
> Tested with Microsoft 365 admin center in July 2026\. Menu labels may differ between tenants and release rings.
Dates help humans judge reliability. They also give answer systems context when several sources disagree, especially around pricing, licensing, and UI labels.
## Practical SEO checklist
Use this before worrying about GEO:
| Area | Check | Why it matters |
| --------------- | ------------------------------------------------------ | -------------------------------------------- |
| Crawlability | Page returns 200, is not blocked, appears in sitemap | Search and AI systems need access |
| Canonical | Canonical URL points to the preferred page | Prevents diluted signals and wrong citations |
| Intent | One page answers one clear search intent | Improves relevance and internal linking |
| Title and meta | Title is specific, meta description explains the value | Helps CTR and snippet quality |
| Helpful content | Page answers the query with examples and caveats | Thin content is easy to ignore |
| Internal links | Hub and support pages link to each other | Builds topical authority |
| Structured data | Schema matches visible content | Gives machines a cleaner interpretation |
| Performance | Core pages load quickly on mobile | Slow pages lose users and crawl efficiency |
## Practical GEO checklist
Use this after the SEO basics are in place:
| Area | Check | Why it matters |
| -------------- | ------------------------------------------------------------ | ---------------------------------------------- |
| Direct answer | Key sections start with a concise answer | Easier extraction into AI summaries |
| Entities | Products, tools, people, dates, and companies are named | Reduces ambiguity |
| Evidence | Claims have screenshots, examples, tables, or official links | Increases citation value |
| Source clarity | Author, date, canonical URL, and publisher are visible | Supports trust and attribution |
| Follow-ups | FAQ or subheadings answer conversational questions | Matches AI query patterns |
| Freshness | Pages show update dates and tested versions | Prevents stale advice from looking current |
| Access policy | AI/search crawlers are allowed or blocked intentionally | Controls visibility and risk |
| Measurement | Track branded mentions, referral traffic, and cited pages | GEO needs different metrics than ranking alone |
## How I would measure this on a small technical blog
This part is still messy. I would not pretend otherwise.
For my own Ghost blog, I would start with a baseline before trying to measure GEO. Google Search Console is not the useful source for me right now, so I use the data I can actually verify. In this case that is Bing Webmaster Tools.
Not because Bing is the whole market. It is not. But it gives me a current view of two things I care about: normal search performance and AI citations. That is enough to stop guessing.
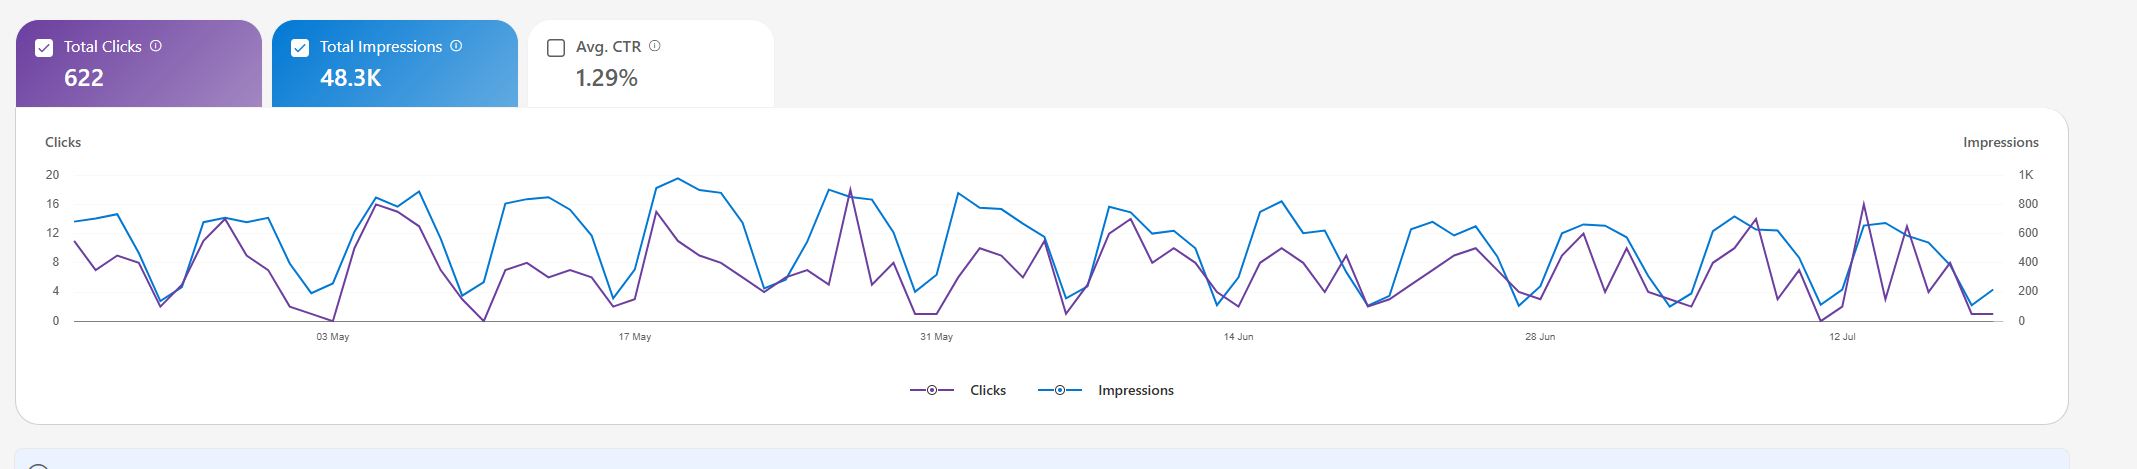
Current search performance baseline in Bing Webmaster Tools: 622 clicks, 48.3K impressions, and 1.29% average CTR. This is not the finish line. It is the starting point before changing titles, internal links, and answer-ready sections.
The first screenshot tells me whether the classic SEO layer works at all. Are pages getting impressions? Do people click? Is the CTR weak enough that titles and snippets need work? Simple questions, but useful ones.
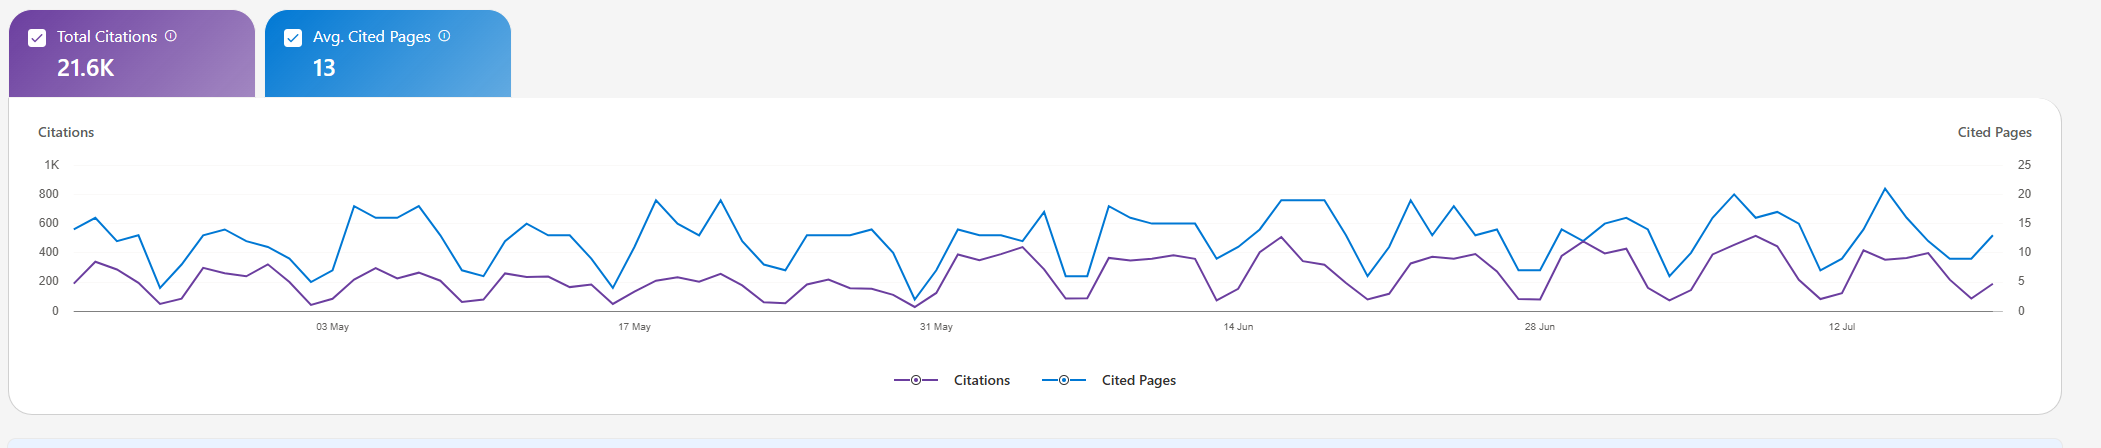
AI citation baseline: 21.6K total citations and an average of 13 cited pages. This is the part I would watch after improving structure, dates, answer blocks, and source clarity.
The second screenshot is more interesting for GEO. It shows whether the content is already being used as citation material. I would not read too much into one snapshot, but I would keep it. Without a baseline, every later improvement is just a feeling.
So, my measurement flow would be quite simple:
- use Bing Webmaster Tools for the current search and AI citation baseline
- track which pages get impressions but not enough clicks
- check which pages become cited in AI answers
- refresh titles, internal links, dates, and answer blocks on the pages that already show signals
- repeat the same check monthly instead of changing ten things every day
For the GEO side, I would still add manual checks. Once a month, ask the same questions in Perplexity, ChatGPT Search, Copilot, and Gemini. Then write down which sources are cited and whether my page appears.
This is not perfect measurement. Perfect measurement does not exist here yet. But a consistent baseline is better than pretending that AI answers behave like classic rankings.
## A concrete before-and-after example
Imagine a page targeting "best document signing option for Microsoft 365".
Weak SEO/GEO version:
> There are many electronic signature solutions available today. Choosing the right one depends on your business requirements. Microsoft, Adobe, and DocuSign all offer useful capabilities.
Better version:
> For organizations already standardized on Microsoft 365, Microsoft 365 eSignature is worth checking first because it keeps signing workflows close to SharePoint and the Microsoft admin model. Adobe Acrobat Sign and DocuSign are stronger when you need mature external workflows, broader integrations, or advanced agreement lifecycle features. The best choice depends on licensing, compliance requirements, recipient experience, and whether signatures should stay inside Microsoft 365.
Then add:
- a comparison table
- screenshots of the Microsoft 365 admin setup
- a licensing note with date
- links to official Microsoft, Adobe, and DocuSign docs
- a short FAQ: "Is Microsoft 365 eSignature included in E3?", "Can external recipients sign?", "Where are audit trails stored?"
The improved version can rank in search, work as a comparison snippet, and give AI tools a clear, balanced answer to cite. The weak version mostly says: "there are options". That is not wrong, but it is not useful either.
## Why GEO is worth doing
GEO is worth doing because search behavior is changing faster than most content teams admit. Users still click links, but they also ask AI systems for summaries, comparisons, recommendations, and troubleshooting steps. If your content only works as a blue link, you are betting that the old journey stays dominant.
That is the part I actually like about GEO: the non-spammy version forces you to write clearer pages. Direct answers, better structure, visible dates, and real examples help humans first. The machines just benefit from the cleanup.
The bad version of GEO will be spammy: pages stuffed with fake FAQs, keyword variants, and robotic definitions written for bots. That will age badly.
The useful version is more honest: make expert content easier to verify, quote, and trust. If a page cannot survive that standard, the problem is probably not the algorithm.
## My take
My take is simple: I would not build a separate GEO strategy before fixing the boring SEO base. Crawl the page. Answer the question early. Show evidence. Name the systems. Keep dates visible. Then check whether AI search tools can cite the page without turning it into nonsense.
That is not magic. It is just better technical writing.
## Sources worth reading
- [Google Search Central: SEO Starter Guide](https://developers.google.com/search/docs/fundamentals/seo-starter-guide?ref=blog.bajonczak.com)
- [Google Search Central: Creating helpful, reliable, people-first content](https://developers.google.com/search/docs/fundamentals/creating-helpful-content?ref=blog.bajonczak.com)
- [Google Search Central: Introduction to structured data](https://developers.google.com/search/docs/appearance/structured-data/intro-structured-data?ref=blog.bajonczak.com)
- [Google Search Central: AI features and your website](https://developers.google.com/search/docs/appearance/ai-features?ref=blog.bajonczak.com)
- [OpenAI Platform docs: Overview of OpenAI crawlers](https://platform.openai.com/docs/bots?ref=blog.bajonczak.com)
- [Perplexity docs: Perplexity crawlers](https://www.perplexity.ai/perplexitybot?ref=blog.bajonczak.com)
### Microsoft 365 eSignature Guide: Setup, Licensing, Governance and Troubleshooting
URL: https://blog.bajonczak.com/microsoft-365-esignature-guide/
Last updated: 2026-08-02T08:07:23.000Z
Microsoft 365 eSignature sounds like a small feature.
Open a document, request a signature, wait for the signed PDF to come back into SharePoint. Done.
In a real tenant it is not quite that small. The signature button touches billing, SharePoint sharing, external guests, document permissions, legal acceptance, audit logs, sensitivity labels, retention and support. That does not make the feature bad. It just means I would not roll it out like a random Office feature.
The switch is the easy part. The mess is around the switch.
This guide is how I would look at Microsoft 365 eSignature as an IT admin: what it is, where it fits, what has to be ready before enabling it, and where I would still choose Adobe Sign, DocuSign or a more mature signing platform.
## What Microsoft 365 eSignature actually is
Microsoft 365 eSignature is Microsoft's native way to request electronic signatures from documents that already live in Microsoft 365, mainly SharePoint and Word.
The simple flow looks like this:
1. A user starts a signature request from a supported document.
2. The document is prepared for signing.
3. Recipients receive a signing request.
4. They sign the PDF version.
5. The completed PDF and audit trail land back close to the original Microsoft 365 content.
That is the useful part: the document does not have to start its life in a separate contract platform. If your team already works in SharePoint, the signing process can stay near the place where the document was created, reviewed and stored.
But that also means eSignature inherits a lot of your Microsoft 365 reality. If SharePoint permissions are messy, eSignature will not magically clean them up. If external sharing is not understood, signing requests will expose that. If nobody owns retention and audit requirements, the button just gives users a faster way to create governance questions.
So I would describe it like this:
> Microsoft 365 eSignature is a practical signing workflow for simple Microsoft 365 documents. It is not a full contract lifecycle management platform.
That distinction matters.
## Where it is a good fit
I like Microsoft 365 eSignature for boring, normal internal workflows where the document already belongs in SharePoint.
Good candidates:
- simple approvals that need a signature instead of just an email reply
- HR forms with a clear owner and a limited audience
- internal policy confirmations
- smaller supplier or customer documents where the process is not complex
- teams that already use SharePoint libraries as the system of record
- departments that send a low number of signature requests and do not need advanced routing
The main benefit is not that Microsoft invented signing. They did not. The benefit is that simple signing becomes closer to the document workspace users already know.
That can reduce tool sprawl. It can also reduce the habit of downloading a document, uploading it somewhere else, sending it around, then storing the final copy manually.
And yes, in 2026 people still print, sign, scan and mail PDFs back. I see that as a process smell. Sometimes even a security smell. If the document is already in Microsoft 365, a controlled digital signing flow is usually cleaner than another copy travelling through inboxes and scanners.
## Where I would be careful
I would not treat Microsoft 365 eSignature as a default replacement for Adobe Acrobat Sign, DocuSign or a dedicated contract workflow platform.
I would be careful when you need:
- complex multi-step routing
- reusable contract templates with heavy automation
- advanced signer identity options
- deep CRM, ERP or CLM integration
- high-volume agreement workflows
- detailed business reporting across all agreements
- strict legal workflows that your legal team already mapped to an existing provider
For those cases, use the right signing platform. Microsoft 365 eSignature is attractive because it is close to SharePoint. That is also its boundary.
I keep the vendor decision separate in the comparison article:
[Microsoft 365 eSignature vs Adobe Sign vs DocuSign](https://blog.bajonczak.com/microsoft-365-esignature-vs-adobe-sign-vs-docusign/)
## Before enabling it: the admin checklist
I would not start in the Microsoft 365 admin center.
I would start with these questions:
- Which teams are allowed to use eSignature first?
- Which SharePoint sites are in scope?
- Are external signers allowed?
- Which document types are allowed?
- Do sensitivity labels or encryption break the signing flow?
- Who pays for requests?
- Who supports users when requests fail?
- Who decides whether a document is legally acceptable for this flow?
- Where do signed PDFs live afterwards?
- Which audit or retention requirements apply?
If those questions are not answered, enabling the feature tenant-wide is just a faster way to create tickets.
### Tenant availability
First check whether Microsoft 365 eSignature is available in your tenant and region. Microsoft has changed availability and licensing details over time, so I would always verify the current Microsoft documentation before promising anything to the business.
Do not rely on an old blog post, including this one, for exact availability or pricing.
### Admin role
Make sure the person configuring it has the right admin permissions. Depending on the setup, this can involve Microsoft 365 admin settings, SharePoint configuration, billing configuration and external sharing policies.
In practice, this is not a one-admin decision. You usually want at least:
- Microsoft 365 admin
- SharePoint admin
- identity/security admin input
- legal or compliance input
- billing owner
- pilot business owner
That sounds heavy for a signing button, but it avoids the classic pattern where IT enables something and then spends three weeks explaining why it behaves exactly like the tenant was configured.
### Legal fit
I am not a lawyer, and I would not let IT decide the legal validity of a signing process alone.
Before rollout, legal or compliance should define which document types are allowed. Some documents may be fine with a simple electronic signature. Others may require a stronger identity proof, a specific provider, or a process that Microsoft 365 eSignature is not meant to cover.
My practical rule:
> Start with low-risk, high-friction documents. Do not start with your most sensitive contract process.
## How I would enable it in a tenant
The exact screens may change, but the rollout logic should stay boring.
### 1\. Pick a pilot scope
Do not start tenant-wide.
Choose one or two SharePoint sites with a clear owner and a real use case. For example, an HR operations site or a procurement pilot library.
The pilot should be small enough to support manually, but real enough to expose problems.
Avoid a fake demo site where everything works because permissions are clean and nobody uses it.
### 2\. Check SharePoint sharing
External signing usually depends on external access and sharing behavior. If your SharePoint external sharing policies are locked down, requests may fail. If they are too open, you may have a different problem.
Check:
- site-level sharing settings
- tenant-level SharePoint sharing settings
- guest access expectations
- whether recipients need to authenticate
- whether conditional access affects external users
- whether links expire as expected
This is where many “eSignature problems” are really SharePoint problems with a nicer error message.
### 3\. Check labels and encryption
Sensitivity labels are useful, but they can also break workflows if nobody tested the combination.
Before rollout, test documents with the labels your users actually use:
- normal internal documents
- confidential documents
- encrypted documents
- documents with external sharing restrictions
- PDFs created from Word documents
Do not assume the happy path covers your real libraries.
### 4\. Connect billing
Microsoft 365 eSignature uses a pay-as-you-go model through Azure billing. That is convenient for occasional usage, but it also means usage can grow quietly once the button is visible.
Before enabling it, define:
- which Azure subscription is used
- who owns the cost center
- how usage will be reviewed
- whether departments need chargeback or showback
- whether there is a monthly threshold for review
The hidden cost is not the first test request. The hidden cost is every department discovering that signing is now one click away.
### 5\. Enable the feature
Once scope, sharing, labels and billing are clear, enable eSignature in the Microsoft 365 admin experience according to the current Microsoft documentation.
I would document the exact settings you changed and store that next to the pilot decision. Future-you will thank you when someone asks why one site can send requests and another cannot.
### 6\. Run a real end-to-end test
Run at least these tests before telling users it is available:
- internal sender to internal signer
- internal sender to external signer
- document from the pilot SharePoint library
- labelled document
- rejected or expired request, if supported in your scenario
- signed PDF access for the sender
- signed PDF access for someone who should not see it
- audit trail review
The last two are important. A signing flow that completes is not automatically a secure signing flow.
### 7\. Prepare support
Users will not ask “is external collaboration disabled on this SharePoint site?”
They will say:
> The signature button is gone.
or:
> The customer cannot sign.
So prepare a small support runbook before rollout. Include the obvious checks: feature enabled, supported file type, user permissions, external sharing, labels, conditional access, guest restrictions and billing state.
For deeper issue handling, keep the troubleshooting article open:
[Microsoft 365 eSignature troubleshooting guide](https://blog.bajonczak.com/microsoft-365-esignature-troubleshooting/)
## SharePoint governance baseline
Microsoft 365 eSignature looks like a signing feature. Admins should treat it as SharePoint governance.
The signing flow depends on the boring stuff:
- site permissions
- sharing settings
- guest access
- sensitivity labels
- encryption
- conditional access
- document ownership
- retention
- audit logs
If those pieces are messy, eSignature will expose the mess very quickly.
### Do not start tenant-wide
I would start with named pilot sites, not a global announcement.
A good pilot site has:
- a business owner
- a known document type
- clear permissions
- a small group of senders
- external sharing rules that are already understood
- someone who agrees to provide feedback
A bad pilot is “everyone can try it and we will see what happens”. That is not a pilot. That is production with worse monitoring.
### Decide who can send requests
Not everyone who can edit a document should automatically send signature requests for the company.
At minimum, decide:
- which users or groups can initiate requests
- whether requests are limited to specific libraries
- whether templates or naming rules are needed
- whether signed PDFs need a defined storage location
- whether users are allowed to send requests to private email addresses
The permission model should match the process, not just the technical possibility.
### External signing needs real rules
External signers are where convenience and risk meet.
Define rules for:
- allowed recipient domains, if needed
- guest access behavior
- whether signers must authenticate
- how long access should last
- who can resend requests
- what happens when the wrong recipient is used
The worst version is a document that was carefully controlled inside SharePoint and then casually shared during signing.
### Plan where signed PDFs live
The signed PDF should not become an orphan.
Decide whether completed documents stay next to the original, move into a records library, inherit metadata, or trigger a follow-up process.
If the signed copy is the legally relevant artifact, it needs ownership and retention. Otherwise, you only moved the mess from email attachments into a document library.
### Use audit logs
For rollout, I would check audit events during the pilot. Not because I expect drama, but because it tells you whether the process is understandable.
Look for:
- who sends requests
- which sites are used
- whether external recipients are common
- whether failed attempts cluster around one policy
- whether users try to sign documents from the wrong libraries
Audit data is not just for incidents. It is also feedback on your rollout design.
## Licensing, pricing and limitations
Microsoft 365 eSignature is not licensed like a normal per-user Microsoft 365 add-on. It uses Azure pay-as-you-go billing.
That can be a good fit when signing volume is occasional. It can also be annoying when usage grows and nobody owns the cost.
I would treat pricing as a rollout input, not a footnote.
### Pay-as-you-go changes the conversation
With per-user licensing, the cost conversation usually happens before rollout. With pay-as-you-go, the cost conversation can happen after people already use the feature.
That is why I would define a simple usage review from day one:
- check request volume after the pilot
- review the Azure cost line monthly
- watch for departments using it as a general approval tool
- decide when volume justifies a different provider or process
For exact prices and limits, check Microsoft's current documentation. Pricing, regions and included capabilities can change.
### Limits that matter in practice
The limits I would check before rollout:
- supported file types
- number of recipients
- request size limits
- regional availability
- external recipient behavior
- trial availability
- audit and retention behavior
- integration limits compared with Adobe Sign or DocuSign
Do not discover those limits with the CEO's contract.
### The hidden costs
The hidden costs are usually not technical.
They are:
- support tickets when users pick the wrong site
- confusion around external signers
- legal review for document types that were never approved
- cleanup of signed PDFs in the wrong libraries
- billing questions after usage grows
- governance work that should have happened before launch
That is why I prefer a controlled rollout, even for a feature that looks simple.
## Minimal rollout checklist
This is the checklist I would actually use before enabling Microsoft 365 eSignature broadly.
### Decision checklist
- Legal/compliance approved the document types for this signing method.
- A pilot business owner is named.
- Pilot SharePoint sites are selected.
- Sender groups are defined.
- External signer rules are documented.
- Billing owner and Azure subscription are clear.
- Support owner is named.
### Technical checklist
- Tenant availability checked.
- Admin roles confirmed.
- SharePoint tenant sharing checked.
- Site-level sharing checked.
- Guest access behavior tested.
- Sensitivity labels tested.
- Encrypted documents tested, if relevant.
- Signed PDF storage behavior confirmed.
- Audit events reviewed.
### Rollout checklist
- Pilot users informed.
- Support runbook prepared.
- Known limitations documented.
- Comparison against Adobe Sign / DocuSign done for high-volume workflows.
- Usage and cost review scheduled.
- Internal links and guidance point to one main guide, not seven scattered posts.
## Quick troubleshooting map
Most eSignature issues are not mysterious. They are usually SharePoint, permissions, external sharing, labels, file format, conditional access or billing showing up as an eSignature issue.
Start here:
| Symptom | First checks |
| ----------------------------------- | ----------------------------------------------------------------------- |
| Signature option is missing | Feature enabled, supported file type, user permissions, site scope |
| User cannot create a request | Sender permission, billing state, admin rollout scope |
| External signer cannot sign | SharePoint sharing, guest access, conditional access, recipient address |
| Signed document cannot be accessed | Library permissions, link behavior, final PDF location |
| Request fails for labelled document | Sensitivity label, encryption, external sharing restrictions |
| Costs look wrong | Azure billing, request volume, departments using it outside the pilot |
For the full triage flow, use the separate troubleshooting article:
[Common Microsoft 365 eSignature Problems and Troubleshooting](https://blog.bajonczak.com/microsoft-365-esignature-troubleshooting/)
## My take
I like Microsoft 365 eSignature for what it is: a practical signing option for simple documents that already belong in Microsoft 365.
I do not like it as a blanket answer to every signing process.
If a team just needs a controlled way to sign SharePoint documents without printing, scanning or pushing every PDF into another platform, it can be a good fit. If the process needs advanced routing, heavy templates, contract lifecycle management or strict identity options, I would still look at Adobe Sign, DocuSign or a dedicated platform.
The important part is not the button. The important part is the operating model around the button.
Start small. Pick the right sites. Test external signing. Watch labels and permissions. Review costs. Keep legal in the loop.
That is boring advice, but it is exactly the kind of boring that keeps a signing rollout from turning into another tenant cleanup project.
## Related articles
- [Microsoft 365 eSignature vs Adobe Sign vs DocuSign](https://blog.bajonczak.com/microsoft-365-esignature-vs-adobe-sign-vs-docusign/)
- [Common Microsoft 365 eSignature Problems and Troubleshooting](https://blog.bajonczak.com/microsoft-365-esignature-troubleshooting/)
### Microsoft 365 eSignature vs Adobe Sign vs DocuSign
URL: https://blog.bajonczak.com/microsoft-365-esignature-vs-adobe-sign-vs-docusign/
Last updated: 2026-08-02T08:07:24.000Z
# Microsoft 365 eSignature vs Adobe Sign vs DocuSign
This is not a religious debate. It is a workflow decision.
**Guide:** If you are not choosing between vendors yet and first need the Microsoft 365 rollout basics, start with the [Microsoft 365 eSignature admin guide](https://blog.bajonczak.com/microsoft-365-esignature-guide/).
Microsoft 365 eSignature is attractive when the document already lives in SharePoint and the signing process is simple. Adobe Acrobat Sign and DocuSign are stronger when signing is part of a larger agreement process with templates, routing, identity options, integrations and reporting.
This article belongs to the [Microsoft 365 eSignature guide](https://blog.bajonczak.com/microsoft-365-esignature-guide/). If you need a reusable decision artifact, download the [comparison table](https://blog.bajonczak.com/microsoft-365-esignature-comparison-table/).
## The short version
Use Microsoft 365 eSignature when you want a simple Microsoft-native signing flow and the signed document should stay in SharePoint.
Use Adobe Acrobat Sign when PDF-heavy workflows, Adobe tooling or mature signing templates are already part of the business.
Use DocuSign when agreements are a serious business process rather than a document with a signature field.
That is oversimplified, but it is a decent starting point.
## Comparison table
| Area | Microsoft 365 eSignature | Adobe Acrobat Sign | DocuSign |
| ------------------------- | ---------------------------------------------------------- | --------------------------------------------- | --------------------------------------------- |
| Best fit | Simple SharePoint-native signing | PDF-heavy enterprise signing | Advanced agreement workflows |
| Storage model | Signed PDF returns to SharePoint | Provider workflow with Microsoft integrations | Provider workflow with Microsoft integrations |
| Microsoft 365 integration | Native SharePoint, Word, Teams Approvals and Purview audit | Strong Microsoft 365 integrations | Strong Microsoft 365 integrations |
| Pricing shape | Pay-as-you-go per request | Plan/licensing dependent | Plan/licensing dependent |
| Governance model | SharePoint and Entra governance matter heavily | Provider admin plus integration governance | Provider admin plus integration governance |
| Advanced templates | Limited compared with dedicated platforms | Strong | Strong |
| Bulk send and routing | Not the main strength | Stronger | Stronger |
| Best admin argument | Keeps simple workflows inside Microsoft 365 | Mature PDF signing ecosystem | Mature agreement workflow ecosystem |
## Where Microsoft 365 eSignature wins
Microsoft wins on proximity.
The document is already in SharePoint. The user is already in Microsoft 365\. The signed PDF comes back to the same place. Audit activity can be searched in Microsoft Purview. Teams Approvals can help users track requests.
For common internal approvals, HR forms, policy acknowledgements, procurement documents or low-complexity external signing, that is a strong story.
It also reduces tool sprawl. If a process does not need a dedicated eSignature platform, keeping it inside Microsoft 365 is cleaner.
## Where Adobe Sign and DocuSign win
Dedicated platforms win when signing is not the whole process.
Think reusable template libraries, conditional routing, bulk sending, advanced recipient authentication, branded experiences, CRM integration, contract operations, APIs, delegated administration and reporting. That is where Adobe Acrobat Sign and DocuSign have had years to mature.
If sales, legal or procurement already run critical workflows through one of those platforms, do not rip it out just because Microsoft added a native option.
## Governance is different, not gone
Microsoft 365 eSignature pushes governance into SharePoint and Entra. Site permissions, guest access, sharing restrictions, sensitivity labels and conditional access all matter.
Adobe Sign and DocuSign push more of the workflow governance into the provider platform. You still need Microsoft integration governance, but the signing process itself is usually managed in the signing product.
Neither model is automatically better. The better model is the one your organization can actually operate.
## My recommendation
I would define three buckets:
1. Microsoft 365 eSignature for simple, SharePoint-native signing.
2. Adobe Sign or DocuSign for advanced, regulated, high-volume or customer-critical workflows.
3. No eSignature tool at all for things that should just be an approval, a form or a workflow task.
That third bucket matters. Not every “please confirm this” needs a paid signature request.
## Bottom line
Microsoft 365 eSignature will not kill Adobe Sign or DocuSign. It does not need to.
Its job is to cover the boring but useful middle: documents already in Microsoft 365 that need a simple signature and a signed PDF back in SharePoint. Use it there and it makes sense. Push it into every workflow and you will eventually regret it.
### Common Microsoft 365 eSignature Problems and Troubleshooting
URL: https://blog.bajonczak.com/microsoft-365-esignature-troubleshooting/
Last updated: 2026-08-02T08:07:24.000Z
# Common Microsoft 365 eSignature Problems and Troubleshooting
Most Microsoft 365 eSignature problems are not mysterious. They are usually SharePoint, permissions, external sharing, file format, labels or conditional access showing up as an eSignature issue.
**Guide:** If you are still planning the rollout, start with the [Microsoft 365 eSignature admin guide](https://blog.bajonczak.com/microsoft-365-esignature-guide/). This page is for the tickets that show up after or during rollout.
That is annoying, but it is also good news. You can troubleshoot it with a method instead of guessing.
This article is part of the [Microsoft 365 eSignature guide](https://blog.bajonczak.com/microsoft-365-esignature-guide/). Keep it next to the [tenant readiness checklist](https://blog.bajonczak.com/microsoft-365-esignature-tenant-readiness-checklist/) and the [SharePoint governance guide](https://blog.bajonczak.com/sharepoint-esignature-setup-governance/).
## The signature option is missing
Start with the obvious checks:
- Is eSignature enabled in the Microsoft 365 admin center?
- Has it been less than 24 hours since activation?
- Is the document in a SharePoint site enabled for eSignature?
- Is the user opening the PDF from the SharePoint document library viewer?
- Did the user open the file in Edge, Adobe Reader or another viewer instead?
- Does the user have the right permissions?
Microsoft’s troubleshooting guidance is clear on one point: the PDF viewer must be opened by selecting the PDF from a SharePoint library. If the user opens the file another way, the signing option may not appear.
## The user cannot create a request
Check the document and the folder first.
- Does the sender have edit rights?
- Does the sender have sharing rights to the folder?
- Is the PDF under 10 MB?
- Is the PDF unencrypted?
- Are site sharing settings restricted to owners?
- Is the document in a private group where the sender cannot share?
- Are DLP, sensitivity labels, encryption or access policies blocking the flow?
Also check whether the document was previously signed. Microsoft says new eSignature requests cannot be started from documents that were already signed.
## External recipient cannot sign
External signing issues usually come down to guest access or conditional access.
Check:
- Is external sharing enabled at tenant and site level?
- If new external guests are allowed, is Microsoft Entra B2B integration for SharePoint and OneDrive configured?
- Are domain restrictions blocking the recipient?
- Is conditional access blocking the eSignature app or the guest flow?
- Did the signer receive the email?
- Did the message land in junk or spam?
Microsoft notes that admins may need to review conditional access behavior for the Microsoft eSign service. Be careful here. Do not punch a broad hole in conditional access just to make one document work. Test the policy change with security involved.
## Adobe Sign or DocuSign request fails from SharePoint
When you start a request for another provider from SharePoint, the provider may need to open or download the document. Encryption, download restrictions and access policies can block that.
Check:
- Is the document encrypted?
- Is download blocked?
- Does the sender have permission to download the file?
- Is the provider integration authorized correctly?
- Does the provider support the document state you are sending?
If users keep hitting this, revisit the tool decision. The [Microsoft 365 eSignature vs Adobe Sign vs DocuSign](https://blog.bajonczak.com/microsoft-365-esignature-vs-adobe-sign-vs-docusign/) comparison can help.
## Signed document cannot be accessed
Microsoft checks whether the sender can write to the original location before and after signing. If permissions change while the request is in progress, the completed document can become hard to access.
Check:
- Does the sender still have access to the originating folder?
- Was the file moved during the signing process?
- Did someone change library or folder permissions?
- Is the completion email offering temporary access?
This is another reason to avoid running signature workflows from chaotic libraries.
## Quick PowerShell check for site sharing
Microsoft’s troubleshooting article suggests checking SharePoint site sharing capabilities with SharePoint Online PowerShell:
```powershell
Connect-SPOService -Url "https://yourtenant-admin.sharepoint.com"
Get-SPOSite -Limit All | Select-Object Url, SharingCapability
```
This is only a starting point. Tenant and site settings can look fine while folder permissions, labels or conditional access still block the process.
## My triage questions
When someone reports an issue, ask these first:
1. Which SharePoint site and library contains the document?
2. PDF or Word?
3. Is the file encrypted or sensitivity-labeled?
4. Internal signer or external signer?
5. Existing guest or new external recipient?
6. Does the sender have sharing rights?
7. Can the issue be reproduced with a clean test document?
8. Do Purview Audit events show anything useful?
That list will solve more cases than a long call full of screenshots.
## Bottom line
Troubleshooting gets much easier when the rollout is designed properly. Approved sites, clear sharing rules, tested labels and a support path remove most of the chaos.
If the tenant is already messy, Microsoft 365 eSignature will not create the mess. It will reveal it.
### SharePoint eSignature Setup and Governance
URL: https://blog.bajonczak.com/sharepoint-esignature-setup-governance/
Last updated: 2026-07-09T11:28:42.000Z
# SharePoint eSignature Setup and Governance
Microsoft 365 eSignature looks like a signing feature. Admins should treat it as SharePoint governance.
The signing flow depends on the boring stuff: site permissions, sharing settings, guest access, labels, encryption, conditional access, ownership and retention. If those pieces are messy, eSignature will expose the mess very quickly.
Use this article with the [Governance Template](https://blog.bajonczak.com/microsoft-365-esignature-governance-template/) and the full [Microsoft 365 eSignature guide](https://blog.bajonczak.com/microsoft-365-esignature-guide/).
## Do not start tenant-wide
The first governance decision is scope.
I would not enable every SharePoint site on day one. Start with a pilot group of sites where the business owner is known, the document types are clear and the permissions are not a museum of old projects and broken inheritance.
Put sites into buckets:
- approved for eSignature;
- pilot only;
- blocked until ownership is fixed;
- requires legal or compliance review first.
If a site has no owner, it should not send signature requests. That rule alone prevents a lot of pain.
## Decide who can send requests
The sender needs edit and sharing rights. In many SharePoint sites, that describes far more people than admins realize.
Define the model:
- Can all site members send requests?
- Should only site owners or a dedicated group send them?
- Are external requests limited to certain teams?
- Are some libraries excluded?
- Does legal need to approve certain document types first?
If the answer is “we will see how people use it”, you are already choosing cleanup work later.
## External signing needs real rules
External signing is useful. It is also where many problems start.
Microsoft notes that external recipients who are not existing guests require Microsoft Entra B2B integration for SharePoint and OneDrive plus guest sharing. That means your guest access and sharing posture are part of the eSignature design.
Decide:
- existing guests only or new guests allowed;
- allowed and blocked domains;
- conditional access behavior;
- guest lifecycle and access reviews;
- who supports external signers;
- which document types may be sent outside the organization.
Do not let every site invent its own answer.
## Test sensitivity labels before users do
Sensitivity labels and encryption are exactly the kind of thing that look fine in a policy document and then break a workflow at the worst time.
Test the labels your users actually apply. Test encrypted documents. Test restricted download policies. Test documents in libraries with unique permissions.
If a label blocks signing, that may be correct. The point is to know before someone is trying to get a contract signed at 16:55.
## Plan where signed PDFs live
The completed signed PDF is stored back in SharePoint. Good. But which SharePoint location is the record?
Decide:
- whether signed PDFs are records;
- how long they are retained;
- whether users can move or delete them;
- whether metadata is required;
- whether source documents and signed PDFs follow the same retention;
- who owns cleanup when a department reorganizes.
This is not glamorous work. It is exactly the work that makes the feature safe.
## Use Purview audit
Microsoft says eSignature events can be searched in Microsoft Purview Audit. Track events such as request created, sent, canceled, declined, expired, completed, viewed, signed and downloaded.
At minimum, admins should know how to answer:
- Who sent this request?
- Who signed it?
- When was it completed?
- Was the signed document downloaded?
- Did the request fail or expire?
If nobody can answer those questions, the rollout is not ready.
## Prepare support before launch
The common tickets will be predictable:
- missing signature option;
- PDF too large or encrypted;
- user opened the PDF outside SharePoint;
- sender lacks sharing rights;
- external signer blocked by guest or conditional access settings;
- signed document cannot be saved because permissions changed.
Point support teams to the [troubleshooting guide](https://blog.bajonczak.com/microsoft-365-esignature-troubleshooting/) and give them a test site where they can reproduce issues.
## My baseline policy
Enable eSignature only for sites with an owner, a defined document scope, tested external sharing behavior, known retention expectations and a support path.
If that feels strict, good. A signature workflow creates business evidence. It should not live in an ownerless library with mystery permissions.
### Microsoft 365 eSignature Licensing, Pricing and Limitations
URL: https://blog.bajonczak.com/microsoft-365-esignature-licensing-pricing-limitations/
Last updated: 2026-07-09T11:28:29.000Z
# Microsoft 365 eSignature Licensing, Pricing and Limitations
Microsoft 365 eSignature is not licensed like a normal per-user Microsoft 365 add-on. It uses pay-as-you-go billing through Azure.
That can be great for occasional signing. It can also be a nasty surprise if every department starts sending low-value signature requests because the button is convenient.
This article is part of the [Microsoft 365 eSignature guide](https://blog.bajonczak.com/microsoft-365-esignature-guide/). For setup steps, read [How to enable Microsoft 365 eSignature in your tenant](https://blog.bajonczak.com/enable-microsoft-365-esignature-tenant/). For vendor selection, use the [comparison table](https://blog.bajonczak.com/microsoft-365-esignature-comparison-table/).
## How billing works
Microsoft lists eSignature under Microsoft 365 document processing pay-as-you-go services. Before users can send requests, you need a linked Azure subscription.
That means usage becomes consumption. Someone has to own the bill. Someone has to review the volume. If nobody does, the feature will still work, but finance may discover it later in the least pleasant way.
## Current Microsoft-listed price
Microsoft’s pay-as-you-go pricing page currently lists eSignature like this:
- Meter: electronic signature requests created
- Included recipients: up to 10 recipients per request
- Price: USD $2.00 per request
Check Microsoft’s pricing page before you quote this internally. Pricing pages change, and procurement will not care that an old blog post looked confident.
## Trial note
Microsoft’s overview currently says that through June 2026, tenants with pay-as-you-go billing set up can try a limited amount of eSignature by sending up to five requests at no cost.
That is enough to test the flow. It is not enough to prove your operating model.
## Quick cost examples
Because the meter is request-based, the rough math is simple:
- 50 requests/month: about USD $100/month
- 250 requests/month: about USD $500/month
- 1,000 requests/month: about USD $2,000/month
The useful question is bigger than “what will this cost?” Ask which signing requests are worth formalizing in the first place.
If teams start using paid signature requests for things that should be simple approvals, the governance model is wrong.
## Limits that matter
Based on Microsoft Learn, these are the limits I would put in front of admins before a pilot:
- Microsoft 365 public cloud availability, excluding Indonesia.
- Multi-geo tenants: home geo only.
- Simple electronic signatures, so legal fit must be checked.
- Unencrypted PDFs only.
- Microsoft troubleshooting guidance references PDFs under 10 MB for request creation.
- Up to 10 recipients per request.
- Up to 50 fields total in a PDF request.
- At least one required signature field per recipient.
- Word signing requires subscription Word desktop, `.docx`, an unencrypted file, an enabled SharePoint site and a supported update channel.
- New requests cannot be started from documents that were previously signed.
None of these are shocking. They are just the kind of details users only notice when a real document fails five minutes before a deadline.
## The hidden costs
The bill is only one part of the cost.
You also need time for:
- external sharing decisions;
- guest access and conditional access testing;
- site owner training;
- sensitivity label testing;
- retention decisions for signed PDFs;
- audit review;
- service desk documentation.
This is why I would not treat eSignature as “free because we already have Microsoft 365”. You may not buy a separate license, but you still pay in operations.
## When the model works well
Pay-as-you-go works well when signing volume is moderate, sporadic or limited to a few departments. It is also useful when you do not want to buy named licenses for people who only send a few requests per year.
If signing is a core business process with high volume, templates, routing or contract operations behind it, compare the total picture against Adobe Acrobat Sign or DocuSign. The [Microsoft 365 eSignature vs Adobe Sign vs DocuSign](https://blog.bajonczak.com/microsoft-365-esignature-vs-adobe-sign-vs-docusign/) article covers that decision.
## Bottom line
The pricing is simple: pay per request.
The decision is not simple. You need to decide which documents deserve a paid signing request, which teams can send them and when a dedicated signing platform is the better tool.
### How to Enable Microsoft 365 eSignature in Your Tenant
URL: https://blog.bajonczak.com/enable-microsoft-365-esignature-tenant/
Last updated: 2026-07-09T11:27:59.000Z
# How to Enable Microsoft 365 eSignature in Your Tenant
The switch is the easy part.
The work is everything around the switch: billing, external sharing, site scope, permissions, labels, support and the awkward question of which documents are actually allowed to be signed this way.
This guide is part of the [Microsoft 365 eSignature guide](https://blog.bajonczak.com/microsoft-365-esignature-guide/). For the actual rollout, I would not start in the admin center. I would start with the [tenant readiness checklist](https://blog.bajonczak.com/microsoft-365-esignature-tenant-readiness-checklist/) and the [licensing and limitations overview](https://blog.bajonczak.com/microsoft-365-esignature-licensing-pricing-limitations/).
## 1\. Check whether your tenant can use it
Microsoft 365 eSignature is available in the Microsoft 365 public cloud worldwide, with Indonesia excluded in Microsoft’s current documentation. In multi-geo tenants, Microsoft says the service is available in the home geo only.
That matters if your organization has strict data residency expectations. Do not assume a multi-geo tenant means every geo behaves the same way for this feature.
## 2\. Confirm the legal fit
Microsoft describes the service as using simple electronic signatures.
For everyday internal approvals, forms or low-risk business documents, that may be fine. For regulated contracts, high-value agreements or scenarios where signer identity assurance is critical, legal needs to decide whether this is sufficient.
Do this before users fall in love with the button.
## 3\. Use the right admin role
Microsoft says a SharePoint Administrator or Global Administrator can set up eSignature in the Microsoft 365 admin center.
Use SharePoint Administrator where possible. Global Administrator should be the exception, not the daily operating model.
## 4\. Set up pay-as-you-go billing
Microsoft 365 eSignature uses pay-as-you-go billing through a linked Azure subscription. Microsoft’s pricing page currently lists eSignature at USD $2.00 per electronic signature request, with up to 10 recipients included in one request.
The price is easy to understand. The ownership is where tenants get sloppy.
Before rollout, decide who owns the Azure cost, who reviews usage and what volume would trigger a review.
## 5\. Enable eSignature in the Microsoft 365 admin center
Microsoft’s setup path is:
1. Open the Microsoft 365 admin center.
2. Go to Settings > Org settings.
3. Open Pay-as-you-go services.
4. Select the Settings tab.
5. Under Document & image services, select eSignature.
6. Enable Let people in your organization use eSignature.
Microsoft notes that background processes run after activation and the service can take up to 24 hours to become fully operational.
## 6\. Decide what to do with external signers
External signing is where the rollout stops being a simple feature setup.
If external recipients are not already guests, Microsoft says you need Microsoft Entra B2B integration for SharePoint and OneDrive plus guest sharing. That affects security, compliance and support.
Decide this in writing:
- Are new external guests allowed, or only existing guests?
- Are some domains blocked or allowed?
- Can every enabled site send externally?
- Who supports an external signer who cannot access the request?
- Which conditional access policies apply?
## 7\. Start with controlled SharePoint sites
Do not enable every site just because you can.
Start with a pilot: a few sites, clear owners, simple documents and users who will give useful feedback. Good candidates are HR forms, procurement documents, policy acknowledgements or internal approvals where simple electronic signatures are enough.
Avoid ownerless sites, sensitive libraries and chaotic permission structures. They will make troubleshooting miserable.
The governance side is covered in [SharePoint eSignature setup and governance](https://blog.bajonczak.com/sharepoint-esignature-setup-governance/).
## 8\. Test before announcing it
At minimum, test:
- an internal signer;
- an existing external guest;
- a new external recipient, if allowed;
- an unencrypted PDF under 10 MB;
- a Word `.docx` from an enabled site;
- ordered recipients;
- request cancellation;
- completed signed PDF storage;
- Purview audit events;
- Teams Approvals tracking.
Also test what happens when things are wrong: encrypted files, restricted sharing, missing permissions and conditional access friction.
## 9\. Prepare support
The first tickets will sound like feature issues, but many will be SharePoint issues:
- the button is missing;
- the sender cannot share the document;
- the external signer cannot access it;
- a label or encryption blocks the flow;
- the signed document cannot be saved where expected.
Give the service desk the [troubleshooting guide](https://blog.bajonczak.com/microsoft-365-esignature-troubleshooting/) before broad rollout.
## Bottom line
Enabling Microsoft 365 eSignature is a short admin center task. Rolling it out properly is a governance project.
Start small. Watch the cost. Test external access. Make the rules boring and clear. Boring is good here.
### What is Microsoft 365 eSignature?
URL: https://blog.bajonczak.com/what-is-microsoft-365-esignature/
Last updated: 2026-07-09T11:23:07.000Z
# What is Microsoft 365 eSignature?
Microsoft 365 eSignature is Microsoft’s native way to request electronic signatures from documents stored in Microsoft 365, mainly SharePoint.
That is the simple description. The more useful one is this: it is a signing workflow built into the place where many companies already keep their working documents. A user can start a request from SharePoint or, for supported Word scenarios, from Word. The recipients sign a PDF copy. The completed PDF lands back in SharePoint.
For many teams, that is enough. For some teams, it is absolutely not enough. The trick is knowing the difference before people start using it for everything.
If you are planning a rollout, use the full [Microsoft 365 eSignature guide](https://blog.bajonczak.com/microsoft-365-esignature-governance-template/) and the [tenant readiness checklist](https://blog.bajonczak.com/microsoft-365-esignature-tenant-readiness-checklist/).
## What happens in the PDF flow
A user opens an unencrypted PDF from a SharePoint document library, chooses the signing option, adds recipients, places signature fields and sends the request. Recipients get a notification, open the request, accept the electronic signing terms and sign.
When the request is complete, SharePoint stores the signed PDF in the same location as the original file.
That storage detail matters. It means the signed document can follow the same ownership, retention and audit thinking as the rest of the library, assuming your SharePoint governance is not already a mess.
## What happens in Word
Microsoft also supports eSignature from Word desktop for eligible users and documents. The Word file must be a `.docx`, unencrypted and stored in a SharePoint site enabled for eSignature. Users can place eSignature fields directly in Word, then send a request.
The signer does not edit the source Word file. They sign a generated PDF copy, and the completed PDF is saved back to the SharePoint location.
This is useful for repeatable templates such as HR letters, approvals or standard agreements. It is not a full contract lifecycle system.
## What kind of signature is this?
Microsoft describes the service as using simple electronic signatures.
That sentence should make legal and compliance teams pay attention. Simple electronic signatures are perfectly fine for many business processes, but they are not the answer to every regulated, high-risk or identity-sensitive scenario.
Before rollout, decide which document types are allowed and which must stay with a stronger or more specialized signing platform.
## Why admins should care
This feature leans heavily on SharePoint and Microsoft Entra behavior.
The sender needs edit and sharing rights. External recipients may require Microsoft Entra B2B integration for SharePoint and OneDrive. Site sharing, unique permissions, sensitivity labels, conditional access, encryption and download restrictions can all affect whether the process works.
So yes, it is an eSignature feature. But operationally it behaves like a SharePoint governance feature. The [SharePoint eSignature governance guide](https://blog.bajonczak.com/sharepoint-esignature-setup-governance/) goes deeper on that.
## Audit trail
Microsoft says eSignature activities can be searched in Microsoft Purview Audit. Useful events include request created, sent, canceled, declined, expired and completed. Recipient actions such as viewing, signing and downloading the signed document can also appear.
For Microsoft 365-heavy organizations, that is one of the better arguments for the native option.
## When it is a good fit
Microsoft 365 eSignature is worth considering when:
- the document already lives in SharePoint;
- the signing flow is simple;
- simple electronic signatures are legally sufficient;
- up to 10 recipients per request is enough;
- the signed copy should stay in Microsoft 365;
- the organization wants Purview audit visibility;
- buying another signing platform would be overkill.
## When I would be careful
I would be careful if the process needs advanced identity checks, heavy templates, complex routing, bulk sending, CRM integration, legal negotiation workflows or strict regulated signing requirements.
In those cases, compare it properly against Adobe Acrobat Sign and DocuSign instead of forcing every use case into the Microsoft-native tool. I covered that in [Microsoft 365 eSignature vs Adobe Sign vs DocuSign](https://blog.bajonczak.com/microsoft-365-esignature-vs-adobe-sign-vs-docusign/).
## Bottom line
Microsoft 365 eSignature is not magic and it is not a universal replacement for dedicated signing platforms.
It is a pragmatic option for simple signing workflows that already belong in Microsoft 365\. Used that way, it can reduce friction. Used without boundaries, it becomes one more thing admins have to clean up later.
### How to set up Microsoft Places properly: buildings, floors, rooms, desks, and privacy
URL: https://blog.bajonczak.com/how-to-set-up-microsoft-places-buildings-floors-rooms-desks/
Last updated: 2026-07-16T17:16:41.000Z
Most Microsoft Places demos show the nice part: a user opens Outlook or Teams, sees a building, picks a desk, and the hybrid day suddenly looks organized. The hard part is the setup behind it. Places only becomes useful when the directory model is clean: **building → floor → section → room / workspace / desk**.
✅
**Need the practical rollout checklist?**
I also created a detailed Microsoft Places setup checklist for buildings, floors, sections, rooms, desk pools, individual desks, privacy, pilot validation, and scale-out. Use it before touching production. [Open the Microsoft Places setup checklist](https://blog.bajonczak.com/microsoft-places-setup-checklist/).
This guide walks through a practical setup using one example building, two floors, meeting rooms, a desk pool, and individual desks. I also show how I would import data from a facilities information system — I will call it the **FIS export** in the scripts — so the configuration is repeatable instead of a one-time admin portal exercise.
> The examples below use `contoso.com`, fictional building data, and PowerShell. Do not paste them blindly into production. Run them first in a pilot tenant or with a tiny mail-enabled pilot group.
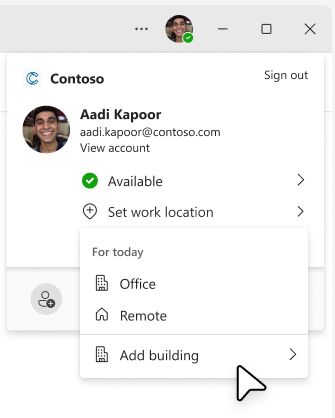
*Screenshot source: Microsoft Learn, “Configure buildings and floors”.*
## Why Microsoft Places is worth the effort
Microsoft Places is not just another booking UI. It connects several Microsoft 365 signals that were previously scattered across Outlook, Teams, Exchange resource mailboxes, room lists, and facilities data.
The main benefits are practical:
- **Better office days**: users can plan where they will work, see buildings in their work plan, and choose rooms or desks with richer metadata.
- **Desk booking without spreadsheet chaos**: individual desks can be reservable, drop-in, assigned, or unavailable. Desk pools can still exist for simpler areas.
- **Cleaner room discovery**: Places Finder uses building/floor hierarchy instead of only flat room lists, so users can navigate by location.
- **Facilities analytics**: once the data is structured, real estate and facilities teams can reason about utilization instead of guessing.
- **Future-ready maps**: IMDF floorplans can be correlated to Places objects so desks, rooms, and points of interest show up on maps.
- **Governance**: admins can enable features gradually by group instead of turning everything on for the whole tenant on day one.
The catch: Places is only as good as the hierarchy and metadata you feed into it.
## The target scenario
We will build a fictional building:
- Building: **Contoso Campus West**
- Address: **Friedrichstraße 100, 10117 Berlin, Germany**
- Floors: **0** and **1**
- Floor 0 sections: **Reception**, **Meeting Zone**
- Floor 1 sections: **Engineering**, **Quiet Zone**
- Rooms:
- `CW-0.101 Focus Room` — 4 people
- `CW-0.102 Project Room` — 8 people, Teams Room enabled
- `CW-1.201 Workshop Room` — 12 people
- Desk pool:
- `CW-1 Engineering Desk Pool` — capacity 10
- Individual desks:
- `CW-1-ENG-Desk-01` — reservable
- `CW-1-ENG-Desk-02` — drop-in
- `CW-1-QZ-Desk-01` — assigned to one person
The important design rule is this:
```text
Building
└── Floor
└── Section
├── Room
├── Workspace / desk pool
└── Desk
```
Rooms can be parented to a floor or a section. Workspaces and individual desks must be parented to a section. That one rule avoids a surprising number of missing-room and missing-desk tickets later.
## Step 0: prerequisites and roles
## Get practical Azure, Microsoft 365, AI and integration notes from real projects.
Subscribe
Email sent! Check your inbox to complete your signup.
No fluff. Just architecture ideas, code snippets, cost traps and tools I actually use.
Use **PowerShell 7.4 or later**. Microsoft’s Places module is not managed through old Windows PowerShell.
```powershell
# Run in PowerShell 7.4+
$ErrorActionPreference = 'Stop'
Install-Module -Name ExchangeOnlineManagement -Scope CurrentUser -Force
Install-Module -Name MicrosoftTeams -Scope CurrentUser -Force
Install-Module -Name MicrosoftPlaces -Scope CurrentUser -Force
Connect-ExchangeOnline
Connect-MicrosoftTeams
Connect-MicrosoftPlaces
```
For permissions, avoid using Global Administrator as your normal operating model. Microsoft Places supports built-in Places roles, and Exchange Online also has Places-specific management roles.
For a setup admin, you typically need:
- **Places Administrator** for full Places onboarding and operations.
- **TenantPlacesManagement** to manage Places through Exchange/Places PowerShell.
- **MailRecipient** or Exchange permissions when scripts create or manage resource mailboxes.
Example assignment for a setup user:
```powershell
# Run as an Exchange admin / organization management admin
New-ManagementRoleAssignment -Role TenantPlacesManagement -User places.setup@contoso.com
```
For day-two operations, delegate less:
```powershell
# Building admin for facilities staff
New-ManagementRoleAssignment -Role "PlacesBuildingManagement" -User facilities.berlin@contoso.com
```
My opinion: separate the project setup identity from the facilities day-to-day identity. Places touches buildings, rooms, mailboxes, desk modes, maps, analytics, and policies. That is too broad for everyone who only needs to maintain desks.
## Step 1: create a clean FIS export
Most organizations already have the relevant source data somewhere: a CAFM tool, a facilities information system, Excel exports, floorplan tooling, or a room inventory. The trick is to normalize that data before it reaches Microsoft 365.
Create a CSV called `places-fis-import.csv`:
```csv
Type,BuildingName,CountryOrRegion,State,City,Street,PostalCode,GeoCoordinates,FloorName,FloorSortOrder,SectionName,DisplayName,Mailbox,Capacity,Mode,AssignedPerson,Tags,Wheelchair,AudioDevice,DisplayDevice,VideoDevice,TeamsRoom
Building,Contoso Campus West,DE,BE,Berlin,Friedrichstraße 100,10117,"52.520008;13.404954",,,,,,,,,,,,,,
Floor,Contoso Campus West,,,,,,,0,0,,,,,,,,,,,,
Floor,Contoso Campus West,,,,,,,1,1,,,,,,,,,,,,
Section,Contoso Campus West,,,,,,,0,0,Reception,,,,,,,,,,,
Section,Contoso Campus West,,,,,,,0,0,Meeting Zone,,,,,,,,,,,
Section,Contoso Campus West,,,,,,,1,1,Engineering,,,,,,,,,,,
Section,Contoso Campus West,,,,,,,1,1,Quiet Zone,,,,,,,,,,,
Room,Contoso Campus West,,,,,,,0,0,Meeting Zone,CW-0.101 Focus Room,cw-0-101@contoso.com,4,,,"focus-room;whiteboard",false,,Surface Hub 3,,false
Room,Contoso Campus West,,,,,,,0,0,Meeting Zone,CW-0.102 Project Room,cw-0-102@contoso.com,8,,,"project-room;video",true,Teams Audio,Front Display,Teams Camera,true
Room,Contoso Campus West,,,,,,,1,1,Engineering,CW-1.201 Workshop Room,cw-1-201@contoso.com,12,,,"workshop;hybrid",true,Ceiling Mic,Front Display,PTZ Camera,false
Workspace,Contoso Campus West,,,,,,,1,1,Engineering,CW-1 Engineering Desk Pool,cw-1-deskpool@contoso.com,10,Reservable,,"dock;height-adjustable",true,,,,
Desk,Contoso Campus West,,,,,,,1,1,Engineering,CW-1-ENG-Desk-01,,1,Reservable,,"dock;height-adjustable",true,,USB-C Dock,,
Desk,Contoso Campus West,,,,,,,1,1,Engineering,CW-1-ENG-Desk-02,,1,DropIn,,"dock;near-window",false,,USB-C Dock,,
Desk,Contoso Campus West,,,,,,,1,1,Quiet Zone,CW-1-QZ-Desk-01,,1,Assigned,alex.wilber@contoso.com,"quiet-zone",false,,,,
```
A few choices here are intentional:
- Building address lives on the **building**, not each room.
- Floor sort order is explicit so floorplans can later align with Places floor order.
- Sections are modeled as neighborhoods. Do not skip them for desks.
- Tags are semicolon-separated because facilities people can maintain that easily in Excel.
- The import contains both rooms and desks, but the script handles them differently because Exchange-backed rooms/workspaces and Places-native desks do not behave the same way.
## Step 2: provision the hierarchy from the FIS export
This script creates the building, floors, sections, rooms, workspace, and desks from the CSV. It is written to be understandable first and clever second.
Save it as `01-import-places-fis.ps1`:
```powershell
#Requires -Version 7.4
param(
[Parameter(Mandatory)]
[string]$CsvPath
)
$ErrorActionPreference = 'Stop'
Import-Module MicrosoftPlaces
Import-Module ExchangeOnlineManagement
Connect-MicrosoftPlaces
Connect-ExchangeOnline
$data = Import-Csv -Path $CsvPath
function Get-Single($Items, [string]$Message) {
if (($Items | Measure-Object).Count -ne 1) {
throw $Message
}
return $Items | Select-Object -First 1
}
function Get-OrCreateBuilding($row) {
$existing = Get-PlaceV3 -Type Building | Where-Object DisplayName -eq $row.BuildingName
if ($existing) { return Get-Single $existing "Building '$($row.BuildingName)' is ambiguous." }
$building = New-Place -Type Building -Name $row.BuildingName
Set-PlaceV3 -Identity $building.PlaceId `
-CountryOrRegion $row.CountryOrRegion `
-State $row.State `
-City $row.City `
-Street $row.Street `
-PostalCode $row.PostalCode `
-GeoCoordinates $row.GeoCoordinates
return Get-PlaceV3 -Type Building | Where-Object DisplayName -eq $row.BuildingName | Select-Object -First 1
}
function Get-OrCreateFloor($building, $row) {
$existing = Get-PlaceV3 -AncestorId $building.PlaceId |
Where-Object { $_.Type -eq 'Floor' -and $_.DisplayName -eq $row.FloorName }
if ($existing) { return $existing | Select-Object -First 1 }
return New-Place -Type Floor -Name $row.FloorName -ParentId $building.PlaceId -SortOrder ([int]$row.FloorSortOrder)
}
function Get-OrCreateSection($floor, $row) {
$existing = Get-PlaceV3 -AncestorId $floor.PlaceId |
Where-Object { $_.Type -eq 'Section' -and $_.DisplayName -eq $row.SectionName }
if ($existing) { return $existing | Select-Object -First 1 }
return New-Place -Type Section -Name $row.SectionName -ParentId $floor.PlaceId
}
$buildingRows = $data | Where-Object Type -eq 'Building'
foreach ($row in $buildingRows) {
$null = Get-OrCreateBuilding $row
}
$floorRows = $data | Where-Object Type -eq 'Floor'
foreach ($row in $floorRows) {
$building = Get-Single (Get-PlaceV3 -Type Building | Where-Object DisplayName -eq $row.BuildingName) "Building '$($row.BuildingName)' not found."
$null = Get-OrCreateFloor $building $row
}
$sectionRows = $data | Where-Object Type -eq 'Section'
foreach ($row in $sectionRows) {
$building = Get-Single (Get-PlaceV3 -Type Building | Where-Object DisplayName -eq $row.BuildingName) "Building '$($row.BuildingName)' not found."
$floor = Get-Single (Get-PlaceV3 -AncestorId $building.PlaceId | Where-Object { $_.Type -eq 'Floor' -and $_.DisplayName -eq $row.FloorName }) "Floor '$($row.FloorName)' not found."
$null = Get-OrCreateSection $floor $row
}
$spaceRows = $data | Where-Object { $_.Type -in @('Room','Workspace','Desk') }
foreach ($row in $spaceRows) {
$building = Get-Single (Get-PlaceV3 -Type Building | Where-Object DisplayName -eq $row.BuildingName) "Building '$($row.BuildingName)' not found."
$floor = Get-Single (Get-PlaceV3 -AncestorId $building.PlaceId | Where-Object { $_.Type -eq 'Floor' -and $_.DisplayName -eq $row.FloorName }) "Floor '$($row.FloorName)' not found."
$section = Get-Single (Get-PlaceV3 -AncestorId $floor.PlaceId | Where-Object { $_.Type -eq 'Section' -and $_.DisplayName -eq $row.SectionName }) "Section '$($row.SectionName)' not found."
$tags = @()
if ($row.Tags) { $tags = $row.Tags -split ';' | Where-Object { $_ } }
$isWheelchair = [System.Convert]::ToBoolean($row.Wheelchair)
if ($row.Type -eq 'Room') {
# If your room mailboxes already exist, replace this New-Place call with Set-PlaceV3 -Identity $row.Mailbox -ParentId $section.PlaceId ...
$room = New-Place -Type Room -Name $row.DisplayName -ParentId $section.PlaceId -Mailbox $row.Mailbox -Capacity ([int]$row.Capacity)
Set-PlaceV3 -Identity $row.Mailbox `
-Capacity ([int]$row.Capacity) `
-IsWheelChairAccessible $isWheelchair `
-AudioDeviceName $row.AudioDevice `
-DisplayDeviceName $row.DisplayDevice `
-VideoDeviceName $row.VideoDevice `
-MTREnabled ([System.Convert]::ToBoolean($row.TeamsRoom)) `
-Tags $tags
}
if ($row.Type -eq 'Workspace') {
$workspace = New-Place -Type Workspace -Name $row.DisplayName -ParentId $section.PlaceId -Mailbox $row.Mailbox -Capacity ([int]$row.Capacity)
Set-PlaceV3 -Identity $row.Mailbox -Capacity ([int]$row.Capacity) -IsWheelChairAccessible $isWheelchair -Tags $tags
Set-CalendarProcessing -Identity $row.Mailbox -EnforceCapacity $true
}
if ($row.Type -eq 'Desk') {
if ($row.Mode -eq 'Assigned') {
$metadata = New-Object 'System.Collections.Generic.Dictionary[String,object]'
$metadata.Add('AssignedPersonEmailAddress', $row.AssignedPerson)
$mode = @{ Name = 'Assigned'; Metadata = $metadata }
} else {
$mode = @{ Name = $row.Mode }
}
$desk = New-Place -Type Desk -Name $row.DisplayName -ParentId $section.PlaceId -Mode $mode
Set-PlaceV3 -Identity $desk.PlaceId -IsWheelChairAccessible $isWheelchair -DisplayDeviceName $row.DisplayDevice -Tags $tags
}
}
Get-PlaceV3 -Type Building | Format-Table DisplayName, PlaceId
```
Run it like this:
```powershell
.\01-import-places-fis.ps1 -CsvPath .\places-fis-import.csv
```
If your Exchange room mailboxes already exist, I would not recreate them. Import the hierarchy first, then link existing rooms with `Set-PlaceV3 -Identity room@contoso.com -ParentId `.
## Step 3: create room lists for Outlook compatibility
Places Finder and Room Finder use the same underlying Exchange room/workspace data, but Room Finder still relies on room lists. I still create one room list per building. It keeps older Outlook experiences sane and gives you a fallback while piloting Places Finder.
```powershell
Connect-ExchangeOnline
$buildingRoomList = 'Contoso Campus West'
$roomListAlias = 'ContosoCampusWestRooms'
New-DistributionGroup -Name $buildingRoomList -Alias $roomListAlias -RoomList
Add-DistributionGroupMember -Identity $roomListAlias -Member cw-0-101@contoso.com
Add-DistributionGroupMember -Identity $roomListAlias -Member cw-0-102@contoso.com
Add-DistributionGroupMember -Identity $roomListAlias -Member cw-1-201@contoso.com
Add-DistributionGroupMember -Identity $roomListAlias -Member cw-1-deskpool@contoso.com
```
For larger estates, generate this from the same CSV instead of maintaining two sources of truth.
## Step 4: enable buildings and pilot Places Finder
By default, buildings are not visible in all Places experiences. Enable buildings first:
```powershell
Connect-MicrosoftPlaces
Set-PlacesSettings -EnableBuildings 'Default:true'
```
I would not enable Places Finder for everyone immediately. Start with a mail-enabled security group, validate that users see the right rooms/desks, then expand.
```powershell
# Example values. Replace with your real group object ID and tenant ID.
$pilotGroupObjectId = '53212aff-b481-31b1-970b-2ca512e6ae53'
$tenantId = 'ef2a9712-4022-4bcb-8a8c-bc2a4256201c'
Set-PlacesSettings -PlacesFinderEnabled "Default:false,OID:$pilotGroupObjectId@$tenantId:true"
Get-PlacesSettings
```
Later, once the pilot is clean:
```powershell
Set-PlacesSettings -PlacesFinderEnabled 'Default:true'
```
Microsoft documents that settings changes can take time to propagate. Build that delay into the rollout plan instead of debugging for hours ten minutes after a change.

*Screenshot source: Microsoft Learn, “Enable Places Finder”.*
## Step 5: configure desk booking deliberately
Individual desks have modes:
- `Reservable`: users can book the desk in advance or on the spot.
- `DropIn`: available for immediate use, not advance reservation.
- `Assigned`: permanently linked to a user.
- `Unavailable`: not available for booking, for example maintenance.
Example changes after import:
```powershell
Connect-MicrosoftPlaces
$building = Get-PlaceV3 -Type Building | Where-Object DisplayName -eq 'Contoso Campus West'
$floor = Get-PlaceV3 -AncestorId $building.PlaceId | Where-Object { $_.Type -eq 'Floor' -and $_.DisplayName -eq '1' }
$section = Get-PlaceV3 -AncestorId $floor.PlaceId | Where-Object { $_.Type -eq 'Section' -and $_.DisplayName -eq 'Engineering' }
# Add another reservable desk. A desk mailbox is created automatically if needed.
$newDesk = New-Place -Type Desk -Name 'CW-1-ENG-Desk-03' -ParentId $section.PlaceId -Mode @{ Name = 'Reservable' }
Set-PlaceV3 -Identity $newDesk.PlaceId -Tags @('dock','height-adjustable','near-window') -DisplayDeviceName 'USB-C Dock'
# Change a desk to drop-in mode.
Set-PlaceV3 -Identity $newDesk.PlaceId -Mode @{ Name = 'DropIn' }
```
Licensing matters here. Microsoft has been moving individual desk booking to a **space licensing** model. For production planning, check the current Microsoft Places licensing table before promising every desk will be bookable. The admin setup can be correct while the user experience still waits on licensing propagation.
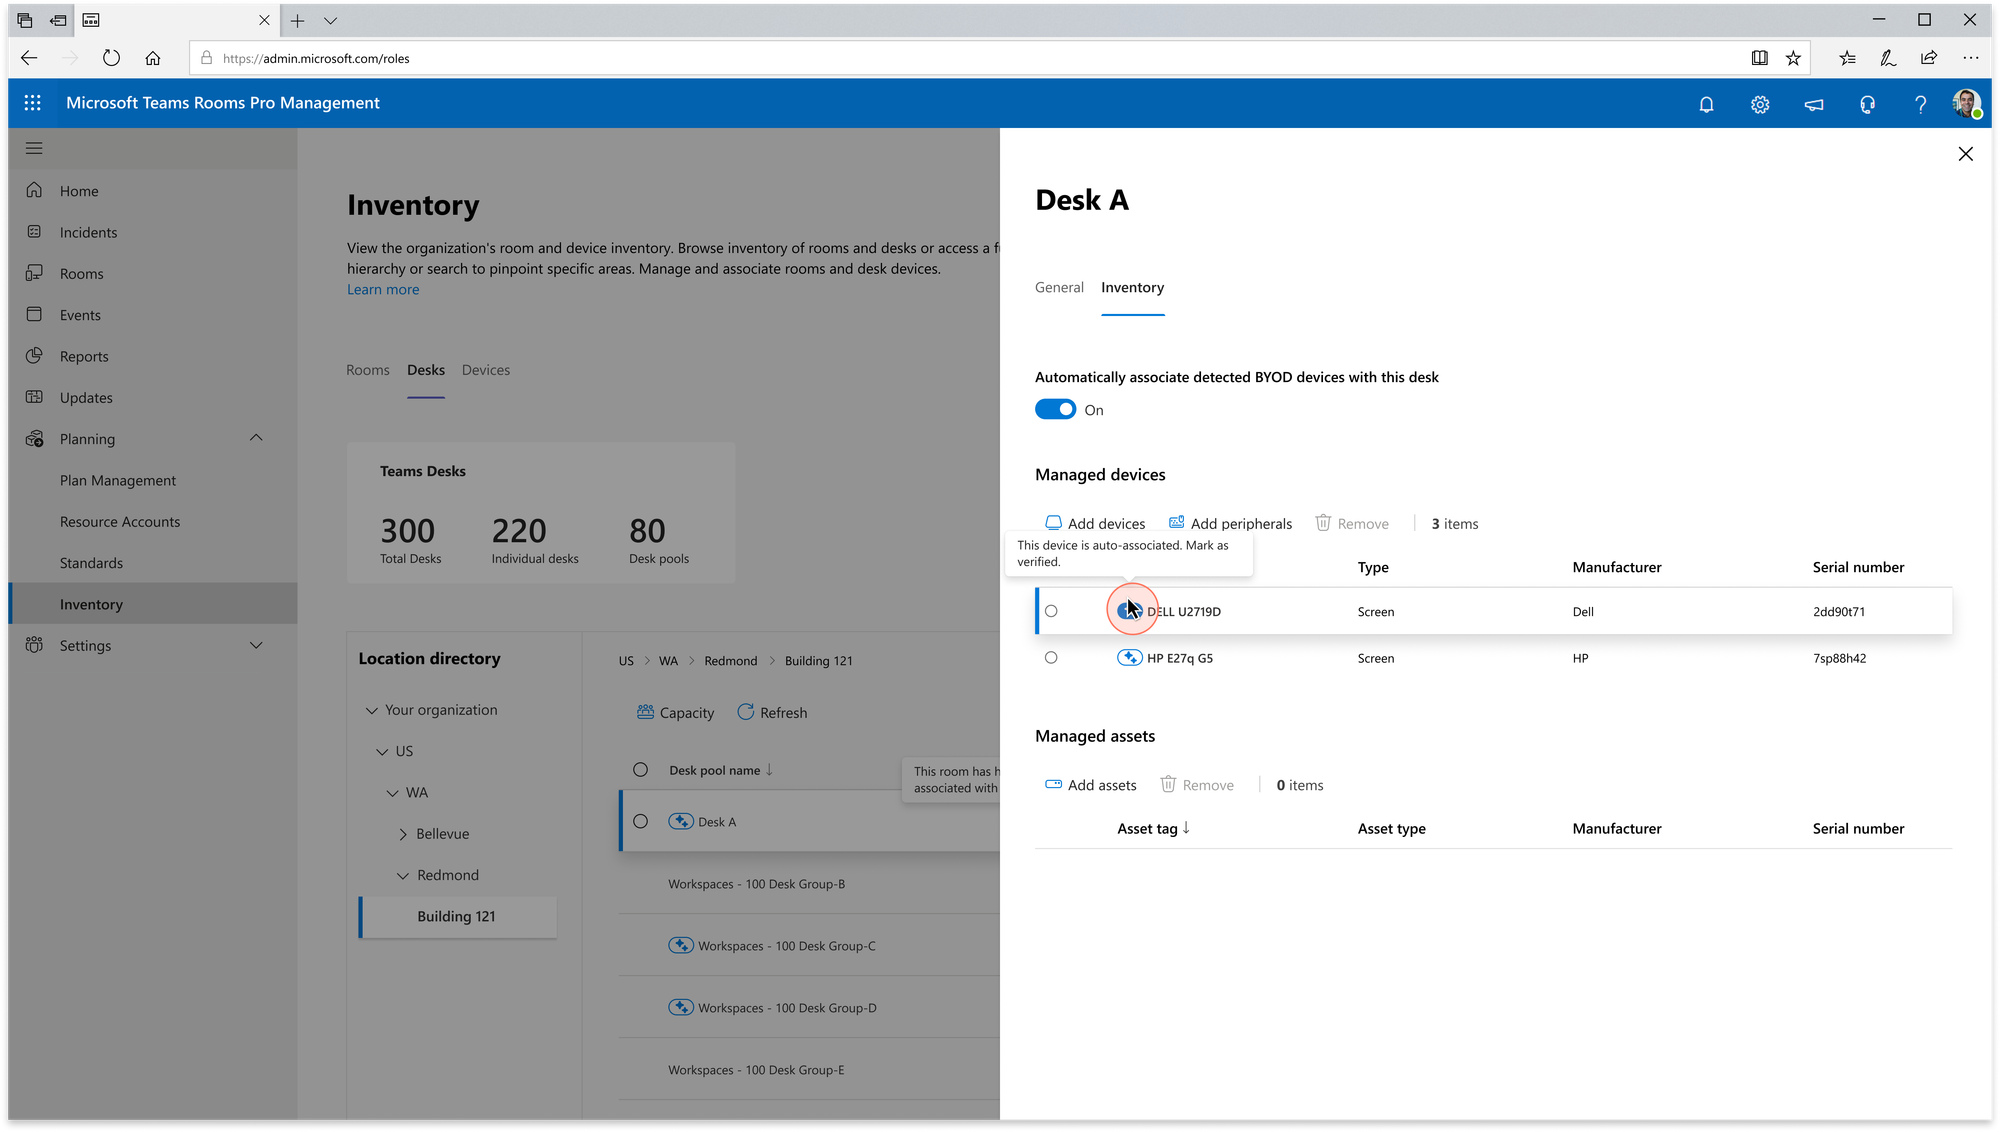
*Screenshot source: Microsoft Learn, “Setting up Bookable Desks in Microsoft Teams”.*
## Step 6: add workplace check-in only after the privacy conversation
Workplace check-in is useful: users can connect to a known Wi-Fi network or desk peripheral and have Teams update their actual work location. But this is exactly where you need a clear privacy story.
The technical setup is straightforward. A Teams admin enables the policy:
```powershell
Connect-MicrosoftTeams
New-CsTeamsWorkLocationDetectionPolicy -Identity wld-places-pilot -EnableWorkLocationDetection $true
Grant-CsTeamsWorkLocationDetectionPolicy -PolicyName wld-places-pilot -Identity alex.wilber@contoso.com
```
For Wi-Fi based building detection, configure SSIDs and BSSIDs:
```powershell
Connect-MicrosoftPlaces
# Corporate Wi-Fi names. Multiple SSIDs are separated with semicolon.
Set-PlacesSettings -Collection Presence -WorkplaceWifiNetworkSSIDList 'Default:Contoso-Corp;Contoso-Secure'
```
Create `wifi-bssid.csv`:
```csv
BSSID,BuildingName
D0:4D:C6:AA:1B:20,Contoso Campus West
A1:4D:B6:25:1B:40,Contoso Campus West
15:AD:C6:AF:1B:11,Contoso Campus West
```
Then map and upload:
```powershell
Add-WifiDevices -Action MapBuildings -InputFilePath .\wifi-bssid.csv
# Review the generated BuildingMapping.csv, correct names if needed, then:
Add-WifiDevices -Action UploadEntries -InputFilePath .\wifi-bssid.csv -BuildingMappingFile .\BuildingMapping.csv
```
My recommendation: use **Ask mode** / opt-in language where possible during rollout, communicate clearly, and start with volunteers. The productivity value is real, but so is the trust risk if employees feel surprised.
# Privacy: what I would tell the works council
For Germany and the EU, Microsoft Places needs a clear Datenschutz explanation before rollout. The core points I would document internally:
1. **Purpose limitation**: the purpose is office coordination, room/desk booking, and space planning — not attendance control.
2. **User visibility control**: users can choose whether to share work location with coworkers. The signal is organizational, not public.
3. **No continuous tracking**: workplace check-in reacts to configured signals such as Wi-Fi changes or desk peripherals. It is not a GPS movement tracker.
4. **No historical attendance view from check-in**: Microsoft’s workplace check-in documentation explicitly frames it as collaboration support, not monitoring or surveillance.
5. **User consent / OS permission**: Teams needs operating-system location permission for location-based check-in scenarios. Users can opt in/out depending on admin configuration.
6. **Least privilege admin model**: do not hand out Global Admin. Use Places Administrator, Building Administrator, Desk Administrator, and Exchange role assignments as narrowly as possible.
7. **Data minimization**: import only the metadata users need to make decisions — capacity, accessibility, equipment, tags. Do not import sensitive HR attributes into room or desk labels.
8. **Pilot first**: start with one building and a mail-enabled security group. Verify the experience and privacy wording before broad rollout.
9. **Works council / DPO involvement**: in German organizations, involve Betriebsrat and Datenschutzbeauftragte early. Places can be benign, but workplace location always deserves transparency.
A good rollout message is simple:
> “Microsoft Places helps colleagues coordinate office days, rooms, and desks. It is not used for time tracking or attendance monitoring. You control whether your work location is visible to coworkers, and workplace check-in can be changed in Teams privacy settings.”
That wording matters more than another architecture diagram.
## Step 7: add floorplans with IMDF when the directory is stable
Floorplans are optional, but they make Places much more intuitive. Microsoft Places uses **IMDF** packages. Each building gets its own correlated IMDF ZIP, usually containing files such as `building.geojson`, `footprint.geojson`, `level.geojson`, and `unit.geojson`. If you want desks and furniture to appear, include `section.geojson` and `fixture.geojson` too.
The high-level process:
```powershell
Connect-MicrosoftPlaces
$building = Get-PlaceV3 -Type Building | Where-Object DisplayName -eq 'Contoso Campus West'
# Export Places directory entries for correlation.
Get-PlaceV3 -AncestorId $building.PlaceId | Export-Csv .\contoso-campus-west-places.csv -NoTypeInformation
# Generate mapfeatures.csv from the IMDF ZIP.
Import-MapCorrelations -MapFilePath .\contoso-campus-west-imdf.zip
# After manually correlating PlaceId/Name/Type in mapfeatures.csv:
Import-MapCorrelations -MapFilePath .\contoso-campus-west-imdf.zip -CorrelationsFilePath .\mapfeatures.csv
# Upload the correlated package.
New-Map -BuildingId $building.PlaceId -FilePath .\imdf_correlated.zip
```
New maps can take time to appear. Do not troubleshoot the Outlook UI two minutes after upload.
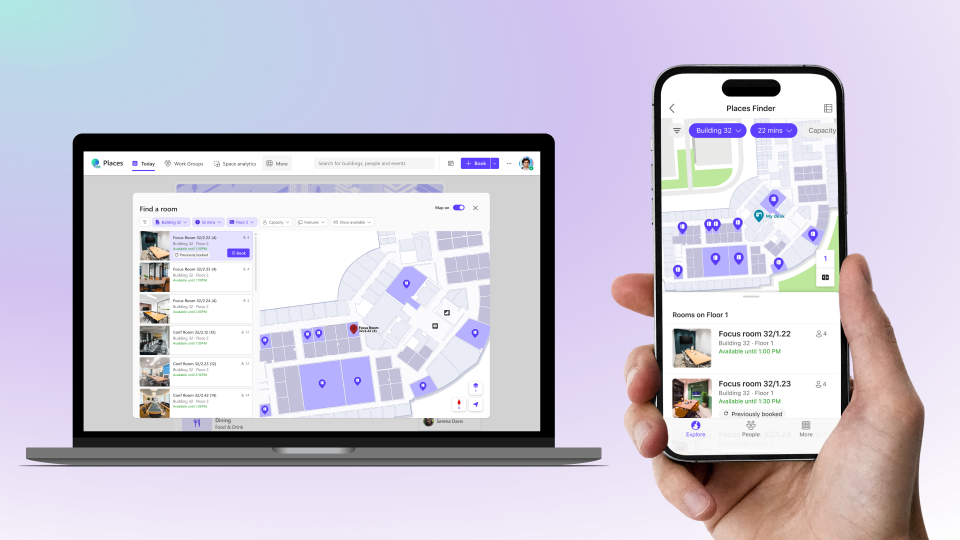
*Screenshot source: Microsoft Learn, “Configure floorplans”.*
*Screenshot source: Microsoft Learn, “Configure floorplans”.*
## Step 8: verify the setup
I use a boring checklist because it catches most mistakes.
```powershell
Connect-MicrosoftPlaces
# Buildings visible in directory
Get-PlaceV3 -Type Building | Format-Table DisplayName, PlaceId, City, CountryOrRegion
# Full tree below the example building
$building = Get-PlaceV3 -Type Building | Where-Object DisplayName -eq 'Contoso Campus West'
Get-PlaceV3 -AncestorId $building.PlaceId |
Sort-Object Type, DisplayName |
Format-Table Type, DisplayName, ParentId, PlaceId
# Rooms/workspaces should have capacity and parent information
Get-PlaceV3 -Type Room | Where-Object DisplayName -like 'CW-*' |
Format-Table DisplayName, Capacity, ParentId, IsWheelChairAccessible
# Desk modes should be intentional
Get-PlaceV3 -Type Desk | Where-Object DisplayName -like 'CW-*' |
Format-Table DisplayName, Mode, ParentId, Mailbox
```
Then test as a pilot user:
1. Open Teams or Outlook calendar.
2. Set work location to the building.
3. Create a meeting and open Places Finder.
4. Filter by capacity, accessibility, and tags.
5. Book one room.
6. Book one individual desk.
7. Try the desk pool.
8. Confirm old Room Finder still sees the building room list where needed.
9. Wait up to 24 hours before declaring room/workspace association broken.
## Common mistakes
**Skipping sections.** Desks and workspaces need sections. Create them even if the building only has one “General” section per floor.
**Using room-level address data after hierarchy setup.** Once rooms/workspaces are parented, manage location at building level. Otherwise your data will look inconsistent across experiences.
**Turning on Places Finder too early.** If the hierarchy is incomplete, users will conclude the product is broken. Pilot with a small mail-enabled group.
**Treating FIS data as clean.** Facilities exports often contain “1”, “01”, “First Floor”, and “Floor 1” for the same floor. Normalize before import.
**Forgetting propagation time.** Some changes are immediate, some take hours, and room/workspace associations can take up to a day.
**Not planning licensing for desks.** A desk can exist in Places but still not behave as expected for booking until licensing is assigned and propagated.
## My rollout plan
For a real tenant I would do it in this order:
1. Pick one representative building.
2. Clean the FIS export and agree naming conventions.
3. Import buildings, floors, sections, rooms, one desk pool, and a handful of individual desks.
4. Keep Room Finder compatibility through building room lists.
5. Enable buildings tenant-wide only after validating naming.
6. Enable Places Finder for a pilot mail-enabled group.
7. Add desk booking and policies.
8. Have Datenschutz/Betriebsrat review the workplace check-in wording.
9. Enable workplace check-in for volunteers.
10. Add IMDF maps once the directory is stable.
11. Roll building by building, not tenant by tenant.
Microsoft Places is one of those products where the UI looks simple because the model underneath is strict. Respect the model, automate the import, and be transparent about privacy. Then it becomes genuinely useful instead of another half-configured Microsoft 365 feature.
## Source links
- Microsoft Places overview: https://learn.microsoft.com/en-us/microsoft-365/places/places-overview
- Configure buildings and floors: https://learn.microsoft.com/en-us/microsoft-365/places/get-started/quick-setup-buildings-floors
- Configure desk booking: https://learn.microsoft.com/en-us/microsoft-365/places/configure-desk-booking
- Enable Places Finder: https://learn.microsoft.com/en-us/microsoft-365/places/enable-places-finder
- Configure floorplans: https://learn.microsoft.com/en-us/microsoft-365/places/configure-maps-in-places
- Configure workplace check-in: https://learn.microsoft.com/en-us/microsoft-365/places/configure-auto-detect-work-location
- Microsoft Places PowerShell: `New-Place`, `Set-PlaceV3`, `Set-PlacesSettings`
### Teufel ROCKSTER AIR 2 Review: Expensive, Loud, and Worth It
URL: https://blog.bajonczak.com/teufel-rockster-air-2-review/
Last updated: 2026-07-07T12:34:06.000Z
*Affiliate disclosure: This article contains affiliate links. If you buy through them, I may earn a small commission at no extra cost to you.*
There are two very different kinds of Bluetooth speakers.
The first kind is the speaker you buy because it is convenient. It sits on a shelf, survives a few afternoons on the terrace, and sounds decent enough while you are cooking, grilling, or cleaning up the garden. The second kind is the speaker you buy because the normal Bluetooth speaker is simply not enough anymore: the garden is too large, the party is too noisy, the music disappears as soon as people start talking, and turning the volume higher only makes the sound thinner and more annoying.
The [**Teufel ROCKSTER AIR 2**](https://amzn.to/4eMLzMq?ref=blog.bajonczak.com) clearly belongs to the second category. This is not a tiny lifestyle speaker with a handle. It is a serious, battery-powered event speaker that feels closer to a compact PA system than to a normal Bluetooth box. It is bigger, heavier, and more expensive than many casual speakers. But after using it outside for garden work, relaxed evenings, and smaller celebrations, that extra cost starts to make sense.
If you want the short version: the [ROCKSTER AIR 2](https://amzn.to/4eMLzMq?ref=blog.bajonczak.com) is expensive, yes — but the sound quality, volume reserves, battery life, and flexibility make it a strong choice if you regularly need powerful outdoor audio without dragging a full PA setup into the garden.
SPONSORED
Teufel ROCKSTER AIR 2
Powerful outdoor speaker for garden parties and small events.
[Shop here ](https://amzn.to/4eMLzMq?ref=blog.bajonczak.com)

*The ROCKSTER AIR 2 in a real garden setup: this is exactly the kind of outdoor use where a normal Bluetooth speaker starts to feel too small.*
## Quick verdict
The [Teufel ROCKSTER AIR 2](https://amzn.to/4eMLzMq?ref=blog.bajonczak.com) is best for people who want more than background music. It is ideal for garden parties, small celebrations, barbecue evenings, hobby events, karaoke-style use, and even normal garden work when you want music that still sounds full while you are moving around.
The biggest reason to buy it is not only loudness. Many cheaper speakers can get loud for a moment. The difference is that the ROCKSTER AIR 2 keeps the sound controlled when the volume rises. Bass stays present, vocals remain understandable, and the whole presentation feels more confident than the average party speaker.
It is not the right product if you want something ultra-portable, waterproof in the rugged outdoor-speaker sense, or cheap. At around 14 kg and with a premium price tag, this is a speaker you buy because you have a use case for it. But if that use case is there, the quality is convincing.
## What makes the ROCKSTER AIR 2 different?
The ROCKSTER AIR 2 is marketed as a mobile active event Bluetooth speaker. That description is accurate. It is built for music, small stages, speeches, parties, and outdoor use where a normal Bluetooth speaker quickly reaches its limits.
According to Teufel, the speaker uses a 2-way bass reflex design with a 250 mm woofer and a 25 mm high-frequency driver. The official specifications list a frequency range of 47 Hz to 22,000 Hz, 80 watts RMS total output, and up to 115 dB peak sound pressure at one meter. In practical terms, this means the speaker has enough low-end body and volume headroom to fill an outdoor area without sounding like it is fighting for survival.
It also supports Bluetooth 5.0 with AAC, aptX, and aptX HD, which is nice if you care about better wireless audio quality from compatible devices. On top of that, it has real inputs: 3.5 mm AUX, 6.3 mm jack, XLR microphone input, XLR input, USB-C, and a guitar input. This makes it far more flexible than a normal party box. You can use it for music, a microphone, an instrument, or a mixed setup.
The battery is another major point. Teufel lists up to 58 hours at medium volume and up to 31 hours at maximum volume in Eco mode. Real-world runtime always depends on volume, bass level, temperature, and what else you connect, but the key point is simple: this is not a speaker where you constantly worry about the battery after one afternoon.
## Real garden use: where it shines
A speaker like this only makes sense if it works outside the spec sheet. In the garden, the ROCKSTER AIR 2 immediately feels different from smaller speakers. You do not need to place it directly next to everyone. You can set it up on the terrace, near a wall, or on a stand, and it still has enough presence to cover the area.
That matters more than people think. With smaller speakers, outdoor music often becomes uneven. It is loud for the people sitting close to the speaker and too quiet for everyone else. If you turn it up, the nearby people get annoyed before the whole garden actually sounds good. The ROCKSTER AIR 2 handles this better because it has the power and projection to spread the sound without needing to be pushed into harsh territory.
For small celebrations, that is exactly what you want. A birthday in the garden, a barbecue with friends, a small family party, or music while people move between terrace and lawn — this speaker has the confidence for it. You can keep it at a comfortable level and still get a full, warm sound. When the evening gets louder, there is still reserve.
For garden work, it is honestly a bit of a luxury, but a nice one. When mowing, cleaning, planting, or doing longer jobs outside, a normal speaker often disappears behind ambient noise. The ROCKSTER AIR 2 has enough body to stay enjoyable even when you are not standing directly in front of it. You do not need to run it at silly volume either; it simply sounds bigger and more effortless.
## Sound quality: powerful without becoming messy
The strongest argument for the ROCKSTER AIR 2 is sound quality at higher volume. A lot of party speakers are tuned to impress for five seconds in a shop: exaggerated bass, bright treble, flashy lights, and a loud first impression. That can be fun, but it often becomes tiring after a while.
The Teufel approach feels more mature. The bass is strong and physical, but it does not completely swallow the rest of the music. Kick drums have weight, electronic tracks feel energetic, and pop music gets the kind of fullness that makes outdoor listening satisfying. At the same time, vocals remain clear enough that the music does not turn into a wall of bass.
This is especially important at small parties. People talk, children run around, glasses clink, chairs move, and the garden is not an acoustically perfect room. A speaker needs to cut through that without becoming sharp. The ROCKSTER AIR 2 does a good job here. It has enough clarity for voices and enough bass for energy.
At louder levels, the speaker still feels composed. That is where the higher price becomes easier to understand. Cheaper speakers can sound exciting at medium volume, but when pushed harder they often compress, distort, or lose detail. The ROCKSTER AIR 2 gives you more room before that happens. You are paying for headroom, not only for maximum volume.
## Loudness and coverage
Teufel states 103 dB RMS at one meter and 115 dB peak at one meter. Numbers like that are always measured under specific conditions, so I would not treat them as a direct promise for every garden or party situation. But they do communicate the class of the product: this is not a casual living-room speaker.
In practice, the volume reserve is one of the biggest strengths. You can use the ROCKSTER AIR 2 at moderate volume and still get a full sound. That is better than buying a weaker speaker and running it close to its limit all the time. Audio gear usually sounds better when it has reserve.
For a small garden party, one unit is already plenty in many cases. Teufel also says two ROCKSTER AIR 2 speakers can be connected wirelessly as a stereo setup, and up to ten can be connected via XLR cable in a DJ setup. Most home users will not need that, but it shows the intended direction: this speaker can grow beyond a single casual use case.
## Battery life and daily practicality
The long battery life is a big advantage. Officially, Teufel lists up to 58 hours at medium volume. Even if your real use is lower because you play louder, that still gives the ROCKSTER AIR 2 a practical edge. You can use it for an afternoon, leave it ready for the next day, and not feel like charging is part of every session.
The battery type is also worth mentioning: Teufel lists a lithium iron phosphate battery with 7,800 mAh capacity. LiFePO4 batteries are generally known for stability and cycle life, which fits a product that should last for years rather than one summer.
Another useful detail is the USB-C power bank function. It is not the headline feature, but at a party or in the garden it can be helpful. If a phone is running the playlist and the battery gets low, the speaker can help keep things going.

*The rear panel and patio setup show why this is closer to a compact event speaker than a simple Bluetooth box.*
## Inputs: more useful than they look at first

One reason the ROCKSTER AIR 2 feels more serious than many Bluetooth speakers is the input section. Bluetooth is the obvious daily use case, but the extra ports matter.
The microphone input makes sense for announcements, karaoke, small events, or family celebrations where someone wants to say a few words. The instrument input is useful if you play guitar or want a simple outdoor jam setup. AUX is still handy for older devices or situations where Bluetooth is not ideal. XLR support also makes the speaker more flexible if you ever want to connect it into a more classic event setup.
This is the difference between a party gadget and a practical event speaker. You may not use every input every week, but having them means the speaker can solve more problems over time.
## Build, size, and handling
The ROCKSTER AIR 2 is not small. Official dimensions are 32.3 cm wide, 58.9 cm high, and 34.4 cm deep, with a weight of 14.15 kg. That is portable, but not “throw it in any backpack” portable. You move it intentionally.
For me, that weight is acceptable because the sound output matches it. The speaker feels like a real piece of equipment, not a plastic toy pretending to be a PA. The design is bold, especially with the large front grille and the red Teufel logo. It looks at home in a garden or party setting.
A 35 mm stand flange is included, which is very useful. Placing a speaker higher often improves coverage, especially outside. On the ground, bass can feel bigger, but sound may not spread as evenly. On a stand, music and speech can reach people better. If you plan to use it regularly for parties, a stand is not just a nice extra; it can make the whole setup better.
## What I like most
The best thing about the ROCKSTER AIR 2 is that it does not feel stressed. Whether it is background music while working outside or louder music for guests, it has enough reserve to stay enjoyable.
I also like that it sounds good with normal music. Some large party speakers are impressive with electronic bass tracks but become less pleasant with rock, acoustic music, podcasts, or vocals. The ROCKSTER AIR 2 is more balanced. It still has party energy, but it does not feel limited to one genre.
The long runtime is another major plus. Outdoor speakers should be simple. If you constantly need to think about charging, adapters, or whether the speaker will survive the evening, the fun disappears. Here the battery life gives confidence.
## What could be better?
The first downside is obvious: the price. This is not an impulse purchase. If you only need soft music on a balcony twice a month, the ROCKSTER AIR 2 is overkill. A smaller speaker will be cheaper, easier to carry, and probably enough.
The second downside is size and weight. 14 kg is fine for moving from the house to the garden, but it is not something everyone wants to carry often. If you want a speaker for hiking, beach trips, or quick travel, this is not the right category.
The third point is weather protection. Teufel’s own customer review summary mentions that some customers criticize the lack of splash-water protection. For me, that means I would treat it as outdoor-capable, not outdoor-careless. It belongs on the terrace, in the garden, or at an event — but I would not leave it standing in heavy rain.
## Comparison: ROCKSTER AIR 2 vs cheaper party speakers
Cheaper party speakers can be fun, and some of them offer lights, wheels, app effects, and huge marketing numbers. The queostion is whether they still sound good when you actually use them outdoors.
The ROCKSTER AIR 2 wins on confidence. It is less about gimmicks and more about strong sound, useful inputs, and long runtime. If your main goal is the lowest possible price, it will not win. If your goal is quality and a speaker that can handle real garden use without sounding thin, it makes much more sense.
Compared with compact Bluetooth speakers, the difference is even clearer. A small speaker is easier to carry, but it cannot create the same body and coverage. Outdoor sound needs air movement. The 250 mm woofer helps the ROCKSTER AIR 2 deliver bass that feels real instead of simulated.
Compared with a full PA system, the ROCKSTER AIR 2 is simpler. You do not need separate speakers, an amp, a mixer, cables everywhere, and a power source. For many small events, that simplicity is worth a lot.
## Who should buy it?
Buy the ROCKSTER AIR 2 if you regularly use music outside, host small parties, want strong sound for a garden or terrace, or need a flexible speaker for music plus microphone or instrument input. It is also a good fit if you are tired of Bluetooth speakers that sound fine indoors but weak outside.
It is especially attractive if quality matters more to you than the cheapest price. Yes, it costs more than many alternatives. But the extra money goes into the things you actually notice: cleaner loud playback, deeper bass, longer runtime, and a more serious set of inputs.
Skip it if you only need light background music, if you need something very compact, or if you want a rugged waterproof speaker for rough weather. In those cases, a smaller and cheaper model is probably the smarter buy.
## Best use cases
The ROCKSTER AIR 2 makes the most sense in these situations:
| Use case | Why it works |
| -------------------- | --------------------------------------------------------- |
| Small garden parties | Strong volume reserve and full outdoor sound |
| BBQ evenings | Music stays present without sounding harsh |
| Garden work | More enjoyable sound while moving around outside |
| Family celebrations | Microphone input is useful for announcements or karaoke |
| Small hobby events | Flexible inputs and long battery life reduce setup stress |
| Terrace listening | Big, warm sound without needing a full PA system |
## Buying advice
If you are comparing the ROCKSTER AIR 2 with cheaper speakers, ask yourself one question: do you only need music, or do you need music that still feels good outside when people are talking and moving around?
If it is only background sound, save the money. If you want a speaker that can become the center of a small party, the ROCKSTER AIR 2 is in a different league from normal Bluetooth boxes.
My advice would be to buy it if you already know you will use it regularly. The value is not in owning the loudest possible speaker. The value is in having reliable, powerful, high-quality sound whenever the garden, party, or event needs more than a small speaker can deliver.
**Check the current price here:** [Teufel ROCKSTER AIR 2 on Amazon](https://amzn.to/4eMLzMq?ref=blog.bajonczak.com)
## Final verdict
The Teufel ROCKSTER AIR 2 is not cheap, and it is not meant to be. It is a premium portable event speaker for people who actually need outdoor sound with authority.
For small parties, garden gatherings, barbecue evenings, and even normal garden work, it delivers exactly what smaller speakers often lack: body, clarity, volume reserve, and endurance. The sound remains enjoyable at louder levels, the bass has real presence, and the battery life is strong enough that you can focus on the evening instead of the charging cable.
The drawbacks are real: price, size, weight, and the need to treat weather protection sensibly. But none of those feel surprising for this class of speaker. If anything, they define the category.
So, is the ROCKSTER AIR 2 worth it? If you only want a small speaker for casual background music, no. But if you want a high-quality portable speaker that can handle a garden party, a small event, or loud outdoor listening without losing control, then yes — the Teufel ROCKSTER AIR 2 is absolutely worth considering.
It costs more, but the quality is the reason it makes sense.
### AI FinOps on Azure: How to Measure and Optimize the Cost of Models, Tokens, and Agents
URL: https://blog.bajonczak.com/ai-finops-on-azure/
Last updated: 2026-07-21T11:24:49.000Z
*Token cost is only one part of the bill. For AI workloads on Azure, I care more about the cost of a completed task: one useful summary, one finished agent run, one resolved support case, one workflow that did not need a human to repair it afterwards.*
The repository for this article is here: [github.com/SBajonczak/finops](https://github.com/SBajonczak/finops?ref=blog.bajonczak.com)
## Why normal cloud cost views are not enough
Traditional Azure cost management is good at answering a familiar question:
> Which subscription, resource group, or service generated the cost?
That is still useful. But it is not enough for generative AI systems.
One user action can trigger much more than one model call. A simple "summarize this case" button might do all of this in the background:
- build the prompt
- run retrieval against Azure AI Search or a database
- create or reuse embeddings
- call one or more models
- call tools or internal APIs
- retry after rate limits or bad intermediate results
- run content safety checks
- write traces and audit events
- store logs in Application Insights or Log Analytics
The invoice may show Azure OpenAI, Azure AI Search, Container Apps, API Management, Storage and Log Analytics. The product owner usually wants a different answer:
> Did the task complete, did it save time, and what did one useful outcome cost?
That is the reason I do not like looking only at cost per token. It is easy to measure, but it can push you into the wrong optimization.
A cheaper model is not cheaper if it fails more often. A shorter prompt is not cheaper if it removes the context the model needed. Less logging is not cheaper if nobody can explain why an agent loop burned through the budget overnight.
For AI FinOps, the metric I would put near the top is:
> cost per successfully completed business task
Not cost per token. Not cost per request. Those are useful signals, but they are not the business result.
## What AI FinOps has to answer
For Azure AI workloads, finance data and application behavior do not line up automatically.
Azure Cost Management can tell you what a resource costs. Azure Monitor can show technical usage. The application has to add the missing business context.
At minimum, I want to be able to answer:
- Which application or product created the request?
- Which use case was it?
- Which tenant, cost center, or internal team owns it?
- Which model deployment was used?
- Which agent ran, and how many steps did it take?
- How many retries happened?
- Did the task actually complete?
- Was the result good enough to avoid manual rework?
This is why cost allocation cannot be only a finance report at the end of the month. It has to be part of the application architecture.
If three products share one Azure OpenAI resource, Azure tags on that resource will not tell you which product burned the tokens. The application needs request-level metadata.
## Where the money goes
The model is often only part of the workload cost.
For a retrieval augmented generation setup, you pay before the chat model is even called: storage, indexing, chunking, embeddings, refresh jobs and search queries.
For an agent setup, you may pay after the first answer: planning, tool calls, retries, validation, tracing and follow-up model calls.
And then there is observability. Application Insights and Log Analytics are extremely useful, but ingestion and retention are not free. If you trace everything with full payloads, your monitoring bill can become part of the AI cost problem.
So I split the cost picture into three views.
### 1\. List price
List price is the public price for a model or Azure service. It is useful for estimates and architecture discussions.
It is not your invoice.
Prices depend on model version, region, deployment type, input tokens, output tokens, cached tokens, provisioned throughput, serverless options, date, discounts and commercial agreements.
I would not hard-code model prices into business logic. Use official pricing pages for documentation, or retrieve pricing dynamically if you need automation.
### 2\. Technical usage
Technical usage is what the system actually did:
- input tokens
- output tokens
- total tokens
- model requests
- latency
- errors
- retries
- tool calls
- cache hits
- agent steps
Azure Monitor exposes many useful metrics, but metric names and availability vary by resource. A collector should not assume every Azure AI resource exposes exactly `InputTokens`, `OutputTokens`, or `ModelRequests`.
Query what is available and handle missing metrics gracefully.
### 3\. Financial cost
Financial cost comes from Azure Cost Management, cost exports, invoices, actual cost and amortized cost.
This data can lag behind technical telemetry. It can also differ because of rounding, credits, reservations, negotiated pricing, billing windows and shared resources.
In reports, I like to keep the labels honest:
- list price: published price
- estimated cost: modeled projection
- observed usage: tokens, requests, retries, steps
- amortized Azure cost: normalized cost view for commitments
- actual invoiced cost: what billing finally reports
Mixing these up creates arguments nobody enjoys.
## Reference architecture
For the reference implementation, I used a simple pattern:
```mermaid
flowchart LR
User[User or Application] --> Gateway[Azure API Management]
Gateway --> AI[Azure OpenAI or Microsoft Foundry]
AI --> Agent[AI Agent]
Agent --> Tools[Tools and APIs]
Agent --> Search[Azure AI Search]
Search --> Data[Storage and Databases]
Gateway --> AppInsights[Application Insights]
AI --> Monitor[Azure Monitor]
Agent --> AppInsights
CostManagement[Azure Cost Management] --> Collector[AI FinOps Collector]
Monitor --> Collector
AppInsights --> Collector
Collector --> Dashboard[Grafana, Power BI or Azure Workbook]
Collector --> Alerts[Budgets and Alerts]
```
The gateway is useful because it gives you a central place for authentication, quotas, header normalization and logging.
The model endpoint handles inference. Agents coordinate model calls, retrieval and tools. Application Insights captures traces, exceptions, dependency calls and custom events. Azure Monitor provides platform metrics. Azure Cost Management provides the financial view.
The collector joins these signals into snapshots and Prometheus metrics so dashboards can show something meaningful.
## The operating model I would use
I would not start with a giant AI FinOps program. Start with one workload, then make the model repeatable.
### Discover
Find the AI workloads first.
For each workload, document:
- owner
- application or product
- environment
- model deployment
- Azure resources
- cost center
- business use case
- agent tools
- shared infrastructure
Shared resources matter. One Azure OpenAI account, AI Search service or Log Analytics workspace may support several applications.
### Measure
Collect both sides: money and behavior.
Financial data:
- actual cost
- amortized cost
- forecast
- budgets
- cost exports
Technical data:
- input and output tokens
- requests
- retries
- agent steps
- tool calls
- latency
- error rate
- successful outcomes
In the reference API, I expose endpoints like:
```text
/api/costs
/api/token-usage
/api/snapshot
/metrics
```
### Allocate
Allocate cost by useful dimensions, not only by resource group.
For AI systems, I usually want:
```text
application
product
team
environment
tenant
useCase
costCenter
agentName
modelDeployment
success
```
Start with showback if the organization does not yet trust the numbers. Show teams what they consume. Move to chargeback only when ownership and metadata quality are good enough.
### Control
Controls should exist at several layers:
- budgets and forecast alerts
- anomaly alerts
- rate limits
- maximum input and output tokens
- context size limits
- agent step limits
- retry limits
- concurrency limits
- model allowlists
- deployment policies
One important Azure detail: budgets can notify and trigger actions. They do not automatically stop spending by themselves.
If you need a hard stop, implement it in the gateway, application, policy or automation layer.
### Optimize
The order matters.
I would optimize like this:
1. Remove unnecessary requests.
2. Stop agent loops.
3. Reduce retries.
4. Reduce irrelevant context.
5. Limit output length where it makes sense.
6. Route simple tasks to cheaper models.
7. Cache repeatable work.
8. Improve retrieval quality.
9. Use batch processing where it fits.
10. Compare pay as you go with provisioned throughput.
11. Tune observability retention and sampling.
A 20 percent cheaper model does not help if the agent calls it five times more often.
### Repeat
AI workloads change quickly. New models, new agents and new retrieval pipelines can change cost behavior overnight.
So AI FinOps should become a regular review, not a one-time dashboard.
## Required KPIs
Here is the simple example I use when explaining the topic:
```text
1,000 agent runs
total cost: €120
successful tasks: 600
cost per agent run: €0.12
cost per successful task: €0.20
```
Now change the model routing. The average run cost drops to €0.09, but successful tasks drop to 300.
```text
1,000 agent runs
total cost: €90
successful tasks: 300
cost per agent run: €0.09
cost per successful task: €0.30
```
The dashboard looks cheaper per run. The business result is worse.
That is the trap.
## Tags and request metadata
Use Azure resource tags for the high level ownership view:
```text
owner
costCenter
environment
application
product
useCase
workloadType
dataClassification
```
For AI workloads, I would set:
```text
workloadType=ai
```
But tags are not enough when several applications share one Azure OpenAI or Microsoft Foundry resource.
Add request-level metadata as well:
```text
applicationId
tenantId
costCenter
useCase
agentName
modelDeployment
correlationId
environment
success
```
Do not log raw personal data, full prompts or confidential documents just to allocate cost. Use pseudonymous identifiers where possible. Keep Prometheus labels low cardinality and non-personal.
## Implementation notes from the reference repo
The reference collector is a FastAPI app written for Python 3.12\. Locally it can use Azure CLI authentication. In Azure it should use Managed Identity through `DefaultAzureCredential`.
### Authentication
```python
from azure.identity import DefaultAzureCredential
from azure.mgmt.costmanagement import CostManagementClient
from azure.monitor.query import MetricsQueryClient
credential = DefaultAzureCredential()
cost_client = CostManagementClient(credential)
metrics_client = MetricsQueryClient(credential)
```
### Querying Azure Cost Management
The collector uses the Azure Cost Management Query API through the official SDK. It requests `ActualCost` for a custom period and can group by dimensions such as `ServiceName`.
```python
def query_actual_cost(self, *, scope: str, start: datetime, end: datetime, group_by: str | None):
grouping = [QueryGrouping(type="Dimension", name=group_by)] if group_by else None
definition = QueryDefinition(
type="ActualCost",
timeframe="Custom",
time_period=QueryTimePeriod(from_property=start, to=end),
dataset=QueryDataset(
granularity="None",
aggregation={"totalCost": QueryAggregation(name="PreTaxCost", function="Sum")},
grouping=grouping,
),
)
return self.client.query.usage(scope=scope, parameters=definition)
```
The implementation should not invent cost data. If the API is unavailable or the identity lacks permissions, return a clear error.
### Querying Azure Monitor
Metric names are configurable:
```text
FINOPS_METRIC_NAMES=InputTokens,OutputTokens,GeneratedTokens,ProcessedPromptTokens,TotalTokens,ModelRequests
```
The collector queries metrics independently so one missing optional metric does not break the entire snapshot.
```python
for metric_name in metric_names:
result = self.client.query_resource(
resource_id,
metric_names=[metric_name],
timespan=(start, end),
granularity=interval,
aggregations=[MetricAggregationType.TOTAL],
)
```
To inspect available metrics for a resource:
```bash
az monitor metrics list-definitions --resource "" --output table
```
### Cost per successful task
```python
def calculate_business_task_cost(stats: BusinessTaskStats) -> BusinessTaskCost:
per_run = stats.total_cost / stats.agent_runs if stats.agent_runs > 0 else None
per_success = stats.total_cost / stats.successful_tasks if stats.successful_tasks > 0 else None
return BusinessTaskCost(cost_per_agent_run=per_run, cost_per_successful_task=per_success)
```
### Prometheus metrics
The `/metrics` endpoint exposes metrics like:
```text
azure_ai_finops_actual_cost
azure_ai_finops_input_tokens_total
azure_ai_finops_output_tokens_total
azure_ai_finops_model_requests_total
azure_ai_finops_cost_per_request
azure_ai_finops_cost_per_successful_task
```
For labels, use hashes for scopes and resources where needed. Avoid personal identifiers.
### Budget deployment with Bicep
```bicep
resource budget 'Microsoft.Consumption/budgets@2024-08-01' = {
name: budgetName
properties: {
category: 'Cost'
amount: amount
timeGrain: 'Monthly'
timePeriod: {
startDate: startDate
}
notifications: {
threshold80: {
enabled: true
operator: 'GreaterThanOrEqualTo'
threshold: 80
thresholdType: 'Actual'
contactEmails: [
contactEmail
]
}
}
}
}
```
Again: budgets notify or trigger actions. They are not hard spending limits.
## Security and privacy
Use Managed Identity in Azure. Use `DefaultAzureCredential` locally. Do not build the normal deployment path around client secrets.
Assign the smallest permissions that work. Monitoring Reader for metrics and Cost Management Reader for cost data are usually the kind of roles to start with. Keep deployment permissions separate from runtime permissions.
For allocation, do not store raw prompts, confidential documents or full model responses. Store the metadata needed to understand cost and reliability:
- correlation ID
- application ID
- cost center
- use case
- model deployment
- success flag
- retry count
- latency
If user or tenant grouping is required, pseudonymize identifiers and keep them out of Prometheus labels.
## My take
AI FinOps on Azure is not a token dashboard.
It is the connection between financial cost, technical telemetry, ownership and business outcome. If that connection is missing, teams will optimize whatever is easiest to measure. Usually tokens. Sometimes requests. Rarely the actual result.
I would start with inventory and tags, then add request-level metadata. Query Azure Cost Management for the money view. Query Azure Monitor and application telemetry for usage and behavior. Track retries, agent steps, tool failures, cache hit rate, latency and success.
Then optimize the workflow before optimizing the model price.
Because if you only measure cost per token, you will eventually make a cheap system that fails expensively.
## References
- Microsoft Learn: Azure Cost Management Query Usage REST API, 2025-03-01: [https://learn.microsoft.com/en-us/rest/api/cost-management/query/usage?view=rest-cost-management-2025-03-01](https://learn.microsoft.com/en-us/rest/api/cost-management/query/usage?view=rest-cost-management-2025-03-01&ref=blog.bajonczak.com)
- Microsoft Learn: Create and manage budgets in Microsoft Cost Management: [https://learn.microsoft.com/en-us/azure/cost-management-billing/costs/tutorial-acm-create-budgets](https://learn.microsoft.com/en-us/azure/cost-management-billing/costs/tutorial-acm-create-budgets?ref=blog.bajonczak.com)
- Microsoft Learn: Microsoft.Consumption/budgets Bicep reference: [https://learn.microsoft.com/en-us/azure/templates/microsoft.consumption/budgets](https://learn.microsoft.com/en-us/azure/templates/microsoft.consumption/budgets?ref=blog.bajonczak.com)
### Why I built a Microsoft 365 connector for SAP SuccessFactors
URL: https://blog.bajonczak.com/why-i-built-a-microsoft-365-connector-for-sap-successfactors/
Last updated: 2026-06-16T10:18:55.000Z
There is a moment in almost every Microsoft 365 project where the conversation changes.
At first, everybody talks about agents, Power Apps, copilots, automation, approvals, self service, HR scenarios, service processes. The room is full of ideas. Then somebody asks the practical question: "Can we actually use the data from our core system?"
> Spoiler Alert: [https://sap-connectors.bajonczak.com/](https://sap-connectors.bajonczak.com/?ref=blog.bajonczak.com)
And very often, that is where the energy drops.
Not because the idea was bad. Not because Microsoft 365, Power Platform, or agents are weak. The problem is simpler: the business wants to work in the tools it already understands, but the data sits somewhere else. In many companies, especially in HR, that somewhere else is SAP SuccessFactors.
I built my connector because I kept seeing that gap.
## The gap between ideas and usable data
Business departments do not wake up in the morning thinking about APIs, Swagger files, OAuth settings, or certification rules. They think about people, processes, exceptions, approvals, reports, and the small daily tasks that slow everything down.
A HR team might want to ask an agent for employee information. A manager might want a simple Power App that supports onboarding. A service team might want to trigger a workflow when a change happens in SuccessFactors. None of those people should need to become integration developers first.
That is the point of connectors in the Power Platform.
Microsoft describes custom connectors as wrappers around REST or SOAP APIs. They make external services available inside Azure Logic Apps, Power Automate, Power Apps, and Copilot Studio. Once the connector exists, makers can use actions and triggers without dealing with the raw API every time.
That sounds technical, but the business meaning is much bigger: a connector turns a system into something people can actually build with.
## How a connector becomes real
The Power Platform connector process is surprisingly structured. Microsoft does not just ask for a nice name and an endpoint.
A connector needs a clear OpenAPI 2.0 definition. That definition describes the operations, inputs, outputs, and data structures the platform can expose to makers. It also needs an API properties file, where connection parameters, authentication, colors, capabilities, and policies live. And it needs a README that explains what the connector does, how to use it, how to get credentials, what operations exist, and what limitations users should know about.
For a public connector, the work also goes through GitHub. Microsoft's PowerPlatformConnectors repository is the place where connector definitions are submitted. Independent Publisher connectors live in their own folder, are submitted by people or companies that do not own the underlying service, and become available as premium connectors in the Power Platform after review. A pull request must include the connector files, tested operations, screenshots from successful flows, the right labels, and enough documentation for Microsoft and the community to understand what is being submitted.
There is also validation. The repository checks the Swagger definition, looks for connector rule violations, and watches for breaking changes. That matters. A connector is not a demo artifact. Once people start building apps, flows, and agents on top of it, every change has consequences.
I like that discipline. It forces you to think about the connector as a product, not as a one-time integration trick.
## Why SAP SuccessFactors needed this
SAP SuccessFactors is central in many HR landscapes. Microsoft 365 is central in many daily work landscapes. Power Platform sits exactly where business teams want to turn process knowledge into usable apps, workflows, and agents.
But the connection between those worlds was not where I wanted it to be.
There are many generic ways to integrate systems. You can build APIs. You can use middleware. You can write custom code. You can route everything through an integration platform. Those approaches are valid, and in some enterprise scenarios they are the right answer.
But they do not solve the maker problem.
A business department does not want to wait for a full integration project every time it wants to test a new process idea. A Power Apps maker should not have to understand every technical detail of the SuccessFactors API before building a simple experience. A Microsoft 365 agent should not need a custom backend for every first experiment.
So I built the missing layer: a Microsoft 365 premium connector for SAP SuccessFactors.
The goal is not to replace enterprise integration architecture. The goal is to make SuccessFactors accessible where modern work happens: inside Power Apps, Power Automate, and Microsoft 365 agents.
## From technical access to business enablement
The important part is not the connector file itself. The important part is what it unlocks.
When a connector is available in the Power Platform gallery, a department can start building. They can create a Power App for a focused HR process. They can automate a request flow. They can give an agent controlled access to selected SuccessFactors capabilities. They can prototype faster and learn faster.
That changes the role of IT too.
Instead of being the team that has to build every screen, every workflow, and every small integration by hand, IT can define the boundary. Which actions are exposed? Which data is safe? Which scenarios are supported? Which governance rules apply? The business gets room to move, and IT keeps the architecture from turning into chaos.
That is where I see the real value.
Connectors are not just technical plumbing. Done properly, they are governance tools. They define the safe lane where business users can build without bypassing the systems that matter.
## Why I am making it available
I could have kept this as a private connector for one scenario. That would have been easier.
But the gap is bigger than one customer, one department, or one project. Many companies are trying to bring Microsoft 365 agents, Power Platform, and SAP based HR processes closer together. The demand is already there. What is missing is a reusable bridge that people can start from.
That is why the connector will be available for a limited time in the Power Platform gallery and also through:
https://sap-connectors.bajonczak.com
This is the first step in a larger direction. I am going to keep expanding this topic, because I believe the next wave of enterprise productivity will not be won by isolated AI demos. It will be won by people who understand both sides: the business systems where the data lives and the Microsoft 365 tools where work actually happens.
That is the space I am building in.
## Taking a position
I do not want to be another person talking abstractly about agents.
Agents only become useful when they can act on the right business context. Power Apps only become valuable when they reduce friction for real users. Power Automate only matters when it connects the systems behind the process.
That is why connectors matter so much.
With this SAP SuccessFactors connector, I am closing a specific gap: making HR data and actions easier to use inside Microsoft 365 and the Power Platform. More importantly, I am setting a direction for how I want to work from here: practical, reusable connectors that help departments move faster without losing control.
My focus is clear now.
I want to become the person companies think of when they need Microsoft 365, Power Platform, agents, and SAP business systems to work together in a way the business can actually use.
Not as a slide. Not as a proof of concept that dies after a workshop.
As something people can build on.
### Why an ultrawide monitor changed my laptop workflow
URL: https://blog.bajonczak.com/why-an-ultrawide-monitor-changed-my-laptop-workflow/
Last updated: 2026-06-12T07:49:04.000Z
I used to work mostly from a laptop screen. That is fine for a quick mail, a meeting link, or checking something while sitting on the couch. But for real work, especially when I have to switch between my own device and customer laptops, the small screen becomes the bottleneck very quickly.
My current setup is simple: a 34-inch ultrawide monitor, mounted on a monitor arm, with a Logitech MX keyboard and an MX Master mouse. Nothing exotic. No giant gaming cockpit. Just enough screen space and just enough switching comfort to stop fighting the setup.

This is the actual desk setup I am talking about: the laptop stays usable, but the ultrawide monitor becomes the main workspace. It is not a showroom desk, and that is the point. Real work happens between customer devices, cables, notes, coffee, and the tools you use every day.
Transparency note: this article contains Amazon affiliate links. If you buy through them, I may earn a commission at no extra cost to you.
## The problem with laptop-only work
A laptop screen is portable, but it is cramped. The moment you need more than one window, you start playing window Tetris.
For me that usually means:
- a customer system or remote desktop
- documentation or tickets
- Teams, Slack, mail, or a browser tab with research
- notes for what I am actually doing
On a small laptop display, one of those things is always hidden. You switch windows, lose context, switch back, resize something, and then do the same dance again five minutes later.
That friction sounds small, but it adds up. It is not only about comfort. It changes how you work. If documentation is always buried behind another window, you read it less. If notes are annoying to reach, you take fewer notes. If the meeting window covers your actual work, you constantly compromise.
## Why ultrawide works better than two random screens
A second monitor already helps. But an ultrawide monitor feels different because you get one continuous workspace.
With a 21:9 screen I can place my main work window in the center and keep supporting windows on the sides. No bezel in the middle. No weird gap between screens. No "which monitor did that window open on?" moment.
My monitor is the [LG Electronics 34WP500-B UltraWide Monitor](https://amzn.to/3Q9C00B?ref=blog.bajonczak.com). It is a 34-inch 21:9 display, and for office and IT work that format hits a sweet spot. Wide enough to replace a dual-screen setup for many tasks, but still clean enough on the desk.
A typical day looks like this:
- left side: ticket, chat, or documentation
- center: customer environment, IDE, browser, or admin console
- right side: notes, mail, or a second reference window
That layout sounds boring. That is exactly why it works.
## The underrated part: connecting two laptops
One big advantage of this setup is that I can connect two laptops to the monitor. I often work with dedicated customer laptops, and I do not want to rebuild my whole desk every time I switch context.
The LG 34WP500-B has two HDMI inputs, so I can keep two devices connected and switch the monitor input when needed. This is not the same as a full KVM switch. The monitor does not magically move every USB device between laptops. But combined with the MX keyboard and mouse, it gets very close to the workflow I want.
For me, that is the practical win:
- customer laptop connected to one HDMI input
- private or work laptop connected to the other HDMI input
- same large screen
- same desk position
- same keyboard and mouse family
I can move between machines without turning the desk into a cable mess.
## The MX keyboard and mouse make the setup feel complete
The screen is only half the story. If the monitor can switch between laptops but your keyboard and mouse are still tied to one machine, the experience gets annoying.
That is where the [Logitech MX Keys S keyboard](https://amzn.to/4uwu47O?ref=blog.bajonczak.com) and the [Logitech MX Master 3S mouse](https://amzn.to/4ehLKh7?ref=blog.bajonczak.com) fit nicely. Both are built for multi-device work. You can pair them with multiple computers and switch between them instead of unplugging things all the time.
I already wrote a separate review of the MX Master 3S here: [Review: Logitech MX Master 3S](https://blog.bajonczak.com/review-logitech-mx-master-3s/).
The short version: the MX Master is one of those tools that does not feel exciting in a spec sheet, but you notice it every day. The scroll wheel, the ergonomics, and the device switching make it a very good companion for a multi-laptop desk.
The MX Keys S has the same kind of appeal. Quiet typing, solid layout, and device buttons that are actually useful if you move between machines.
## The monitor arm matters more than expected
I mounted the monitor on an [ARCTIC Z1 Pro monitor arm](https://amzn.to/3QaMP2v?ref=blog.bajonczak.com). This is one of those upgrades that looks optional until you have it.
A monitor arm gives you three things:
- better height adjustment
- more desk space
- cleaner cable routing
With an ultrawide screen, position matters. If the monitor is too low, you bend your neck. If it is too far away, text becomes uncomfortable. If it sits on a bulky stand, it steals a lot of desk space.
A good arm lets the screen float where it belongs. The desk feels less crowded, and the whole setup looks calmer.
## What this setup is good at
This setup is a good fit if you regularly work with several windows and more than one computer.
It is especially useful for IT work, consulting, customer support, development, admin tasks, documentation, and meetings where you need to look at the actual system while keeping notes or chat visible.
It also works well if you do not want two separate monitors. I know some people love dual-screen setups. I get it. But for me, one large clean canvas feels better than two separate panels.
## What to watch out for before buying
There are a few things I would check before copying this setup.
First, think about resolution. A 34-inch ultrawide gives you a lot of horizontal space, but you should check whether the resolution matches your expectations for text sharpness. For office work it can be perfectly fine, but people who are very sensitive about pixel density may prefer a higher resolution model.
Second, check your laptop ports. If your laptop only has USB-C and the monitor uses HDMI, you may need an adapter or dock.
Third, be realistic about switching. Two HDMI inputs are useful, but they are not a full KVM solution. If you want one button to switch monitor, keyboard, mouse, webcam, headset, and USB devices together, look into a proper KVM switch or docking setup.
For my workflow, the monitor input switch plus Logitech multi-device switching is enough. It keeps the setup simple.
## Best practice for the teaser image
For a blog teaser image, I would not use a generic product collage. It looks like an ad and usually gets ignored. The better option for this article is the real desk photo, cleaned up as a 16:9 hero image with a short readable headline.
A better clickable image should do four things:
- show the actual idea in one second: laptop desk, ultrawide screen, switching between devices
- use a real setup instead of a fake product collage, because it immediately feels more personal
- use very little text, large enough to read on mobile
- keep strong contrast between the headline and the background
The teaser image for this post follows that idea: the actual workspace photo, a dark overlay, and one short message. No tiny product specs. No overloaded Amazon-style graphic. The point is not to explain everything in the image. The point is to make someone click.
## My take
A widescreen monitor will not make bad work good. But it removes a very specific kind of daily friction.
For me, the best part is not only the size. It is the combination: ultrawide monitor, two connected laptops, monitor arm, MX keyboard, and MX Master mouse. That turns a small laptop workflow into a proper desk setup without making it complicated.
If you often work with customer laptops or jump between machines, this is one of the cleaner upgrades you can make.
## Products mentioned
- [LG Electronics 34WP500-B UltraWide Monitor](https://amzn.to/3Q9C00B?ref=blog.bajonczak.com)
- [ARCTIC Z1 Pro monitor arm](https://amzn.to/3QaMP2v?ref=blog.bajonczak.com)
- [Logitech MX Keys S keyboard](https://amzn.to/4uwu47O?ref=blog.bajonczak.com)
- [Logitech MX Master 3S mouse](https://amzn.to/4ehLKh7?ref=blog.bajonczak.com)
- [My MX Master 3S review](https://blog.bajonczak.com/review-logitech-mx-master-3s/)
### Claude Fable 5: What Changed, When to Use It, and How It Compares to Opus 4.8
URL: https://blog.bajonczak.com/claude-fable-5-vs-opus-4-8/
Last updated: 2026-07-21T11:39:17.000Z
*My practical read on Claude Fable 5: not a new default model for everything, but a premium escalation tier for the work where Opus is no longer enough.*
Anthropic positions Claude Fable 5 as its most capable generally available Claude model. That sounds like a normal model announcement, but the important question is more boring and more useful:
> When would I actually pay for it?
For many teams, Opus has been the top-tier default when Sonnet was not enough. Fable 5 changes that slightly. It gives Anthropic a more expensive tier above Opus for the tasks where reasoning quality, long context, and agent reliability matter more than token price.
That does not mean I would route everything to Fable.
The better pattern is probably:
- Sonnet for normal production workloads
- Opus for harder reasoning and coding tasks
- Fable for the few tasks where the premium is visible in the result
That last part matters. If the output is not better, the model is just more expensive.
> Note: this article is based on Anthropic's public documentation as of June 2026\. Pricing and availability can change, so treat the numbers as a snapshot.
## The short version
Fable 5 is interesting for three reasons.
First, Anthropic positions it above Opus for demanding reasoning and long-horizon agent work.
Second, it supports a very large context window and long outputs. That opens useful workflows, but it also makes it easy to spend money accidentally.
Third, there are production details developers need to handle properly: refusals, fallback routing, adaptive thinking, billing and telemetry.
The catch is simple: Fable 5 costs twice as much as Opus 4.8 on base token pricing.
So the decision is not "which model is better?". The decision is:
> Which tasks are expensive enough when they fail that Fable is worth the premium?
## What Fable 5 is for
The API model ID is:
```text
claude-fable-5
```
Anthropic describes it as a model for difficult reasoning, long-horizon agentic workflows, large context workloads, complex tool use, and high-value work where quality matters more than marginal token cost.
There is also Claude Mythos 5, which shares the same core capabilities and pricing but is limited availability through Project Glasswing. For most teams, Fable 5 is the one they would evaluate first.
I would think of Fable as an escalation model. Not the model you call because it is new, but the model you call after cheaper models stop being good enough.
## The technical changes that matter
### Large context by default
Fable 5 supports a 1 million token context window by default.
That can change the architecture for some workflows. Older context limits often forced chunking, retrieval, summarization, or multi-step document processing. With a larger context window, some of those workflows become simpler.
Good candidates:
- reviewing a large codebase section
- analyzing long legal or compliance document sets
- reconstructing a multi-day incident timeline
- reading a large customer support history
- comparing many research papers or specifications
- running an agent with a long execution trace
But I would not blindly paste everything into the prompt. A huge context can still be noisy, slow and expensive. Bigger context does not remove the need for good retrieval, source selection and evaluation.
### Long output is useful, and dangerous
Fable 5 can generate up to 128k output tokens in one request.
That is useful for migration plans, structured reports, document conversion, code review findings or detailed test plans.
It is also where costs can surprise you. Output tokens are usually the expensive side of the bill. If an app lets the model produce huge answers by default, the first cost review will be unpleasant.
I would set output limits per use case instead of giving every workflow the maximum.
### Adaptive thinking needs cost awareness
Fable 5 uses adaptive thinking as its thinking mode. Earlier patterns where you explicitly disable thinking do not apply the same way. Anthropic exposes an effort parameter to control depth.
For developers, this matters because a "simple" request and a "deep reasoning" request are no longer only prompt design questions. They are routing, latency and cost questions.
If your app has mixed workloads, route simple tasks to cheaper models. Do not make Fable the endpoint for everything just because it is the strongest model.
### Do not rely on raw chain of thought
Fable 5 does not return raw chain of thought. Depending on configuration, thinking blocks may contain a readable summary or an omitted/empty thinking field.
That is fine for production systems. Applications should not rely on hidden internal reasoning anyway.
If you need auditability, log the parts you can actually use:
- inputs
- retrieval sources
- tool calls
- model outputs
- validation results
- confidence signals
- correlation IDs
That is more useful than pretending raw chain of thought is a proper audit log.
### Refusal handling belongs in normal control flow
This is an easy footgun.
When Claude Fable 5 refuses a request, the Messages API can return an HTTP 200 response with:
```text
stop_reason: "refusal"
```
So refusal handling cannot live only in your exception handler. HTTP 200 does not automatically mean the model completed the business task.
Your application has to inspect the response body and decide what happens next:
- show a safe user-facing message
- ask for clarification
- stop the workflow
- route to a fallback model if your policy allows it
- log the refusal as part of task state
This is boring integration work, but it prevents messy production behavior.
## Fable 5 vs Opus 4.8
Opus 4.8 is still a strong high-end model. It is designed for complex reasoning, agentic coding and high-autonomy work. It also supports a large context window and long outputs.
The practical difference is positioning and price.
Anthropic positions Fable 5 as the premium tier above Opus. That means Fable has to earn its place through better outcomes, not just better benchmark language.
### Pricing snapshot
| Model | Input | Output | 5 min cache write | 1 hour cache write | Cache read |
| --------------- | ---------- | ---------- | ----------------- | ------------------ | ------------ |
| Claude Fable 5 | $10 / MTok | $50 / MTok | $12.50 / MTok | $20 / MTok | $1 / MTok |
| Claude Opus 4.8 | $5 / MTok | $25 / MTok | $6.25 / MTok | $10 / MTok | $0.50 / MTok |
Fable is exactly 2x the base token price of Opus.
Batch pricing follows the same pattern:
| Model | Batch input | Batch output |
| --------------- | ------------ | ------------- |
| Claude Fable 5 | $5 / MTok | $25 / MTok |
| Claude Opus 4.8 | $2.50 / MTok | $12.50 / MTok |
### Quick cost examples
Assume a request uses 200k input tokens and 20k output tokens.
With Fable 5:
```text
Input: 200,000 × $10 / 1,000,000 = $2.00
Output: 20,000 × $50 / 1,000,000 = $1.00
Total: $3.00
```
With Opus 4.8:
```text
Input: 200,000 × $5 / 1,000,000 = $1.00
Output: 20,000 × $25 / 1,000,000 = $0.50
Total: $1.50
```
For one important request, that difference may not matter. At scale, it absolutely does.
For a batch job with 100 million input tokens and 10 million output tokens:
```text
Fable 5 batch: (100 × $5) + (10 × $25) = $750
Opus 4.8 batch: (100 × $2.50) + (10 × $12.50) = $375
```
So the routing question is simple: does Fable reduce failures, review time or rework enough to justify double the price?
## Where I would use Fable 5
### Hard coding work
Fable makes sense for software tasks where the model has to stay coherent for a long time:
- large refactors
- multi-file architectural changes
- deep bug hunts
- migration planning
- dependency upgrade analysis
- codebase-wide security remediation
I would not use it for small edits. For everyday coding, cheaper models are usually enough. But for a migration where a bad plan wastes days of senior engineering time, Fable can be justified.
### Long-context document work
The large context window is useful when the model needs to keep many documents in view:
- contract review
- procurement comparisons
- compliance gap analysis
- audit preparation
- technical due diligence
- large specification sets
The prompt still needs structure. "Read everything and tell me what you think" is not enough.
Ask for concrete findings, citations, risk categories, unknowns and follow-up questions.
### Incident analysis
Incident response is messy. Logs, alerts, chat messages, deployment notes, ticket comments and dashboards rarely line up cleanly.
A useful workflow could be:
1. collect the timeline
2. ask Fable to identify likely causal chains
3. extract uncertainty and missing evidence
4. draft the postmortem
5. let humans correct it before publishing
The model should not be the final authority. It should help humans see the incident more clearly.
### Research synthesis
For research-heavy teams, Fable can sit on top of a large corpus:
- literature reviews
- policy analysis
- market research
- competitive intelligence
- internal knowledge synthesis
This is most valuable when the hard part is not finding one source, but reconciling many sources that only partly agree.
### Complex support escalations
Most support tickets do not need Fable.
But escalations can involve long histories, previous failed fixes, account-specific rules and policy constraints. That is where an escalation tier makes sense.
A sane routing setup could be:
- Haiku or Sonnet for classification and simple replies
- Opus for advanced troubleshooting
- Fable only for difficult escalations or important accounts
That is much cheaper than sending every ticket to the premium model.
## Example: refusal handling and fallback
A production integration should treat refusal as a normal model result:
```python
from anthropic import Anthropic
client = Anthropic()
response = client.messages.create(
model="claude-fable-5",
max_tokens=4000,
messages=[
{"role": "user", "content": "Analyze this customer escalation and draft a reply..."}
],
)
if response.stop_reason == "refusal":
# This is not an HTTP exception.
# It is a successful API response with a refusal state.
fallback = client.messages.create(
model="claude-opus-4-8",
max_tokens=4000,
messages=[
{"role": "user", "content": "Analyze this customer escalation and draft a reply..."}
],
)
result = fallback
else:
result = response
```
In a real system, I would not hardcode this inside business logic. Put model routing, refusal handling, fallback policy and billing telemetry behind a gateway or model layer. Then you can change model choices later without editing every workflow.
## When Fable is worth the money
Use Fable when one of these is true:
- Opus is not reliable enough for the task.
- A wrong answer is expensive.
- The context is genuinely large.
- The workflow runs for many agent steps.
- The output needs deep synthesis, not just summarization.
- Human review time is more expensive than the model premium.
Good examples:
- "Find the root cause across this full incident timeline."
- "Review this migration plan and identify hidden risks."
- "Compare these contracts and flag non-standard clauses."
- "Synthesize this research corpus with explicit uncertainty."
- "Plan a modernization project from legacy system documentation."
## When Opus is probably the better default
Use Opus 4.8 when the task is complex, but not extreme:
- normal agentic coding
- architecture review
- medium-sized document analysis
- internal assistants
- planning tasks
- advanced troubleshooting
For many teams, the boring routing strategy is the right one:
1. Start with Sonnet for most production workloads.
2. Escalate to Opus for complex reasoning.
3. Escalate to Fable only when Opus is not good enough or the economics justify it.
Boring routing is usually how you keep AI costs under control.
## My take
Claude Fable 5 is not a drop-in replacement for Opus. I would not make it the default model just because it is the strongest one.
The important parts are operational: refusal handling, fallback behavior, prompt caching economics, adaptive thinking, output limits and the fact that Fable costs twice as much as Opus 4.8.
If I were adding it to a production stack, I would introduce it as an escalation tier and measure outcomes. Does it solve more tasks? Does it reduce review time? Does it avoid rework? Does it produce better results on the cases where Opus struggles?
If yes, use it there.
If not, keep the money.
## Sources
- Anthropic Docs: Models overview: [https://platform.claude.com/docs/en/about-claude/models/overview](https://platform.claude.com/docs/en/about-claude/models/overview?ref=blog.bajonczak.com)
- Anthropic Docs: Introducing Claude Fable 5 and Claude Mythos 5: [https://platform.claude.com/docs/en/about-claude/models/introducing-claude-fable-5-and-claude-mythos-5](https://platform.claude.com/docs/en/about-claude/models/introducing-claude-fable-5-and-claude-mythos-5?ref=blog.bajonczak.com)
- Anthropic Docs: Claude pricing: [https://platform.claude.com/docs/en/about-claude/pricing](https://platform.claude.com/docs/en/about-claude/pricing?ref=blog.bajonczak.com)
- Anthropic Docs: What's new in Claude Opus 4.8: [https://platform.claude.com/docs/en/about-claude/models/whats-new-claude-4-8](https://platform.claude.com/docs/en/about-claude/models/whats-new-claude-4-8?ref=blog.bajonczak.com)
### Building an Azure FinOps Toolkit for real chargeback
URL: https://blog.bajonczak.com/building-an-azure-finops-toolkit-for-real-chargeback/
Last updated: 2026-05-19T06:00:49.000Z
Azure cost reporting is easy until somebody asks the awkward question: "Which cost center should pay this invoice?"
The Azure portal can show spend by subscription, resource group, tag, meter and service. That is useful, but it is not a chargeback model. Chargeback needs ownership rules, allocation logic, invoice reconciliation and a boring audit trail. If those rules live in a spreadsheet that only one person understands, the process will break as soon as the environment grows.
This is the idea behind the Azure FinOps Toolkit I started here:
[https://github.com/SBajonczak/AzureFinopsToolkit](https://github.com/SBajonczak/AzureFinopsToolkit?ref=blog.bajonczak.com)
The repository is meant to become a practical starter kit: Terraform templates for the Azure foundation, tagging guardrails, Cost Management exports and a small report generator that can compare Azure usage data with reseller or third-party invoice rows.
## The problem: Azure cost is not always the invoice
In a direct Azure contract, the Azure Cost Management export is often close enough to the invoice for internal reporting. In indirect reseller or CSP setups, the invoice can include additional lines: reseller fees, marketplace products, corrections, discounts, support items or bundled services.
That means a useful FinOps report has to answer four questions:
1. Which Azure resources created the cost?
2. Which system or team owns those resources?
3. Which cost center should receive the charge?
4. Where does the reseller invoice differ from the Azure export?
If you skip the fourth question, finance will still need a manual reconciliation step. That is where hidden Excel logic starts to creep in.
## The architecture
The toolkit uses Azure Cost Management exports as the raw source, then enriches the data with tags and mapping rules.
There are two layers:
- Terraform creates the foundation: export storage, Cost Management exports, tag policies and budgets.
- The reporting script reads exported usage, reseller invoice rows and allocation mappings, then writes CSV reports for finance and operations.
I like this split because Terraform is good at making the Azure side repeatable, while a reporting script is easier to test and evolve than a pile of portal filters.
## Landing zones are part of the cost model
A landing zone is not only an architecture topic. It shapes how cost can be explained later.
Subscriptions are useful boundaries when ownership, budget, compliance or RBAC differ. Tags are useful for dimensions inside that boundary: application, environment, owner and cost center.
My rule of thumb: use subscriptions for control-plane boundaries, use tags for reporting dimensions. Do not ask tags to do the job of a landing zone.
## The minimum tag contract
The first Terraform module creates an Azure Policy initiative for required tags:
```hcl
module "required_tag_policy" {
source = "../../modules/tag-policy"
policy_assignment_scope = var.policy_assignment_scope
required_tags = ["cost_center", "application", "environment", "owner"]
effect = "Audit"
}
```
I would start with `Audit`, especially in existing environments. Going straight to `Deny` looks clean on paper and creates pain in real life. Once teams understand the model and deployment pipelines add the tags automatically, moving selected scopes to `Deny` is reasonable.
The default tag set is intentionally small:
| Tag | Example | Why it matters |
| ------------ | ------------- | ----------------------- |
| cost\_center | CC1001 | finance owner |
| application | payments-api | system or product owner |
| environment | prod | prod/nonprod split |
| owner | team-payments | accountable team |
You can add more later, but these four already cover most chargeback conversations.
## Terraform foundation for Cost Management exports
The second module creates the export storage account and scheduled Cost Management exports.
```hcl
module "finops_foundation" {
source = "../../modules/finops-foundation"
location = var.location
resource_group_name = var.resource_group_name
storage_account_name = var.storage_account_name
cost_exports = var.cost_exports
budgets = var.budgets
tags = {
cost_center = "FINOPS"
application = "azure-finops-toolkit"
environment = "prod"
owner = "platform-team"
}
}
```
A subscription export definition looks like this:
```hcl
cost_exports = {
app_prod = {
scope = "/subscriptions/00000000-0000-0000-0000-000000000001"
recurrence_period_start = "2026-01-01T00:00:00Z"
export_path = "app-prod"
}
}
```
Budgets can be added with tag filters:
```hcl
budgets = {
cc1001_prod = {
scope = "/subscriptions/00000000-0000-0000-0000-000000000001"
amount = 2500
start_date = "2026-01-01T00:00:00Z"
contact_emails = ["finops@example.com"]
filters = {
tag_name = "cost_center"
tag_values = ["CC1001"]
}
}
}
```
This does not magically solve FinOps, but it gives you a repeatable reporting substrate. Every subscription that should participate in chargeback gets an export and the same tag policy.
## Allocation rules for shared services
Direct resource cost is easy: read the `cost_center` tag and charge the amount there.
Shared services need rules. A hub network, central firewall, monitoring workspace or backup vault may serve multiple teams. The toolkit keeps that logic in YAML:
```yaml
shared_services:
shared-connectivity:
allocation_method: percentage
allocations:
CC1001: 0.45
CC1002: 0.35
CC2001: 0.20
```
A cost row tagged with `cost_center=shared-connectivity` is split across the target cost centers. The report keeps the original amount and the allocation rule, so the split is auditable.
This is deliberately simple. Start with percentages if you have no better driver. Later you can replace them with user count, transaction volume, bandwidth or another metric that better reflects consumption.
## Invoice reconciliation
The reporting script accepts Azure export CSV files and optional reseller invoice CSV files:
```bash
python3 scripts/generate_chargeback_report.py \
--cost-export ./exports/2026-05/*.csv \
--invoice ./invoices/reseller-may.csv \
--mapping ./mappings/cost-centers.yaml \
--output-dir ./reports/2026-05
```
It writes four reports:
| Report | Purpose |
| ----------------------- | ----------------------------------------------------------------- |
| chargeback-detailed.csv | row-level allocation for finance review |
| chargeback-summary.csv | monthly total by cost center, application, environment and source |
| variance-report.csv | comparison between Azure export amount and invoice amount |
| unallocated-costs.csv | missing tag or missing mapping backlog |
The variance report is the important one when a reseller sits between you and Microsoft:
```csv
subscription_id,azure_export_amount,invoice_amount,variance
00000000-0000-0000-0000-000000000001,348.70,360.00,11.30
00000000-0000-0000-0000-000000000002,80.00,54.50,-25.50
```
A variance is not automatically bad. It can be a fee, discount, tax-related difference, marketplace charge or timing difference. The point is that it becomes visible and reviewable.
## What this gives you
A useful Azure FinOps setup is not a dashboard. It is a small system:
The Terraform code makes the reporting inputs predictable. The script makes allocation explicit. The output gives finance a chargeback file and gives operations a backlog of missing metadata.
That last part matters. FinOps should not only explain last month. It should improve next month. Every missing tag in `unallocated-costs.csv` is a concrete fix, not a vague governance complaint.
## Where I would take this next
The first version is intentionally plain: Terraform plus CSV. That makes it easy to run in a pipeline and easy for finance to inspect.
The next useful additions would be:
- GitHub Actions to run monthly report generation.
- Optional upload to a data lake or Fabric workspace.
- More allocation methods for shared services.
- Support for reservations and savings plan normalization.
- A Power BI model on top of the generated CSVs.
- Stronger Terraform examples for management-group scoped landing zones.
The boring version is the right starting point. Get the exports right, make ownership mandatory, reconcile the invoice and keep every allocation rule in source control. Once that works, dashboards are the easy part.
### Calling Custom Code from Microsoft 365 Copilot Studio
URL: https://blog.bajonczak.com/calling-custom-code-from-microsoft-365-copilot-studio/
Last updated: 2026-05-18T06:26:17.000Z
# Calling Custom Code from Microsoft 365 Copilot Studio
Most Copilot demos stop at the chat experience. That is useful for explaining the interface, but it misses the part where enterprise projects usually get difficult: the moment the agent has to call governed code, evaluate real data, and write the result into another system.
For this post I built a small installable demo repository:
**GitHub:** [SBajonczak/customagentm365demo](https://github.com/SBajonczak/customagentm365demo?ref=blog.bajonczak.com)
The scenario is simple on purpose:
1. A user talks to an agent in Microsoft 365 / Copilot Studio.
2. Copilot Studio calls a custom HTTPS action.
3. The custom code validates the request and analyzes structured records.
4. The result is returned to Copilot Studio and dispatched to configured target environments such as Teams, SharePoint, Microsoft Fabric, Dataverse, or a generic webhook.
That separation matters. Copilot Studio owns the conversation. The custom code owns validation, deterministic business logic, auditability, and downstream writes.
## Architecture
The demo uses this shape:
```text
Microsoft 365 chat
|
v
Copilot Studio agent / topic
| HTTPS action with x-api-key
v
Custom Agent M365 Demo (Fastify + TypeScript)
| validate + analyze + correlate
v
Target environments
- webhook
- Teams / Power Automate
- SharePoint / Graph-backed flow
- Fabric pipeline
- Dataverse action
```
The important design choice is that Copilot Studio does **not** receive broad write access to every target system. It calls one narrow API. That API decides which payloads are valid, which targets are allowed, and what gets sent.
## What the custom agent service contains
The repository is a TypeScript/Node.js project with:
- an installable npm package (`package.json`);
- a `/health` endpoint;
- a `POST /agent/invoke` endpoint for Copilot Studio;
- typed Zod request validation plus TypeScript response models;
- API-key protection through the `x-api-key` header;
- deterministic data analysis code;
- target dispatchers for `webhook`, `teams`, `sharepoint`, `fabric`, and `dataverse`;
- unit/API tests;
- Docker support;
- Copilot Studio setup documentation.
The request model is deliberately narrow:
```ts
export const AgentRequestSchema = z.object({
conversation_id: z.string().min(1),
user_id: z.string().min(1),
instruction: z.string().min(1),
data: z.array(z.record(z.unknown())).default([]),
target_environments: z.array(TargetEnvironmentSchema).min(1),
correlation_id: z.string().min(1).optional()
});
export type AgentRequest = z.infer;
```
That is the first production lesson: do not let a language model invent arbitrary writes or queries. Give it a small, typed contract.
## The endpoint Copilot Studio calls
The core endpoint is short:
```ts
app.post('/agent/invoke', async (request, reply) => {
const parsed = AgentRequestSchema.safeParse(request.body);
if (!parsed.success) {
return reply.code(400).send({ detail: 'Invalid request payload' });
}
const agentResponse = analyzeRecords(parsed.data);
const dispatches = [];
for (const target of parsed.data.target_environments) {
dispatches.push(await destination.send(target, parsed.data, agentResponse));
}
return { ...agentResponse, dispatches };
});
```
The interesting part is not the number of lines. The interesting part is the boundary:
- input is validated before analysis;
- analysis is deterministic and testable;
- every response has a `conversation_id` and `correlation_id`;
- dispatching is explicit per target environment;
- missing target configuration is reported as `skipped`, not hidden.
## Local installation
Clone the repo and run the tests:
```bash
git clone https://github.com/SBajonczak/customagentm365demo.git
cd customagentm365demo
npm install
npm test
npm run build
```
Start the API locally:
```bash
export CUSTOM_AGENT_API_KEY='change-me'
npm run dev
```
Invoke it with a sample payload:
```bash
curl -X POST http://localhost:8000/agent/invoke -H 'content-type: application/json' -H 'x-api-key: change-me' -d '{
"conversation_id": "copilot-chat-1",
"user_id": "ada@example.com",
"instruction": "Analyze incident backlog",
"data": [
{"id": "INC-1", "status": "open", "severity": "high"},
{"id": "INC-2", "status": "resolved", "severity": "low"}
],
"target_environments": ["webhook"]
}'
```
A typical response looks like this:
```json
{
"conversation_id": "copilot-chat-1",
"correlation_id": "...",
"record_count": 2,
"status_counts": {
"open": 1,
"resolved": 1
},
"summary": "Analyzed 2 records and found 1 open item(s).",
"recommendations": [
"Prioritize open items before sending the result to downstream systems."
],
"dispatches": [
{
"target": "webhook",
"status": "skipped",
"detail": "CUSTOM_AGENT_WEBHOOK_URL is not configured"
}
]
}
```
The skipped dispatch is intentional. It lets you test the agent before wiring it to Teams, SharePoint, Fabric, or Dataverse.
## Installing the agent behind HTTPS
Copilot Studio needs an HTTPS endpoint. For a real environment, deploy the container or Node.js app to something like Azure Container Apps, Azure App Service, Azure Functions, or an API Management-backed service.
The demo includes a Dockerfile:
```bash
docker build -t customagentm365demo .
docker run --rm -p 8000:8000 -e CUSTOM_AGENT_API_KEY=change-me customagentm365demo
```
For target dispatching, configure one URL per environment:
```bash
export CUSTOM_AGENT_WEBHOOK_URL='https://example.com/receiver'
export CUSTOM_AGENT_TEAMS_URL='https://example.com/teams-flow'
export CUSTOM_AGENT_SHAREPOINT_URL='https://example.com/sharepoint-flow'
export CUSTOM_AGENT_FABRIC_URL='https://example.com/fabric-pipeline'
export CUSTOM_AGENT_DATAVERSE_URL='https://example.com/dataverse-action'
```
In Microsoft 365 projects these URLs are often Power Automate flows, Logic Apps, Azure Functions, or API Management endpoints that perform the final write with the correct identity and permissions.
## Creating the Copilot Studio agent
In Copilot Studio, the high-level setup is:
1. Create a new agent, for example **Incident Triage Agent**.
2. Add a topic or action trigger such as: `Analyze these records and send the result to Teams`.
3. Add an HTTPS action that calls `POST /agent/invoke`.
4. Map the conversation/user context and the business data into the request schema.
5. Add the `x-api-key` header through a connection or environment secret.
6. Use the API response fields (`summary`, `recommendations`, `dispatches`) in the final chat answer.
Example request body:
```json
{
"conversation_id": "${conversation.id}",
"user_id": "${user.email}",
"instruction": "Analyze incident backlog and send a short result",
"data": [
{"id": "INC-1", "status": "open", "severity": "high"},
{"id": "INC-2", "status": "resolved", "severity": "low"}
],
"target_environments": ["webhook", "teams"],
"correlation_id": "optional-correlation-id"
}
```
The exact UI labels in Copilot Studio can change, but the pattern stays the same: the Copilot agent is the orchestrator, and your code is the governed tool behind an HTTPS action.
## Testing the boundary
The repo includes tests for the two areas that tend to break first:
- request validation;
- API behavior and dispatching.
For example, unknown target environments are rejected:
```ts
it('rejects unknown target environments', () => {
const result = AgentRequestSchema.safeParse({
conversation_id: 'chat-123',
user_id: 'user@example.com',
instruction: 'Summarize',
data: [{ status: 'open' }],
target_environments: ['ftp']
});
expect(result.success).toBe(false);
});
```
And the endpoint test verifies that a valid request is analyzed and dispatched:
```ts
it('analyzes and dispatches a valid request', async () => {
const sink = new InMemoryDestination();
const app = buildApp({ destination: sink, expectedApiKey: 'test-key' });
const response = await app.inject({
method: 'POST',
url: '/agent/invoke',
headers: { 'x-api-key': 'test-key' },
payload: {
conversation_id: 'copilot-chat-1',
user_id: 'ada@example.com',
instruction: 'Analyze incident backlog',
data: [{ id: 'INC-1', status: 'open' }],
target_environments: ['webhook']
}
});
expect(response.statusCode).toBe(200);
});
```
I would not skip these tests in a real customer project. The chat layer will evolve quickly, prompts will change, and people will add more targets. The API contract is what keeps the system from becoming a pile of hidden side effects.
## Production notes
For a real tenant, I would harden this in a few places:
- replace the demo API key with Entra ID authentication or a managed API gateway policy;
- put downstream writes behind least-privilege identities;
- log correlation IDs without logging sensitive business payloads;
- add per-target retry and dead-letter handling;
- use separate environments for development, test, and production;
- add tenant-specific authorization checks before dispatching to Teams, SharePoint, Fabric, or Dataverse;
- keep Copilot prompts away from secrets and write permissions.
The main point is not that every custom agent must be a TypeScript service. The point is that Copilot Studio should call a governed, testable boundary when the conversation needs to touch real business systems.
That is the difference between a nice demo and something I would trust in production.
### Teufel Rockster Air 2 review: powerful portable sound, but should you buy it over the JBL PartyBox Stage 320?
URL: https://blog.bajonczak.com/teufel-rockster-air-2-review-vs-jbl-partybox-stage-320/
Last updated: 2026-05-17T15:35:45.000Z
# Teufel Rockster Air 2 review: powerful portable sound, but should you buy it over the JBL PartyBox Stage 320?
*Transparency note: the Amazon links in this article are affiliate links. If you buy through them, I may earn a commission at no extra cost to you. I have not run a long-term hands-on test of these speakers.*
If you are looking for a serious portable Bluetooth speaker, the **Teufel Rockster Air 2** and the **JBL PartyBox Stage 320** sit in a similar “big party speaker” category, but they are not really built for exactly the same buyer.
The Teufel feels more like a compact mobile PA system: loud, flexible, long-lasting, and ready for microphones, instruments, small events, speeches, DJs, karaoke, and outdoor setups. The JBL is more obviously a party speaker: easier to move around, cheaper, flashier, and probably the better fit for most casual buyers.
So which one should you actually buy?
## Quick verdict
If I had to recommend one speaker for most people, I would pick the **JBL PartyBox Stage 320** because it is cheaper, easier to transport, has a built-in light show, and has very strong public ratings.
But if you care more about **battery life, PA-style flexibility, microphone/instrument inputs, and a more professional event setup**, the **Teufel Rockster Air 2** is the more serious device.
- **Buy the Teufel Rockster Air 2** if you want a portable event speaker with long battery life and flexible inputs: [check the Teufel Rockster Air 2 on Amazon](https://amzn.to/3PJNCXS?ref=blog.bajonczak.com)
- **Buy the JBL PartyBox Stage 320** if you want the better value party speaker for most private parties: [check the JBL PartyBox Stage 320 on Amazon](https://amzn.to/4fqubxx?ref=blog.bajonczak.com)
## The Teufel Rockster Air 2 at a glance
The **Teufel Rockster Air 2** is a portable Bluetooth event speaker with a clear focus on power and flexibility. According to the Amazon listing, it offers:
- Bluetooth 5.0 with aptX, aptX HD and AAC
- Up to **58 hours** of battery life at medium volume
- Up to **31 hours** at maximum volume in Eco mode
- A removable LiFePO4 battery
- Microphone, instrument and AUX inputs
- USB-C power bank function
- 35 mm tripod flange
- Up to **103 dB RMS** and **115 dB peak**
- Support for stereo setups with two Rockster Air 2 units
- XLR-based linking for larger setups
That specification list tells you quite a lot about the target audience. This is not just a speaker for playing a playlist in the kitchen. It is meant for people who need loud, mobile, reasonably serious sound.
At the time I checked the listing, the Teufel Rockster Air 2 was shown at around **€529.99** with a rating of around **4.5 out of 5 stars** from about **100 reviews**. Amazon prices and review counts can change, so treat those numbers as a snapshot rather than a fixed fact.
## What I like about the Teufel Rockster Air 2
### 1\. The battery life is the standout feature
The biggest argument for the Teufel is battery life. Up to 58 hours at medium volume is excellent for this class of speaker. Even the claimed 31 hours at maximum volume in Eco mode is impressive.
For garden parties, small events, club rooms, outdoor workouts, sports events or speeches, this matters. A speaker that still has power left after a long day is simply less annoying to own.
### 2\. It is closer to a mobile PA than a normal party speaker
The Teufel has microphone, instrument and AUX inputs. That makes it much more flexible than a simple Bluetooth party box. You can use it for karaoke, announcements, a guitar, small performances or DJ-style setups.
That is where the Rockster Air 2 starts to justify its higher price. If you only want music from your phone, you may not need this. If you want a more flexible event speaker, it becomes much more interesting.
### 3\. The battery is removable
A removable LiFePO4 battery is a practical long-term advantage. Batteries age. A product with a replaceable battery is usually a safer buy than one where the whole device becomes less useful once the battery degrades.
### 4\. Better codec support than many party speakers
Bluetooth with aptX, aptX HD and AAC is a nice detail. It does not magically turn a party speaker into a studio monitor, but it does show that Teufel is paying attention to audio quality and not just loudness.
## What I do not like about the Teufel Rockster Air 2
### 1\. It is expensive
At roughly €530 at the time of checking, the Teufel is not an impulse purchase. It costs noticeably more than the JBL PartyBox Stage 320.
That price only makes sense if you actually need the Teufel’s strengths: battery life, input flexibility, PA-style use, and very loud output.
### 2\. It lacks the fun factor of a classic party box
The Teufel looks and feels more serious. That can be a good thing, but it also means you do not get the obvious party features of the JBL: the synchronized light show, the flashy design language, and the “turn it on and the room gets a vibe” effect.
### 3\. Transport looks less convenient than the JBL
The JBL PartyBox Stage 320 has wheels and a telescopic handle. That is boring on paper but hugely useful in real life. Big speakers are always heavier and more annoying to move than people expect.
If you move your speaker often, the JBL has a clear practical advantage.
## The JBL PartyBox Stage 320 as the main alternative

The **JBL PartyBox Stage 320** is the more mainstream party speaker. It is built around JBL Pro Sound, two 6.5-inch woofers, two 1-inch tweeters, a music-synchronized light show, wheels, and a telescopic handle.
According to the Amazon listing, it offers:
- Up to **18 hours** of battery life
- 10-minute quick charge for about 2 additional hours of playback
- AI Sound Boost for real-time audio optimization
- Built-in light show
- Wheels and telescopic handle
- Auracast support for connecting multiple compatible JBL speakers
- Replaceable battery, sold separately
At the time I checked the listing, it was shown at around **€420** with a rating of around **4.8 out of 5 stars** from about **730 reviews**.
## Teufel Rockster Air 2 vs JBL PartyBox Stage 320
| Category | Teufel Rockster Air 2 | JBL PartyBox Stage 320 |
| --------------------------------- | ------------------------------------------------------- | --------------------------------------------- |
| Approx. price at time of checking | €529.99 | €420 |
| Battery life | Up to 58 hours | Up to 18 hours |
| Main strength | PA-style flexibility and long runtime | Party features and value |
| Transport | Portable, but less comfort-focused | Wheels and telescopic handle |
| Light show | No | Yes |
| Microphone/instrument use | Stronger focus | More party-oriented |
| Multi-speaker setup | Stereo / XLR options | Auracast |
| Best for | Events, speeches, karaoke, outdoor use, semi-pro setups | Private parties, garden parties, casual users |
## Which one should you buy?
### Buy the Teufel Rockster Air 2 if…
You should choose the **Teufel Rockster Air 2** if you want a speaker that can do more than just play music loudly.
It is the better fit if:
- You need very long battery life
- You want microphone or instrument inputs
- You might use the speaker for speeches or small events
- You care about a more PA-like setup
- You want a removable battery
- You want to place it on a tripod
- You may later expand into stereo or linked speaker setups
In that case, the higher price makes sense: [Teufel Rockster Air 2 on Amazon](https://amzn.to/3PJNCXS?ref=blog.bajonczak.com)
### Buy the JBL PartyBox Stage 320 if…
You should choose the **JBL PartyBox Stage 320** if you mostly want a powerful, fun and practical party speaker.
It is the better fit if:
- You want the better price-performance ratio
- You care about easy transport
- You like the built-in light show
- You mainly use Bluetooth playback
- You want a proven party speaker with lots of public feedback
- You do not need 50+ hours of battery life
For most buyers, this is probably the smarter purchase: [JBL PartyBox Stage 320 on Amazon](https://amzn.to/4fqubxx?ref=blog.bajonczak.com)
## My final recommendation
The **Teufel Rockster Air 2** is the more serious and flexible product. It is the speaker I would look at for events, long outdoor days, microphone use, karaoke, small performances, DJ-style setups or situations where battery life really matters.
But the **JBL PartyBox Stage 320** is the speaker I would recommend to most people. It costs less, is easier to move, has a more obvious party feature set, and has stronger public review momentum.
So my practical recommendation is:
- **Best overall for most people:** [JBL PartyBox Stage 320](https://amzn.to/4fqubxx?ref=blog.bajonczak.com)
- **Best for more serious mobile event use:** [Teufel Rockster Air 2](https://amzn.to/3PJNCXS?ref=blog.bajonczak.com)
If your use case is “I want a great speaker for birthdays, garden parties and casual events”, get the JBL. If your use case is “I need a portable speaker that can also behave like a small PA system”, get the Teufel.
### Ubiquiti U7-LR review: WiFi 7 with strong range, but no 6 GHz
URL: https://blog.bajonczak.com/ubiquiti-u7-lr-review-wifi-7-no-6-ghz/
Last updated: 2026-05-15T19:34:25.000Z
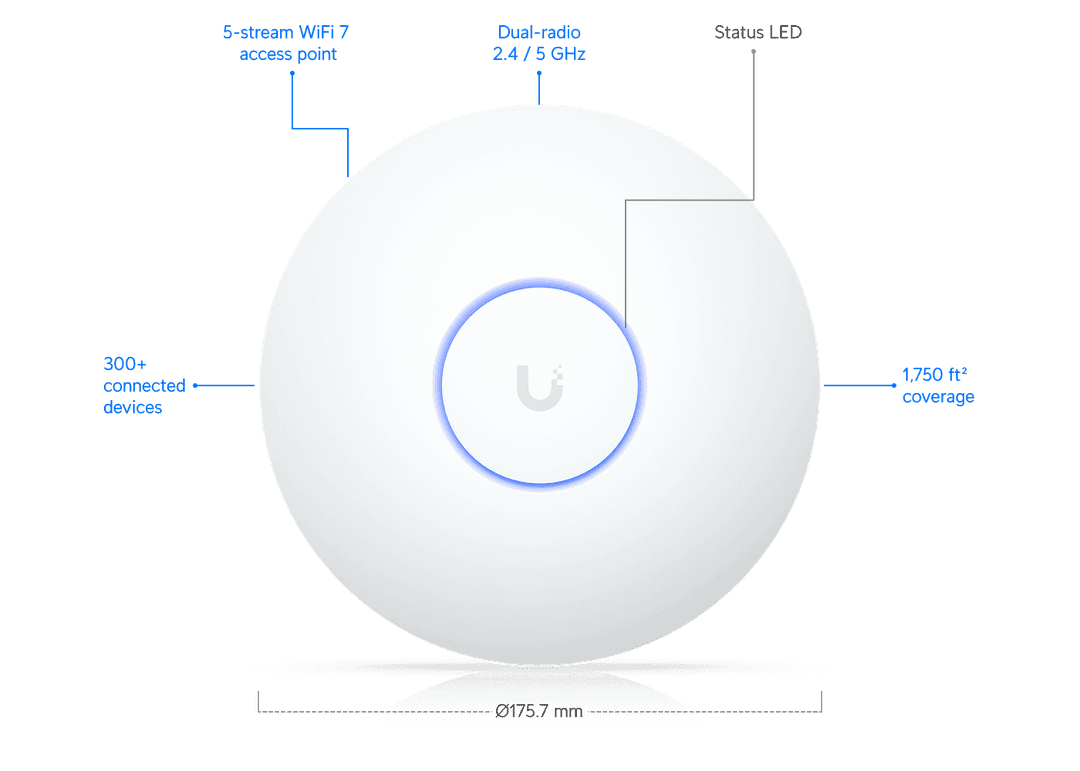
*Image: Ubiquiti / official product image*
Disclosure: This article contains affiliate links. If you buy through one of these links, I may earn a small commission. The price stays the same for you.
The Ubiquiti U7-LR is one of those access points that looks like an obvious upgrade at first glance. WiFi 7, Long Range, UniFi, 2.5 GbE, PoE. If you already run UniFi at home or in a small office, it sounds like an easy yes.
I would still not buy it blindly.
The U7-LR is interesting, but there is one detail you should know before ordering it: it is a WiFi 7 access point without 6 GHz. That does not make it a bad product. It just changes what you should expect from it.
[View the Ubiquiti U7-LR on Amazon](https://amznto/3PsNXhx?ref=blog.bajonczak.com)
## Quick verdict
The Ubiquiti U7-LR makes the most sense if you already use UniFi and want a modern access point with good range, a 2.5 GbE uplink and PoE. For a house, a larger apartment, a small office, a medical practice or a studio, it can be a very solid choice.
But if you hear "WiFi 7" and automatically expect 6 GHz, look closer. The U7-LR uses 2.4 GHz and 5 GHz. It does not have a 6 GHz radio. For many setups that is fine. For a full high-end WiFi 7 setup, a tri-band model may be the better fit.
## What the U7-LR offers
According to Ubiquiti's official specifications, the U7-LR comes with:
| Feature | Ubiquiti U7-LR |
| ------------------------- | ------------------------- |
| WiFi standard | WiFi 7 |
| Frequency bands | 2.4 GHz and 5 GHz |
| 6 GHz band | No |
| 5 GHz data rate | up to 4.3 Gbps at 160 MHz |
| 2.4 GHz data rate | up to 688 Mbps |
| Spatial streams | 5 |
| Uplink | 1x 2.5 GbE RJ45 |
| Power | PoE |
| Maximum power consumption | 14 W |
| Stated coverage | up to 160 m² / 1,750 ft² |
| Stated client count | 300+ |
| Mounting | Ceiling or wall |
That is a strong spec sheet for this class of access point. The 2.5 GbE port matters because a regular gigabit uplink can become a bottleneck on newer access points. The 160 MHz channel width on 5 GHz is also nice to have, assuming your environment allows it.
And that last part matters. In an apartment building with lots of neighboring networks, 160 MHz is not always the best idea. More channel width can mean more interference. In a detached house or a small office, it may work well. In a crowded area, stability can be more useful than a pretty speed test.
## The main catch: WiFi 7, but no 6 GHz

*Image: Ubiquiti / official product image*
This is the part that can cause confusion. WiFi 7 does not automatically mean that a device supports the 6 GHz band.
The U7-LR is a dual-band access point. It uses 2.4 GHz and 5 GHz. That can be a sensible choice for range and compatibility, since many devices still live on those bands anyway. But if your main reason for upgrading to WiFi 7 is 6 GHz, this is not the access point you are looking for.
I would not think of the U7-LR as the ultimate WiFi 7 playground. I would think of it as a modern UniFi access point focused on range, 5 GHz performance and everyday reliability.
## Who should consider the Ubiquiti U7-LR?
The U7-LR is a good fit if you already use UniFi or want to build a UniFi network properly. The appeal is not just the access point itself. It is the UniFi Network platform around it.
Multiple SSIDs, VLANs, guest networks, roaming, band steering, client isolation and decent visibility into your network are the reasons people buy UniFi in the first place.
Good use cases include:
- a house or larger apartment with a centrally mounted access point
- a small office with employees and a guest WiFi network
- a medical practice, agency, studio or shop
- a holiday apartment where you want managed WiFi instead of a random consumer router
- an existing UniFi setup that needs a WiFi 7 upgrade
In these environments, the U7-LR is more interesting than a typical consumer router. Not because it magically makes your internet faster, but because it fits into a cleaner network setup.
## Who should probably skip it?
If you are looking for a router that connects directly to your DSL, cable or fiber line, the U7-LR is the wrong product. It is not a router. It is not a modem. It is an access point.
You need the rest of the network around it: a router or gateway, ideally a PoE switch or a suitable PoE injector, and some way to manage UniFi Network.
I would probably skip it if:
- you do not want to use UniFi
- 6 GHz is a must-have for you
- you do not have PoE or do not want to add it
- you expect an all-in-one home router
- you only need WiFi for one small room
UniFi is not impossibly complicated, but it is still more of a system than a plug-and-forget consumer box. That is either the whole point, or it is unnecessary overhead.
## What customer reviews suggest
On Amazon Germany, the Ubiquiti U7-LR currently sits at around 4.2 out of 5 stars with 78 global ratings. The positive reviews mostly mention good range, stable connections and easy setup inside an existing UniFi environment.
Some reviews are very short, which is normal for Amazon. Still, the pattern is useful: people who already know UniFi seem to get along with the U7-LR quickly. Several buyers describe it as a reliable access point that does exactly what they expected.
There is also some criticism. One international review points out that the U7-LR is not a tri-band access point. Another mentions that 2.4 GHz performance did not meet expectations compared with 5 GHz. That lines up with the main caveat above: do not read "WiFi 7" and assume you are getting every premium WiFi 7 feature.
## PoE and 2.5 GbE are not optional details
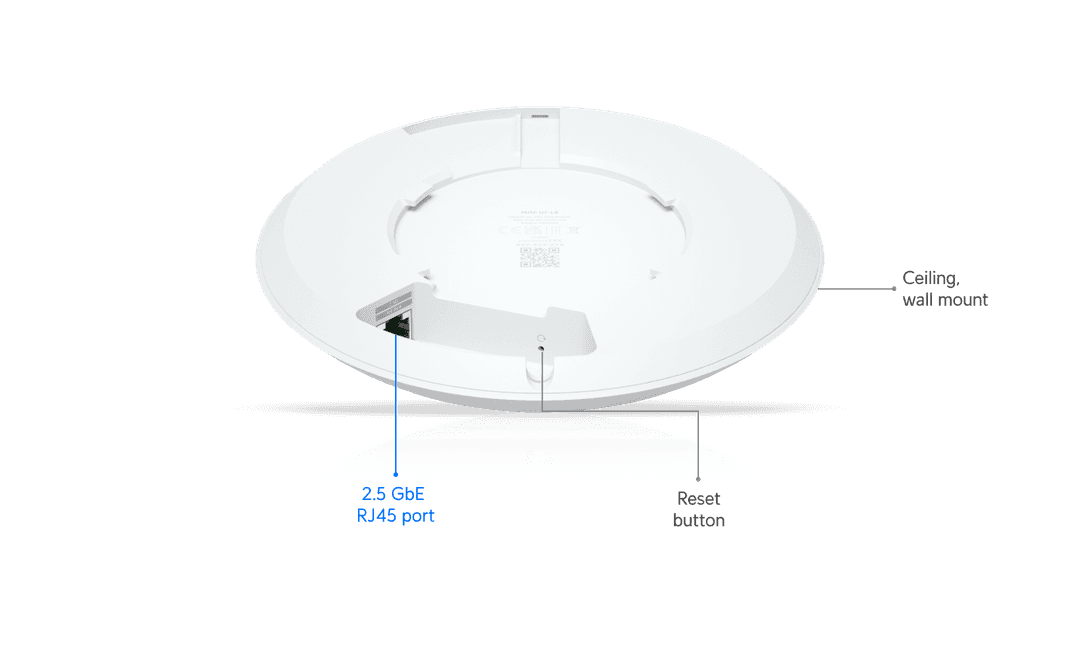
*Image: Ubiquiti / official product image*
The U7-LR is powered via PoE. In a clean network installation, that is great. One Ethernet cable handles data and power. For casual living-room use, it can be an extra hurdle.
If your switch does not provide PoE, you need a suitable PoE injector. You should also think about the uplink. The access point has a 2.5 GbE port, and ideally the switch port behind it should support 2.5 GbE as well.
That does not mean gigabit is useless. For many internet connections it is still enough. But if you are buying a WiFi 7 access point, it makes sense to check whether the rest of your network can keep up.
## U7-LR or another UniFi access point?
The U7-LR is attractive if range and modern 5 GHz performance matter more to you than 6 GHz. If you already own several WiFi 7 clients with 6 GHz support and want to use that band, compare it with a proper tri-band access point before buying.
If you want to cover a house or small office with stable UniFi WiFi, the U7-LR looks like a sensible option. I would not read the "300+ clients" figure as a realistic recommendation for hundreds of active devices hammering the network at once. It is more a sign that Ubiquiti designed this for more than three phones and a TV.
## My take
What I like about the U7-LR is that it knows what it is. It is not trying to be a flashy consumer router with a friendly app and a dozen marketing claims. It is a UniFi access point. That is the reason to buy it.
The Long Range name and the WiFi 7 label make it appealing, but the missing 6 GHz radio belongs in every buying decision. If you know that and it fits your setup, the U7-LR is a very interesting upgrade.
If you simply want "full WiFi 7", I would compare alternatives first.
## Should you buy it?
I would buy the Ubiquiti U7-LR if:
- you already use UniFi
- you want a ceiling or wall mounted access point
- you can provide PoE properly
- you care about strong 5 GHz performance and range
- 6 GHz is not required for your setup
I would not buy it if you actually need a router, or if 6 GHz is the main reason you are upgrading.
[View the Ubiquiti U7-LR on Amazon](https://amzn.to/3PsNXhx?ref=blog.bajonczak.com)
Note: This article is not based on my own hands-on lab test. The assessment is based on Ubiquiti's official specifications, the Amazon product page and publicly visible customer reviews.
### Stop logging PII: a configurable Node.js sanitizer logger
URL: https://blog.bajonczak.com/stop-logging-pii-a-configurable-node-js-sanitizer-logger/
Last updated: 2026-05-15T04:50:29.000Z
Logging is one of those topics that looks harmless until it is not.
A developer adds a request object to a debug statement. A payment error includes a card number. A support workflow logs an email address, a phone number, and a bearer token because "we only need it for troubleshooting." Two months later those logs are in a SIEM, a data lake, three alert rules, and a backup nobody remembers.
That is the part that bothers me about PII in logs: the first mistake is small, but the copies multiply quietly.
So I built a small Node.js example that sanitizes data at the logging boundary:
[github.com/SBajonczak/PiiSanitizer](https://github.com/SBajonczak/PiiSanitizer?ref=blog.bajonczak.com)
The idea is simple: before anything leaves your application as a log line, it passes through a configurable sanitizer. Common PII gets masked. Known sensitive object keys get redacted. Domain-specific identifiers can be configured without changing the logger code.
## What the logger does
The repository currently provides a lightweight Node.js module with no runtime dependencies.
It can:
- mask email addresses, phone numbers, IBAN-like values, and credit card numbers
- redact sensitive keys such as `password`, `token`, `authorization`, and `apiKey`
- walk nested objects and arrays without mutating the original input
- emit either object records or JSON lines
- accept custom rules for application-specific identifiers
The important design choice is that configuration owns the sensitive patterns. The logger should not need a new release every time a project discovers a new internal ID format.
## Basic usage
Here is the smallest useful example:
```js
import { createPiiLogger } from './src/index.js';
const logger = createPiiLogger({ format: 'json' });
logger.info('Login for jane.doe@example.com', {
password: 'correct-horse-battery-staple',
phone: '+49 170 1234567',
});
```
The output is safe to ship to container logs:
```json
{
"level": "info",
"timestamp": "2026-05-14T12:51:45.760Z",
"args": [
"Login for [EMAIL]",
{
"password": "[REDACTED]",
"phone": "[PHONE]"
}
]
}
```
This is deliberately boring. Good logging infrastructure should be boring. The exciting part is everything that does not leak.
## Configuring domain-specific rules
Every company has identifiers that do not look sensitive to a generic library.
In SAP-heavy landscapes, for example, a personnel number may show up as `PERNR 12345678`. Depending on the context, that can absolutely be personal data. A generic email masker will not catch it.
So the sanitizer supports custom regex rules and key rules:
```js
import { createPiiLogger, defaultRules } from './src/index.js';
const logger = createPiiLogger({
format: 'json',
rules: [
...defaultRules,
{
name: 'sapPersonnelNumber',
type: 'regex',
pattern: '\\bPERNR[ -]?\\d{8}\\b',
replacement: '[SAP_PERSONNEL_NUMBER]',
},
{
name: 'employeeIdKey',
type: 'key',
keys: ['employeeId', 'pernr'],
replacement: '[EMPLOYEE_ID]',
},
],
});
logger.info('User jane.doe@example.com opened PERNR 12345678', {
employeeId: '12345678',
authorization: 'Bearer never-log-this',
});
```
Output:
```json
{
"level": "info",
"args": [
"User [EMAIL] opened [SAP_PERSONNEL_NUMBER]",
{
"employeeId": "[EMPLOYEE_ID]",
"authorization": "[REDACTED]"
}
]
}
```
The key rule is intentionally separate from the regex rule. Sometimes the value itself is harmless without context, but the field name makes it sensitive. A number called `employeeId` should be treated differently from the same number inside `items[0].quantity`.
## Why sanitize at the logger boundary?
You can try to make every developer remember what not to log.
I would not bet a privacy incident on that.
The safer pattern is a boundary:
```text
application code
-> logger
-> sanitizer
-> stdout / log collector / SIEM
```
Application code can still make mistakes. The sanitizer catches the common ones before they leave the process.
This does not remove the need for good logging discipline. I still would not log raw HTTP requests, raw SAP payloads, payroll data, banking data, or identity documents. But a logger-level sanitizer gives you a last line of defense against accidental leakage.
## A few implementation details
The sanitizer walks values recursively:
```js
const output = sanitize({
user: {
name: 'Jane Doe',
email: 'jane.doe@example.com',
password: 'secret',
profile: {
phone: '+49 170 1234567',
},
},
});
```
Result:
```js
{
user: {
name: 'Jane Doe',
email: '[EMAIL]',
password: '[REDACTED]',
profile: {
phone: '[PHONE]',
},
},
}
```
The original object is not mutated. That matters because logging should not change application state.
Credit card masking uses a Luhn check, so the sanitizer does not replace every long number it sees. That reduces false positives in boring business data, which is important if people are expected to keep this enabled.
Key matching ignores case, spaces, underscores, and dashes. These should all match the same rule:
```text
accessToken
access_token
Access Token
access-token
```
## Tests first, because this kind of code needs trust
I built the example test-first with Node's built-in test runner. No Jest, no Vitest, no dependency tree just to prove the point.
Run it with:
```bash
npm test
```
The tests cover:
- masking common PII in strings
- recursive object sanitization
- custom SAP-style identifier rules
- logger output through a custom sink
- JSON-line logging for container environments
You can also run the example directly:
```bash
npm run example
```
## What this is not
This is not a magic GDPR shield.
It does not decide whether you are allowed to process data. It does not classify every possible personal attribute. It does not replace data minimization, retention policies, access control, or a proper DPIA when one is needed.
It is a practical guardrail for a common failure mode: sensitive values accidentally ending up in logs.
And honestly, that is already useful.
## Where I would take it next
The current repository is a small working foundation. The next useful steps would be:
- package it properly for npm
- add TypeScript type definitions
- add adapters for popular loggers like Pino and Winston
- add rule presets for common enterprise domains
- add structured audit metadata so teams can see which rules fired
- add benchmarks before anyone puts it on a hot path
But the core idea will stay the same: log what helps you operate the system, not whatever happened to be nearby in memory.
Source code: [github.com/SBajonczak/PiiSanitizer](https://github.com/SBajonczak/PiiSanitizer?ref=blog.bajonczak.com)
### A practical SAP agent in Azure AI Foundry: OData in, governed answer out
URL: https://blog.bajonczak.com/a-practical-sap-agent-in-azure-ai-foundry-odata-in-governed-answer-out/
Last updated: 2026-05-14T12:35:25.000Z
Most enterprise agent demos cheat at the exact point where things get interesting.
They show a nice chat window. They connect it to a toy API. The agent calls a function, gets a clean JSON response, and everyone nods. Then you try the same pattern against a real SAP system and suddenly the demo has to deal with authorization, OData filters, weird field names, data minimization, audit logs, and the uncomfortable fact that "ask the model to query SAP" is not an architecture.
This post is the version I would actually start with.
The scenario is intentionally boring: a support or operations user asks why a customer order is blocked. The agent should look up a small, approved slice of SAP data, summarize the situation, and suggest the next action. No direct database access. No model-generated OData. No magic prompt that says "be secure" and hopes for the best.
## The shape of the solution
I would split the system into four parts:
1. Azure AI Foundry hosts the agent and handles the conversation.
2. The agent gets one narrow tool, for example `get_order_status`.
3. A backend service owns the SAP integration and calls an approved OData endpoint.
4. Identity, logging, and policy live outside the prompt.
The agent is allowed to ask a question. The tool is allowed to fetch a specific business object. The SAP layer is allowed to enforce the ugly but necessary rules.
That separation matters. If the model can invent arbitrary OData queries, it can also invent expensive, broad, or unauthorized queries. If the backend only exposes a small function with typed parameters, the blast radius is much smaller.
## Example architecture
A minimal production-ish flow looks like this:
```text
User
-> Teams / web app / Copilot extension
-> Azure AI Foundry agent
-> function tool: get_order_status(order_id)
-> integration API
-> SAP OData endpoint / SAP BTP destination / API Management
-> sanitized JSON back to the agent
-> short answer + next action
```
I like putting Azure API Management or a small integration API between Foundry and SAP. It gives you one place for throttling, logging, allow lists, correlation IDs, and request validation. You can also swap the SAP backend later without teaching the agent a new trick.
## The SAP side: keep it boring
Here is a deliberately small Python client for an SAP OData endpoint. The important part is not the HTTP library. The important part is that the caller cannot pass arbitrary filters.
```python
# sap_client.py
import os
import requests
from dataclasses import dataclass
@dataclass(frozen=True)
class OrderStatus:
order_id: str
customer_name: str
lifecycle_status: str
delivery_block: str | None
credit_block: str | None
net_value: float
currency: str
class SapClient:
def __init__(self) -> None:
self.base_url = os.environ["SAP_ODATA_BASE_URL"].rstrip("/")
self.username = os.environ["SAP_TECH_USER"]
self.password = os.environ["SAP_TECH_PASSWORD"]
def get_order_status(self, order_id: str) -> OrderStatus:
if not order_id.isdigit() or len(order_id) > 12:
raise ValueError("order_id must be a numeric SAP sales order id")
url = f"{self.base_url}/sap/opu/odata/sap/API_SALES_ORDER_SRV/A_SalesOrder('{order_id}')"
params = {
"$select": ",".join([
"SalesOrder",
"SoldToPartyName",
"OverallSDProcessStatus",
"DeliveryBlockReason",
"CreditBlockReason",
"TotalNetAmount",
"TransactionCurrency",
])
}
response = requests.get(
url,
params=params,
auth=(self.username, self.password),
headers={"Accept": "application/json"},
timeout=10,
)
response.raise_for_status()
data = response.json()["d"]
return OrderStatus(
order_id=data["SalesOrder"],
customer_name=data.get("SoldToPartyName", ""),
lifecycle_status=data.get("OverallSDProcessStatus", "Unknown"),
delivery_block=data.get("DeliveryBlockReason") or None,
credit_block=data.get("CreditBlockReason") or None,
net_value=float(data.get("TotalNetAmount", 0)),
currency=data.get("TransactionCurrency", ""),
)
```
A real implementation would probably use OAuth, principal propagation, SAP BTP destinations, or an API Management policy instead of a technical user. Fine. The same rule still applies: the agent should not build the SAP query. Your integration layer should.
## The tool boundary
Now wrap the SAP client in a tiny tool function. This is also the place where I would remove fields the user should not see.
```python
# tools.py
from sap_client import SapClient
sap = SapClient()
def get_order_status(order_id: str) -> dict:
"""Return a sanitized status summary for one SAP sales order."""
status = sap.get_order_status(order_id)
blocks = []
if status.delivery_block:
blocks.append({"type": "delivery", "reason": status.delivery_block})
if status.credit_block:
blocks.append({"type": "credit", "reason": status.credit_block})
return {
"order_id": status.order_id,
"customer_name": status.customer_name,
"lifecycle_status": status.lifecycle_status,
"blocks": blocks,
"net_value": status.net_value,
"currency": status.currency,
}
```
Notice what is missing: pricing conditions, margin, bank details, free text notes, internal partner data, and anything else that tends to leak into "just give the AI access" projects.
The model gets the minimum amount of data needed to answer the business question.
## Registering the tool in Azure AI Foundry
The current Azure AI Foundry agent pattern is straightforward: define a function tool, create an agent version, send a user prompt, execute the requested function call in your app, and submit the tool output back to the model.
The sketch below follows that shape. It is not meant to be pasted blindly into production, but it shows the moving parts.
```python
# foundry_agent.py
import json
import os
from azure.ai.projects import AIProjectClient
from azure.ai.projects.models import FunctionTool, PromptAgentDefinition, Tool
from azure.identity import DefaultAzureCredential
from openai.types.responses.response_input_param import (
FunctionCallOutput,
ResponseInputParam,
)
from tools import get_order_status
project = AIProjectClient(
endpoint=os.environ["AZURE_AI_PROJECT_ENDPOINT"],
credential=DefaultAzureCredential(),
)
openai = project.get_openai_client()
conversation = openai.conversations.create()
get_order_status_tool = FunctionTool(
name="get_order_status",
description="Get the sanitized status of one SAP sales order by numeric order id.",
parameters={
"type": "object",
"properties": {
"order_id": {
"type": "string",
"description": "Numeric SAP sales order id, for example 4711000420",
}
},
"required": ["order_id"],
"additionalProperties": False,
},
strict=True,
)
tools: list[Tool] = [get_order_status_tool]
agent = project.agents.create_version(
agent_name="sap-order-status-agent",
definition=PromptAgentDefinition(
model="gpt-4.1-mini",
instructions=(
"You help operations users understand SAP sales order status. "
"Use the provided tool when an order id is present. "
"Do not ask for or expose sensitive personal, payroll, banking, or margin data. "
"Answer briefly. If a block exists, explain the likely owner and next action."
),
tools=tools,
),
)
response = openai.responses.create(
input="Why is sales order 4711000420 blocked?",
conversation=conversation.id,
extra_body={"agent_reference": {"name": agent.name, "type": "agent_reference"}},
)
tool_outputs: ResponseInputParam = []
for item in response.output:
if item.type == "function_call" and item.name == "get_order_status":
args = json.loads(item.arguments)
result = get_order_status(**args)
tool_outputs.append(
FunctionCallOutput(
type="function_call_output",
call_id=item.call_id,
output=json.dumps(result),
)
)
final_response = openai.responses.create(
input=tool_outputs,
conversation=conversation.id,
extra_body={"agent_reference": {"name": agent.name, "type": "agent_reference"}},
)
print(final_response.output_text)
```
A possible answer might be:
```text
Sales order 4711000420 is blocked because it has a credit block.
The order value is 18,420 EUR for Contoso Retail GmbH.
Next action: ask credit management to review the customer exposure before release.
```
That is the right level of boring. The agent did not browse SAP. It did not decide which table to query. It called one approved capability.
## Add correlation IDs before you add more tools
Before I would add a second or third SAP tool, I would add tracing.
Every request should carry a correlation ID from the UI to Foundry, from Foundry to the integration API, and from the integration API to SAP or API Management logs.
```python
# api.py
from fastapi import FastAPI, Header, HTTPException
from tools import get_order_status
app = FastAPI()
@app.get("/orders/{order_id}/status")
def order_status(order_id: str, x_correlation_id: str | None = Header(default=None)):
if not x_correlation_id:
raise HTTPException(status_code=400, detail="Missing X-Correlation-ID")
result = get_order_status(order_id)
# In production, log this as structured telemetry.
# Never log secrets or full SAP payloads.
print({
"correlation_id": x_correlation_id,
"tool": "get_order_status",
"order_id": order_id,
"block_count": len(result["blocks"]),
})
return result
```
This is the part that gets skipped in demos and then hurts later. When a user says "the agent told me the wrong thing," you need to reconstruct what it saw, which tool it called, what SAP returned, and which policy version was active.
Without that, you are debugging vibes.
## Where the avatar fits
If you are building a Casandra-style avatar on top of this, I would keep the avatar layer dumb.
The avatar can make the interaction feel nicer. It can speak, explain, ask follow-up questions, and show the answer in a more human way. But it should not own the SAP permissions, the OData query, or the policy decisions.
A clean split looks like this:
```text
Avatar / UI:
- captures the user request
- shows status and confidence
- asks for missing order id
- renders the final answer
Foundry agent:
- decides whether a tool call is needed
- turns tool output into an explanation
- follows response policy
Integration backend:
- validates input
- calls SAP
- trims data
- logs access
- enforces authorization
```
That makes the avatar replaceable. Today it is a web avatar. Tomorrow it might be Teams, Copilot, a mobile app, or a voice interface. The SAP contract stays the same.
## The policies I would enforce early
I would not wait for an enterprise governance board to invent a 40-page document. Start with five rules in code:
- Only approved tools can access SAP.
- Tools must have typed schemas and `additionalProperties: false`.
- The model never receives raw SAP payloads.
- Every tool call gets a user id, tenant/context id, and correlation id.
- Tool output is logged as metadata, not as full business data.
Those five rules already avoid a lot of trouble.
## A small test that catches a big mistake
Here is the kind of test I would add before showing the agent to anyone outside the team:
```python
# test_tools.py
import pytest
from tools import get_order_status
def test_rejects_non_numeric_order_ids():
with pytest.raises(ValueError):
get_order_status("4711; $filter=NetValue gt 0")
def test_tool_does_not_return_internal_fields(monkeypatch):
class FakeSap:
def get_order_status(self, order_id):
return type("OrderStatus", (), {
"order_id": order_id,
"customer_name": "Contoso Retail GmbH",
"lifecycle_status": "Blocked",
"delivery_block": None,
"credit_block": "Credit exposure exceeded",
"net_value": 18420.0,
"currency": "EUR",
"margin": 0.42,
"internal_note": "Do not expose this",
})()
import tools
monkeypatch.setattr(tools, "sap", FakeSap())
result = get_order_status("4711000420")
assert "margin" not in result
assert "internal_note" not in result
assert result["blocks"][0]["type"] == "credit"
```
A test like this is not glamorous. Good. Glamour is usually where agent projects start lying to themselves.
## My take
For SAP integration, Azure AI Foundry becomes interesting when you stop treating it as a chatbot builder and start treating it as an orchestration layer with strict tool contracts.
The model should explain. Your backend should decide what data exists, who can see it, and how it is fetched.
That is less flashy than "natural language over SAP," but it is much closer to something I would trust in a real environment.
### Enterprise Agent Governance on Azure in 2026: Registry, Identity, Guardrails, Observability
URL: https://blog.bajonczak.com/enterprise-agent-governance-on-azure-in-2026-registry-identity-guardrails-observability/
Last updated: 2026-08-02T10:12:50.000Z
*My practical view: once agents can call tools and change things, they are no longer a chat feature. They are automation with a blast radius.*
Enterprise AI is moving from “Copilot writes a draft” to “agents run parts of a workflow”. That sounds like a small wording change, but it is a very different governance problem.
A text assistant can still create risk. It can summarize the wrong document, draft a bad email, or expose content that was already badly permissioned. But in most Copilot scenarios the user still decides what to send, publish, approve, or change.
An agent that can query systems, open tickets, trigger pipelines, update records, or change configuration sits in another category. At that point, I would govern it more like CI/CD, APIs, service principals, and admin tooling. Not like a chatbot.
The questions I want every organization to answer are simple:
- Which agents exist?
- Who owns them?
- Which identity do they use?
- Which tools can they call?
- Which data can they touch?
- What did they do yesterday?
- Who gets called when something goes wrong?
If those questions are hard to answer, the environment is not ready for broad agent adoption.
## Copilot vs agents: what actually changes
A lot of Microsoft 365 Copilot use cases are still read and draft scenarios:
- summarize a document
- draft an email or Teams post
- find “what do we know about X?” across Microsoft 365 content
- help with meeting notes, recaps, and next steps
That is powerful, but it usually stays inside the user’s existing Microsoft 365 boundary. Copilot works with Microsoft Graph, SharePoint, OneDrive, Teams, Exchange, and the permissions already present in the tenant.
The risk profile changes when we move from “Copilot proposes” to “agents act”. Agentic workflows can:
- call tools and APIs
- update systems of record
- start workflows
- create tickets
- run checks across multiple systems
- make decisions based on goals, not just one prompt
That is where governance stops being a nice add-on. If the agent can do real work, the owner, identity, permissions, tool design, approval model, and logs matter more than the model name.
My rule of thumb:
> If the problem lives mostly inside Microsoft 365 and is about understanding, structuring, or communicating information, start with Copilot. If the problem crosses systems and can change state, treat it as an agent or automation platform problem.
That distinction helps avoid two common mistakes: pushing Copilot into areas where a proper backend is needed, and building heavy agent infrastructure for a use case that only needs cleaner Microsoft 365 content.
## Agent sprawl is the new shadow IT
Most companies will not start with one big agent platform.
They will start with small experiments:
- a Teams bot for HR questions
- an incident helper for DevOps
- a BI agent that explains KPI changes
- a support agent that drafts replies
- a Power Automate flow with an LLM step
- a Copilot Studio agent owned by one department
- an MCP server built by an integration team
- an OpenClaw workflow used by a developer or platform team
Each one looks harmless on its own. Then six months later nobody knows how many agents exist, which credentials they use, which data sources they access, or whether anyone still owns them.
That is the point where agent governance becomes real.
My opinion: treat agents like platform assets from the beginning. Not with a giant approval machine, but with enough structure that IT, security, and the business can still answer basic questions.
## Agent 365 vs a customer owned registry
Microsoft is clearly moving toward a more governed agent landscape with concepts like Agent 365: a central place where agents in the Microsoft ecosystem can be registered, managed, monitored, and controlled.
That direction makes sense. A central view is better than “somewhere in Copilot Studio there are three flows and nobody remembers what they do”. Agent 365 can help with questions such as:
- Which Copilot and Microsoft 365 agents exist?
- Who owns them?
- Which policies apply?
- Which workflows are autonomous?
- Which systems and identities are involved?
- What is the potential blast radius?
But I would not make Agent 365 the only source of truth for the whole company.
The reason is simple: not every agent lives inside the Microsoft 365 control plane. Many real setups will also include Foundry, MCP servers, custom backend services, OpenClaw workflows, scripts with LLM steps, and older automations that suddenly get an AI interface.
So I would think about it like this:
- **Agent 365**: the Microsoft side of the agent landscape. Copilot Studio, Microsoft 365 agents, Copilot visible tools, and the policies Microsoft can enforce there.
- **Customer registry**: the cross-system source of truth. It includes Microsoft agents, Foundry/MCP agents, OpenClaw workflows, custom services, and any automation that acts with AI assistance.
Agent 365 can feed the customer registry. It can be an important subsystem. But the customer still owns the full map, because the customer owns the risk.
The minimal registry does not need to be a new platform on day one. A table, a YAML file in a repo, or a small internal app is enough if it is maintained and used during reviews.
For each agent I would track at least:
- name and purpose
- owner and contact
- environment
- frontend or entry point
- autonomy level
- identity
- data scope
- read and write capabilities
- approval requirements
- logs and metrics location
- risk level
- review cycle
- fallback path if the agent must be disabled
This is boring. That is exactly why it works.
## Ownership roles: who owns what?
Copilot and agent governance should not become a new silo. Most organizations already have the pieces:
- Microsoft 365 and Entra ID admins
- security and compliance owners
- data owners for HR, finance, sales, operations, and other domains
- a platform or architecture function
- application and integration teams
What is often missing is the explicit agreement about who decides what.
For a practical 2026 setup I would name these roles.
### Copilot or AI product owner
This person or team owns the business adoption story. They define what Copilot and agents are supposed to help with, prioritize use cases, coordinate enablement, and act as the first escalation point for “can we use AI for this?” questions.
They should not own every technical detail, but they keep the overall direction coherent.
### Security and compliance owner
This role owns data classification, regulatory concerns, incident response expectations, and audit requirements.
A good security owner does not just say no. They define where general Copilot is fine, where a specialized agent is needed, where human approval is mandatory, and where the answer is simply “not in scope”.
### Data and domain owners
These are the people who know the business systems and the sensitivity of the data. HR, finance, legal, sales, operations, manufacturing, and support all have different risk profiles.
They answer questions like:
- Which systems and sites hold critical data?
- What can a general assistant see?
- What needs a specialized agent?
- Which questions should not be answered at all?
- Which actions require approval from the domain?
### Technical platform owner
This is usually a mix of Microsoft 365, Entra ID, infrastructure, integration, and platform engineering.
They turn decisions into tenant settings, identities, RBAC, connector configuration, MCP tool schemas, deployment pipelines, logging, dashboards, and operational runbooks.
### Agent owner
Every serious agent needs a named owner. Not “IT”. Not “the AI team”. A person or team that accepts responsibility for the agent’s purpose, access, changes, review cycle, and retirement.
If nobody wants to own an agent, it should not be in production.
## Scope and data decisions you cannot dodge
Before building more agents, I would write down a few scope decisions in plain language.
For example:
> In 2026, our primary Copilot scope is knowledge work inside Microsoft 365: documents, mails, chats, meeting content, and selected knowledge bases. We do not treat general Copilot as a universal frontend for HR, finance, ERP, security operations, or production infrastructure.
Then define data source rules. A first version could look like this:
- Microsoft 365 content: in scope, but permission cleanup is required.
- Ticketing and knowledge base systems: in scope via approved connectors with proper ACL mapping.
- HR systems: out of scope for general Copilot. Only specialized agents with HR approval.
- Finance and core ERP: out of scope for general Copilot. Curated reports and documents are fine.
- Security operations: propose-only by default. No autonomous containment or changes without a separate design review.
- Public websites and internet sources: only where explicitly configured and labeled.
This does not need to be perfect in the first week. But it needs to exist. Otherwise every team assumes their favorite system is obviously in scope.
## Identity: this is where the blast radius lives
Every agent acts under some identity.
For Microsoft 365 productivity scenarios, delegated user permissions often make sense. The agent acts within the user’s context and inherits the user’s access. That fits summarization, drafting, personal search, and many Copilot experiences.
For backend automation, I usually expect a service principal or managed identity. On Azure, managed identity is often the cleaner default because there are no long-lived secrets to rotate manually.
The dangerous pattern is the shared super identity: one “agent-prod” account with broad access because it made the first demo easier. That is how a small agent becomes a big incident.
My baseline rules:
- use managed identities where possible
- avoid shared super identities
- separate identities by environment
- separate identities by risk level
- scope RBAC to the smallest practical resource scope
- prefer read-only before write access
- require a design review before production write access
- remove unused capabilities during quarterly reviews
When someone asks whether an agent can do something, I ask this first:
> What identity would it use, and what damage could that identity do?
That question is usually more useful than a long abstract AI safety discussion.
For higher risk agents I also want the registry to show the blast radius in plain language. Not just “Contributor on rg-prod-data”, but “can update records in the curated revenue database” or “can create but not approve access requests”.
## Guardrails belong in code
Prompts are not policy.
A system prompt that says “do not leak data” is better than nothing, but it is not a control. Real controls sit in the tool layer, API layer, data layer, and identity layer.
For agent tools I want:
- small named tools
- strict input schemas
- server-side validation
- allowlists for sensitive operations
- explicit approval steps for risky actions
- no generic “run anything” tools in production
- no arbitrary SQL or HTTP tools exposed to a model
- rate limits and circuit breakers
- clear error handling
Good tool design is boring on purpose.
Good:
```text
bi_get_revenue_snapshot(date, compareDays, currency)
```
Bad:
```text
run_sql(query)
```
The first tool is governable. The second one is an exfiltration path with a nice name.
The same logic applies to business actions.
Good:
```text
create_access_review_ticket(userId, systemId, reason)
propose_entra_group_change(userId, groupId, justification)
```
Risky:
```text
update_entra_user(anyPayload)
call_internal_api(method, url, body)
```
If the backend owns the schema, validation, authorization, and approval flow, the model can help choose a useful action without being trusted with unlimited power.
For Copilot extensions, Graph connectors, plugins, and MCP tools, I would make production rules explicit:
- only the platform team deploys production connectors
- every connector has a data owner sign-off
- every custom tool has a short security design note
- tools that write data require approval rules
- sensitive HR, finance, legal, and security topics use whitelists, not just deny lists
You cannot stop users from asking bad questions. But you can control which data is indexed, which tools exist, and what the backend is willing to do.
## Observability: auditors do not care that the model is clever
If an agent makes a bad decision, nobody wants to hear that the model was reasoning. They want to know what happened.
For any serious agent, logs should answer:
- who triggered it
- which agent ran
- which frontend was used
- which tools it called
- which systems were touched
- what changed
- which identity was used
- whether approval happened
- where an error occurred
- whether this happened before
On Azure, I would normally place this in Application Insights and Log Analytics, with dashboards and alerts where they make sense. The exact stack can vary. The log shape matters more than the logo.
For every tool call, log at least:
```json
{
"correlationId": "7f4f8d0e-8d9e-4a9a-b4b4-example",
"agentName": "revenue-drop-analyst",
"agentVersion": "2026.05.3",
"toolName": "bi_get_revenue_snapshot",
"frontend": "teams",
"caller": "pseudonymous-user-id",
"identity": "mi-agent-revenue-drop-prod",
"environment": "prod",
"tenantId": "tenant-a",
"dataScope": "revenue_kpi_curated",
"approvalId": null,
"outcome": "success",
"durationMs": 420
}
```
For write actions, add the action type, target system, target record type, approval reference, and before/after identifiers where appropriate. Do not log raw prompts, secrets, confidential documents, or personal data just because logging feels good. Store enough to audit behavior and debug incidents, not enough to create a second data leak.
I would also monitor patterns, not just failures:
- unusual tool-call spikes
- repeated access denials
- new tools used for the first time in production
- agents calling systems outside their normal pattern
- high latency or timeout rates
- many refused or approval-blocked actions
Those signals are often more useful than a monthly screenshot of usage numbers.
## Agent Fact Sheet example
A lightweight Agent Fact Sheet is a good starting point. It can live in a repo next to the code or in the registry backing store.
```yaml
apiVersion: governance.bajonczak.com/v1
kind: AgentFactSheet
metadata:
name: revenue-drop-analyst
environment: prod
version: 2026.05.3
status: active
ownership:
ownerTeam: platform-data-team
businessOwner: finance-analytics
securityContact: infosec-ai-review@example.com
supportChannel: teams://agent-support
purpose: >
Explains daily revenue drops from curated BI metrics and prepares
investigation notes for finance analysts.
frontends:
- teams
- scheduled-job
classification:
riskLevel: medium
autonomy: propose-only
productionWriteAccess: false
humanApprovalRequiredFor:
- publishing_external_reports
- changing_finance_records
identity:
type: azure-managed-identity
name: mi-agent-revenue-drop-prod
rbacScope:
- /subscriptions/00000000-0000-0000-0000-000000000000/resourceGroups/rg-bi-prod
blastRadius: >
Can read curated revenue KPI data. Cannot update finance records,
raw ERP tables, customer master data, or access control settings.
dataScope:
allowed:
- revenue_kpi_curated
- region_breakdown_curated
- product_category_curated
prohibited:
- individual_salary_data
- raw_erp_tables
- customer_personal_data
capabilities:
read:
- tool: bi_get_revenue_snapshot
system: fabric_warehouse_curated_metrics
- tool: bi_get_region_breakdown
system: fabric_warehouse_curated_metrics
write: []
outOfScope:
- run_sql
- update_finance_record
- send_external_email
guardrails:
toolAllowlistOnly: true
maxRowsPerQuery: 500
promptLogging: false
rawDocumentLogging: false
requiresDataOwnerApprovalForNewTools: true
observability:
applicationInsights: ai-agent-prod
logAnalyticsWorkspace: law-agent-prod
dashboard: https://portal.azure.com/example-dashboard
alertRules:
- repeated-access-denied
- unusual-tool-call-volume
- first-prod-use-of-new-tool
operations:
reviewCycle: monthly
lastReviewed: 2026-05-01
fallbackPath: Disable Teams app registration and managed identity assignment.
changeProcess: Pull request plus platform and data-owner approval.
```
This does not have to be perfect. It has to be useful. If an auditor, security engineer, or new team member can understand the agent from this file, the registry is already doing real work.
## Operating model without killing momentum
Governance fails when it becomes a giant approval machine. It also fails when everyone can ship anything and call it innovation.
The lighter model I prefer:
- During design: write or update the Agent Fact Sheet.
- During deployment: registry entry required before production.
- For new data sources: data owner sign-off required.
- For new write access: named owner, security review, and approval model required.
- Monthly: review new agents, changed tools, errors, denials, and unusual usage.
- Quarterly: re-check RBAC, identities, owners, and unused capabilities.
- Always: make it easy to disable an agent quickly.
This is not very different from how mature teams already handle cloud permissions and CI/CD pipelines. Agents just make the same discipline more urgent.
## Short stack placement: Copilot, Foundry/MCP, OpenClaw
I would not force one tool to do everything.
### Copilot
Use Copilot for the Microsoft 365 tenant people already work in: documents, mails, chats, meetings, summaries, drafts, and knowledge work over permissioned M365 content.
Do not treat general Copilot as a direct frontend to every ERP, HR, finance, or infrastructure system.
### Foundry and MCP
Use Foundry and MCP when you need serious backend orchestration across systems. This is where carefully designed tools like `sap_list_users`, `entra_list_users`, `create_ticket`, or `bi_get_revenue_snapshot` make sense.
The agent can plan and explain. The backend owns authentication, authorization, validation, business rules, and logging.
### OpenClaw
Use OpenClaw for personal, team-level, or self-hosted automation where you control the infrastructure and accept the risk. It is powerful for developer productivity, local workflows, blog plumbing, small ops tasks, and experiments.
I would not casually place OpenClaw in charge of production SAP, HR, or identity workflows unless the same registry, identity, guardrail, and logging discipline applies.
The placement is simple:
- Copilot for knowledge work inside Microsoft 365.
- Foundry/MCP for governed cross-system enterprise agents.
- OpenClaw for self-hosted automation where the owner understands the blast radius.
Pick the tool that matches the governance level of the problem.
## Platform boundaries are getting stricter
Enterprise platforms are becoming more careful about how agents access business APIs, which credentials they use, and where audit trails live. That is not surprising. If third-party agents can act inside core systems, platform owners will demand clearer boundaries.
The architecture lesson is simple: do not build on gray-area access paths.
Use official APIs, clear identities, scoped permissions, explicit approvals, and proper logging. It is less exciting than a demo, but it survives contact with security, legal, and operations.
## My take
Agent governance is not one feature you switch on. It is a platform habit.
If agents only draft text, you can start with lightweight rules. Once they call tools or change systems, you need a registry, identity model, code-level guardrails, and auditable logs.
I would start small:
- one customer-owned registry
- one Agent Fact Sheet per serious agent
- managed identities or tightly scoped app identities
- small tools instead of generic access
- Application Insights and Log Analytics for tool-call visibility
- monthly reviews for changes, errors, and access drift
That is enough to move without pretending the risk is gone.
The goal is not to slow every team down. The goal is to make sure that when the company has 5, 20, or 100 agents, someone can still answer the boring questions. Which agents exist? Who owns them? What can they do? What did they do yesterday? And how do we stop them if we need to?
### SAP’s API Policy v4/2026 vs Agentic AI: What Enterprise Customers Should Do Now
URL: https://blog.bajonczak.com/saps-api-policy-v4-2026-vs-agentic-ai-what-enterprise-customers-should-do-now/
Last updated: 2026-05-08T05:29:03.000Z
Right now, one of the hottest (and most frustrating) topics in SAP circles is the updated API policy narrative around third‑party generative AI and autonomous agents.
If you’re a customer, it’s easy to get pulled into vendor drama: who is blocking whom, who is trying to lock in which ecosystem, who is “protecting stability” vs. “killing innovation”.
But if you’re the person who actually has to build and run SAP integrations, the only question that matters is much more boring:
> What should we do *now* so our AI plans don’t depend on brittle SAP interfaces or unclear policy interpretations?
In this post I’ll share how I read SAP’s API policy v4/2026 direction from a customer and architect perspective, what I would stop doing immediately, and what I would build instead if my goal is: “use SAP data for analytics and AI, but remain defensible to security, auditors, and SAP itself”.
## What’s changing: agentic AI is now a first-class concern
There has always been a line between:
- **published and supported SAP APIs**, and
- **internal / undocumented interfaces** that people use anyway because they’re convenient.
What’s different in 2026 is that “agentic AI” shifts the risk profile dramatically. A traditional integration calls a few endpoints in a predictable sequence. An autonomous agent can:
- plan a sequence of API calls,
- try different paths when something fails,
- repeat queries at scale,
- and do all of that based on prompts that evolve over time.
From a platform owner’s point of view, that’s scary — whether you’re SAP, Microsoft, Salesforce, or anyone else. It increases load risk, stability risk, and makes “what exactly is consuming our APIs?” harder to control.
So the policy shift itself is not surprising. The impact on customers is.
## The real customer risk: building your AI strategy on gray areas
Most customer frustration I’ve seen isn’t about “SAP wants published APIs”. That’s reasonable.
The frustration comes from uncertainty and gray areas:
- What exactly is allowed for AI use cases?
- What about partners and tools that rely on existing integration patterns?
- What about internal AI initiatives that don’t “train a model on SAP data” but do analytics or RAG?
If your architecture depends on undocumented endpoints, private tables, or “we’ve always done it this way”, you’re exposed. Not just to SAP policy — also to security findings and audit questions.
That’s why I think this moment is a forcing function for customers:
> Move your SAP-to-AI story from “agent calls SAP directly” to “governed data products and well-defined interfaces”.
## What I would stop doing immediately
Here are the patterns I would actively kill off (or at least freeze) if I was responsible for SAP + AI integrations right now.
### 1) “AI agent calls SAP APIs directly” without hard guardrails
If your plan is “let’s connect Copilot / a third-party agent / a generic LLM tool directly to SAP and see what happens”, you’re betting on a policy gray zone and a technical stability risk at the same time.
Even if it’s technically possible today, it’s rarely defensible long-term.
### 2) Undocumented APIs as strategic dependencies
If a connector, script, or partner product relies on undocumented endpoints, treat it like technical debt with a deadline. It might work for years — until it doesn’t, and then your AI roadmap gets blocked by a contract conversation.
### 3) Bulk extraction without clear purpose
“Let’s copy all SAP data into a lake and figure out AI later” is almost always a governance failure. If you can’t explain:
- which data you extract,
- why you need it,
- who owns it,
- who can access it,
then you are creating a bigger problem than any API policy could.
## What I would build instead: the “governed data product” pattern
The most robust response I see is to treat SAP data like what it is: a system of record with strong boundaries.
You don’t connect random agents to your system of record. You build a controlled integration path and land curated data in a governed platform you own.
A generic reference architecture looks like this:
```mermaid
flowchart LR
SAP[SAP (system of record)] -->|Published APIs / supported connectors| INT[Integration Layer]
INT -->|Curated datasets| DP[Data Platform (Fabric/Lakehouse/Warehouse)]
DP --> BI[BI / Reporting]
DP --> AI[AI workloads (RAG / agents / notebooks)]
AI --> OUT[Teams / Copilot extensions / Tickets]
```
This pattern has three advantages in the current climate:
- **Policy defensibility:** you can point to supported interfaces and data minimization.
- **Security trimming:** you control access at the data platform layer with clear roles and logging.
- **Stability:** agents query curated datasets, not production SAP APIs at unpredictable scale.
If your SAP systems are on-prem or in private networks, Microsoft Fabric (for example) supports connecting to on‑prem sources via the on‑premises data gateway in its Data Factory experience. That lets you keep SAP private while still enabling a governed pipeline to the cloud.
## How to keep AI innovation alive without violating boundaries
The goal is not to slow down innovation. The goal is to move innovation to the right layer.
Instead of “agent talks to SAP”, aim for:
- **Agents talk to tools.** (MCP/Foundry style tool contracts.)
- **Tools talk to curated datasets or approved APIs.**
- **All sensitive logic sits in backends you control.** Not in prompts.
This is also how you stay model-agnostic: you can swap the LLM, while your tool contracts, guardrails, and datasets remain stable.
## Practical checklist: what to clarify this month
If you want to respond proactively rather than emotionally, here’s what I would clarify within the next 2–4 weeks:
- **Inventory:** which integrations currently touch SAP via undocumented/private interfaces?
- **AI scope:** which AI use cases do we actually want (analytics, RAG, agents that act)?
- **Published APIs:** for each use case, which published interfaces exist (and which don’t)?
- **Data products:** what is the smallest curated dataset that still creates value?
- **Ownership:** who owns the dataset, the pipeline, and the downstream agent?
- **Access model:** how do roles map to what people/agents can see?
- **Logging & review:** how will you detect “this agent is pulling too much”?
None of this is glamorous, but it’s exactly what turns “AI ambition” into “AI you can run in production”.
## My take
It’s tempting to treat SAP’s API policy shift as a pure vendor power move. Maybe it is, maybe it isn’t. As a customer, that framing doesn’t help you.
What helps you is a durable architecture that survives policy changes:
- published interfaces where possible,
- curated data products instead of bulk dumps,
- agents operating on governed datasets and tool contracts,
- and clear ownership + observability.
If you build that, you can keep innovating with AI — even if SAP, Microsoft, and everyone else keeps adjusting the rules of the game.
And you’ll have a much stronger position in any discussion with SAP or partners, because you’re not asking for a loophole. You’re building a defensible integration story.
### Building an MCP Server in TypeScript: Reacting to Signals, Querying BI, and Handing Off to a Second Agent
URL: https://blog.bajonczak.com/building-an-mcp-server-in-typescript-reacting-to-signals-querying-bi-and-handing-off-to-a-second-agent/
Last updated: 2026-08-02T10:13:29.000Z
*The useful MCP pattern is not “let the model access everything”. It is the opposite: expose a few safe tools, return structured data, and keep the agent away from raw systems.*
Most agent demos still start with a chat box. You ask something, the model answers. Fine.
In enterprise systems, the valuable cases often start somewhere else:
- an alert fires,
- a KPI drops,
- a job fails,
- a ticket changes priority,
- a customer escalates.
That is where MCP becomes interesting.
Instead of giving an agent broad access to infrastructure, you expose a small set of tools with stable schemas. The agent can call those tools, but the dangerous parts stay in normal backend code: authentication, authorization, query limits, input validation, logging, and data shaping.
In this example I use TypeScript to build a small MCP-style workflow:
1. a revenue drop signal comes in,
2. an orchestrator agent asks an MCP server for safe BI numbers,
3. the MCP server queries a controlled BI backend,
4. a second analyst agent turns the numbers into a short summary and next steps.
The important part is not the demo itself. The important part is the boundary.
## What MCP is, in normal language
MCP stands for Model Context Protocol. The simple version:
> MCP is a standard way for agents to discover and call tools.
A tool can represent a BI metric, SAP order lookup, ticket query, Teams notification, build pipeline action, or anything else you decide to expose.
If you have built API gateways, ESBs, OData services, REST APIs, or integration layers, this should feel familiar. In the past we normalised system integrations. With MCP we normalise tool capabilities for agents.
The agent should not need to know whether the backend is Fabric, Power BI, SAP, Graph, Azure DevOps, PostgreSQL, or a custom service. It should know:
- this tool exists,
- these inputs are allowed,
- this output shape comes back,
- these errors can happen.
That is the useful mental model. MCP is not a license to expose your whole estate to a model. It is a contract layer between an agent and the systems you already run.
## The use case
Imagine a daily revenue KPI check.
One morning a monitoring rule fires:
```text
Revenue today is down more than 12 percent vs. the 7-day average.
```
A useful automated response should answer a few basic questions:
- How large is the drop?
- Is it concentrated in a region, channel, or product group?
- Is this a data issue, a business issue, or still unclear?
- What should a human check next?
What I do not want is an agent with a generic SQL tool against the warehouse.
That is the difference between a useful automation and a future incident report.
## Architecture
The shape is simple:
```mermaid
flowchart LR
SIG[Signal event: revenue_drop] --> A1[Agent 1: Orchestrator]
A1 --> MCP[MCP server: safe BI tools]
MCP --> BI[BI system / curated metric service]
A1 --> A2[Agent 2: Analyst]
A2 --> OUT[Summary and next steps]
```
The roles are separated on purpose.
| Component | Job | What it must not do |
| --------------------- | ------------------------------------------------------- | ------------------------------------------- |
| Signal source | Emit a small event when a KPI crosses a threshold | Decide root cause |
| Agent 1: Orchestrator | Decide which safe tools to call | Query BI directly |
| MCP server | Validate tool inputs, enforce access, call backend code | Accept raw SQL or free-form backend actions |
| BI backend | Return curated metric data | Return more fields than needed |
| Agent 2: Analyst | Explain the provided numbers and propose checks | Invent causes or access systems directly |
Agent 1 receives the signal and decides which tool calls are needed. The MCP server exposes controlled tools like `bi_get_revenue_snapshot` and `bi_get_revenue_breakdown`. Agent 2 only receives structured numbers and writes the narrative.
The analyst agent never touches the BI system directly. That one design choice removes a lot of risk.
## Contracts first: keep them boring
The contracts are the stable part of the design. Models will change. Prompt syntax will change. Vendor APIs will change. These types should not change every week.
```ts
export type RevenueSignalEvent = {
type: 'revenue_drop';
tenantId: string;
user: {
objectId: string;
upn: string;
roles: string[];
groups: string[];
};
occurredAt: string;
thresholdPct: number;
metric: 'revenue';
currency: 'EUR' | 'USD';
scope: {
date: string;
compareDays: number;
};
};
export type RevenueSnapshot = {
date: string;
currency: 'EUR' | 'USD';
today: number;
baselineAvg: number;
deltaAbs: number;
deltaPct: number;
quality: {
isComplete: boolean;
missingDataReason?: string;
};
};
export type BreakdownDimension = 'region' | 'channel' | 'productGroup';
export type BreakdownRow = {
key: string;
today: number;
baselineAvg: number;
deltaAbs: number;
deltaPct: number;
};
export type RevenueBreakdown = {
dimension: BreakdownDimension;
rows: BreakdownRow[];
};
export type AnalystResult = {
summary: string;
likelyCategory: 'business_issue' | 'data_issue' | 'unclear';
nextSteps: string[];
confidence: 'low' | 'medium' | 'high';
};
```
Notice what is missing: raw SQL, table names, dynamic filters, or a “query whatever you want” field.
That is deliberate.
## TypeScript MCP server shape
The exact SDK can change, but the pattern stays the same:
1. define tool input schemas,
2. validate inputs server-side,
3. enforce tenant and user access,
4. call trusted backend code,
5. return structured JSON,
6. log the call.
A compact version looks like this:
```ts
import { z } from 'zod';
import { createMcpServer, ToolContext } from './mcpRuntime';
import { biClient } from './biClient';
import { canReadRevenueMetrics } from './policy';
import { auditToolCall } from './audit';
const DateString = z.string().regex(/^\d{4}-\d{2}-\d{2}$/);
const RevenueSnapshotInput = z.object({
date: DateString,
compareDays: z.number().int().min(1).max(30).default(7),
currency: z.enum(['EUR', 'USD']).default('EUR'),
});
const RevenueBreakdownInput = z.object({
date: DateString,
compareDays: z.number().int().min(1).max(30).default(7),
dimension: z.enum(['region', 'channel', 'productGroup']),
topN: z.number().int().min(3).max(50).default(10),
currency: z.enum(['EUR', 'USD']).default('EUR'),
});
async function requireRevenueAccess(ctx: ToolContext) {
const allowed = await canReadRevenueMetrics({
tenantId: ctx.tenantId,
objectId: ctx.user.objectId,
roles: ctx.user.roles,
groups: ctx.user.groups,
});
if (!allowed) {
throw Object.assign(new Error('Not allowed to read revenue metrics'), {
code: 'forbidden',
});
}
}
export function buildServer() {
const server = createMcpServer({
name: 'bi-insights-mcp',
version: '1.0.0',
});
server.tool({
name: 'bi_get_revenue_snapshot',
description: 'Returns today vs baseline revenue snapshot for one tenant and date.',
inputSchema: RevenueSnapshotInput,
async handler(input: z.infer, ctx: ToolContext) {
await requireRevenueAccess(ctx);
const output = await biClient.getRevenueSnapshot({
tenantId: ctx.tenantId,
...input,
});
await auditToolCall({
correlationId: ctx.correlationId,
tenantId: ctx.tenantId,
userObjectId: ctx.user.objectId,
tool: 'bi_get_revenue_snapshot',
input,
resultMeta: { date: output.date, deltaPct: output.deltaPct },
});
return output;
},
});
server.tool({
name: 'bi_get_revenue_breakdown',
description: 'Returns revenue breakdown by region, channel, or product group.',
inputSchema: RevenueBreakdownInput,
async handler(input: z.infer, ctx: ToolContext) {
await requireRevenueAccess(ctx);
const output = await biClient.getRevenueBreakdown({
tenantId: ctx.tenantId,
...input,
});
await auditToolCall({
correlationId: ctx.correlationId,
tenantId: ctx.tenantId,
userObjectId: ctx.user.objectId,
tool: 'bi_get_revenue_breakdown',
input,
resultMeta: { dimension: output.dimension, rows: output.rows.length },
});
return output;
},
});
return server;
}
```
The schema is doing real work here. It limits dates, dimensions, result size, and currency. The handler enforces tenant and role checks before the BI client runs.
Do not push those checks into a prompt. Prompts are for communication and planning. Code is for policy, security, validation, and execution.
## BI tool schema
I like documenting tools in a way that a backend engineer, security reviewer, and product owner can all read.
| Tool | Input | Output | Access | Notes |
| --------------------------- | -------------------------------------------- | ---------------- | ----------------------------------- | --------------------------------------- |
| bi\_get\_revenue\_snapshot | date, compareDays, currency | RevenueSnapshot | Finance analyst or revenue ops role | One tenant only. No raw dimensions. |
| bi\_get\_revenue\_breakdown | date, compareDays, dimension, topN, currency | RevenueBreakdown | Same as snapshot | Dimension allow-list only. Max 50 rows. |
Example tool manifest in plain JSON terms:
```json
{
"name": "bi_get_revenue_breakdown",
"description": "Returns revenue breakdown by an approved business dimension.",
"inputSchema": {
"type": "object",
"additionalProperties": false,
"properties": {
"date": {
"type": "string",
"pattern": "^\\d{4}-\\d{2}-\\d{2}$"
},
"compareDays": {
"type": "integer",
"minimum": 1,
"maximum": 30,
"default": 7
},
"dimension": {
"type": "string",
"enum": ["region", "channel", "productGroup"]
},
"topN": {
"type": "integer",
"minimum": 3,
"maximum": 50,
"default": 10
},
"currency": {
"type": "string",
"enum": ["EUR", "USD"],
"default": "EUR"
}
},
"required": ["date", "dimension"]
}
}
```
This is also where capability thinking helps. I am not exposing “the BI API”. I am exposing two capabilities:
- get the revenue snapshot,
- get a bounded breakdown for approved dimensions.
Small tools beat giant `do_everything` endpoints.
Bad tools look like this:
```text
run_sql(query)
call_any_http(url, payload)
query_bi(metric, dimensions, filters, sqlHint)
```
They feel flexible, but they destroy your security story and make audits almost useless.
## BI client: keep SQL behind the tool
For the BI layer, this could be Microsoft Fabric Warehouse, a SQL endpoint, a Power BI dataset API, or a custom internal metric service.
The rule stays the same: do not expose a generic `query(sql)` tool.
Keep the query in backend code and only allow safe parameters.
```ts
import sql from 'mssql';
import { RevenueSnapshot, RevenueBreakdown } from './contracts';
const allowedDimensions = {
region: 'region_name',
channel: 'sales_channel',
productGroup: 'product_group',
} as const;
const pool = new sql.ConnectionPool({
server: process.env.FABRIC_SQL_HOST!,
database: process.env.FABRIC_SQL_DB!,
user: process.env.FABRIC_SQL_USER!,
password: process.env.FABRIC_SQL_PASSWORD!,
options: { encrypt: true },
});
async function getPool() {
if (!pool.connected) await pool.connect();
return pool;
}
export const biClient = {
async getRevenueSnapshot(opts: {
tenantId: string;
date: string;
compareDays: number;
currency: 'EUR' | 'USD';
}): Promise {
const p = await getPool();
const req = p.request();
req.input('tenantId', sql.VarChar(64), opts.tenantId);
req.input('date', sql.Date, opts.date);
req.input('compareDays', sql.Int, opts.compareDays);
req.input('currency', sql.VarChar(3), opts.currency);
const result = await req.query(`
WITH baseline AS (
SELECT AVG(amount) AS baselineAvg
FROM fact_revenue
WHERE tenant_id = @tenantId
AND currency = @currency
AND [date] >= DATEADD(day, -@compareDays, @date)
AND [date] < @date
),
today AS (
SELECT SUM(amount) AS today
FROM fact_revenue
WHERE tenant_id = @tenantId
AND currency = @currency
AND [date] = @date
)
SELECT today.today, baseline.baselineAvg
FROM today CROSS JOIN baseline;
`);
const row = result.recordset[0] ?? {};
const today = Number(row.today ?? 0);
const baselineAvg = Number(row.baselineAvg ?? 0);
const deltaAbs = today - baselineAvg;
const deltaPct = baselineAvg === 0 ? 0 : (deltaAbs / baselineAvg) * 100;
return {
date: opts.date,
currency: opts.currency,
today,
baselineAvg,
deltaAbs,
deltaPct,
quality: { isComplete: true },
};
},
async getRevenueBreakdown(opts: {
tenantId: string;
date: string;
compareDays: number;
dimension: keyof typeof allowedDimensions;
topN: number;
currency: 'EUR' | 'USD';
}): Promise {
const dimensionColumn = allowedDimensions[opts.dimension];
if (!dimensionColumn) throw new Error('Unsupported dimension');
const p = await getPool();
const req = p.request();
req.input('tenantId', sql.VarChar(64), opts.tenantId);
req.input('date', sql.Date, opts.date);
req.input('compareDays', sql.Int, opts.compareDays);
req.input('currency', sql.VarChar(3), opts.currency);
req.input('topN', sql.Int, opts.topN);
const result = await req.query(`
WITH today AS (
SELECT ${dimensionColumn} AS [key], SUM(amount) AS today
FROM fact_revenue
WHERE tenant_id = @tenantId
AND currency = @currency
AND [date] = @date
GROUP BY ${dimensionColumn}
),
baseline AS (
SELECT ${dimensionColumn} AS [key], AVG(daily_amount) AS baselineAvg
FROM (
SELECT [date], ${dimensionColumn}, SUM(amount) AS daily_amount
FROM fact_revenue
WHERE tenant_id = @tenantId
AND currency = @currency
AND [date] >= DATEADD(day, -@compareDays, @date)
AND [date] < @date
GROUP BY [date], ${dimensionColumn}
) d
GROUP BY ${dimensionColumn}
)
SELECT TOP (@topN)
COALESCE(today.[key], baseline.[key]) AS [key],
COALESCE(today.today, 0) AS today,
COALESCE(baseline.baselineAvg, 0) AS baselineAvg
FROM today
FULL OUTER JOIN baseline ON today.[key] = baseline.[key]
ORDER BY COALESCE(today.today, 0) - COALESCE(baseline.baselineAvg, 0) ASC;
`);
return {
dimension: opts.dimension,
rows: result.recordset.map((row) => {
const today = Number(row.today ?? 0);
const baselineAvg = Number(row.baselineAvg ?? 0);
const deltaAbs = today - baselineAvg;
const deltaPct = baselineAvg === 0 ? 0 : (deltaAbs / baselineAvg) * 100;
return {
key: String(row.key),
today,
baselineAvg,
deltaAbs,
deltaPct,
};
}),
};
},
};
```
There is one dynamic SQL part here: the dimension column. That only comes from an internal allow-list, never from the model. Everything else is parameterized.
This is not a complete production BI client. The point is the shape: tenant scope, allow-listed dimensions, parameterized values, no raw SQL from the model.
## Access control in code
Access control belongs in code, not in prompt instructions like “only show finance data to finance users”.
A minimal policy module could look like this:
```ts
type RevenuePolicyInput = {
tenantId: string;
objectId: string;
roles: string[];
groups: string[];
};
const revenueReaderRoles = new Set([
'finance-analyst',
'revenue-ops',
'tenant-admin',
]);
export async function canReadRevenueMetrics(input: RevenuePolicyInput) {
if (!input.tenantId) return false;
const hasRole = input.roles.some((role) => revenueReaderRoles.has(role));
if (!hasRole) return false;
// Optional: check group-to-tenant mapping from your IAM or app database.
return userBelongsToTenant(input.objectId, input.tenantId);
}
async function userBelongsToTenant(objectId: string, tenantId: string) {
// Replace with your Entra / app DB lookup.
// The important part: make this a backend decision, not a model decision.
return Boolean(objectId && tenantId);
}
```
For sensitive categories I would also add topic and field guards. For example: revenue by region might be fine for one role, but customer-level revenue, compensation, legal matters, investigations, or M&A data may need separate approval paths or no agent access at all.
A model swap should not change your access story. A cheaper model, a faster model, or a locally hosted model may behave differently, but it should never receive data the backend did not authorize.
## Agent 1: react to the signal
The orchestrator can be an HTTP endpoint, Service Bus consumer, Event Grid handler, scheduled job, or workflow engine activity.
Here is the HTTP version:
```ts
import express from 'express';
import { z } from 'zod';
import { callMcpTool } from './mcpClient';
import { runAnalystAgent } from './secondAgent';
const RevenueSignalEventSchema = z.object({
type: z.literal('revenue_drop'),
tenantId: z.string().min(1),
user: z.object({
objectId: z.string().min(1),
upn: z.string().email(),
roles: z.array(z.string()),
groups: z.array(z.string()),
}),
occurredAt: z.string(),
thresholdPct: z.number(),
metric: z.literal('revenue'),
currency: z.enum(['EUR', 'USD']),
scope: z.object({
date: z.string().regex(/^\d{4}-\d{2}-\d{2}$/),
compareDays: z.number().int().min(1).max(30),
}),
});
const app = express();
app.use(express.json());
app.post('/signals', async (req, res) => {
const event = RevenueSignalEventSchema.parse(req.body);
const correlationId = req.header('x-correlation-id') ?? crypto.randomUUID();
const { date, compareDays } = event.scope;
const toolContext = {
tenantId: event.tenantId,
user: event.user,
correlationId,
};
const snapshot = await callMcpTool(
'bi_get_revenue_snapshot',
{ date, compareDays, currency: event.currency },
toolContext,
);
const byRegion = await callMcpTool(
'bi_get_revenue_breakdown',
{ date, compareDays, dimension: 'region', topN: 10, currency: event.currency },
toolContext,
);
const byChannel = await callMcpTool(
'bi_get_revenue_breakdown',
{ date, compareDays, dimension: 'channel', topN: 10, currency: event.currency },
toolContext,
);
const analysis = await runAnalystAgent({
event,
snapshot,
breakdowns: [byRegion, byChannel],
});
return res.json({ ok: true, correlationId, analysis });
});
app.listen(3000);
```
In production, I would add authentication on the signal endpoint, idempotency keys, retry limits, dead-letter handling, and structured logs around every tool call.
Without logs, this kind of workflow becomes painful very quickly.
## Two-agent handoff
The handoff between the orchestrator and the analyst agent should be data, not vibes.
Agent 2 receives:
- the original event,
- the snapshot,
- the breakdowns,
- a strict output schema.
It does not receive BI credentials. It does not receive SQL. It does not receive an open tool list.
```ts
import {
RevenueSignalEvent,
RevenueSnapshot,
RevenueBreakdown,
AnalystResult,
} from './contracts';
import { llm } from './llmClient';
export async function runAnalystAgent(input: {
event: RevenueSignalEvent;
snapshot: RevenueSnapshot;
breakdowns: RevenueBreakdown[];
}): Promise {
const prompt = `
You are an analyst agent.
Use only the numbers provided.
Do not invent causes.
If the data does not prove a cause, say that it is unclear.
Return a short summary and concrete next steps.
Event:
${JSON.stringify(input.event, null, 2)}
Snapshot:
${JSON.stringify(input.snapshot, null, 2)}
Breakdowns:
${JSON.stringify(input.breakdowns, null, 2)}
`;
return llm.generateJson({
schema: {
type: 'object',
additionalProperties: false,
properties: {
summary: { type: 'string' },
likelyCategory: {
type: 'string',
enum: ['business_issue', 'data_issue', 'unclear'],
},
nextSteps: {
type: 'array',
items: { type: 'string' },
minItems: 1,
maxItems: 6,
},
confidence: {
type: 'string',
enum: ['low', 'medium', 'high'],
},
},
required: ['summary', 'likelyCategory', 'nextSteps', 'confidence'],
},
prompt,
});
}
```
A good answer would be something like:
```text
Revenue is down 14 percent vs. the 7-day baseline. The largest negative deltas are in Region West and Direct Sales. The provided data does not prove a root cause. Check order intake, campaign end dates, and whether the pricing or ingestion feed changed overnight.
```
That is useful. It is also bounded.
## Model-agnostic layer: do not make the prompt the program
A common mistake is to put the whole application into the prompt:
- business rules,
- access rules,
- which systems to call,
- which fields are allowed,
- error handling,
- escalation rules.
That works for demos. It becomes fragile when you change models, change pricing tiers, move workloads for data residency, or route simple tasks to a faster model.
A better split is:
| Layer | Stable? | Owns |
| ------------------ | ------------------- | ------------------------------------------------------- |
| Frontend | Replaceable | Chat, Teams, Copilot, web UI, CLI |
| Agent orchestrator | Mostly stable | Planning loop, tool selection, handoff, retries |
| MCP tools | Stable | Schemas, validation, output shaping |
| Policy code | Stable | Authorization, tenant scope, topic guards |
| Backend systems | Stable but evolving | BI, SAP, Graph, ticketing, data platforms |
| Model runtime | Replaceable | Language understanding, summarisation, planning support |
Model-agnostic does not mean model-indifferent. Some tasks need speed. Some need stronger reasoning. Some require data residency. Some may run on a local or private model.
The point is that the model should be a runtime dependency, not the place where your security model lives.
A simple model router can be boring:
```ts
type Workload = 'triage' | 'analysis' | 'code' | 'sensitive-summary';
type ModelChoice = {
provider: 'azure-openai' | 'local' | 'other';
deployment: string;
};
export function chooseModel(input: {
workload: Workload;
sensitivity: 'normal' | 'confidential';
maxLatencyMs: number;
}): ModelChoice {
if (input.sensitivity === 'confidential') {
return { provider: 'azure-openai', deployment: 'private-standard' };
}
if (input.workload === 'triage' && input.maxLatencyMs < 1500) {
return { provider: 'azure-openai', deployment: 'fast-small' };
}
return { provider: 'azure-openai', deployment: 'reasoning-large' };
}
```
The tools, schemas, policies, and audit logs stay the same if you change this routing later.
That is the real benefit.
## Where Foundry and MCP fit
In a Microsoft-heavy estate, I would place the pieces like this:
```mermaid
flowchart TD
C[Copilot / Teams / Web UI] --> O[Agent orchestrator]
O --> F[Foundry agent runtime if used]
O --> M[MCP tools]
M --> APIM[API Management / custom backend]
APIM --> BI[Fabric / Power BI / SQL]
APIM --> SAP[SAP / ERP]
APIM --> GRAPH[Microsoft Graph]
APIM --> TICKETS[Azure DevOps / Jira / ServiceNow]
```
My practical take:
- Use Copilot where the work lives inside Microsoft 365: documents, mail, Teams, meetings, SharePoint.
- Use Foundry when you want a managed place to define agents, test variants, connect tools, and observe behavior.
- Use MCP as the tool contract layer between agents and backend capabilities.
- Keep API Management or your own backend in front of systems that need real policy, secrets, throttling, and audit.
MCP and Foundry do not replace your existing APIs, SAP integration layer, Fabric model, Graph permissions, or IAM setup. They sit above those things.
That is why I think integration engineers stay relevant here. The agent does not care whether there is OData, BTP, HANA, Fabric SQL, Graph, or a custom service behind the tool. But somebody still has to design the capability, secure it, shape the data, and operate it.
## Testing and operational notes
I would not ship this because a demo produced one nice answer. I would test the boring parts first.
### Contract tests
- Invalid dates are rejected.
- `compareDays` cannot exceed the configured maximum.
- `dimension` only accepts the allow-list.
- `topN` is capped.
- Extra fields are rejected if your runtime supports strict schemas.
### Policy tests
- A user without the finance role gets `forbidden`.
- A user from tenant A cannot query tenant B.
- Sensitive dimensions require separate approval or are not exposed.
- The policy result is logged without leaking sensitive data.
### BI tests
- Queries are parameterized.
- Dynamic column names only come from internal allow-lists.
- Empty baselines do not crash the tool.
- Late or incomplete data sets `quality.isComplete` correctly.
- Result size stays bounded.
### Agent tests
- The analyst agent must not claim a root cause when the data only shows correlation.
- The output must match the JSON schema.
- Known incidents can be replayed through the orchestrator.
- Model changes are tested against the same fixture set.
### Operations
Add these from day one:
- correlation IDs from signal to tool call to analyst output,
- structured logs for tool name, tenant, caller, latency, and result metadata,
- no raw secrets or full result payloads in logs,
- retry limits and dead-letter handling,
- idempotency for repeated signals,
- dashboards for tool error rate and latency,
- a small registry page that lists each agent, owner, tools, data touched, and escalation path.
The registry does not need to be fancy. A table is better than tribal knowledge.
Example:
| Agent | Owner | Trigger | Tools | Data | Human fallback |
| -------------------- | ----------- | --------------- | ------------------------------------------------------- | ---------------------------- | ------------------- |
| Revenue drop analyst | Revenue Ops | Daily KPI alert | bi\_get\_revenue\_snapshot, bi\_get\_revenue\_breakdown | Aggregated revenue by tenant | Revenue Ops on-call |
## What makes this enterprise-friendly
Three design choices matter most.
First: no raw query tools. The MCP server exposes safe metric tools with strict schemas.
Second: least privilege. The BI credentials should be read-only and scoped to the required dataset or tenant.
Third: separation of responsibilities. The analyst agent does not access BI directly. It only sees the numbers the MCP tool returned.
This is the same pattern I like for SAP, Microsoft 365, Entra, and service desk scenarios. MCP tools should be a narrow capability surface, not a tunnel into every backend system.
## My take
Building an MCP server is not interesting because it is new. It is interesting because it forces discipline.
You define the tools. You define the schemas. You decide which backend actions are allowed. You log the calls. You keep the model away from the raw system.
That is the part many agent demos skip.
If I were building this for a real tenant, I would start small: one signal, two BI tools, one analyst output, clear logs. Then I would add more signals only after the boundaries are proven.
The goal is not AI magic. The goal is controlled automation that can reason over the data you intentionally expose, without turning your BI system into a free-form prompt endpoint.
### Model-Agnostic Agents: How I Build an Agent Layer That Survives Model Swaps
URL: https://blog.bajonczak.com/model-agnostic-agents-how-i-build-an-agent-layer-that-survives-model-swaps/
Last updated: 2026-05-06T19:19:45.000Z
Every time there’s a big model release or a partnership shake‑up, the same anxiety shows up in enterprise AI conversations:
*“What if we build everything on model X… and then next year model Y is better, cheaper, or mandated by policy?”*
It’s a valid concern. And it’s also a signal that many teams are building agents the wrong way around.
> If your agent architecture makes it painful to swap models, you’ve probably put too much business logic in the model layer.
In this post I’ll describe how I design a **model‑agnostic agent layer** in 2026: an approach that lets you change models (or even run multiple) without rewriting your entire system. I’ll use a Microsoft‑centric stack because that’s where I spend most of my time: Copilot as a frontend, Foundry/MCP as an orchestration layer, and real backends that enforce security and governance.
## Model-agnostic doesn’t mean model-indifferent
Let’s get one misconception out of the way.
Model‑agnostic does *not* mean you don’t care which model you run. It means you accept reality:
- models improve quickly,
- pricing changes,
- data residency and compliance requirements differ,
- some workloads need speed, others need depth,
- and vendors will keep changing the integration story.
So you build your architecture in a way that keeps that variability manageable.
## The anti-pattern: “the prompt is the program”
The most common way teams accidentally lock themselves into one model is simple:
- They put business rules into prompts.
- They let the model decide which systems to call and how.
- They rely on a model-specific tool/function calling format.
- They don’t maintain stable schemas for actions.
This works for demos. It’s fragile in production. And it’s exactly what makes a model swap painful, because your “application” is basically a pile of prompt behaviour.
A model‑agnostic approach starts with a different mindset:
> Prompts are for communication and planning. Code is for policy, security, validation, and execution.
## The stable core: tools, schemas, and policy
To keep agents model‑agnostic, I anchor the system around three stable things:
1. **Tool contracts (schemas)** – what can be done, with what inputs and outputs.
2. **Policy and guardrails** – what is allowed, for whom, under which conditions.
3. **Observability** – logs and metrics that tell you what the agent actually did.
The model is then “just” a planner and natural language interface sitting on top of those stable primitives.
## Reference architecture: Copilot frontend + agent layer + tools
This is the mental model I keep coming back to:
```mermaid
flowchart LR
U[User] --> F[Frontends: Copilot / Teams / Web / CLI]
F --> A[Agent Orchestrator Layer]
A --> T[Tool APIs / MCP tools]
T --> S[Systems of Record: SAP, Entra, Ticketing, Data Platforms]
```
The “agent orchestrator layer” can be Foundry/MCP, your own service, or both. The key is that it owns:
- tool definitions (schemas),
- authentication and permissions,
- input validation and output shaping,
- logging and auditing.
Copilot (or any other frontend) is then a client. A very good client, but still just a client.
## Design principle 1: small tools beat giant “do everything” endpoints
When you expose actions to agents, keep them small and well named.
Good tools look like:
- `sap_get_user(userId)`
- `entra_find_user(upn)`
- `report_identity_drift(scope)`
- `create_ticket(system, summary, severity)`
Bad tools look like:
- `call_any_http(url, payload)`
- `run_sql(query)`
- `do_everything(action, params)`
The bad tools feel “flexible”, but they destroy your security model and make audits impossible. They also tie your prompts to one model’s behaviour, because you need insane prompting to keep the model from doing unsafe things.
## Design principle 2: put access control in code, not in prompts
If your agent can touch systems like SAP, HR, finance, ticketing, or identity, then access control must be enforced in code.
In practice, my baseline is:
- Every tool call includes a user context (UPN / objectId, roles, groups).
- Backends filter results by ACL before the model sees any data.
- Topic guards exist for sensitive categories (compensation, layoffs, investigations).
This is also what makes model swaps easier: a new model can be “dumber” about policy and you still won’t leak data, because the backend never hands it over.
## Design principle 3: treat models as interchangeable runtime dependencies
Once you have stable tools and guardrails, swapping models becomes a runtime choice:
- fast model for triage and routing,
- strong reasoning model for complex planning,
- specialized model for code generation,
- maybe an on‑prem model for sensitive content.
The agent layer can route requests based on:
- cost budget,
- latency targets,
- data sensitivity,
- workload type (summarise vs plan vs generate code).
This is where “model agnosticism” stops being theoretical. It becomes a practical operating mode.
## Where Foundry/MCP fits
I like MCP because it forces you to formalise tool contracts. I like Foundry because it gives you a place to host agents/tools with environment separation and observability.
But the deeper value is architectural: you’re moving from “prompt glue” to “tools with schemas”. That’s the step that makes agents maintainable and model‑agnostic.
In a Microsoft world, I often end up with this split:
- Copilot for inside‑M365 experiences (documents, mail, Teams).
- Foundry/MCP agents for cross‑system workflows (SAP + Entra + ticketing + data platforms).
- A clear boundary where your backend owns policy and secrets.
## Practical checklist: how to know you’re model-agnostic
Here are a few “smell tests” I use:
- If you swapped models tomorrow, would your access control story still hold? (It should.)
- Are your actions expressed as stable tool schemas, or as paragraphs in prompts?
- Can you replay and audit tool calls without involving the model?
- Do you have a single place to see which agents exist, who owns them, and what tools they have?
If the answer is “no” to any of these, you’re not model‑agnostic yet. You’re model‑dependent with extra steps.
## My take
Models will keep changing. That’s the only stable prediction in this space.
The way to build durable agents in 2026 is to stop treating the model like your application runtime. Treat it like a planning engine that sits on top of:
- clean tool contracts,
- hard guardrails enforced in code,
- and observability you can show to a security team without embarrassment.
If you do that, you get the best of both worlds:
- you can ride the model curve (better, cheaper, more local, more compliant),
- without rebuilding your agents every time the industry changes its mind.
### SAP Tightens AI Data Access: A Clean Way to Connect SAP to Microsoft Fabric (On-Prem Gateway)
URL: https://blog.bajonczak.com/sap-tightens-ai-data-access-a-clean-way-to-connect-sap-to-microsoft-fabric-on-prem-gateway/
Last updated: 2026-05-01T10:07:17.000Z
There’s a topic that keeps coming up in SAP + AI conversations right now: SAP tightening its API policy around third‑party generative AI and autonomous agents.
If you’re a customer, you can be annoyed (understandably). But you also have a practical problem to solve:
> You still need SAP data in analytics and AI workflows – just without building on brittle, non‑published interfaces or violating terms.
This is where Microsoft Fabric becomes interesting, not as a “hack”, but as a clean way to build a governed data path from SAP into a platform you control.
In this post I want to answer two questions:
- Is it actually possible to connect SAP data to Fabric in an elegant way, even when direct third‑party AI data access becomes restricted?
- If yes: what does a sane, compliant architecture look like with Fabric + an on‑premises data gateway / connector?
Short answer: yes, it’s possible – as long as you design it like an enterprise data integration, not like “Copilot reads SAP” magic.
## What SAP’s policy shift changes (and what it doesn’t)
The way I interpret the current situation is not “SAP blocks integration”. SAP has always had a strong line between:
- published, supported APIs and integration patterns, and
- undocumented/internal interfaces and mass extraction via side doors.
What’s new is the explicit attention on **generative and autonomous AI scenarios** – especially those that look like:
- large-scale extraction for third‑party model training,
- agents calling internal APIs in uncontrolled ways,
- or “shadow AI” data access paths that bypass SAP’s intended architectures.
For customers, the lesson is simple: if your AI strategy depends on undocumented SAP interfaces, it’s fragile. You want to sit on published APIs and official integration routes.
## Why Fabric is a good place to land SAP data (in a governed way)
Microsoft Fabric is not “an AI tool”. It’s a data platform that gives you:
- pipelines (Data Factory experience),
- data flows / transformations,
- Lakehouse / Warehouse storage,
- Power BI,
- and governance controls around that (access, lineage, monitoring).
That matters because the best response to “SAP restricts third‑party AI data access” is usually not “find another backdoor”. It’s: build a clean, internal data product that you can then use for analytics and AI under your own governance.
## The key enabler: getting from on-prem SAP to Fabric securely
If your SAP systems are on‑prem (or in a network segment that isn’t directly reachable from the internet), the practical question is: how do I connect Fabric to those sources?
In Fabric’s Data Factory experience, Microsoft supports connecting to on‑premises data sources via the **on‑premises data gateway**. This gateway runs inside your network and allows Fabric pipelines / data flows to reach internal systems without exposing them publicly.
In other words: the “connector” lives where your SAP is, not where the cloud is. That’s the elegant part.
### What can you connect to?
From Microsoft’s own Fabric guidance, the on‑premises data gateway is the foundation for built‑in SAP connectors and also works with generic connectors like OData/ODBC/OLE DB/Oracle/etc. For SAP specifically, the options I see most often are:
- **SAP OData** (e.g. S/4HANA OData services, ECC OData services, SuccessFactors OData) using Fabric’s generic OData connector,
- **SAP HANA** using the appropriate driver via gateway,
- and in some cases specialized SAP connectors that rely on SAP-specific drivers installed alongside the gateway.
The exact best choice depends on your SAP landscape and what SAP exposes as published APIs in your context.
## A reference architecture that stays on the safe side
Here’s the architecture I’d recommend if the goal is: “Use SAP data for analytics and AI, but do it in a way that feels defensible to SAP, security, and auditors.”
```mermaid
flowchart LR
SAP[SAP (on-prem / private network)] -->|Published APIs (OData/BAPI via supported connectors)| GW[On-premises Data Gateway]
GW -->|Fabric Pipelines / Dataflows| LH[Fabric Lakehouse/Warehouse]
LH --> BI[Power BI / Reports]
LH --> AI[AI workloads (RAG, agents, notebooks)]
AI -->|Outputs| M365[M365 / Teams / Copilot extensions]
```
The key ideas:
- **Use published interfaces.** No undocumented SAP tables scraped via ad‑hoc RFC calls “because it’s faster”.
- **Land data in Fabric under governance.** Access control, lineage, retention, and audit should exist at the data platform layer.
- **AI consumes curated data products.** Not raw SAP dumps, not uncontrolled “agent queries”, but a defined dataset with clear ownership.
## How this helps with the “third-party AI” restriction
Even if SAP restricts “third‑party autonomous AI agents calling SAP APIs directly”, you still have multiple legitimate paths:
- You integrate SAP data into *your* data platform via supported interfaces.
- You apply your own governance (who sees what, what is exported, what is retained).
- You build AI workloads that operate on the curated Fabric data, not on uncontrolled SAP API access.
This doesn’t magically remove licensing or policy constraints. You still need to be compliant with SAP’s terms and your contract. But you’re no longer in the “shadow integration” territory where your entire AI plan depends on a technical loophole.
## Practical considerations (what you need to clarify)
If you want to do this “for real”, there are a few questions you should clarify early:
- **Which SAP APIs are officially published for your scenario?** (S/4 vs ECC vs SuccessFactors can be very different.)
- **Data minimisation:** what is the smallest dataset that still creates value?
- **Refresh patterns:** do you need near-real-time, hourly, daily loads?
- **Identity mapping:** how do you map SAP identities/roles to who can see which data in Fabric?
- **Security boundary:** do you keep the gateway host locked down like a production integration server? (You should.)
- **Downstream AI use:** are you doing RAG over curated documents, analytics, or action-taking agents? Each needs different guardrails.
## My take
When vendors tighten policies, the instinct is to look for technical workarounds. I think that’s the wrong move here.
If SAP is pushing customers away from uncontrolled third‑party AI data access, the best long‑term response is to build a proper, governed data path: published APIs, a controlled integration layer, and a curated dataset in a platform like Fabric.
Fabric + on‑premises data gateway is not a loophole. It’s a grown‑up architecture: the kind that lets you say “yes, we use SAP data for AI” and still sleep at night because you can explain, audit and control the flow.
If you want, I can follow up with a more concrete hands‑on version (step-by-step) once we pick one SAP source type (e.g. SuccessFactors OData, S/4 OData, or HANA) and a target pattern (Lakehouse vs Warehouse + Power BI + RAG).
### Passwords, MFA, and Passwordless in 2026: What I’d Actually Do
URL: https://blog.bajonczak.com/passwords-mfa-and-passwordless-in-2026-what-id-actually-do/
Last updated: 2026-05-01T07:46:18.000Z
If you work in IT long enough, you’ll see the same sentence in different slides over and over again:
*“Passwords are dead.”*
They’re not. They’re just no longer enough on their own.
In this post I want to walk through how I look at three login setups in 2026:
- password only,
- password + MFA,
- passwordless + MFA.
And more importantly, where each of them is still acceptable, where it’s no longer good enough, and what I’d do in a normal Microsoft‑centric environment to move things in the right direction without declaring a 5‑year identity transformation project.
## Why password-only login is fundamentally broken
On paper, password-only login still “works”:
- user types username + password,
- system checks hash,
- access granted.
The problem is that in 2026, almost all of the assumptions behind this model are gone:
- people reuse passwords across services,
- password leaks + credential stuffing are a permanent background noise,
- phishing kits and malware have industrialised credential theft.
If an attacker gets hold of your password, that’s it. There is no second barrier.
In practical terms, I treat password-only login like this:
- OK for low-risk personal stuff that doesn’t matter if it pops (test accounts, throwaway services).
- NOT OK for anything that touches company data, email, files, HR or finance.
For corporate environments, password-only login is basically “anonymous plus liability”.
## Why password + MFA is the current baseline
Adding multi-factor authentication (MFA) closes the biggest gap: a leaked password is no longer a complete account takeover.
In a typical Microsoft / Entra ID setup today, that looks like:
- user enters username + password,
- system checks risk and policies,
- user confirms via push notification, code, FIDO key or similar.
This doesn’t make you bulletproof. It does raise the bar significantly. Attackers now need:
- the password,
- *and* a way to get past MFA – via prompt bombing, SIM swap, malware on device, real‑time phishing proxies, social engineering, etc.
That’s a lot harder to scale than simple credential stuffing.
For company use, my view is simple:
- password + MFA is the minimum for any serious SaaS / identity / admin / remote access.
- if you can’t or won’t enforce MFA for a system, treat it as untrusted and isolate accordingly.
The details matter though. Not all MFA is equal.
### Not all MFA is created equal
Roughly, I think of MFA options in a spectrum:
- weakest: SMS codes (easy to phish, SIM‑swap, intercept),
- better: TOTP apps (authenticator codes),
- better again: push approvals with number matching and clear context,
- best in class: FIDO2 / security keys / platform authenticators.
In an Entra ID world, that translates into:
- avoid SMS where you can,
- prefer Microsoft Authenticator with number matching and login context,
- for admins and high‑risk roles, push hard towards FIDO2 keys or strong device‑bound authenticators.
So if you say “we have MFA”, but it’s mostly SMS to personal phones, you’ve raised the bar a bit, but not as much as you probably think.
## Where passwordless + MFA comes in
“Passwordless” is a confusing term because many people hear “less secure”. What it actually means in practice is:
- you remove the reusable password from the primary login flow,
- you replace it with something tied to a device, a key or a strong authenticator,
- you often still have multiple factors – they’re just baked into the flow, not bolted on.
In the Microsoft ecosystem, common passwordless options include:
- Windows Hello for Business (Hello + PIN/biometric bound to the device),
- FIDO2 security keys,
- Microsoft Authenticator passwordless sign‑in.
These are “passwordless” from the user point of view, but still multi‑factor under the hood:
- something you have (device, key),
- something you are or know (biometric, PIN),
- plus device binding and anti‑phishing properties.
This kills an entire class of attacks:
- no password to phish and replay,
- no password database to steal and crack,
- no password reuse across systems.
### “Passwordless + MFA” in the real world
In practice, I see a few patterns that work:
- For standard employees:
move to passwordless sign‑in (e.g. Windows Hello for Business + Authenticator) for day‑to‑day, keep a strong password only as a recovery path.
- For admins and sensitive roles:
enforce FIDO2 keys or equivalent, with strict Conditional Access and no legacy protocols.
You can still require step‑up MFA for high‑risk actions (e.g. admin portals, financial approvals), but the default login experience no longer revolves around a reusable password.
## How I’d phase this in a Microsoft‑centric environment
If I had to move a “normal” enterprise from password‑only sprawl to something sane without breaking everything, I’d think in phases rather than slogans.
### Phase 1: kill password‑only for important stuff
First goal: make sure no important system is still password‑only.
Concretely:
- Enforce MFA for Entra ID sign‑ins, at least for browser and modern apps.
- Identify legacy protocols and apps that can’t handle modern MFA and plan their replacement or isolation.
- Upgrade from SMS MFA to app‑based or FIDO where possible.
This phase is about closing the obvious holes.
### Phase 2: make MFA usable and consistent
If MFA feels like a random punishment from the sky, people will resist it and fall for fatigue attacks.
So I’d:
- use risk‑based and Conditional Access policies to only prompt when it actually matters,
- standardise on a small set of MFA methods (don’t let every team invent their own),
- explain clearly *why* MFA is there and how to recognise suspicious prompts.
The goal is to make MFA feel like a normal part of the job, not a random nuisance.
### Phase 3: introduce passwordless where it makes sense
Once MFA is the norm and your identity hygiene is improving, you can gradually move to passwordless for the main flows.
For example:
- enable Windows Hello for Business for corporate devices,
- pilot FIDO2 keys with admins and a few friendly power users,
- offer passwordless options in Microsoft Authenticator.
Don’t rip passwords out overnight. Treat them as a recovery path and slowly reduce how often people actually need them.
## Where I still accept “just a password”
Even in 2026, I’m not dogmatic. There are places where I still accept password‑only login, but I treat them consciously as low‑trust:
- throwaway accounts for testing or demos,
- services that have no connection to production data or identities,
- temporary lab setups where convenience matters more than security and everything can be nuked easily.
The key is to ensure those islands are genuinely isolated. If you use the same password for “toy lab” and “prod tenant”, you’ve defeated the entire point.
## My take
The debate “password vs password + MFA vs passwordless” often sounds more religious than practical.
From where I sit today:
- password‑only is over for anything that matters,
- password + MFA is the pragmatic baseline and will be around for a long time,
- passwordless + MFA (in disguise) is where you want to end up for most users, especially in a Microsoft 365 / Entra world.
The trick is not to chase buzzwords, but to quietly kill off the worst patterns, make MFA normal and then use passwordless to make the remaining security feel less painful and more natural.
If you get that right, you won’t need another “Passwords are dead” slide. People will just stop noticing that they’re not really logging in with passwords anymore.
### SAP HR, Entra ID and Copilot: Three Identity Mistakes I Keep Seeing
URL: https://blog.bajonczak.com/sap-hr-entra-id-and-copilot-three-identity-mistakes-i-keep-seeing/
Last updated: 2026-04-03T11:10:03.000Z
When you put SAP HR, Entra ID and Copilot into the same sentence, the slide usually looks clean:
- SAP (or SuccessFactors) is the system of record for people and org structure.
- Entra ID is your identity and access front door.
- Copilot sits on top of Microsoft 365 and “knows your organisation”.
In reality, there are a few recurring cracks in that picture – and they show up long before you even touch Copilot:
- HR and IT don’t quite agree on who “owns” identity data.
- SAP and Entra are “roughly in sync”, but nobody can prove it quickly.
- Copilot is rolled out on a tenant that was never designed with AI in mind.
In this post I want to call out three identity mistakes I keep seeing in SAP‑heavy environments that directly impact Entra ID and, by extension, Copilot.
None of them are new. Copilot just makes them much more visible.
## Mistake 1: Treating SAP ↔ Entra sync as a black box
Almost every SAP customer has some kind of sync between HR and Entra:
- a standard connector,
- a homegrown ETL job,
- a BTP or CPI flow,
- or a mixture of all of the above.
On paper, the story is simple: SAP is the source of truth, Entra reflects “who works here and what they do”.
In practice, I see a few flavours of the same problem:
- nobody can say, on the spot, how many active employees in SAP don’t have an Entra account,
- there is no easy way to list Entra accounts that have no corresponding SAP record (excluding service accounts),
- department, manager and role information drifts between SAP and Entra over time.
As long as you only used Entra as “the thing that lets people log in”, this was annoying but survivable. Once Copilot starts using your Entra graph as context, it becomes more than that.
Copilot will happily answer questions like:
- “Who is the manager of X?”
- “Which department does Y belong to?”
- “Show me open tasks or documents for team Z.”
Those answers are only as good as your identity data. If SAP and Entra disagree, Copilot faithfully reflects the disagreement.
### What I’d do differently
Instead of treating the sync as “that thing that runs at 3am”, I’d treat it as a small product:
- give it an owner (or small team) jointly between HR and IT,
- define what “healthy” looks like (maximum tolerated drift, sync latency, exceptions),
- add a Sync Insights layer on top – an agent or reporting job that can answer, in plain language:
- “Show me active SAP employees without Entra accounts.”
- “Show me Entra accounts with no SAP record.”
- “List department mismatches between SAP and Entra.”
You don’t have to fix every mismatch automatically. But you should stop pretending the black box is fine just because nobody touches it.
## Mistake 2: Blurring the line between HR data and collaboration data
The second pattern is more subtle: HR data leaking into places where it doesn’t belong – and then surfacing via Copilot.
Typical examples:
- Spreadsheets with salary information stored in broadly accessible SharePoint sites “just for a moment”.
- Performance review notes living in personal OneDrives that have never been cleaned up.
- Org change plans emailed around and then forgotten in mailboxes that Copilot can search.
That’s not really SAP’s fault. It’s what happens when people export data out of SAP/SuccessFactors into tools that were never meant to be long‑term systems of record for sensitive HR content.
Without Copilot, this was already a governance and security issue. With Copilot, the impact is multiplied:
- a normal user might never stumble across that old spreadsheet via manual search,
- Copilot, however, can connect dots across mails, files and chats and surface “helpful” summaries.
It’s the classic “Security Trimming as Insider Threat” problem, but for HR.
### What I’d do differently
I’d make a very clear distinction between:
- **HR systems of record** (SAP, SuccessFactors, dedicated HR apps),
- **collaboration space** (M365: SharePoint, Teams, OneDrive, mail).
And then I’d put a few simple rules in writing:
- Which HR reports are allowed to live in M365 at all (and where)?
- Which data types must never be stored in general collaboration spaces (e.g. raw salary tables, full performance review exports)?
- How long temporary exports are allowed to live before they must be deleted or moved back into a system of record.
On the Copilot side, I’d treat HR‑sensitive content as a separate category:
- Either it is **deliberately** brought into Copilot via specialized HR agents with tight scoping and HR‑only audiences.
- Or it is kept **deliberately** out of general Copilot scope by fixing permissions and cleaning up collaboration spaces.
“We’ll see what Copilot finds” is kein Governance‑Konzept.
## Mistake 3: Assuming Copilot will understand SAP roles and org charts by osmosis
The third mistake is a conceptual one: believing that once Copilot is turned on, it will “understand the organisation” simply because SAP and Entra exist somewhere in the background.
What Copilot actually sees by default is:
- M365 artefacts (documents, mails, chats, sites) via Graph.
- Entra ID as identity and access context.
It does not automatically understand:
- SAP role concepts (positions, jobs, personnel areas, custom HR attributes).
- Which SAP attributes map to which Entra/M365 concepts.
- Which HR structures are “internal plumbing” vs. useful for Copilot answers.
If you never translate your SAP model into something Copilot can see (via Entra attributes, Graph connectors, dedicated agents, documentation), Copilot will make naive assumptions based on what’s in M365:
- Org charts reconstructed from who appears in which meetings and threads.
- Role concepts inferred from distribution lists and Teams memberships.
That can be directionally helpful – but also very misleading.
### What I’d do differently
First, I’d be explicit about which HR concepts matter for Copilot at all:
- manager relationships,
- department/organisation units,
- maybe job families or seniority bands (carefully),
- locations/time zones.
Then I’d work with HR and identity/Entra teams to:
- map the relevant SAP attributes into Entra in a consistent way (and keep them in sync),
- document the mapping somewhere humans can read it,
- decide consciously which of these attributes can be used in Copilot scenarios (e.g. dynamic audiences, routing, personalisation).
If you go further and build SAP‑aware agents (via MCP/Foundry or other backends), I’d make that mapping an explicit part of the design:
- Agents should be able to resolve a user from an Entra identity back to the relevant SAP record(s).
- They should enforce SAP/HR‑level rules around who can see what about whom.
In other words: don’t hope Copilot “learns” your org structure by magic. Give it a clean, governed view of the parts that matter.
## My take
None of these mistakes are new. SAP HR and Entra ID have had friction points for a long time, and collaboration environments were often full of Excel shadow data even before Copilot. What is changing is the visibility: Copilot makes poor identity data more visible. Copilot makes HR data leaks in M365 noticeable faster. Copilot amplifies misunderstandings about your role and org models. The good news: you don’t have to reinvent anything. If you: treat your SAP↔Entra sync as a product instead of a black box, cleanly separate HR data from collaboration data, and deliberately define which SAP concepts Copilot should even be aware of, then Copilot becomes more of an amplifier of your clean structures rather than an amplifier of your legacy issues. And as a side effect, you also end up with a much better foundation for everything that comes next: specialized HR agents, sync insight tools, or Foundry/MCP workflows that build on an identity landscape you actually understand.
### Agent Registry vs. Agent 365: Who Should Own Your Agent Landscape?
URL: https://blog.bajonczak.com/agent-registry-vs-agent-365-who-should-own-your-agent-landscape/
Last updated: 2026-03-29T10:00:52.000Z
As soon as you move from “Copilot writes me nicer emails” zu “Agents führen Workflows aus”, taucht eine sehr praktische Frage auf:
> Wer hat eigentlich noch den Überblick, welche Agents es gibt, was sie können und mit welchen Berechtigungen sie laufen?
Microsofts Antwort darauf heißt inzwischen unter anderem **Agent 365**: ein zentraler Ort, an dem autonome Workflows und Agenten registriert, verwaltet und überwacht werden sollen.
Ich halte das für den richtigen Weg – aber nicht die ganze Antwort.
In diesem Artikel geht es darum, wie ich das Thema **Agent Registry** aus Kundensicht sehe: welche Probleme Agent 365 adressiert, wo du trotzdem eine eigene Sicht brauchst und wie ich beides zusammen denken würde.
## Was eine Agent Registry grundsätzlich leisten muss
Egal, ob sie Agent 365, „Agent Hub“ oder anders heißt – eine sinnvolle Registry löst aus meiner Sicht vier Probleme:
- **Inventar:** Welche Agenten existieren überhaupt?
- **Ownership:** Wer ist für welchen Agent verantwortlich?
- **Capabilities:** Was darf ein Agent tun, in welchen Systemen?
- **Transparenz:** Was hat ein Agent tatsächlich in der letzten Zeit getan?
Wenn du ehrlich bist: viele Organisationen könnten diese vier Fragen heute nicht einmal für ihre klassischen Skripte, Cronjobs und Admin-Tools gut beantworten. Mit AI-Agents wird das nicht besser, wenn du es nicht bewusst angehst.
## Wie Agent 365 in dieses Bild passt
Ich vereinfache hier stark, aber die grobe Idee hinter Agent 365 ist:
- Copilot- und andere Microsoft-Agents an einer Stelle sichtbar machen,
- Policies für autonome Workflows definieren und zentral enforce’n,
- die „Blast Radius“-Frage besser beantworten: was kann welcher Agent potenziell anrichten?
Das ist hilfreich, weil es eine Alternative zu „wir haben irgendwo in Copilot Studio und anderswo noch drei Flows und niemand weiß mehr genau, was läuft“ bietet.
Aber: Agent 365 sieht naturgemäß nur den Teil der Welt, der im Microsoft-Ökosystem lebt. Alles, was du außerhalb baust – Foundry/MCP-Agenten, OpenClaw-Skills, eigene Backend-Services – taucht dort nicht automatisch auf.
Genau deshalb brauchst du aus meiner Sicht eine **eigene Agent Registry-Story**, in die Agent 365 dann ein Baustein wird, nicht der ganze Tempel.
## Die minimale eigene Agent-Registry
Du musst dafür kein riesiges Tool einführen. Ein erster brauchbarer Schritt ist ein sehr unspektakuläres, aber ehrliches Agent-Register – zur Not als Tabelle oder YAML-Datei im Repo.
Für jeden Agent würde ich mindestens festhalten:
- **Name** und kurze Beschreibung („Sync Insights SAP↔Entra“, „Ticket-Triage für IT-Support“, …)
- **Owner** (Person oder Team), inklusive Kontakt
- **Scope** (in welchen Bereichen darf er arbeiten, z.B. nur Test-Tenant, nur internes HR, nur Dev-Systeme)
- **Capabilities** (welche Systeme liest/schreibt er, welche Aktionen sind erlaubt: create/update/delete/approve)
- **Identity** (unter welchem technischen Konto / welcher App-Registration läuft er?)
- **Frontends** (wird er über Copilot genutzt, Teams, Web-UI, CLI?)
- **Logs** (wo finde ich Logs und Metriken?)
Das ist nichts, was Agent 365 dir abnehmen kann, wenn du es nicht definierst. Umgekehrt kann Agent 365 ein Datenlieferant für genau diese Tabelle sein – aber das Model musst du dir selbst überlegen.
## Wie ich Agent 365 und eine eigene Registry zusammendenken würde
Wenn ich es mir als Kunde wünschen dürfte, sähe mein Setup so aus:
- **Agent 365** verwaltet alle Agenten, die im Copilot-/Microsoft-365-Ökosystem leben (Copilot Studio, native M365-Agents, evtl. MCP-Tools, die direkt an Copilot hängen).
- **Eine eigene, systemübergreifende Registry** (kann am Ende auch nur ein ordentlich gepflegtes Repo sein) bildet das „Single Source of Truth“ über:
- Microsoft-Agents (über Sync/Exports aus Agent 365),
- Foundry/MCP-Agenten,
- OpenClaw-Agents,
- sonstige Automationen, die „AI-getrieben“ sind.
Agent 365 wäre in diesem Bild ein wichtiges Subsystem, aber keine Entschuldigung, die nicht-Microsoft-Welt zu vergessen.
## Was du zusätzlich brauchst: Policies, nicht nur Inventar
Eine Registry ist die halbe Miete. Die andere Hälfte sind die Regeln, die du darauf anwendest.
Konkrete Fragen, die ich für alle Agenten klären würde – egal, ob sie in Agent 365 hängen oder nicht:
- **Autonomie-Level:** Darf dieser Agent eigenständig Änderungen vornehmen, oder nur Vorschläge machen?
- **Umgebungen:** In welchen Tenants/Umgebungen darf er laufen (Dev/Test/Prod)?
- **Approval-Flows:** Braucht es für bestimmte Aktionen (z.B. HR/Finance/Security) immer eine menschliche Bestätigung?
- **Data Scope:** Welche Datenkategorien sind explizit tabu (z.B. individuelle Gehaltsdaten, laufende Ermittlungen)?
- **Review-Cadence:** Wie oft schauen wir auf Logs, Fehlerraten und Nutzerfeedback für diesen Agent?
Das ist im Prinzip das gleiche Denken, das du für CI/CD-Pipelines oder Admin-Tools brauchst – nur angewendet auf Agents.
## Ein einfacher Startpunkt: „Agent Fact Sheet“ pro Agent
Wenn dir eine vollständige Registry zu viel erscheint, fang mit einem **Agent Fact Sheet** pro wichtigem Agent an. Eine Seite, die folgende Fragen beantwortet:
- Was macht dieser Agent konkret?
- Wer ist der Owner?
- Welche Systeme liest/schreibt er?
- Unter welcher technischen Identität läuft er?
- Welche Sicherheitsmaßnahmen gibt es (Logging, Approvals, Limits)?
- Wie sieht der Rückfallpfad aus, wenn er deaktiviert werden muss?
Wenn du diese Facts sauber hast, ist der Schritt zu einer strukturierten Registry (Tabelle, YAML, eigenes Tool) nicht mehr weit.
## Meine Einschätzung
Eine bessere Agent-Governance im Microsoft-Ökosystem ist absolut sinnvoll – und ich finde es gut, dass Microsoft mit Agent 365 und Co. in diese Richtung geht.
Aber: Kein Hersteller kann dir die Verantwortung abnehmen, ein eigenes Bild deiner Agentenlandschaft zu haben. Gerade weil du neben Copilot:
- Foundry/MCP für Enterprise-Agents,
- OpenClaw für Self-Hosted-/DevOps-Automation,
- und diverse Legacy-Automationen
parallel betreibst.
Mein Rat wäre deshalb:
- Nutze Agent 365, wenn es dir Sichtbarkeit und Policies für den Microsoft-Teil bringt.
- Bau dir trotzdem eine eigene, systemübergreifende Agent-Registry, auch wenn sie am Anfang „nur“ eine seriös gepflegte Tabelle ist.
- Definiere klare Regeln für Autonomie, Berechtigungen und Review – und wende sie auf alle Agenten an, nicht nur auf die, die in der neuesten Produktankündigung vorkommen.
Dann bist du nicht von einem Werkzeug abhängig – sondern hast ein eigenes Governance-Modell, in das du neue Plattformen wie Agent 365 einbauen kannst, statt ihnen hinterherzulaufen.
### From Copilot to Agents: Why Agent Governance Matters More Than Ever
URL: https://blog.bajonczak.com/from-copilot-to-agents-why-agent-governance-matters-more-than-ever/
Last updated: 2026-03-28T06:29:50.000Z
If you’ve followed the latest Copilot news, you’ve probably seen two phrases pop up again and again:
- **agentic AI** – Copilot and friends doing more than just chat and summarisation,
- **Agent 365** and “agent governance” – Microsoft’s attempt to keep that power under control.
Marketing aside, there is a very real problem behind those buzzwords:
> Once you let AI agents run workflows on your behalf – not nur Texte schreiben, sondern Dinge *tun* – musst du sehr genau wissen, wer was darf, wie weit der Blast Radius geht und wer das Ganze am Ende verantwortet.
In this post I want to unpack what “agent governance” means in a Microsoft 365 / Copilot world, how I interpret concepts like Agent 365, and what I would put in place myself before I let Copilot or custom agents do more than just answer questions.
## From copilots to agents: what actually changes
Up to now, many Copilot use cases have been fairly contained:
- summarise a document,
- draft an email or a Teams post,
- answer “what do we know about X?” based on M365 content.
Those are powerful, but they’re mostly **read and draft** scenarios. If something goes wrong, the blast radius is limited: the user still decides what to send, publish or act on.
“Agentic AI” is different. The whole point is that agents can:
- call tools and APIs,
- update systems,
- kick off workflows,
- and do all of that semi‑autonomously based on goals, not single prompts.
In other words: we’re moving from “Copilot proposes” to “agents actually change things”. That’s where agent governance stops being optional.
## What Microsoft seems to be aiming for with Agent 365
I’m not going to quote marketing slides here, but if you squint at the current announcements, Agent 365 and similar ideas try to solve a few core problems:
- **Central registry:** know which agents exist, who owns them and what they can do.
- **Blast radius control:** define policies around which systems agents can touch and under which conditions.
- **Governance hooks:** logging, approvals, review flows – so agents don’t become invisible shadow‑IT.
- **Model routing:** decouple the “agent surface” from the underlying model (OpenAI, Anthropic, Microsoft’s own models, …).
That’s a step in the right direction. But relying purely on whatever Microsoft ships next quarter is not enough. You still need your own view of agent governance, because Microsoft can’t know your risk appetite, your compliance rules or your legacy systems.
## Agent governance from the customer side: four dimensions
When I think about agent governance in a Copilot/M365 + SAP/line‑of‑business environment, I break it down into four dimensions:
1. **Scope:** what kinds of agents do we allow at all?
2. **Capabilities:** what can a given agent actually do?
3. **Context & identity:** on whose behalf is the agent acting?
4. **Oversight:** how do we monitor and evolve agents over time?
### 1\. Scope: from “Copilot everywhere” to “agents where it makes sense”
Not every problem deserves an agent.
Before you light up agent frameworks everywhere, I’d explicitly decide:
- Where are agents allowed to operate autonomously? (e.g. internal knowledge workflows, ticket triage, dev/test environments)
- Where are agents only allowed to propose actions? (e.g. HR, finance, security operations)
- Where do we not want agents at all? (e.g. very sensitive regulatory flows that require strict human procedures)
Write that down. Otherwise every vendor demo will implicitly expand your scope without anyone noticing.
### 2\. Capabilities: define tools, not magic
An agent without tools is just a fancy autocomplete. An agent with too many tools is a risk.
For each agent, I’d maintain a short, explicit list of capabilities:
- Which systems can it read from?
- Which systems can it write to?
- Which actions are allowed (create, update, delete, approve, escalate)?
- Which actions are explicitly out of scope?
If you use MCP/Foundry, this naturally becomes your tool schema. If you work purely inside Copilot Studio, it should still exist as a document – not just as a bunch of magic connections in a UI.
For agents that talk to SAP, Entra, ticketing or other core systems, I’d be especially strict:
- Small, well‑named tools that map to real, understood operations.
- No “call arbitrary HTTP” tools that can hit anything with a URL.
- No tools that silently bypass existing approval workflows.
### 3\. Context & identity: whose rights does the agent use?
This is the part that gets hand‑waved in many demos.
Every agent needs to act under some identity. There are two common patterns:
- **User‑delegated agents:** the agent uses the calling user’s permissions.
- **Service agents:** the agent uses its own service account or app identity.
Both can be valid, but you should be clear which you’re using where:
- For personal productivity (“help me with my docs”), delegated permission is fine and aligns with M365’s normal security trimming.
- For cross‑system workflows (SAP + Entra + ticketing), I often prefer service identities with narrow roles – and explicit mapping from user to allowed actions inside the agent backend.
Either way, someone needs to own the question:
- If this agent goes rogue or is misconfigured, what’s the blast radius of the identity it runs under?
That’s where Agent 365‑artige Konzepte helfen können: ein zentraler Ort, an dem du siehst “diese Agenten laufen mit diesen Identitäten und berühren diese Systeme”. Aber das entbindet dich nicht davon, die Rollen sauber zu modellieren.
### 4\. Oversight: treat agents like living systems
An agent is not a one‑and‑done project. It will behave differently as your data, systems and users change.
Basic oversight I’d want for any serious agent:
- Logging of tool calls: who triggered what, on welches System, mit welchem Resultat.
- Metrics: frequency of use, error rates, long‑running or suspicious patterns.
- Review cycles: someone looks at logs and feedback on a regular cadence (monthly/quarterly).
- Change management: changes to agent capabilities and connections go through review, not random edits in prod.
Foundry, Agent 365 und ähnliche Plattformen können hier viel abnehmen – aber nur, wenn du das Thema bewusst adressierst und nicht als “nice extra” betrachtest.
## How this fits into a Copilot + SAP + Entra landscape
Let’s make this less abstract.
Imagine you already have:
- Microsoft 365 Copilot rolled out for knowledge work,
- SAP HR as your people system of record,
- Entra ID as your identity and access front door,
- a few agents (e.g. Sync Insights, ticket triage, documentation helpers).
Agent governance in that world might look like:
- Copilot remains the main assistant inside M365 (documents, mails, chats).
- Critical SAP/Entra data is only exposed to agents via well‑defined tools in your own backend (MCP, Foundry, or similar).
- Agent 365 (or your own registry) tracks which agents exist, who owns them and what tools they have.
- HR and security explicitly sign off on which agents can touch which HR/identity data – and under what conditions (read‑only, propose actions, or actual changes).
The point is not to kill velocity. The point is to make sure that when you have 5, 10, 20 agents in play, you don’t wake up one day and realise nobody knows which one is quietly doing something you never agreed to.
## Pragmatic steps I’d take in 2026
If I had to write down a short, realistic “agent governance starter pack” for 2026, it would be:
1. **Inventory:** List the agents you already have or are planning (Copilot Studio flows, Foundry/MCP agents, OpenClaw skills that touch real systems).
2. **Classify:** For each agent, note scope (where it operates), capabilities (read/write, which systems), identity (which account/roles) and owner.
3. **Set basic rules:** Decide where you allow autonomous actions, where only proposals are allowed, and where agents are off‑limits.
4. **Define an approval path:** For new agents and new capabilities, define who has to say “yes” (data owners, security, platform).
5. **Implement logging and review:** Start small – even basic logs and a quarterly review are better than none.
Then, as Agent 365 and similar products mature, you can plug them into this model instead of letting them dictate it.
## My take
Agent 365 and the whole “agent governance” story are not just another buzzword layer on top of Copilot. They’re a reflection of a real need: once you give AI agents actual power, you need the same discipline you (ideally) already have for CI/CD, APIs and admin tools.
From a customer’s point of view, I wouldn’t wait for Microsoft or any other vendor to hand me the perfect agent governance solution. I’d:
- define my own scope and risk appetite,
- treat agents as first‑class systems with owners, identities and logs,
- use platforms like Foundry and Agent 365 as implementation details – not as my only source of truth.
If you do that, the next wave of “agentic AI” features in Copilot will be a lot less scary. You’ll have a place to put them in your architecture – and a way to say “yes” or “no” based on more than just a demo.
### OpenClaw Isn’t a Toy – It’s a CI/CD System With a Personality
URL: https://blog.bajonczak.com/openclaw-isnt-a-toy-its-a-ci-cd-system-with-a-personality/
Last updated: 2026-03-27T06:01:39.000Z
When you first look at OpenClaw, it’s easy to file it under “AI toy for power users”. A chat interface, some tools, a few integrations – nice, but nothing you couldn’t glue together with a couple of scripts and a hosted LLM.
That’s true at the demo level. But the moment you wire OpenClaw into the things you actually care about – your blog, your repos, your servers, your notifications – it stops being a toy.
From that point on, the more honest comparison is not “another chatbot”, but something closer to this:
> OpenClaw is a CI/CD and operations system with a personality. It just happens to talk back to you in natural language.
In this post I want to unpack what that means in practice: how I think about OpenClaw in a Dev/DevOps context, which workflows it’s well suited for, and where I deliberately draw a line because the blast radius would be too high.
## What OpenClaw looks like through a DevOps lens
If you strip away the chat and the “AI” label for a second, OpenClaw is essentially:
- a daemon running under a specific user on a machine you control,
- a toolbox for automation (shell, HTTP, file I/O, cron, browser, messaging, etc.),
- a way to define repeatable workflows (skills) that use those tools,
- a control surface (chat, CLI, APIs) that you can access from your normal messaging apps.
If that sounds suspiciously like a CI/CD or automation runner glued to a chat UI, that’s because it kind of is.
Where it differs from classic CI/CD systems like Jenkins, GitHub Actions, GitLab CI or Azure DevOps is:
- you’re not limited to “on push / on schedule” events – you can trigger and steer workflows conversationally,
- the agent can *propose* actions or changes instead of blindly running a pipeline,
- you can integrate personal and side-project workflows that would be overkill in your main CI.
That doesn’t mean you should move your production deploys into OpenClaw. It means you can treat it as a personal or team‑level CI/CD and ops layer – with some extra intelligence on top.
## Concrete workflows where OpenClaw shines
Let me give you a few examples where OpenClaw feels strong in day‑to‑day work.
### 1\. Local DevOps chores
There is a long tail of dev/ops chores that are too small for a full pipeline, but annoying enough to automate:
- running a battery of checks on a repo before you start work,
- generating or updating documentation from code comments,
- grepping through logs for a specific pattern and summarising what changed since yesterday,
- pulling status from a few local services (containers, dev databases, message queues).
In a classic setup, you might have a handful of shell scripts or Makefile targets for this. With OpenClaw, you can wrap those into skills and then say things like:
- “Run my pre‑flight checks for project X and tell me if anything looks off.”
- “Summarise errors from the last 24 hours in log file Y.”
The scripts still run the checks. The agent just makes them easier to trigger and interpret.
### 2\. Side‑project automation and home‑lab glue
Once you’re comfortable with OpenClaw on your workstation or a small server, it’s hard not to use it for side projects:
- small monitoring/alerting scripts for your own services,
- backup routines for dev machines or home‑lab boxes,
- simple “keep me honest” tasks like rotating API keys or checking expiry dates.
Again, none of this should be the only line of defence for production systems. But for personal and side‑project infra, OpenClaw hits a sweet spot between “completely manual” and “I built an entire platform for this”.
## How I think about security and blast radius
All of this power comes at a price: OpenClaw often runs on machines that have real access – to your files, your repos, your dev clusters, maybe even your VPN or cloud.
That’s why I treat it more like a CI/CD runner than like a friendly bot.
Practically, that means:
- **Dedicated user.**
Run OpenClaw under its own user account with limited permissions, not as root and not as your main interactive user with full desktop access.
- **Clear boundaries.**
Decide which directories and systems OpenClaw should be able to touch – and which are off‑limits (e.g. no direct access to personal password stores, banking data, HR files).
- **Script first, AI second.**
For anything important, prefer skills that call *explicit* scripts or programs with clear parameters, instead of letting the model invent shell commands on the fly.
- **Human in the loop for destructive actions.**
For operations that can break things (deploys, destructive clean‑ups, firewall changes), keep a confirmation step or even move them into your “real” CI/CD system.
- **Logging.**
Log what commands and scripts are executed via OpenClaw and review patterns over time, especially when you add new skills.
In other words: treat OpenClaw as if you had hired a very capable junior DevOps engineer with shell access. You wouldn’t give them root on every box on day one either.
## Where I deliberately do *not* use OpenClaw
There are a few areas where I consciously draw a line and prefer other tools:
- **Production deployments for customer‑critical systems.**
These belong in battle‑tested CI/CD systems with approvals, rollbacks and strong auditing. OpenClaw can help prepare or validate, but I wouldn’t let it be the only path to prod.
- **Highly regulated data flows.**
Anything that touches regulated personal data (HR, health, finance) I’d keep behind well‑scoped APIs and agents with strict guardrails, not in an open‑ended automation agent on a dev box.
- **Anything that has to be explainable to auditors in one slide.**
“Our CI/CD pipelines run here, with these approvals and logs” is a much easier conversation than “we have an AI agent that sometimes deploys things when we ask nicely”.
That doesn’t mean OpenClaw can’t interact with those worlds at all – it just means there’s usually a sensible boundary: it might open a Jira ticket, call a well‑designed remediation API or generate runbooks and PRs, but it doesn’t unilaterally flip switches in your most sensitive systems.
## How OpenClaw fits into a broader stack
In a previous post I outlined how I see the 2026 AI/automation stack:
- Copilot for the inside‑M365 experience,
- Foundry/MCP for orchestrated enterprise agents across multiple systems,
- OpenClaw for personal and team‑level automation on infrastructure you own.
From that perspective, the “CI/CD system with a personality” view helps to place OpenClaw:
- it’s close to your code, your scripts and your machines,
- it’s fully under your control (self‑hosted),
- it’s allowed to be a bit more experimental than your main enterprise stack,
- but it deserves the same respect as any system that can run commands on your behalf.
And the personality part? That’s the part that makes it fun and a bit addictive – the fact that you can DM your automation like a colleague and say:
- “Ship this draft as a Ghost post and send the push.”
- “Check if any of my side projects have failing health checks.”
- “Tell me what changed in repo X since yesterday that I should pay attention to.”
Underneath, it’s still scripts, APIs and cron. But on the surface, it feels a lot more like talking to a teammate who knows your environment well.
## My take
I don’t see OpenClaw as a replacement for Jenkins, GitHub Actions, Azure DevOps or whatever you use for “serious” pipelines. I see it as the missing piece between those heavyweights and the messy reality of developer and side‑project life.
As long as you:
- run it under the right user,
- give it a carefully chosen view of your world,
- and keep a human hand on the truly dangerous levers,
it can be a ridiculously useful CI/CD and ops companion – one that not only runs your workflows, but also explains what it’s doing and helps you refine the next iteration.
And that, to me, is the sweet spot: not “AI runs everything”, but “automation with a personality that makes it easier to ship and operate the things you actually care about.”
### Copilot After the Shake-Up: What Microsoft’s AI Strategy Shift Really Means for Customers
URL: https://blog.bajonczak.com/copilot-after-the-shake-up-what-microsofts-ai-strategy-shift-really-means-for-customers/
Last updated: 2026-03-25T12:24:35.000Z
Every few months, the AI headlines flip.
One week it’s “OpenAI is changing everything”. The next week it’s “Microsoft restructures Copilot leadership”. Then there’s a new model, a new partnership, a new rumour about who is building what with whom.
If you sit on the customer side, trying to make sensible decisions about Microsoft 365, SAP, identity and governance, a lot of this looks like drama you don’t really have time for.
I think that’s fair. But I also think it’s worth taking a step back and asking:
> What does this Copilot / AI strategy shake‑up actually change for you – if you’re the one who has to run this stuff in production?
In this post I’m not going to rehash corporate press releases. Instead, I’ll outline how I interpret the current Copilot/AI landscape from a customer and architect point of view, and what I would (and wouldn’t) change in my own plans because of it.
## What seems to be happening at a high level
I’m simplifying aggressively here, but the pattern looks roughly like this:
- Microsoft is pushing Copilot across the stack: Windows, Microsoft 365, Azure, security, dev tools.
- OpenAI is not a hidden internal model provider anymore; it’s an independent actor with its own roadmap and cloud relationships.
- Microsoft is investing more into its own “frontier” models and infrastructure, not just wrapping OpenAI.
None of that means “Copilot is dead” or “OpenAI is gone from Microsoft”. It means the relationship is getting more complex and less exclusive.
As a customer, that has two immediate consequences for how I think about my stack:
- Don’t over‑optimise for a single model or provider.
- Pay more attention to the integration and governance layer than to the logo on the model.
## What does *not* change for Copilot in Microsoft 365
Before we talk about strategy shifts, it’s worth grounding what Copilot in Microsoft 365 already is and likely will continue to be for a while.
For me, three things are stable:
1. Copilot is the native assistant for your M365 tenant.
2. Copilot talks to Microsoft Graph and respects your M365 permissions.
3. Copilot’s value is dominated by the quality and structure of *your* tenant data, not by which exact model is behind the scenes this quarter.
If you’re using Copilot to:
- summarise documents, emails and Teams threads,
- prepare drafts and recaps,
- surface existing knowledge across SharePoint, OneDrive and Teams,
then most of your success (or failure) still comes from:
- how messy or clean your information architecture is,
- whether your permissions are sane,
- whether people actually store work in the right places.
A leadership reshuffle or a new frontier model does not suddenly fix (or break) any of that.
## Where the strategy shift *does* matter
Where I do see impact for customers is in three areas:
- cost and performance trade‑offs,
- long‑term lock‑in vs. portability,
- how you design custom agents and extensions.
### 1\. Cost and performance
As Microsoft invests in its own models and infrastructure, you can expect more knobs around:
- which experiences use which underlying model,
- how much context they pull in,
- how “fast vs. smart” they behave.
Some of that will be invisible to you (tuned by Microsoft). Some of it will show up as configuration or SKU choices.
From a customer architecture point of view, my reaction is:
- Design for variability: assume the exact underlying model might change or be tunable.
- Measure the value of Copilot scenarios in terms of time saved / quality improved, not which model answered.
If you find yourself writing architecture docs that are obsessed with “GPT‑X vs Model‑Y” but say nothing about how people actually use Copilot in Word/Teams/Outlook, you’re probably optimising the wrong layer.
### 2\. Lock‑in vs. portability
The more Microsoft and OpenAI become independent “centres of gravity”, the more you have to answer a boring but important question:
> Where do we accept platform lock‑in, and where do we want options?
In my own mental model:
- I’m happy to accept lock‑in at the **experience layer** where it makes sense:
Copilot inside M365 is, by definition, a Microsoft experience. That’s fine – the value is that it’s close to my data and integrated with my tools.
- I’m less happy with deep lock‑in at the **integration and backend layer**:
if I build custom agents, I’d rather they talk to a protocol or platform that can swap models underneath (MCP, Foundry, my own service), instead of hard‑coding a single vendor’s API everywhere.
That’s why I like having a clear split in my stack:
- Use Copilot where the Microsoft 365 experience is the whole point.
- Use an orchestrator layer (Foundry/MCP, your own backend) for cross‑system agents, so you can change models without rewriting business logic.
### 3\. Custom agents and extensions
One obvious direction of travel is deeper integration between Copilot and external tools: Graph connectors, plugins, MCP tools, Foundry agents, you name it.
As Microsoft’s AI strategy evolves, I’d expect:
- more ways to plug your own agents into Copilot (Studio, MCP, partner ecosystems),
- more guidance and guardrails from Microsoft around what “good” looks like,
- some churn in the exact APIs and patterns over the next 1–2 years.
From a customer perspective, I’d react with two principles:
- Design your agents and backends so they are useful **even without** Copilot integration (e.g. usable via Teams, web UIs, CLIs).
- Treat Copilot as **one of several frontends**, not the only one.
That way, if the Copilot side of the integration story changes, your core agents stay intact. You’re swapping one client, not rebuilding the whole thing.
## What I would change in my plans (and what I wouldn’t)
If I were responsible for an organisation’s AI/Copilot roadmap today, here’s what I would and wouldn’t change based on the current shake‑up.
### Things I would NOT change
- **Investing in M365 hygiene.**
Cleaning up SharePoint/Teams/OneDrive, fixing permissions, consolidating where necessary – all of that pays off with or without Copilot, regardless of which model runs under the hood.
- **Rolling out Copilot for classic knowledge work.**
Drafting, summarising, recaps, “what do we know about X?” across existing M365 content – these remain high‑value, low‑regret scenarios.
- **Designing clear governance around data and extensions.**
Scope, data sources, connectors, plugins, guardrails, operations – the governance questions don’t disappear because Microsoft reorganises a product group.
### Things I WOULD adjust
- **Be explicit about where Copilot is the front door – and where it isn’t.**
I’d write down (and communicate) something like:
“We use Copilot primarily for M365 content and light integrations. For deep SAP/ERP/line‑of‑business automation, we use dedicated agents and backends that may or may not surface via Copilot.”
- **Build on protocols and platforms, not single APIs.**
For my own agents, I’d lean into MCP/Foundry or similar patterns, so I can plug in different models (including Microsoft’s own) without changing the agent surface.
- **Watch the cost/performance story, not every leadership headline.**
I’d put effort into understanding which Copilot scenarios actually move the needle in my org and how licensing and usage costs scale – instead of chasing every rumour about which frontier model is being trained where.
## How this plays with SAP and the rest of your estate
If you’re in a SAP‑heavy environment (which is where I spend a lot of my time), the temptation is high to see every Copilot announcement as the next opportunity to “just let AI read SAP”.
I’d resist that urge, no matter how shiny the models are.
The strategy shift doesn’t change the fundamental truth:
- SAP remains a system of record with its own security, compliance and performance constraints.
- Copilot is excellent at working with M365 content around SAP (reports, decks, decisions).
- Deep SAP integration still needs careful design, often via dedicated agents and APIs, not “Copilot will somehow read SAP”.
What might change is *how* you plug those agents into Copilot – via Copilot Studio, MCP tools, Foundry, partner solutions. But the idea that you should have a clear separation between:
- “Copilot as assistant inside M365”, and
- “agents/backends that speak to SAP and other systems with clear guardrails”
is not going away. If anything, it’s becoming more important.
## My take
AI leadership reshuffles and strategy blog posts make for interesting reading, but they don’t run your tenant.
From where I sit, the sane way to react to the current Copilot/AI shake‑up is to double down on the boring, durable bits:
- clean M365 foundations (content, permissions, architecture),
- clear governance around what Copilot is for in your org,
- a deliberate split between experience layer (Copilot) and orchestrator layer (your agents/backends),
- and a healthy scepticism towards “this one model/provider will solve everything”.
Vendors will keep changing org charts and press releases. Models will keep evolving. What doesn’t change is the fact that you have to live with the decisions you make about data, identity and automation today.
If your Copilot plans still make sense when you mentally swap “today’s model” for “some other capable model”, you’re probably on the right track.
### Building a Real Sync Insights Agent with MCP and Foundry (SAP HR + Entra ID)
URL: https://blog.bajonczak.com/building-a-real-sync-insights-agent-with-mcp-and-foundry-sap-hr-entra-id/
Last updated: 2026-08-02T08:32:40.000Z
An SAP HR to Entra ID agent should not be a chatbot with access to two sensitive systems.
That is the wrong starting point.
The useful version is smaller and more boring: a Sync Insights agent that can compare SAP HR or SuccessFactors with Entra ID, report drift, explain mismatches, and maybe prepare remediation steps without immediately changing identity data.
I would build it around tools, not around prompts.
The prompt can help users ask better questions. The backend should decide what the agent can actually do.
## What the agent should answer
Start with questions, not APIs.
Good first questions:
- Which active SAP users are missing in Entra ID?
- Which Entra users no longer exist as active SAP users?
- Which users have department mismatches?
- Which users have manager mismatches?
- Which mismatches are new since yesterday?
- Which departments have the most identity drift?
- Which changes are safe suggestions and which need human review?
Those are operational questions. They are also testable.
Bad first question:
> Can the agent read SAP and Entra and keep them in sync?
That hides too much. It mixes discovery, comparison, policy and write actions into one vague request.
## Architecture
I would keep the architecture simple:
```text
User
-> Teams / Copilot / internal web app
-> Foundry agent
-> MCP tools
-> Integration backend
-> SAP SuccessFactors / SAP HR OData
-> Microsoft Graph / Entra ID
-> Sync report + cited source records
```
The important part is the boundary between the agent and the systems.
The agent does not get raw, open-ended access to SAP and Graph. It gets narrow tools. The backend owns credentials, filtering, comparison rules, logging and rate limits.
In other words:
> Let the agent orchestrate. Do not let it become the security model.
## Tool design
I would expose tools that match operational tasks.
### `sap_list_active_users`
Returns a normalized list of active HR users.
```json
{
"name": "sap_list_active_users",
"description": "List active employees from SAP HR or SuccessFactors with key identity attributes.",
"parameters": {
"type": "object",
"properties": {
"limit": {
"type": "integer",
"default": 1000,
"maximum": 5000
}
}
}
}
```
I would not expose every HR field. The tool should return the fields needed for identity drift, not a full employee dossier.
### `entra_list_users`
Returns the Entra ID side of the comparison.
```json
{
"name": "entra_list_users",
"description": "List Entra ID users with key attributes used for SAP HR comparison.",
"parameters": {
"type": "object",
"properties": {
"limit": {
"type": "integer",
"default": 2000,
"maximum": 10000
}
}
}
}
```
Again, keep the result narrow. The agent does not need every Entra property to answer drift questions.
### `report_sync_mismatches`
This is the main tool.
```json
{
"name": "report_sync_mismatches",
"description": "Compare SAP HR and Entra ID users and return missing users or attribute mismatches.",
"parameters": {
"type": "object",
"properties": {
"includeDepartments": { "type": "boolean", "default": true },
"includeManagers": { "type": "boolean", "default": true },
"limitSap": { "type": "integer", "default": 1000 },
"limitEntra": { "type": "integer", "default": 2000 }
}
}
}
```
This tool should call SAP and Entra through the backend, run comparison logic in code, and return a structured result.
The model can summarize it. It should not calculate it from raw dumps in the chat context.
## Project shape
For a TypeScript implementation, I would keep the project boring:
```text
mcp-sap-entra-agent/
src/
config.ts
sapClient.ts
entraClient.ts
mismatches.ts
mcpServer.ts
audit.ts
.env
package.json
tsconfig.json
```
Setup:
```bash
mkdir mcp-sap-entra-agent
cd mcp-sap-entra-agent
npm init -y
npm install typescript ts-node @types/node axios dotenv
npm install @modelcontextprotocol/sdk
npx tsc --init
```
Environment:
```env
SAP_BASE_URL="https://api.successfactors.eu/odata/v2"
SAP_USERNAME="..."
SAP_PASSWORD="***"
ENTRA_TENANT_ID="..."
ENTRA_CLIENT_ID="..."
ENTRA_CLIENT_SECRET="***"
```
For production, I would avoid long-lived secrets where possible and use managed identity, workload identity or a secret store. The `.env` pattern is fine for a local PoC, not for a serious identity integration.
## SAP client
The SAP side should return a normalized shape.
```ts
// src/sapClient.ts
import axios from 'axios';
import { SAP_BASE_URL, SAP_USERNAME, SAP_PASSWORD } from './config';
export type SapUser = {
userId: string;
email: string | null;
firstName: string | null;
lastName: string | null;
department: string | null;
managerId: string | null;
status: 'Active' | 'Inactive';
};
export async function listSapUsers(limit = 500): Promise {
const url = `${SAP_BASE_URL}/User?$format=json&$top=${limit}&$select=userId,email,firstName,lastName,department,managerId,status`;
const resp = await axios.get(url, {
auth: {
username: SAP_USERNAME,
password: SAP_PASSWORD,
},
});
const results = resp.data?.d?.results ?? [];
return results.map((r: any) => ({
userId: r.userId,
email: r.email || null,
firstName: r.firstName || null,
lastName: r.lastName || null,
department: r.department || null,
managerId: r.managerId || null,
status: r.status === 'Inactive' ? 'Inactive' : 'Active',
}));
}
```
Real SuccessFactors environments vary. Field names, authentication and pagination are the parts I would expect to adjust first.
## Entra client
The Entra side uses Microsoft Graph.
```ts
// src/entraClient.ts
import axios from 'axios';
import {
ENTRA_TENANT_ID,
ENTRA_CLIENT_ID,
ENTRA_CLIENT_SECRET,
} from './config';
export type EntraUser = {
id: string;
userPrincipalName: string;
mail: string | null;
displayName: string | null;
department: string | null;
managerId: string | null;
};
async function getAccessToken(): Promise {
const url = `https://login.microsoftonline.com/${ENTRA_TENANT_ID}/oauth2/v2.0/token`;
const params = new URLSearchParams();
params.append('client_id', ENTRA_CLIENT_ID);
params.append('client_secret', ENTRA_CLIENT_SECRET);
params.append('scope', 'https://graph.microsoft.com/.default');
params.append('grant_type', 'client_credentials');
const resp = await axios.post(url, params);
return resp.data.access_token as string;
}
export async function listEntraUsers(limit = 500): Promise {
const token = await getAccessToken();
const url = `https://graph.microsoft.com/v1.0/users?$top=${limit}&$select=id,userPrincipalName,mail,displayName,department`;
const resp = await axios.get(url, {
headers: { Authorization: `Bearer ${token}` },
});
const value = resp.data?.value ?? [];
return value.map((u: any) => ({
id: u.id,
userPrincipalName: u.userPrincipalName,
mail: u.mail || null,
displayName: u.displayName || null,
department: u.department || null,
managerId: null,
}));
}
```
Manager lookup may need an additional Graph call. I would not hide that cost. If manager comparison matters, model it explicitly and cache carefully.
## Mismatch calculation
Comparison logic belongs in code.
```ts
// src/mismatches.ts
import { SapUser } from './sapClient';
import { EntraUser } from './entraClient';
export type SyncMismatch = {
type: 'MissingInEntra' | 'MissingInSap' | 'AttributeMismatch';
sapUser?: SapUser;
entraUser?: EntraUser;
details: string;
};
function normalizeEmail(email: string | null): string | null {
return email ? email.trim().toLowerCase() : null;
}
export function computeMismatches(
sapUsers: SapUser[],
entraUsers: EntraUser[]
): SyncMismatch[] {
const mismatches: SyncMismatch[] = [];
const activeSapUsers = sapUsers.filter(s => s.status === 'Active');
const entraByEmail = new Map();
const entraByUpn = new Map();
for (const e of entraUsers) {
const emailNorm = normalizeEmail(e.mail);
if (emailNorm) entraByEmail.set(emailNorm, e);
entraByUpn.set(e.userPrincipalName.toLowerCase(), e);
}
for (const s of activeSapUsers) {
const emailNorm = normalizeEmail(s.email);
let match: EntraUser | undefined;
if (emailNorm) match = entraByEmail.get(emailNorm);
if (!match) match = entraByUpn.get(s.userId.toLowerCase());
if (!match) {
mismatches.push({
type: 'MissingInEntra',
sapUser: s,
details: `No Entra user matching SAP userId=${s.userId}, email=${s.email}`,
});
continue;
}
const sapDept = (s.department || '').trim();
const entraDept = (match.department || '').trim();
if (sapDept && entraDept && sapDept !== entraDept) {
mismatches.push({
type: 'AttributeMismatch',
sapUser: s,
entraUser: match,
details: `Department mismatch: SAP="${sapDept}" vs ENTRA="${entraDept}"`,
});
}
}
const sapEmails = new Set(
activeSapUsers.map(s => normalizeEmail(s.email)).filter((e): e is string => !!e)
);
const sapUserIds = new Set(activeSapUsers.map(s => s.userId.toLowerCase()));
for (const e of entraUsers) {
const emailNorm = normalizeEmail(e.mail);
const upn = e.userPrincipalName.toLowerCase();
const emailInSap = emailNorm && sapEmails.has(emailNorm);
const idInSap = sapUserIds.has(upn);
if (!emailInSap && !idInSap) {
mismatches.push({
type: 'MissingInSap',
entraUser: e,
details: `No SAP user for Entra UPN=${e.userPrincipalName}, mail=${e.mail}`,
});
}
}
return mismatches;
}
```
I would add unit tests around this before connecting real systems. The comparison rules are where small mistakes become access problems.
## MCP server
The MCP server should expose narrow tools and keep credentials inside the backend.
```ts
// src/mcpServer.ts
import { createMcpServer, ToolDefinition } from '@modelcontextprotocol/sdk';
import { listSapUsers } from './sapClient';
import { listEntraUsers } from './entraClient';
import { computeMismatches } from './mismatches';
const tools: ToolDefinition[] = [
{
name: 'sap_list_active_users',
description: 'List active users from SAP HR or SuccessFactors.',
inputSchema: {
type: 'object',
properties: {
limit: { type: 'number', minimum: 1, maximum: 5000 },
},
required: [],
},
handler: async (input) => {
const users = await listSapUsers(input.limit ?? 1000);
return { users: users.filter(u => u.status === 'Active') };
},
},
{
name: 'entra_list_users',
description: 'List users from Entra ID with identity comparison fields.',
inputSchema: {
type: 'object',
properties: {
limit: { type: 'number', minimum: 1, maximum: 10000 },
},
required: [],
},
handler: async (input) => {
const users = await listEntraUsers(input.limit ?? 2000);
return { users };
},
},
{
name: 'report_sync_mismatches',
description: 'Compare SAP HR and Entra ID users and return missing users or attribute mismatches.',
inputSchema: {
type: 'object',
properties: {
limitSap: { type: 'number', minimum: 1, maximum: 5000 },
limitEntra: { type: 'number', minimum: 1, maximum: 10000 },
},
required: [],
},
handler: async (input) => {
const sapUsers = await listSapUsers(input.limitSap ?? 1000);
const entraUsers = await listEntraUsers(input.limitEntra ?? 2000);
const mismatches = computeMismatches(sapUsers, entraUsers);
return {
totalSap: sapUsers.length,
totalEntra: entraUsers.length,
mismatchCount: mismatches.length,
mismatches,
};
},
},
];
async function startServer() {
const server = createMcpServer({ tools });
await server.listen(3000);
console.log('[MCP] SAP/Entra Sync Insights agent listening on :3000');
}
startServer().catch((err) => {
console.error('[MCP] Failed to start server', err);
process.exit(1);
});
```
The exact MCP SDK API may change. I would treat this as the shape of the implementation, not a copy-paste guarantee for every SDK version.
## Security trimming and blast radius
This agent should start read-only.
The first version should not disable users, update departments or write manager relationships. It should report drift.
Controls I would add early:
- least-privilege Graph application permissions
- narrow SAP API user or destination
- no salary or private HR fields in tool results
- max result limits
- correlation IDs for every tool call
- logs that record decisions, not full HR payloads
- role-based access to the agent
- no write tools until drift reporting is trusted
The agent should be allowed to say:
> I can show the mismatch report, but I cannot change Entra ID from this chat.
That is not a limitation. That is good design.
## Where Foundry helps
Foundry is useful around the agent lifecycle.
I would use it for:
- registering the agent and tools
- controlling who can access the agent
- evaluating expected answers
- testing tool-call behavior
- deploying the agent in a managed way
- monitoring usage
But Foundry does not replace the integration backend. The backend is still where SAP calls, Graph calls, comparison logic and policy enforcement should live.
If the backend is a mess, Foundry only gives the mess a nicer front door.
## Example user interactions
A good Sync Insights agent should answer like an operations tool.
User:
> Show me active SAP users missing in Entra.
Agent:
> I found 14 active SAP users without a matching Entra account. 9 are new hires from the last 48 hours, 3 are contractors without a mapped mail address, and 2 look like data issues because the SAP userId does not match the Entra UPN pattern. I created no changes. Here is the report grouped by likely cause.
User:
> Which department mismatches should IAM review first?
Agent:
> I would start with 6 users where SAP shows Finance but Entra still shows Sales, because those department values are used in access packages. The other 11 mismatches look like display/reporting drift only.
That is the useful level. Not “here is a giant JSON dump”. Not “I fixed everything for you”.
## Tests I would run first
Before this goes near production, I would test:
| Test | Expected result |
| --------------------------------------- | ------------------------------------- |
| SAP active user missing in Entra | reported as MissingInEntra |
| Entra user with no active SAP match | reported as MissingInSap |
| same user with different department | reported as AttributeMismatch |
| inactive SAP user | not treated like a missing Entra user |
| user without permission asks for report | denied |
| huge tenant query | result limited and paginated |
| SAP unavailable | clear error, no invented answer |
| Graph throttling | retry or fail cleanly |
| sensitive HR field requested | refused or omitted |
The important test is the negative one: the agent must not answer reports for users who are not allowed to see them.
## My take
A real Sync Insights agent is not magic. It is an operational layer over a boring integration backend.
That is exactly why I like the pattern.
SAP and Entra stay behind narrow tools. Comparison logic lives in code. Foundry hosts and governs the agent. MCP makes the tool boundary explicit. The user gets a conversational way to inspect identity drift without giving the model uncontrolled access to HR and identity systems.
I would start read-only, make the reports trustworthy, then add assisted remediation later.
If the reports are not boring yet, the automation should not be powerful yet.
## Related articles
- [SAP vs. Entra ID: Why Your User Sync Should Be a Product, Not a Script](https://blog.bajonczak.com/sap-vs-entra-id-why-your-user-sync-should-be-a-product-not-a-script/)
- [A practical SAP agent in Azure AI Foundry: OData in, governed answer out](https://blog.bajonczak.com/a-practical-sap-agent-in-azure-ai-foundry-odata-in-governed-answer-out/)
### Copilot Governance Playbook: Who Owns What in 2026?
URL: https://blog.bajonczak.com/copilot-governance-playbook-who-owns-what-in-2026/
Last updated: 2026-03-22T13:08:14.000Z
Rolling out Microsoft 365 Copilot is not just “turning on a feature”.
Once the first excitement fades, you end up with a much more practical set of questions:
- Who decides which data Copilot can see?
- Who owns custom plugins and agents?
- Who cleans up the mess when something goes wrong?
If you don’t answer those questions upfront, you get what I keep seeing in the field: Copilot pilots that start strong, then slowly stall because nobody is really in charge of governance.
In this post I want to sketch a pragmatic Copilot governance playbook for 2026 – not a 50‑page policy, but a concrete set of roles, decisions and examples that you can actually work with.
## Copilot governance is not a new silo
Good news first: you don’t have to invent a completely new governance world just for Copilot.
Most organisations already have pieces that matter here:
- Microsoft 365 / Entra ID admins,
- Security and compliance owners,
- data owners for key systems (HR, finance, sales, operations),
- a central architecture or IT strategy function.
Copilot governance is mostly about getting those people to agree on a few things:
- what problems Copilot is supposed to help with,
- which data sources are in and out of scope,
- how you handle extensions (Graph connectors, plugins, agents),
- how you react if something goes wrong.
To make that concrete, I like to frame governance around **four roles** and a small set of recurring **decisions**.
## Four roles you should make explicit
You can call them what you like, but these are the roles I’d define explicitly for Copilot in a mid‑sized or large organisation:
1. Copilot Product Owner
2. Security & Compliance Owner
3. Data / Domain Owners
4. Technical Platform Owner
### 1\. Copilot Product Owner
This is the person (or small team) responsible for Copilot as a “product” inside your organisation:
- defines the vision and main use cases,
- prioritises which departments and scenarios to tackle,
- coordinates training, enablement and communication,
- is the first escalation point when people ask “can Copilot do X?” or “why can’t it do Y?”.
They don’t own all the technical details, but they keep the overall story coherent.
### 2\. Security & Compliance Owner
This role cares about:
- data classification and protection,
- regulatory requirements (finance, public sector, healthcare, etc.),
- incident response if something leaks or goes wrong.
They don’t say “no” to everything. They help define:
- which data categories are in scope for a general Copilot,
- where you require special handling (e.g. separate HR or legal agents),
- what logging and auditing you need around Copilot extensions.
### 3\. Data / Domain Owners
These are the people who know and own specific areas:
- HR / people data,
- finance and accounting,
- sales and customer data,
- operations, manufacturing, etc.
For Copilot, they answer questions like:
- “Which systems and sites actually hold our critical HR/legal/finance data?”
- “What are we comfortable exposing to a general Copilot vs. a specialised agent?”
- “Which questions should Copilot not be able to answer at all?”
### 4\. Technical Platform Owner
This is usually a joint effort between:
- Microsoft 365 / Entra ID admins,
- infrastructure / platform teams,
- and sometimes an integration team (for Graph connectors, plugins, agents).
They take the decisions from the other roles and turn them into:
- tenant and service configuration,
- permission models and group design,
- technical standards for connectors and plugins,
- monitoring and troubleshooting practices.
## The decisions you can’t dodge
Once you have those four roles, you can walk through a concrete decision set. For a Copilot rollout, I usually start with these:
1. Scope: what is Copilot *for* in our organisation?
2. Data sources: which systems and sites are in/out of scope?
3. Extensions: which Graph connectors, plugins and agents are allowed?
4. Guardrails: which topics and actions are off limits?
5. Operations: how do we monitor, support and update Copilot?
### 1\. Scope: what is Copilot for?
This sounds trivial, but writing it down avoids a lot of confusion.
Example scope statement:
> “For 2026, our primary Copilot goal is to support knowledge work inside Microsoft 365: summarising documents, mails and chats, drafting content, and helping find existing information. We deliberately do *not* treat Copilot as a generic front‑end for all business systems.”
That one paragraph already narrows expectations and keeps you out of “can Copilot just read SAP/Salesforce/our mainframe?” debates for the first phase.
### 2\. Data sources: what’s in and what’s out?
Here you combine the views of the Copilot product owner, security and data owners.
At minimum, I’d expect a table like this (kept somewhere people can actually find it):
- M365 content (SharePoint, OneDrive, Teams): in scope, but with permission cleanup required.
- HR systems: out of scope for general Copilot; only via specialised agents with HR approval.
- Finance / core ERP: out of scope for general Copilot; reporting via curated documents is fine.
- Ticketing / KB systems: in scope via Graph connectors, with proper ACL mapping.
- Public websites / internet: in scope only where explicitly configured (e.g. specific trusted sources).
This doesn’t need to be perfect on day one, but it needs to exist. Otherwise, every team will assume their favourite system is “obviously” in scope.
### 3\. Extensions: connectors, plugins, agents
This is where things get interesting – and risky.
You should be explicit about:
- which built‑in Graph connectors you allow (e.g. file shares, websites, third‑party apps),
- who can propose and approve new connectors,
- how you handle custom plugins and MCP/Foundry‑style agents.
Example rules I’ve seen work well:
- Only the platform team can deploy new Graph connectors into production.
- Every connector needs a data owner sign‑off and a short ACL concept.
- Custom plugins/agents must:
- use user context (no anonymous god‑mode service accounts),
- log who did what,
- pass a basic security design review before going live.
If you use Foundry or a similar platform, this is also where you define which agents are “Copilot‑visible” tools and which are internal only.
### 4\. Guardrails: what should Copilot not do?
Every organisation has topics where a generic Copilot should probably not help:
- sensitive HR topics (individual performance, compensation, layoffs),
- ongoing investigations or legal cases,
- very sensitive security content (incident response runbooks, red‑team material).
You can’t prevent people from *asking* those questions. But you can define how Copilot should behave when they do.
Example guardrail policy:
- General Copilot experiences should not answer questions about individual salaries, performance reviews or planned terminations.
- For such topics, the default answer should be a polite refusal and, where appropriate, a pointer to the correct HR or legal contact.
- If specialised HR/legal agents are built, they must be scoped to specific roles, with explicit topic whitelists, not just the absence of a deny list.
On the technical side, those guardrails live in:
- data scoping (don’t index everything),
- backend logic in agents,
- prompt instructions in plugins and extensions.
### 5\. Operations: who watches Copilot in production?
Finally, someone has to treat Copilot as a living system, not a one‑off rollout.
Questions you should have answers for:
- Where do users go when Copilot behaves strangely or seems to leak something?
- Who looks at usage patterns and feedback to spot problems?
- How often do you review connectors, plugins and agents to see if they are still needed and safe?
In organisations that do this well, Copilot has a lightweight operational rhythm: monthly or quarterly reviews, a small backlog of improvements, a known channel for feedback.
## Example: how this could look in a mid‑sized company
To make this less abstract, here’s a simplified example setup for a mid‑sized company (say 3–10k employees):
- Copilot Product Owner: in the Digital Workplace / Modern Work team.
- Security & Compliance Owner: joint between InfoSec and the M365 compliance officer.
- Data Owners: HR, Finance, Sales/Ops each nominate one person as Copilot contact.
- Technical Platform Owner: M365 platform team, plus an integration architect for connectors/agents.
They agree on a one‑page “Copilot Charter” that says:
- Initial scope: knowledge work in M365 (documents, mails, chats), with focus on internal collaboration, not external customer comms.
- Data in scope: M365 content, plus selected KB/ticketing systems via connectors. HR and finance systems explicitly out of scope for general Copilot.
- Extensions: only a small set of approved connectors in phase 1; custom agents go through a light security/architecture review.
- Guardrails: no answers on individual HR topics; no direct access to detailed financial ledgers; no automatic changes in production systems via Copilot.
- Operations: a monthly review call; a Teams channel for feedback; shared dashboards for usage and extension calls.
Is that the ultimate perfect governance framework? No. But it’s infinitely better than “we turned it on and hope for the best”.
## Should you turn this into a PDF or policy doc?
In most organisations, the answer is yes – but with a twist.
I’d treat the kind of playbook you’re reading right now as:
- a living, human‑readable guide for the people actually working with Copilot,
- plus a slightly more formal policy PDF for auditors, risk/compliance and external sharing if needed.
You don’t need a huge legal document to get started. Start with a concise HTML/Markdown version (like this post), then export a PDF that:
- names the roles and their responsibilities,
- captures your current scope, data sources, extension rules and guardrails,
- is easy to update as your Copilot usage evolves.
If you later decide to put that PDF behind a paywall or share a “Copilot Governance Toolkit” externally, great – just make sure you’re not over‑optimising the packaging before your own internal governance is solid.
## My take
Copilot governance is not about inventing a new bureaucracy. It’s about deciding, very deliberately, where Copilot fits into the systems and responsibilities you already have.
Once you’re clear on:
- who owns Copilot as a product,
- who owns security and compliance decisions,
- who owns the data domains,
- and who runs the technical platform,
the rest becomes much easier: data scoping, connector approvals, agent design, guardrails, operations.
The hardest part is not the technology. It’s accepting that “turning on Copilot” is the easy step – and that the real work is deciding how you want to use it, and where you’re not willing to hand things over to an AI, no matter how good the demo looks.
### No, You Don’t Need a 6-Month Integration Project: 3 SAP Use Cases You Can Build with Power Platform in a Weekend
URL: https://blog.bajonczak.com/no-you-dont-need-a-6-month-integration-project-3-sap-use-cases-you-can-build-with-power-platform-in-a-weekend/
Last updated: 2026-03-20T20:09:41.000Z
Whenever SAP comes up in the same sentence as “integration project”, people mentally see six‑month timelines, steering committees and a forest of Visio diagrams.
Don’t get me wrong: there are plenty of SAP projects that *do* justify that level of ceremony.
But there’s also a big category of “we just want this one thing from SAP to show up somewhere useful” – and for those, you don’t need another monster project plan. You need a small, boring, end‑to‑end flow that you can actually build in a weekend.
In this post I want to walk through how I think about that category and sketch three concrete SAP use cases you can realistically build with the Power Platform in a few days instead of a few quarters.
## A quick reality check: what I mean by “weekend project”
Before anyone gets offended: I’m not saying you can redesign your entire SAP landscape in 48 hours with a few flows and a Power App.
When I say “weekend project” here, I mean:
- a narrow scope that you could demo on Monday,
- based on data and API access you already have (or can get without a political war),
- with enough structure that you wouldn’t be ashamed to show it to your SAP and security teams.
The point is to get away from “we’ll think about this in phase 3 of the big programme” and towards “let’s prove value on one specific use case”.
## Use case 1: SAP events into Teams – without a new portal
The first pattern is simple: instead of building yet another portal where people never look, bring SAP events into the places they already live – usually Teams.
Example scenarios:
- New sales orders in a given region should show up in a Teams channel for the sales team.
- High‑severity incidents from SAP (e.g. failed IDocs, interface errors) should notify an on‑call channel.
- Changes in critical master data should be visible to the people who care.
On the SAP side you have a couple of options, depending on what your landscape looks like:
- Use existing integration (PI/PO, CPI, Integration Suite) to emit events onto a queue or web endpoint.
- If you’re in an S/4HANA / BTP world, use standard events or OData APIs.
- In older setups, you might have to cheat with scheduled queries on change tables.
On the Power Platform side, a minimal flow looks like this:
1. Trigger: HTTP request or message from a queue/event hub when SAP emits something.
2. Parse the payload and enrich it with whatever you need (e.g. look up customer names).
3. Post a formatted message into a Teams channel.
You can do this entirely in Power Automate with the standard HTTP and Teams connectors. If you care about traceability and filtering, you can add:
- a SharePoint list or Dataverse table to store recent events,
- a second flow that allows someone to “mute” certain types of notifications for a period of time.
No extra UI, no new portal. Just SAP events where people already hang out all day.
## Use case 2: simple approvals with SAP in the loop
A lot of “SAP workflows” in reality are still mail threads with attached spreadsheets. Someone exports a list, mails it around, collects replies and then manually updates SAP.
Power Platform is a good way to clean this up without replacing SAP’s own workflow engine or re‑implementing everything in BTP.
One pattern I like looks like this:
- A Power App or a Power Automate flow pulls a small, well‑defined set of items from SAP via an API or existing integration (e.g. “open purchase requisitions above amount X”).
- Approvers get a simple interface in Teams, a mobile app or a web form to approve/reject with comments.
- The result flows back to SAP via the same integration path.
From a security perspective, the important part is that SAP remains the system of record. The Power Platform app doesn’t try to “own” the process – it just orchestrates human decisions that ultimately land in SAP.
Concrete pieces you’d build over a weekend:
- a small Power App with a gallery of pending items and a detail screen,
- a Power Automate flow that:
- retrieves items from SAP on a schedule or via a trigger,
- writes them to Dataverse or a SharePoint list,
- kicks off approval requests to the right people,
- writes decisions back to SAP via an API call.
Nothing here requires you to redesign your SAP process. You’re just cleaning up the “people” part around it.
## Use case 3: surfacing SAP KPIs without rebuilding reporting
In almost every SAP shop, there’s a long‑running complaint thread about reporting: too slow, too rigid, too many custom extracts, too many Excel files flying around.
You’re not going to fix that in a weekend. But you can do something more modest and still useful:
- identify a handful of KPIs people keep manually exporting from SAP,
- build a Power BI report or Power App that surfaces exactly those,
- embed that into Teams or a SharePoint site where the audience already is.
The flow looks roughly like this:
1. Work with your SAP team to define a stable extract (table, view, OData service) for the KPIs you care about.
2. Pull that data into Power BI or a Power Platform data source (Dataverse, Azure SQL, etc.).
3. Build a simple report or app around it – no “enterprise dashboard”, just the views people actually use.
4. Expose it in Teams as a tab in the relevant channel or as a standalone app.
The important thing is not to try to rebuild your full BI stack in one go. Pick one or two slices of value and make them stupidly easy to access.
## What makes these “weekend‑ish” and not just wishful thinking?
All three patterns share a few traits that make them realistic for a short, focused push:
- **Narrow, concrete scope.** “This event goes to this channel.” “These items get this approval flow.” “These KPIs show up in this place.”
- **Reuse of existing plumbing.** You’re not inventing a new way to talk to SAP; you’re using APIs and integration points your SAP team is (hopefully) already comfortable with.
- **Clear boundaries.** SAP stays system of record, Power Platform handles presentation and light orchestration.
- **Obvious value.** It’s easy to show why the new flow is better than the mail/Excel/portal mess it replaces.
That doesn’t mean you skip security, compliance or architecture reviews. It just means you aim for a slice that you can get through those reviews without having to re‑justify your entire SAP estate.
## Security and governance: the constraints you should respect
Even for “small” SAP + Power Platform projects, there are a few non‑negotiables in my mind:
- Use service principals and managed identities where possible, not random shared accounts.
- Keep SAP roles narrow for any technical users, so a compromised flow can’t see all of FI/HR/etc.
- Log who triggered what, especially when flows can change data.
- Be clear whether your Power App is internal‑only or exposed to external users (e.g. vendors) and configure that explicitly.
None of that requires a six‑month project. It just requires talking to your SAP, security and identity people early enough that they don’t feel blindsided.
## My take
SAP has a reputation for big projects with big price tags. Sometimes that’s justified. But if every idea that touches SAP is automatically treated as an “initiative”, you end up shipping nothing for months.
The combination of SAP, a few well‑chosen integration points and the Power Platform is a good way out of that trap – as long as you’re honest about scope and risk.
Pick one small, clearly bounded use case. Build it end‑to‑end. Respect the guardrails from your SAP and security teams. Then use that as the reference point for the next conversation, instead of yet another slide with a giant target architecture.
You won’t fix your whole SAP story in a weekend. But you can make one painful corner of it significantly less annoying – and that’s usually enough to get people’s attention.
### AI Agents, Copilot, OpenClaw, Foundry: The Stack I’d Actually Recommend in 2026
URL: https://blog.bajonczak.com/ai-agents-copilot-openclaw-foundry-the-stack-id-actually-recommend-in-2026/
Last updated: 2026-03-19T19:24:04.000Z
If you hang around the Microsoft / cloud / AI corner of the internet long enough, you’ll see the same pattern over and over again:
- someone discovers Copilot and wants it everywhere,
- someone else falls in love with agent frameworks like MCP/Foundry,
- and the home‑lab crowd is busy wiring OpenClaw into everything they own.
On paper, all of this sounds amazing. In practice, you can burn a lot of time and money by throwing the wrong tool at the wrong problem.
In this post I want to write down how I currently think about an AI/automation stack in 2026 – specifically around Microsoft 365 Copilot, Foundry/MCP and OpenClaw – and where I would (and wouldn’t) use each of them.
## Copilot: your “inside M365” assistant
Let’s start with the obvious one. Microsoft 365 Copilot is, by design, an assistant that lives *inside* your Microsoft 365 tenant:
- it talks to Microsoft Graph,
- it sees SharePoint/OneDrive/Teams/Exchange according to your permissions,
- and it shows up where people already work (Outlook, Word, Teams, etc.).
That makes it a great fit for:
- summarising and drafting based on documents, mails and chats you already have,
- answering “what do we know about…” questions inside your M365 content,
- helping with everyday knowledge work like minutes, recaps, next steps.
What it is *not* by default:
- a direct front‑end to every ERP/CRM/HR system you own,
- a tool to SSH into servers or run scripts,
- a replacement for well‑designed applications and workflows.
My rule of thumb for Copilot:
> If the problem lives mostly inside Microsoft 365 and is about understanding, structuring or communicating information, Copilot should be your first stop.
Before you reach for anything else, ask: can we solve 80% of this by cleaning up our M365 content and letting Copilot work on top of that?
## Foundry + MCP: orchestrating serious backend work
Once you move beyond “help me with the stuff in my tenant” into “help me orchestrate real systems”, Copilot alone isn’t enough.
That’s where MCP (Model Context Protocol) and platforms like Foundry come in. They give you a structured way to describe tools and backends that an agent can call:
- you define tools like `sap_list_users`, `entra_list_users`, `create_jira_ticket`,
- your backend implements those tools, with proper auth and business rules,
- the agent gets a clear menu of what it can do and how.
Foundry adds a home for this setup:
- hosting for agents and MCP servers,
- environment separation (dev/test/prod, tenants),
- observability and configuration management.
Where this shines for me:
- cross‑system “insights” agents (e.g. SAP HR ↔ Entra ID sync insights),
- domain‑specific helpers (“explain error codes from our internal systems using our KB”),
- structured automation where you want AI to plan, but your backend to execute.
My rule of thumb for MCP/Foundry:
> Use it when you need a real orchestrator across multiple systems, with clear tools, where security and observability matter as much as the model itself.
If your “agent” is essentially one API call in disguise, you probably don’t need MCP or Foundry yet. If you’re juggling SAP, Entra, ticketing and internal services in a single conversation, you do.
## OpenClaw: your personal automation lab (with teeth)
OpenClaw sits in a different corner of the stack. It’s a self‑hosted agent/control plane that runs wherever you install it – on a server, a VM, a Mac mini in your home office.
It can:
- chat with you via your preferred channels (Telegram, Signal, Discord, …),
- run scripts, call APIs, read and write files, talk to local services,
- use “skills” to glue workflows together (blog publishing, backups, monitoring, etc.).
I think of OpenClaw as:
> a CI/CD system with a personality – more “personal DevOps/ops assistant” than generic enterprise platform.
Where it’s strong:
- personal workflows (blogging, research, small automations around your own accounts),
- developer productivity (repo analysis, code scaffolding, local scripts),
- home‑lab and side projects, where you’re comfortable with the blast radius.
Because it runs with your own permissions on a machine you control, you get a lot of power – and a lot of responsibility. I would not casually tell an OpenClaw agent “you can manage prod SAP” and forget about it.
## How these three actually fit together
If you try to force a single tool to do everything, you end up unhappy:
- pushing Copilot far outside its sweet spot,
- using OpenClaw for things that need tenant‑level governance,
- or building giant MCP agents where a simple app would do.
The stack that currently makes sense to me looks more like this:
- **Layer 1 – Copilot & M365**
daily knowledge work, summarisation, drafting, “what do we know about…” inside your tenant.
- **Layer 2 – Foundry/MCP agents**
orchestrating multiple enterprise systems, exposing carefully designed tools with proper security trimming.
- **Layer 3 – OpenClaw**
personal and team‑level automation on infrastructure you own, where you’re willing to accept more experimental workflows.
A few examples to make that less abstract:
- Writing and publishing a blog article?
Draft in Word with Copilot, refine in your Ghost editor, let OpenClaw handle the “turn this HTML into a Ghost draft + send notifications” plumbing.
- Understanding identity drift between SAP and Entra?
Use a Foundry/MCP agent to compute the mismatches and produce a report. Let Copilot summarise that report for management. Maybe use OpenClaw to kick off some local checks or scripts related to your own test environment.
- Helping a support engineer with internal error codes?
Use a Foundry agent that knows how to call your internal KB and systems, then surface that inside Teams (with Copilot in the mix for explanation). OpenClaw doesn’t need to be involved.
## Where I would *not* use each piece
A quick anti‑pattern list, because that’s often more helpful than the happy path.
**Copilot** is the wrong tool if:
- you expect it to directly manipulate infrastructure,
- you want guaranteed, auditable sequences of actions (that’s what workflows and agents are for),
- you treat it as a “SQL client for everything” instead of a layer on top of curated data.
**Foundry/MCP** is the wrong tool if:
- you only need a single API call and no orchestration,
- you don’t have the capacity to own and maintain the backend logic and schemas,
- you’re trying to “hide” all business logic in prompts instead of proper tools.
**OpenClaw** is the wrong tool if:
- you need centralised enterprise governance and least‑privilege by default,
- you’re not comfortable giving an agent shell/API access on a box that has sensitive stuff on it,
- you really just need a normal application or script, not an always‑on agent.
## My take
We’re past the stage where “just add AI” is an interesting strategy. The question now is where to put which kind of intelligence – and how to keep the overall system understandable.
Right now, my answer looks like this:
- Copilot for the tenant you already have,
- Foundry/MCP for cross‑system orchestration with real backends,
- OpenClaw for personal and experimental automation where you own the risk.
That will evolve, but the principle won’t: pick the tool that matches the blast radius and governance level of the problem. If you do that, you get the upside of all three – without turning your stack into one big, unstructured AI experiment.
### No, Copilot Won’t ‘Just Read SAP’ – Here’s What It Actually Takes
URL: https://blog.bajonczak.com/no-copilot-wont-just-read-sap-heres-what-it-actually-takes/
Last updated: 2026-03-18T06:57:49.000Z
Ever since Microsoft 365 Copilot landed in slide decks, I’ve heard some version of the same sentence in SAP-heavy environments:
*“Nice. Then Copilot can just read SAP for us.”*
I get where that comes from. The promise is tempting: you have years of business logic and data in SAP, you have Copilot as a smart assistant on the Microsoft side – surely you can just point one at the other and be done?
Reality is a bit more boring and a lot more opinionated.
In this post I want to walk through what Copilot can actually see, what it *can’t* see, and what it realistically takes to bring SAP data into the picture without creating a security or governance nightmare.
## What Copilot sees by default (and why SAP isn’t in that list)
Out of the box, Microsoft 365 Copilot lives in the Microsoft 365 universe. When it fetches context, it calls Microsoft Graph and Graph looks at:
- SharePoint sites and OneDrive files,
- Teams chats and channels,
- Exchange mailboxes,
- and other M365 workloads that are wired into the search index.
SAP is not magically part of that.
If you never integrated SAP content into M365, Copilot has no idea that your SAP HR org structure, your SD orders or your FI postings even exist. It can infer things from documents and emails that *talk* about SAP data, but it doesn’t “log into SAP” behind your back.
That’s the first mental shift I try to get across:
> Copilot is very good at working with the information you **already** brought into Microsoft 365\. It doesn’t magically reach into every line-of-business system in your landscape.
## Three realistic paths to bring SAP into the Copilot story
If you want Copilot to answer questions that touch SAP data, there are roughly three families of approaches:
1. Move or mirror some SAP output into Microsoft 365 (documents, reports, exports).
2. Index SAP-related content via Microsoft Graph connectors.
3. Expose SAP via dedicated agents/plugins with a backend you control (e.g. MCP/Foundry, custom APIs).
Each has trade-offs.
### 1\. The pragmatic way: SAP data *around* Copilot
The lowest-friction path is not to wire Copilot directly to SAP at all, but to make sure the artefacts people already use are properly stored in M365:
- key reports exported from SAP and parked in SharePoint,
- project decks that summarise SAP metrics,
- decision docs that describe what happened and why.
If those documents live in well-structured, permissioned SharePoint sites, Copilot can be genuinely useful without ever “seeing” raw SAP tables. You ask questions like:
- “Summarise the main changes in our SAP SD pipeline in the last two months based on recent reports.”
- “What are the key risks mentioned in the latest SAP FI closing decks?”
For many organisations, this already covers a surprising amount of Copilot value around SAP – and it has an underrated benefit: you keep SAP as the system of record and treat Copilot as a consumer of curated output, not as a random SQL console with a chat UI.
### 2\. Graph connectors: indexing SAP-related content
The next level is using Microsoft Graph connectors to index content from systems *around* SAP:
- Confluence spaces where SAP processes are documented,
- ticketing systems (incidents, changes, SAP-related requests),
- file shares with legacy SAP documentation.
Technically you can also imagine connectors that expose SAP output via an intermediate store (for example, pushing selected SAP data into an external connection as `externalItem` objects).
The security model is always the same:
- you push items into an external connection,
- you attach ACLs that say who can see what,
- Graph enforces those ACLs when Copilot searches.
The catch: if you’re lazy with ACLs, you flatten your SAP-related permissions into “Everyone can see everything this connector indexed”. That’s a fast lane to “Copilot tells people things about HR, finance or operations they were never meant to see”.
If you go this route, you have to earn it by doing the boring work:
- decide which SAP data actually belongs in an indexed, text-oriented world,
- map SAP roles/groups to ACLs at indexing time,
- test worst-case queries (“salary”, “restructuring”, “investigation”) before you expose it broadly.
### 3\. Agents and plugins: when you really need live SAP data
For some use cases, read-only documents and indexed content are not enough. You actually want to:
- look up current data in SAP (orders, deliveries, balances, HR records),
- correlate it with Microsoft 365 data (Teams, SharePoint, Entra ID),
- maybe even trigger actions (create tickets, start workflows) based on SAP state.
That’s where dedicated agents or plugins come in.
At a high level, the pattern looks like this:
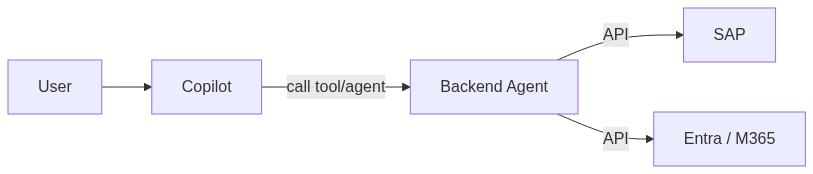
Copilot talks to a backend you own. That backend talks to SAP and Entra/M365 with service credentials, applies your rules, and returns only what the user is allowed to see.
Foundry and MCP are a nice fit here: they give you a structured way to define tools like `sap_get_order`, `sap_list_open_incidents` or `sap_entra_sync_insights` without dumping your entire SAP API surface into a prompt.
The important part: the security model lives entirely in that backend. Microsoft can’t fix it for you.
## The security and governance angle you can’t ignore
Every time someone says “Can’t Copilot just read SAP?”, I translate that in my head to:
- “Are we okay with an AI having *indirect* access to HR, finance and operations data?”
- “If yes, under what rules?”
Some questions I’d insist on answering before building anything serious:
- Which SAP modules are even in scope? FI/CO, SD, HR, CRM… they don’t all have the same risk profile.
- For each module, which *questions* do we want to support? “Explain my payslip” is a different world from “What are the salary ranges in my department?”.
- Who is allowed to ask which questions? How do we reflect that in SAP roles/Entra groups?
- Where do we want to draw hard red lines – questions that should result in “I’m not allowed to answer that”, no matter what?
On the technical side, I’m very allergic to patterns like:
- using a single technical user with SAP\_ALL as the agent account,
- letting the LLM decide freely which SAP APIs to call,
- returning raw table dumps to the model without filtering on user permissions.
Instead, I’d aim for something like:
- Use a dedicated SAP technical user with narrowly scoped roles.
- Always pass the end user’s identity (UPN, objectId) into the backend.
- Map that to SAP authorisations or a separate access table.
- Filter SAP results in code before the LLM sees them.
- Add topic guards for obviously sensitive questions (compensation, layoffs, investigations).
## So what does a realistic SAP + Copilot roadmap look like?
If I had to sketch a pragmatic roadmap for bringing SAP into a Copilot world, it would look something like this:
1. **Get your basics right in M365.**
Clean up permissions on the sites and libraries where SAP-related documents live. You don’t want Copilot to be the first time you realise everyone can see the CFO’s “SAP carve-out” deck.
2. **Make better use of documents you already have.**
Make sure key SAP reports, decks and decision docs land in well-structured SharePoint areas. Let Copilot summarise, compare and cross-reference those before you touch live SAP data.
3. **Use Graph connectors for surrounding systems.**
If you have Confluence, ticketing, or KB systems around SAP, index those properly – with ACLs mapped – so Copilot can answer “how do we…” questions without ever hitting SAP tables.
4. **Start with one focused agent.**
Pick a narrow, high-value use case for a live SAP agent – for example, “Sync insights between SAP HR and Entra ID” or “Explain SAP error messages using our internal KB”. Build one backend, with real security trimming, and prove that it works.
5. **Only then think about broader scenarios.**
Once you’ve seen one agent behave well in production, you’ll have a much better sense of how far you actually want to go. In many cases, you’ll find you don’t need “Copilot reads all of SAP”, you need three or four well-designed SAP-aware agents.
## My take
“Copilot just reads SAP” sounds nice in a meeting, but it hides all the interesting questions under the rug: which data, for whom, under which rules, and with what blast radius if something goes wrong.
The good news is: you don’t need magic. You need a clear idea of how SAP and Microsoft 365 should work together, and then you pick the right tools:
- native Copilot for the M365 world you already have,
- Graph connectors where search over SAP-related knowledge makes sense,
- and a small set of well-designed agents where live SAP data is really worth the risk.
If you approach it that way, Copilot doesn’t become a mysterious black box “that reads SAP somehow”. It becomes what it should be: a smart layer on top of architectures and security models you actually understand.
### Why Copilot Without Security Trimming Is Just a Very Polite Insider Threat
URL: https://blog.bajonczak.com/why-copilot-without-security-trimming-is-just-a-very-polite-insider-threat/
Last updated: 2026-03-17T11:00:37.000Z
When people talk about Microsoft 365 Copilot, they usually focus on the cool demo moments: “summarise this document”, “prepare a reply”, “give me the key risks from last quarter’s deck”.
All of that is fine. But there is an uncomfortable angle that often gets hand‑waved away:
> A Copilot deployment without proper security trimming is basically a very polite insider threat.
Not because Copilot is evil, but because you are giving a very powerful search and reasoning engine access to whatever your identity and data model allows it to see. If that identity and data model is messy, over‑permissive or incomplete, Copilot will faithfully amplify those problems.
In this post I want to walk through why I see it that way, what “security trimming” actually means in practice, and how I would approach Copilot rollouts if I didn’t want to wake up to an unpleasant surprise.
## What Copilot actually sees
Let’s start with the basics. When Copilot fetches context for a user, it doesn’t bypass Microsoft 365\. It asks Microsoft Graph, and Graph applies the same access checks as for normal search:
- SharePoint and OneDrive documents,
- Teams chats and channel messages,
- Exchange emails,
- Planner/Loop/other M365 content depending on your tenant.
Graph only returns items the current user is allowed to access. That’s the good news.
The bad news is: if *your* permissions are a mess, Copilot sits on top of that mess.
All of the classic SharePoint and Teams anti‑patterns translate 1:1 into Copilot risk:
- “Everyone except external users” used on sites that contain sensitive content,
- old project sites where access was never cleaned up,
- ad‑hoc sharing with “anyone with the link”,
- mailboxes that still contain data nobody should have kept in the first place.
As long as people were searching manually, a lot of this flew under the radar. With Copilot, a normal user can suddenly ask broad, cross‑cutting questions like:
- “Summarise our restructuring plans for the next six months.”
- “What are the current salary bands for senior engineers in Germany?”
- “Give me a list of ongoing investigation cases.”
If there are documents, mails or Teams threads that match those queries and the user technically has access (even if they should not), Copilot will happily connect the dots.
## Security trimming: not a buzzword, just basic hygiene
“Security trimming” sounds like marketing, but the idea is simple:
> Users should only see what they are supposed to see – and AI should only use data that user is allowed to see.
For Copilot in Microsoft 365, the first part is older than Copilot itself: it’s the normal M365 permission model. The second part is about not bypassing that model when you extend Copilot.
In practice, I think about three layers:
1. **Native M365 content:** SharePoint/OneDrive/Teams/Exchange.
2. **Indexed external content:** Graph connectors.
3. **Live systems and actions:** custom plugins/agents.
Each needs its own security trimming story.
## Layer 1: fix your own house first
Before you even think about fancy plugins, the boring part matters most: clean up your M365 permissions.
If you connect Copilot to a tenant where:
- executive documents live on broadly shared sites,
- HR files sit in semi‑public libraries “because it was convenient”,
- Teams channels are used as dumping grounds for anything sensitive,
then Copilot is not your problem – your information architecture is.
I’d start with a few ugly, practical questions:
- Do we know where our “crown jewels” actually live (Layoff plans, salary data, M&A decks, investigation reports)?
- Are those locations locked down to the right groups?
- Are we still over‑using “Everyone except external users” on sites that contain sensitive stuff?
- Do we have sharing links floating around that effectively bypass group‑based access?
Copilot doesn’t change how any of this works. It just makes the consequences much more visible.
## Layer 2: Graph connectors – powerful, but dangerous if you’re lazy
Graph connectors are a great way to bring external content into Microsoft Search and Copilot: Confluence, file shares, line‑of‑business systems, you name it.
The security model is straightforward:
- You create an `externalConnection`.
- You push `externalItem` objects into it.
- Each item has an `acl` array that defines who can see it.
If you get the ACLs right, Graph will trim results for you. If you don’t, you’ve just built a single search index that ignores years of permission work in the source system.
The dangerous shortcut looks like this:
- Use a technical account to read “everything” from Confluence or a file share.
- Push all pages/files as external items.
- Assign them very broad ACLs (“Everyone in the company”).
Congratulations, you’ve just flattened your permissions into one big, friendly leak.
Doing it properly takes more effort: you have to map source permissions to ACLs when you index. But that’s the price of not turning Copilot into an unintentional data exfiltration layer.
## Layer 3: custom plugins and agents – your backend *is* the security model
For live systems – SAP, ticketing, finance, HR, custom apps – you can’t rely on indexes alone. You build plugins or agents that call APIs in real time.
Here, security trimming is 100% your responsibility. Microsoft can’t inspect what your backend does.
A few patterns I consider dangerous:
- Using a god‑mode service account with full access to a system.
- Not passing user context from Copilot to your backend (no user id, no roles, nothing).
- Letting the agent query arbitrary tables/entities with no filtering.
Combine that with broad natural language questions, and you’ve built a polite, AI‑driven data‑dumper.
The alternative is more boring but much safer:
- Pass a user identifier (UPN, ObjectId) from Copilot to your backend.
- Look up roles/groups/permissions server‑side.
- Apply an ACL filter in your code before the LLM ever sees any data.
- Optionally add simple topic guards (if question contains “salary” and user is not in HR, refuse).
That’s not rocket science. It’s just taking your existing security model seriously.
## Concrete guardrails I’d put in place
If I had to write down a short, opinionated checklist for Copilot security trimming, it would look like this:
- **Fix your basics first.** Review where your sensitive documents live and who has access. Don’t let Copilot be the first time you realise half the company can see the CEO’s layoff deck.
- **No blind Graph connectors.** If you can’t or won’t map source permissions into ACLs, don’t index that system for Copilot.
- **No god‑mode service accounts in plugins.** Always pass user context and enforce permissions in your backend.
- **Topic guardrails for generic agents.** It’s okay to hard‑block categories like compensation, layoffs or investigations for “normal” roles. Build dedicated, tightly scoped agents for HR/Legal if they really need AI support there.
- **Logging and review.** Log which tools are called for which users and what systems they touch. You don’t need to store all content, but you *do* want to see patterns like “this user keeps asking for sensitive things”.
## Copilot is not the villain here
It’s tempting to blame Copilot for all of this. I don’t think that’s fair.
Copilot is very good at what it’s supposed to do: take the data you have, respect the permissions the platform knows about, and help users answer questions based on that.
If your permissions and extensions are sane, Copilot can be a massive productivity boost without turning into a compliance nightmare. If they aren’t, Copilot will surface exactly the things you’ve been ignoring for years.
That’s why I keep coming back to this line:
> A Copilot deployment without proper security trimming is basically a very polite insider threat.
Not because the AI is “out to get you”, but because it’s the first time many organisations put a powerful, cross‑cutting question engine on top of a permission model nobody ever really stress‑tested.
If you take security trimming seriously – native content, connectors, plugins – Copilot becomes what it should be: a sharp tool in the hands of people who are allowed to use it, instead of a spotlight that accidentally exposes the cracks in your access model.
### If You Still Print and Scan Contracts in 2026, That’s a Security Bug
URL: https://blog.bajonczak.com/if-you-still-print-and-scan-contracts-in-2026-thats-a-security-bug/
Last updated: 2026-03-16T11:16:23.000Z
In almost every company I visit, I still see the same scene: someone prints a contract, signs it with a pen, walks it over to a manager for a second signature, then scans it back in and sends a PDF around by email. Nobody really questions it, because “we’ve always done it that way”.
In 2012, that was normal. In 2026, I’d call it a **security bug**.
Not because paper is evil, but because the whole print–sign–scan workflow lives *outside* the security and compliance world you’ve already invested in. It’s hard to reconstruct who saw what, when. Copies land in places nobody tracks. And while you spend a lot of time and money hardening Microsoft 365 – Entra ID, Conditional Access, DLP, retention – one of your most important processes, signing agreements, is often running as a side quest next to it.
In this post I want to explain why I see it that way and why Microsoft 365 eSignature is not just a “nice convenience feature”, but a real security and compliance upgrade.
## What actually happens when you print and scan
Let’s be honest about what your paper signing flow really looks like.
It usually starts in some system – ERP, CRM, DMS, whatever. Someone exports a contract as a PDF and saves it somewhere: on the desktop, in a random file share, in a personal OneDrive folder, wherever they have muscle memory.
They print it. From that moment on, you have a physical copy lying around: on the printer, on a desk, in a stack of “I’ll deal with this later”. Nobody knows exactly how many people walk past it or glance at it.
Then come signatures. The first person signs, the second is hunted down in the hallway, maybe there’s a last-minute change, so the whole thing is printed again, re-signed, re-scanned. At the end, the contract hits a scanner – often a shared multi‑function device that “belongs” to no one. The device drops a PDF into some generic scan folder or sends it via email from a technical SMTP account.
From there, the file goes on tour: legal, finance, the customer, internal stakeholders. Everyone saves their own copy. Some people forward it, some print it again. Six months later, when you try to reconstruct who saw which version and who signed what, you end up doing email archaeology and digging through files named `final_contract_v7_signed_scan.pdf`.
Formally, the process might still be “okay enough” to get by. But from a security and compliance perspective it’s a mess: uncontrolled digital copies, at least one physical copy, and at best a fuzzy audit trail.
## What changes with Microsoft 365 eSignature
With Microsoft 365 eSignature, you move that signing flow into an environment that already knows a lot about your users and your documents:
- who the user is (Entra ID identity),
- which tenant they belong to,
- which policies apply (MFA, Conditional Access, DLP, retention),
- and where content is supposed to live.
Instead of loosely connected PDFs and scans, you get a tracked signing workflow:
- a clear request that is initiated from within Microsoft 365,
- recipients that are real identities (internal Entra users or properly onboarded guests),
- and an audit trail that sits inside your existing compliance boundaries.
On the practical side, that means:
- far fewer “Scan\_0001.pdf” zombies in random mailboxes,
- no guessing which PDF is actually the final one,
- a much cleaner story for your DPO and your auditors.
### Screenshot 1: Sending a request inside Microsoft 365
This is where a visual helps. If you open the Microsoft adoption page for eSignature, you can see how the “send for signature” experience is meant to look directly inside Microsoft 365.
*In your blog, this is a good place to show a screenshot like:*
- a real eSignature send dialog in Word, Outlook or SharePoint,
- with a document already selected, recipients added and fields configured.
The point of that image is simple: signing doesn’t start on a printer anymore – it starts where the document already lives, inside Microsoft 365.
## Why I call print–sign–scan a security bug
Security is not just about crypto and fancy products. It’s also about how easy it is for normal people to accidentally do the wrong thing.
The classic print–sign–scan flow makes it trivial to do things you don’t actually want:
- leave sensitive contracts on shared printers,
- store “final” versions in personal file locations,
- forward PDFs from unmanaged devices or even private email accounts,
- lose track of which copy is the one that matters.
You don’t need a malicious insider for this to be a problem. Normal, well‑meaning people create unnecessary attack surface simply because the process is messy and unstructured.
When you move the same use case into Microsoft 365 eSignature, you don’t instantly become perfectly compliant. But you do something important:
- you anchor signing in your identity system (Entra ID),
- you reuse policies you already have (MFA, Conditional Access, DLP),
- and you cut down the number of uncontrolled copies by design.
For me, that’s the difference between “we sort of manage” and “we are actively reducing attack surface”.
## Where Microsoft 365 eSignature fits in the real world
I’m not saying Microsoft 365 eSignature replaces every signing solution on the planet. There are absolutely scenarios where a specialised provider like Adobe Acrobat Sign or DocuSign still makes more sense – for example:
- very complex external signing chains,
- highly regulated cross‑border scenarios,
- or very specific legal requirements in certain industries or jurisdictions.
But there is a *huge* middle ground that looks the same in many organisations:
- internal HR flows (contracts, policy acknowledgements, consent forms),
- standard customer contracts and renewals,
- smaller vendor agreements,
- one‑off approvals and sign‑offs.
For that space, the combination of Microsoft 365 + eSignature is almost too obvious:
- you already create and store documents there,
- your employees already authenticate with Entra ID,
- you already pay for the platform and its security features.
Enabling eSignature doesn’t mean introducing yet another tool with its own identity silo. It means attaching a structured signing experience to something you’ve already secured.
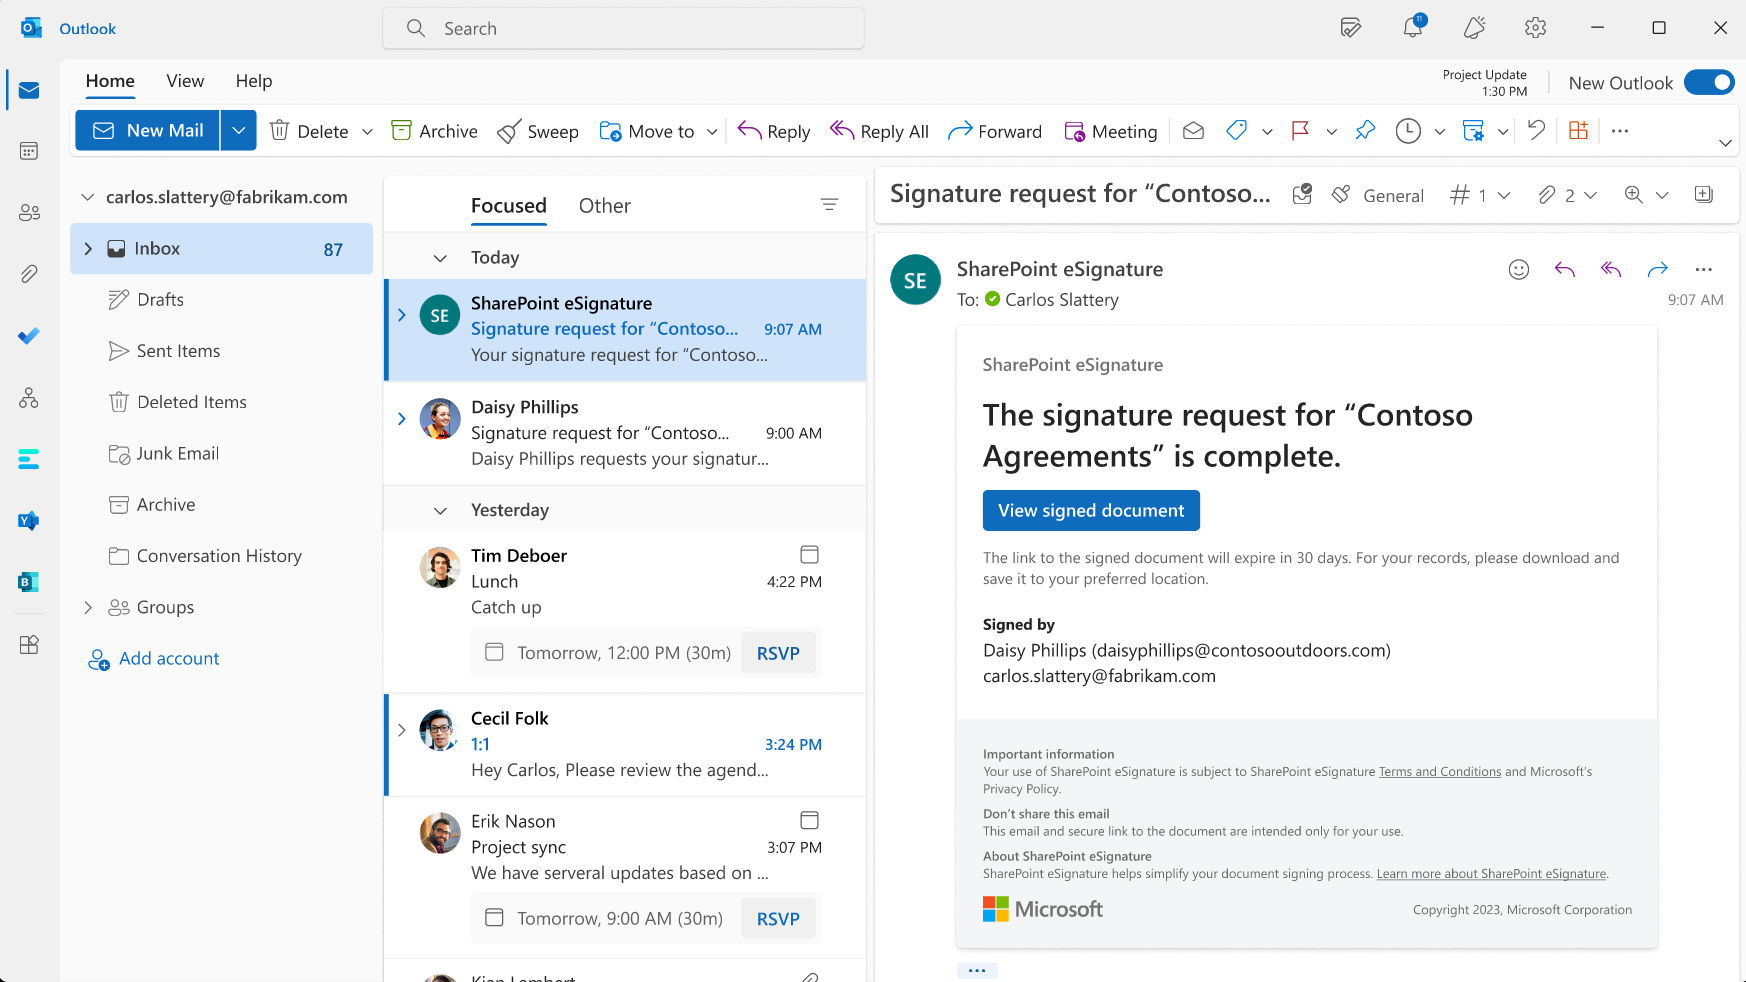
This makes it obvious that signers are not dealing with some random scan attachment, but a structured flow with clear steps.
## How I’d approach this as a security or IT owner
If I were responsible for security or IT in a mid‑sized company, I wouldn’t treat signing as a background chore anymore. I’d do a one‑time mapping of the main signing flows:
- Which flows are internal (HR, internal approvals)?
- Which flows hit customers or partners?
- Which flows are legally critical vs. “nice to have on record”?
Then I’d split them into two buckets:
- **high complexity / high risk** – this is where a specialised provider might remain the best option,
- **high volume / moderate complexity** – this is where Microsoft 365 eSignature is a very strong default.
For that second bucket, I’d explicitly flip the default:
> “If this scenario can run through Microsoft 365 eSignature, that’s what we do. Printing and scanning is the exception, not the standard.”
That change alone doesn’t transform your entire security posture overnight, but it nudges a huge amount of day‑to‑day work into a safer, more traceable pattern. And it gives you a far cleaner story when someone asks:
- Who approved this?
- When exactly did they sign?
- How long do we keep the signed version?
- What happens if we need to prove this in front of an auditor or a regulator?
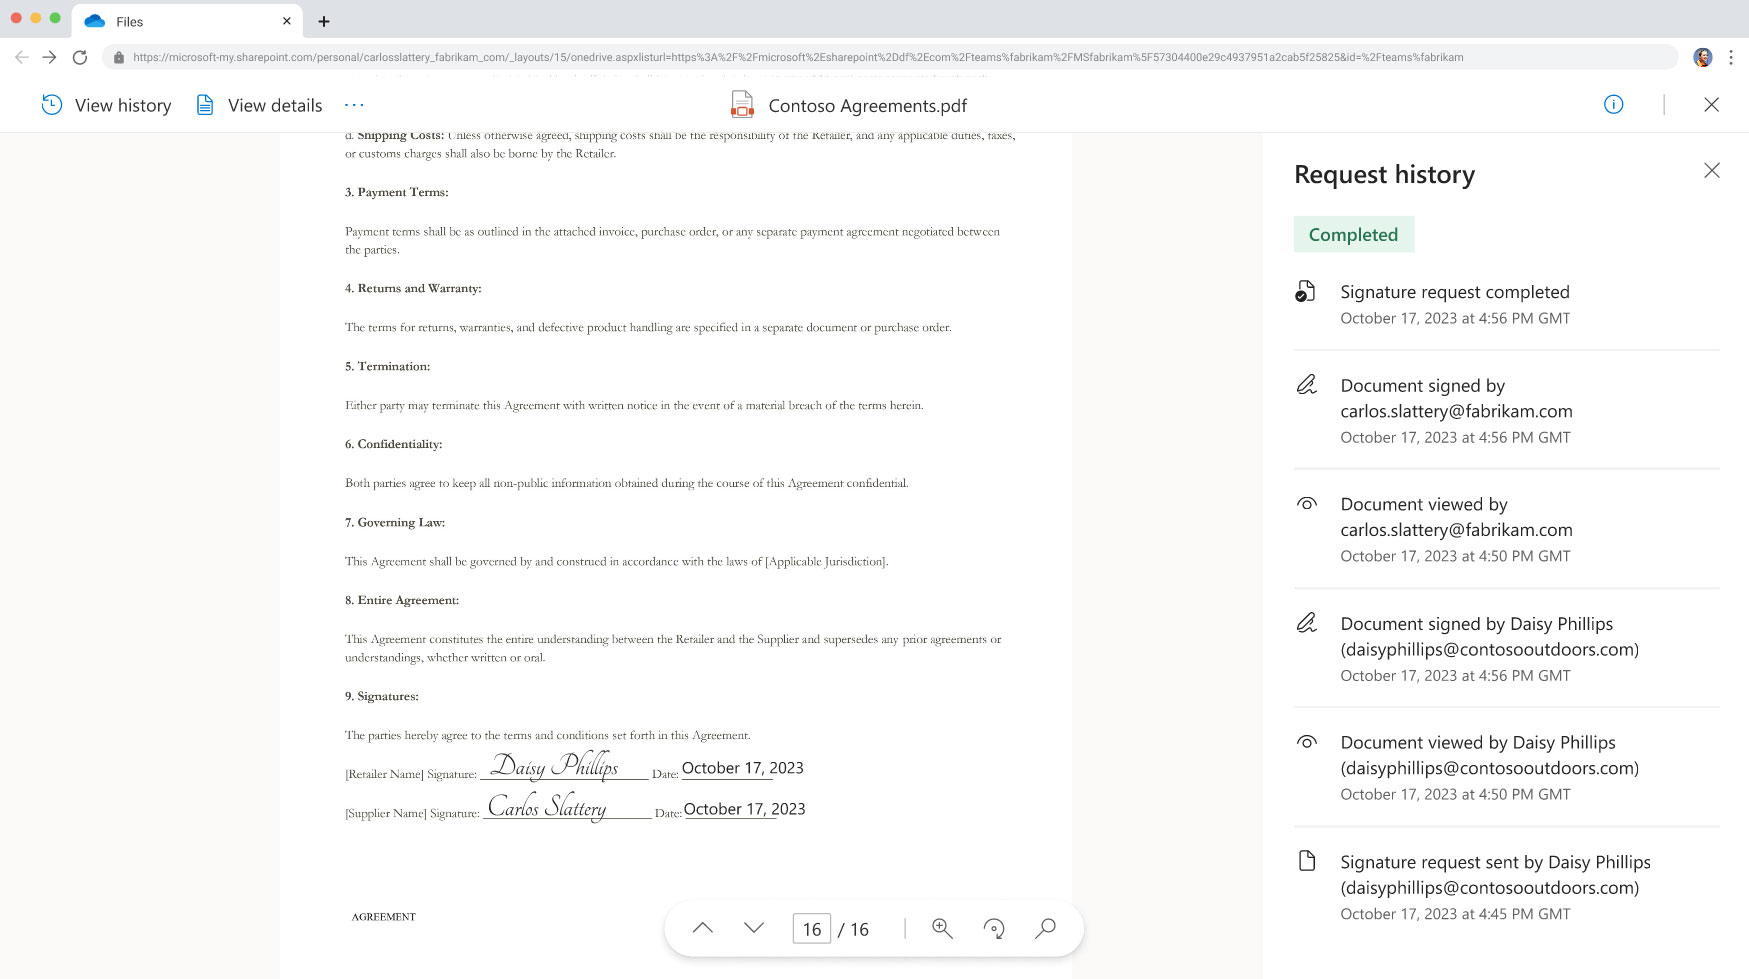
This is the picture you want in people’s heads when they think about “how signing works here” – not a pile of PDFs in someone’s mailbox.
## Conclusion: stop treating signatures as a side quest
Print–sign–scan survived for a long time because it “kind of worked” and everyone knew how to use a printer. But in 2026, when you’re already investing heavily into identity, cloud security and compliance, it doesn’t make sense to run a core business process on the side, disconnected from all of that.
Taking Microsoft 365 eSignature seriously means treating signing like any other critical process:
- bound to real identities,
- protected by the policies you already have,
- and visible in an audit trail you can actually explain.
That’s why I’m comfortable calling the old print–sign–scan approach a security bug in 2026\. Not because it never worked, but because there’s now a much better default available – and choosing not to use it is, in many environments, a conscious decision to accept more risk than you need to.
### MCP Is Not Magic – It’s Just a Cleaner Way to Admit You Need an Orchestrator
URL: https://blog.bajonczak.com/mcp-is-not-magic-its-just-a-cleaner-way-to-admit-you-need-an-orchestrator/
Last updated: 2026-03-15T11:15:59.000Z
Every few months there is a new framework that supposedly “changes everything” about how we build AI systems.
Right now, MCP and Foundry are in that spotlight.
If you read some of the marketing posts, you get the impression that MCP is a kind of magic dust you sprinkle on your agents and suddenly everything is more powerful, safer and easier to manage.
I don’t buy that.
I like MCP. I like Foundry. But not because they are magic.
> MCP is essentially a cleaner way to admit that you need an orchestrator.
In this post I want to unpack what that means, using a very concrete example: an agent that understands the gap between SAP / SuccessFactors and Entra ID, and reports identity drift back to you.
## 1\. The reality before MCP: ad-hoc glue everywhere
Before MCP/Foundry, most “agents” in companies looked like this:
- a chat UI somewhere (Teams bot, web frontend, Slack app),
- a backend service written in whoever’s favourite language,
- a bunch of custom HTTP endpoints or SDK calls to systems like SAP, Entra, Jira, Confluence, ServiceNow, …
- some prompt engineering and an LLM call glued on top.
If you were disciplined, you at least hid those systems behind a minimal set of APIs:
- `getUserProfile(email)` instead of “call SAP, then Graph, then some random DB”,
- `createTicket(summary, details)` instead of “POST to Jira with a half-baked payload”.
If you weren’t, your agent prompt probably contained a free-form explanation like:
> “When you need SAP data, call this URL with this payload. When you need Entra data, call this other URL…”
It worked, but it was fragile and hard to reason about.
## 2\. What MCP actually gives you
MCP (Model Context Protocol) formalises something many of us were already doing intuitively:
- you describe tools in a machine-readable way,
- you keep business logic and credentials on your side,
- the agent gets a clean menu of what it can do and how to call it.
Instead of informal “when you need SAP…” paragraphs, you get structured capabilities like:
- `sap_list_users(limit)`
- `entra_list_users(limit)`
- `report_mismatches(filter)`
Foundry builds on top of this by giving you a consistent runtime, hosting and lifecycle around those tools.
None of that is magic. It’s just good software engineering discipline encoded into a protocol and a platform.
## 3\. Example: A Sync Insights agent on MCP/Foundry
Let’s make this less abstract.
Imagine you want an agent that can answer questions like:
- “Show me active SAP employees who don’t have an Entra account.”
- “Where do department attributes differ between SAP and Entra?”
- “Which Entra accounts look like they should have been deprovisioned already?”
Under the hood you need three things:
1. an SAP/SuccessFactors API client,
2. an Entra ID client (Microsoft Graph),
3. a bit of logic that compares both and reports mismatches.
With MCP/Foundry, you expose this as a small set of tools instead of one giant do-everything endpoint.
### 3.1\. Tool-level view
The tools might look like this in conceptual terms:
- `sap_list_users(limit, departmentFilter)` – returns a normalised list of SAP users.
- `entra_list_users(limit, departmentFilter)` – returns a normalised list of Entra users.
- `report_mismatches(scope)` – returns a summary of differences between both sides.
The Sync Insights agent doesn’t need to know how SAP authentication works or which Entra Graph scopes you requested. It only “sees” the tools.
Behind those tools lives your service code – written in Node, .NET, whatever you like – that you can test like any other backend.
### 3.2\. Why this is better than pure prompt glue
The benefits are subtle but important:
- **Discoverability**: tools are explicit. You can introspect them, generate docs, reason about what the agent can and cannot do.
- **Security**: credentials stay in your server. The agent never sees SAP passwords or client secrets.
- **Reusability**: the same toolset can be used by multiple agents, CLI tools, scripts.
- **Testability**: you can unit test `report_mismatches()` without an LLM in the loop.
You could have built all of this without MCP, of course. But MCP gives you a shared language and wiring for it.
## 4\. Where Foundry adds value
Foundry is essentially a home for your MCP tools and agents.
From my perspective, its value in this story comes from:
- **standardised hosting** for your agents and tools (no more “where is that container running again?”),
- **configuration and environment separation** (dev vs. prod, different tenants),
- **observability**: calls, latency, errors per tool,
- and a place to evolve your agents over time without rewriting everything.
For the Sync Insights agent, a Foundry setup might look like:
- one Foundry project per organisation/tenant,
- a tool bundle exposing SAP and Entra operations,
- an “Insights” agent that knows how to combine them.
From there, you can connect different frontends:
- a Teams message extension,
- a simple web UI for identity admins,
- scheduled runs that post reports into a channel.
## 5\. The orchestrator question you can’t dodge
MCP and Foundry don’t change a fundamental truth about non-trivial AI systems:
> Somewhere, you need an orchestrator that decides which tools to call, in which order, and with which data.
You can pretend that this logic “just happens” inside the LLM because you wrote a long prompt. Or you can admit that:
- part of that orchestration belongs in the model (planning, natural language understanding),
- and part of it belongs in your code (validation, retries, safety checks, state).
MCP makes that split a bit more honest: tools are first-class citizens. Foundry gives you a place to run them.
But you still have to design:
- which tools an agent is allowed to use,
- what a “good plan” looks like for a given workflow,
- and where you want a human in the loop.
## 6\. Where I see the sweet spot for MCP + Foundry
In my own projects, the combination of MCP and Foundry shines when:
- I have to integrate multiple enterprise systems (SAP, Entra, Jira, Confluence, ticketing),
- I want to keep all real credentials and complexity in a backend I own,
- but I want agents to feel like they have a unified “brain” for these systems.
The Sync Insights agent is a great fit for this:
- it’s cross-system by nature (HR vs. Identity),
- it’s read-heavy and insight-focused (perfect for AI summarisation),
- it benefits massively from being able to call multiple tools in a single conversation.
I wouldn’t use MCP/Foundry for a one-off “call this single API and return JSON” plugin – that’s overkill. But the moment you’re juggling several systems and workflows, you need an orchestrator anyway. MCP just gives that orchestrator a standard shape.
## 7\. My take
I don’t see MCP or Foundry as magic. I see them as an honest acknowledgement that:
- tool calls matter,
- backends matter,
- and orchestration is too important to hide in a prompt.
For scenarios like SAP ↔ Entra Sync Insights, that’s exactly what I want:
- a clean set of tools that express what my backend can do,
- a platform that runs them with proper observability,
- and agents that are powerful because their world is well-structured – not because we believed in magic.
If you go into MCP/Foundry with that mindset, you’re less likely to be disappointed – and much more likely to build something that survives the next hype cycle.
### SAP vs. Entra ID: Why Your User Sync Should Be a Product, Not a Script
URL: https://blog.bajonczak.com/sap-vs-entra-id-why-your-user-sync-should-be-a-product-not-a-script/
Last updated: 2026-08-02T08:32:39.000Z
SAP to Entra ID sync is one of those topics that sounds smaller than it is.
On paper it is just identity plumbing: take users from SAP HR or SuccessFactors, compare them with Entra ID, create what is missing, update what changed, disable what should no longer exist.
In a real company, that “small script” decides who can log in, which apps they can reach, which department owns them, who their manager is, and sometimes whether offboarding actually happens.
That is not a script. That is an identity product.
If it breaks, the business does not care that the cron job failed because one OData field changed. The business sees users with wrong access, delayed onboarding, broken manager chains, and audit questions nobody wants to answer on a Friday afternoon.
My take: SAP ↔ Entra ID sync needs owners, SLOs, monitoring and a clear operating model. Code is only one part of it.
## The “just a script” version
The risky version usually starts with good intentions.
Someone builds a small integration:
- call SAP or SuccessFactors
- call Microsoft Graph
- compare users
- update Entra ID
- maybe write a CSV report
- run it every night
For the first few weeks, that can look perfectly fine.
Then the real world arrives:
- SAP changes a field name or value format
- a department rename is handled differently in SAP and Entra
- contractors do not follow the same HR lifecycle
- one legal entity has a different offboarding rule
- manager IDs do not match UPNs
- a Graph permission expires or an app secret is rotated badly
- the sync silently skips 200 users because an API call timed out
- nobody knows whether SAP or Entra is the source of truth for a field
That is where the script becomes a product, whether you admit it or not.
The question is only whether you operate it like one.
## What a sync product needs
A proper SAP ↔ Entra sync product needs more than a job runner.
At minimum, I would define:
| Area | Decision |
| --------------- | ---------------------------------------------------------------------------- |
| Source of truth | Which attributes come from SAP, which from Entra, which from another system? |
| Ownership | Who owns business rules, technical platform and support? |
| SLO | How fresh does identity data need to be? Minutes, hours, overnight? |
| Failure mode | What happens when SAP or Graph is unavailable? |
| Drift handling | How are mismatches detected, reported and resolved? |
| Audit | Can we explain why a user was created, updated or disabled? |
| Exceptions | How are contractors, service accounts and special cases handled? |
| Change control | Who approves new mapped attributes or automation actions? |
That does not mean building a massive platform from day one. It means treating the sync as something the company depends on.
A good first step is to separate three jobs:
1. **Read** from SAP and Entra.
2. **Compare** both worlds and report drift.
3. **Write** changes only after the rules are trusted.
I would not start with full write-back automation. I would start with reliable visibility.
## Drift is the real product problem
The most useful first version is often a Sync Insights view.
Not “fix everything automatically”. Just answer questions like:
- Which active SAP users are missing in Entra ID?
- Which Entra users no longer exist as active SAP users?
- Which users have department mismatches?
- Which users have manager mismatches?
- Which accounts look like stale contractors?
- Which changes would the sync apply if write mode was enabled?
That gives HR, IAM and IT operations a shared view of the mess.
And yes, there will be mess.
Identity drift is normal in companies. People move departments, names change, managers change, contractors come and go, acquisitions add weird edge cases. Pretending that the data is clean is how you end up trusting the wrong automation.
## A small mismatch function
The core comparison logic does not have to be fancy. It has to be explicit and testable.
```ts
type SapUser = {
userId: string;
email: string | null;
department: string | null;
managerId?: string | null;
status?: 'Active' | 'Inactive';
};
type EntraUser = {
userPrincipalName: string;
mail: string | null;
department: string | null;
managerId?: string | null;
};
type SyncMismatch = {
type: 'MissingInEntra' | 'MissingInSap' | 'AttributeMismatch';
sapUser?: SapUser;
entraUser?: EntraUser;
details: string;
};
function normalizeEmail(email: string | null): string | null {
return email ? email.trim().toLowerCase() : null;
}
export function computeMismatches(
sapUsers: SapUser[],
entraUsers: EntraUser[]
): SyncMismatch[] {
const mismatches: SyncMismatch[] = [];
const activeSapUsers = sapUsers.filter(u => u.status !== 'Inactive');
const entraByEmail = new Map();
const entraByUpn = new Map();
for (const e of entraUsers) {
const emailNorm = normalizeEmail(e.mail);
if (emailNorm) entraByEmail.set(emailNorm, e);
entraByUpn.set(e.userPrincipalName.toLowerCase(), e);
}
for (const s of activeSapUsers) {
const emailNorm = normalizeEmail(s.email);
let match: EntraUser | undefined;
if (emailNorm) match = entraByEmail.get(emailNorm);
if (!match) match = entraByUpn.get(s.userId.toLowerCase());
if (!match) {
mismatches.push({
type: 'MissingInEntra',
sapUser: s,
details: `No Entra user for SAP userId=${s.userId}, email=${s.email}`,
});
continue;
}
const sapDept = (s.department || '').trim();
const entraDept = (match.department || '').trim();
if (sapDept && entraDept && sapDept !== entraDept) {
mismatches.push({
type: 'AttributeMismatch',
sapUser: s,
entraUser: match,
details: `Department mismatch: SAP="${sapDept}" vs ENTRA="${entraDept}"`,
});
}
const sapManager = (s.managerId || '').trim().toLowerCase();
const entraManager = (match.managerId || '').trim().toLowerCase();
if (sapManager && entraManager && sapManager !== entraManager) {
mismatches.push({
type: 'AttributeMismatch',
sapUser: s,
entraUser: match,
details: `Manager mismatch: SAP="${sapManager}" vs ENTRA="${entraManager}"`,
});
}
}
const sapEmails = new Set(
activeSapUsers.map(s => normalizeEmail(s.email)).filter((e): e is string => !!e)
);
const sapUserIds = new Set(activeSapUsers.map(s => s.userId.toLowerCase()));
for (const e of entraUsers) {
const emailNorm = normalizeEmail(e.mail);
const upn = e.userPrincipalName.toLowerCase();
const emailInSap = emailNorm && sapEmails.has(emailNorm);
const idInSap = sapUserIds.has(upn);
if (!emailInSap && !idInSap) {
mismatches.push({
type: 'MissingInSap',
entraUser: e,
details: `No SAP user for Entra UPN=${e.userPrincipalName}, mail=${e.mail}`,
});
}
}
return mismatches;
}
```
This kind of code is not the whole solution, but it is the part I want outside the prompt.
The model can explain the mismatch. It should not invent the mismatch.
## Where an agent actually helps
An agent makes sense when it gives people a safer way to ask operational questions.
For example:
> Show me active SAP users missing in Entra ID.
> Which department mismatches changed since yesterday?
> Which manager changes would affect access reviews?
> Summarize the top identity drift risks for this week.
That is useful because the agent can sit on top of tools that are already constrained:
- list active SAP users
- list Entra users
- compute mismatches
- explain mismatch groups
- create a report
- optionally open a ticket
The agent should not get raw, unlimited SAP and Graph access and “figure it out”. That is just prompt glue around sensitive systems.
## MCP and Foundry in this architecture
MCP is useful here because it forces you to admit that the agent needs tools.
Instead of hiding everything behind one vague endpoint like `askSapAnything`, you expose narrow operations:
- `sap_list_active_users`
- `entra_list_users`
- `report_sync_mismatches`
- `get_user_sync_detail`
- `create_sync_review_ticket`
That is cleaner than giving the model direct access to every API and hoping the prompt keeps it disciplined.
Foundry can help with the agent layer: tool registration, hosted orchestration, evaluation, deployment and operational controls. But Foundry does not remove the need for backend rules.
My rule is simple:
> MCP describes the tools. Foundry can host the agent. Your backend still owns the business rules.
## Write mode comes later
I would split the product into maturity stages.
### Stage 1: Read-only visibility
- read SAP users
- read Entra users
- compute drift
- produce reports
- no writes
- no automatic remediation
This is the safest starting point. It builds trust and exposes bad data before automation makes it worse.
### Stage 2: Assisted remediation
- create tickets
- suggest fixes
- generate change payloads
- require human approval
- log decisions
At this stage the agent helps operations, but it does not silently change identity data.
### Stage 3: Controlled write-back
- approved rules only
- small set of attributes
- dry-run mode
- rollback story
- audit trail
- monitoring
- change windows for risky updates
This is where the sync starts acting like automation. I would only go here after the drift reports are boring for a while.
Boring is good. Boring means the rules are understood.
## Operating model
The operating model is where many sync projects fail.
I would define four owners:
### HR data owner
Owns the meaning of SAP fields, employee lifecycle states, departments, manager hierarchy and special cases.
### IAM owner
Owns Entra ID behavior, group strategy, access review implications, joiner/mover/leaver processes and security controls.
### Platform owner
Owns the integration runtime, credentials, monitoring, deployment and incident response.
### Business process owner
Owns what “correct” means for onboarding, offboarding and department changes.
If nobody owns an attribute, do not automate it yet.
## SLOs and monitoring
A sync product needs simple SLOs.
Examples:
- new active SAP employee appears in Entra within 4 hours
- terminated employee is flagged within 30 minutes
- department mismatch report runs every morning
- sync job failures alert within 10 minutes
- no silent partial syncs
- every write action has a correlation ID
The exact numbers depend on the company. The important part is that the numbers exist.
I would monitor:
- successful runs
- failed runs
- partial runs
- API latency
- mismatch counts
- sudden spikes in missing users
- stale secrets or expiring certificates
- Graph throttling
- SAP API errors
A nightly sync without monitoring is not automation. It is a surprise generator.
## Security boundaries
SAP HR data and Entra ID data are sensitive. Treat the agent as an operational tool, not as a casual chatbot.
I would enforce:
- read-only mode by default
- least-privilege app registrations
- narrow SAP API permissions
- no raw dumps in chat
- no full HR records in logs
- role-based access to reports
- correlation IDs for every tool call
- explicit approval before write actions
- retention rules for generated reports
If a user asks “show me all employees with salary details and access risk”, the answer should not be a clever prompt response. It should be a policy decision.
## My take
SAP ↔ Entra ID sync is too important to live as an undocumented script under one admin's home directory.
Start with visibility. Build a Sync Insights layer. Compare SAP and Entra in a repeatable way. Show drift. Put owners around it. Add SLOs. Only then automate writes.
An agent can help, but only if the boring backend is already doing the right things.
That is the pattern I trust:
- SAP and Entra stay behind narrow tools
- comparison logic lives in code
- the agent explains and routes
- humans approve risky changes
- every decision is logged
The magic is not MCP or Foundry. The useful part is admitting that identity sync is a product and operating it accordingly.
## Related articles
- [Building a Real Sync Insights Agent with MCP and Foundry (SAP HR + Entra ID)](https://blog.bajonczak.com/building-a-real-sync-insights-agent-with-mcp-and-foundry-sap-hr-entra-id/)
- [No, Copilot Won’t ‘Just Read SAP’ – Here’s What It Actually Takes](https://blog.bajonczak.com/no-copilot-wont-just-read-sap-heres-what-it-actually-takes/)
### Microsoft Copilot Cowork: What It Means for AI Coworkers in Microsoft 365
URL: https://blog.bajonczak.com/copilot-cowork-when-your-ai-assistant-becomes-a-real-coworker/
Last updated: 2026-07-21T10:44:46.000Z
*My practical read on Microsoft Copilot Cowork, Agent 365, and Microsoft 365 E7\. The interesting part is not the name. It is what happens when Copilot starts touching calendars, files, meetings, and follow-ups on its own.*
## The shift is execution, not chat
Copilot started as a smarter text box. Ask a question, get a draft, rewrite a mail, summarize a meeting. Useful, but still mostly reactive.
Copilot Cowork points in a different direction. Microsoft is trying to move Copilot closer to a real work assistant: something that can understand an outcome, build a plan, run parts of the work in the background, and come back when a human decision is needed.
That sounds small until you think about where most office work actually gets lost. It is often not the big strategy document. It is the coordination around it: calendar mess, missing prep notes, follow-up mails, files in the wrong place, tasks that nobody picked up after a meeting.
That is where Cowork becomes interesting.
In simple terms, the idea is this:
- You describe the result you want, not every single click.
- Copilot looks at the Microsoft 365 context it is allowed to use: mail, calendar, Teams, files, meetings.
- It suggests a plan and keeps you involved at checkpoints.
- For actions that matter, like sending messages, moving meetings, or changing documents, it asks before doing the final step.
If Microsoft gets this right, Copilot stops being "the thing that writes a paragraph" and becomes "the thing that keeps work moving while I do something else".
That is useful. It is also exactly where governance starts to matter.
## Where I can actually see this being useful
The demos usually sound clean. Real tenants are not clean. Calendars are full, permissions are messy, teams use different naming habits, and half the important context sits in old chats nobody wants to read again.
Still, I can see a few realistic use cases.
### Calendar cleanup that does not create more work
A normal week can be full before Monday even starts. Focus time disappears. Preparation time is missing. You have two meetings next to each other and no chance to read anything beforehand.
A useful Cowork scenario would be:
- Check my calendar for the next week.
- Find meetings where I am optional or where another colleague already covers the topic.
- Suggest focus blocks around the things I actually need to finish.
- Draft polite decline or reschedule messages.
- Ask me before anything is sent.
The last point is important. I do not want an agent randomly moving meetings around because it thinks my calendar should be prettier. I want it to do the boring analysis and then let me approve the changes.
### Meeting prep and follow-up
This is probably the strongest use case.
For an important meeting, Cowork could gather the relevant emails, Teams messages, notes, and files. Then it could prepare a short briefing, point out open questions, create a first slide deck, and block prep time in the calendar.
After the meeting, it could draft the follow-up mail and turn decisions into Planner or To Do tasks.
That would save real time, but only if the output is grounded in the right sources. A beautiful summary based on the wrong file is worse than no summary. In Microsoft 365 projects, this always comes back to permissions, document hygiene, and naming. Boring topics, but they decide whether this works.
### Agents inside PowerPoint, OneDrive, Teams, and search
The other interesting part is that Microsoft is pushing more agentic behavior into the apps themselves.
In PowerPoint, Copilot should not only write slides. It should understand structure, content, and design well enough to iterate with you.
In OneDrive and SharePoint, agents can help surface the files that matter for a topic instead of making you search through old folders and half-remembered filenames.
In Teams and Copilot entry points, the agent becomes less of a separate chatbot and more of a layer across the tools people already use all day.
That is the right direction. Nobody wants another portal.
## Agent 365 is the part IT should watch
The exciting demo is Cowork doing work for you. The important admin topic is Agent 365.
As soon as agents can act, the old question changes. It is no longer just "who can read this file?". It becomes:
- Which agent exists in the tenant?
- Who created it?
- Which data can it access?
- Which actions can it perform?
- Where are the logs?
- Who reviews what it did?
Agent 365 is Microsoft's answer to that problem. It is meant to give organizations a control plane for agents, with visibility, policy, security, and integration into tools like Entra, Defender, Purview, and related Microsoft security products.
That is not optional in a serious environment. If agents become normal users of business systems, they need identity, permissions, auditing, lifecycle management, and owners. Otherwise you end up with shadow automation, only with better language skills.
My take: before companies get excited about autonomous workflows, they should map the boring admin model first. Who owns agents? IT? Security? Business departments? A platform team? If that is unclear, the rollout will become messy quickly.
## Microsoft 365 E7: useful bundle or another licensing headache?
Microsoft 365 E7 is positioned as the big frontier AI bundle: Microsoft 365 E5, Copilot, Agent 365, and additional security capabilities around the same stack.
From Microsoft's point of view, this makes sense. If agents operate inside Microsoft 365, the security and governance story is stronger when everything runs through Entra, Defender, Intune, Purview, and the rest of the Microsoft ecosystem.
From a customer point of view, I would be careful.
The bundle may be attractive if a company is already deep in Microsoft 365 and wants to standardize on Copilot and agents. But if the tenant still has basic governance issues, adding a bigger license does not magically fix them.
I would first check:
- Are sensitivity labels and DLP actually used, or only configured once and forgotten?
- Are Teams and SharePoint permissions clean enough for an agent to rely on them?
- Do admins know which Copilot features are enabled for which users?
- Is there a process for agent reviews and retirement?
- Can security teams investigate agent activity without guessing?
If those answers are weak, E7 might give you more features than you can safely operate.
## The opportunity is coordination
The best argument for Cowork is not that it writes better text. Most people already have enough text.
The opportunity is coordination.
Office work has a lot of small steps that are easy to ignore because each one only takes five minutes. The problem is that there are twenty of them. Preparing a meeting, finding the last decision, updating the file, writing the follow-up, creating the task, checking who owns it. None of that is glamorous. All of it eats time.
A good AI coworker could keep that layer moving.
That would help especially in roles where people switch context all day: project managers, consultants, internal IT, sales, HR, service teams, and anyone who lives between meetings and documents.
But the productivity gain will depend on how clearly people describe outcomes. If the prompt is vague, the plan will be vague. If the source data is messy, the answer will be messy. AI does not remove process problems. It usually exposes them.
## The risks are boring, which means they are real
The biggest risks are not science fiction. They are normal enterprise problems with an AI label on top.
### Governance gets heavier
More autonomy means more things to govern.
Companies will need policies for what agents are allowed to do, how approval works, where logs are stored, and who is responsible when something goes wrong. Agent 365 can help, but it will not decide the policy for you.
### People will either underuse it or overtrust it
Both are likely.
Some users will keep using Copilot as a nicer text generator and never hand off real work. Others will trust it too quickly because the output looks confident.
Training has to be practical. Not "AI transformation" slides. Real examples: which tasks are safe, which tasks need approval, what to check before sending, and when to stop the agent.
### Privacy and compliance need concrete answers
In Europe, the questions are predictable:
- Which data can Cowork access?
- How does this interact with GDPR and data residency?
- Are meeting transcripts, chats, and files used in ways employees understand?
- Do default settings match the company's risk profile?
These answers need to be documented before broad rollout, not after the first uncomfortable question from works council, legal, or security.
### Lock-in becomes stronger
Cowork is most valuable when the work already lives in Microsoft 365: Outlook, Teams, OneDrive, SharePoint, Entra, Defender, Intune, Purview.
If a company has many important workflows outside Microsoft, the experience will be uneven. Either more work moves into Microsoft 365, or Cowork only sees part of the picture.
That is not automatically bad. But it should be a conscious decision, not something discovered after buying the license.
## How I would approach a pilot
I would not start with a company wide rollout.
I would pick one or two boring workflows where success is easy to measure:
- meeting preparation and follow-up for a project team
- calendar cleanup for managers
- customer briefing preparation for sales or consulting
- internal IT coordination around recurring service meetings
Then I would define a few rules:
- no automatic external sending without approval
- clear logging of what the agent changed or drafted
- limited data scope at the beginning
- named owner for each agent or workflow
- feedback after every few runs
The goal of the pilot should not be "look, AI works". The goal should be to find out where the agent saves time, where users still need control, and which governance gaps appear immediately.
## My take
Copilot Cowork is one of the more interesting Copilot directions because it focuses on execution. Not just answering. Not just summarizing. Actually moving work forward.
But that also makes it harder to operate safely.
If Microsoft can make the approval model clear and Agent 365 gives admins real visibility, this could become genuinely useful in Microsoft 365 environments. Especially for coordination-heavy work.
I would still treat it as a controlled rollout, not a magic productivity switch. Start with boring workflows, watch the logs, keep approvals strict, and fix the tenant hygiene first.
Because once agents can touch calendars, files, and tasks, the quality of your governance becomes part of the user experience.
*Image credits: screenshots referenced in the original article came from Microsoft's official blogs and TechCommunity posts, especially the Microsoft 365 Copilot February 2026 update.*
### Stop Feeding Copilot Everything: Where ‘Bring Your Own Data’ Should Have Hard Limits
URL: https://blog.bajonczak.com/stop-feeding-copilot-everything-where-bring-your-own-data-should-have-hard-limits/
Last updated: 2026-03-11T17:35:21.000Z
“Bring your own data” is the new magic phrase in the Copilot world. Vendors demo it as if you can just flip a switch and suddenly your AI assistant knows everything your company knows.
Technically, you *can* plug a lot of sources into Microsoft 365 Copilot: SharePoint, file shares, Confluence, Jira, databases, custom APIs…
The more interesting question is:
> Which data should you **never** feed into a generic Copilot in the first place?
In this post I’ll argue for some hard limits on “bring your own data”, based on:
- where Security Trimming actually works out of the box,
- where you need your own guardrails,
- and where the right answer is simply “No, this doesn’t go into Copilot at all.”
## 1\. Where Copilot is naturally strong: M365 content with sane permissions
Let’s start with the part that works best:
- documents in SharePoint and OneDrive,
- conversations in Teams,
- emails in Exchange,
- tasks/plans in Planner, etc.
All of this flows into the Microsoft Graph index and Microsoft Search. When Copilot asks Graph for context, **Graph enforces ACLs** for the current user. If Alice doesn’t have access to a file, it doesn’t show up in her Copilot answers.
That doesn’t mean you’re done – you still need to:
- stop dumping “secret CEO docs” into broad collaboration sites,
- avoid overusing “Everyone except external users” on sensitive libraries,
- and generally treat SharePoint as a real DMS, not a file dump.
But at least the security model is clear and enforced at the platform level.
## 2\. Where BYO data starts to hurt: external sources without proper trimming
The story changes once you plug in external systems:
- Confluence wikis,
- file shares,
- line-of-business apps,
- databases, custom APIs…
There are roughly two ways people do this today:
1. Microsoft Graph connectors that index external content as `externalItem`.
2. Custom agents/plugins that call your APIs at runtime.
Both are valid. Both can be safe. Both can be incredibly dangerous if you ignore Security Trimming.
### 2.1\. The “god mode service account” trap
A common anti-pattern looks like this:
- Copilot calls a custom connector / agent.
- The agent uses a technical account to query Confluence, Jira, SQL, etc.
- That account can see “everything”.
- The agent returns whatever it finds to Copilot, regardless of who is asking.
You’ve effectively built a very polite internal data exfiltration tool.
Queries like:
- “List upcoming restructurings.”
- “What are the salaries of senior engineers in Germany?”
- “Show me current investigation reports.”
might not return anything in normal M365 search, but suddenly work great via Copilot – because you gave one backend user access to all of it.
## 3\. Categories of data that should trigger a hard “why?”
Before talking about mechanics, let’s be very clear on **what** we’re talking about.
Whenever someone suggests “let’s bring system X into Copilot”, I’d ask:
- Does this system contain any of the following?
- **HR & compensation data**
Salaries, bonuses, performance reviews, promotion decisions, layoff lists.
- **Legal & compliance data**
Investigations, incident reports, privileged legal advice, whistleblower cases.
- **Security-sensitive logs & configs**
Firewall rules, security incident logs, vulnerability reports, secrets.
- **Highly regulated customer data**
Health records, financial transaction details, anything under strict regulation.
If the answer is “yes”, I’d default to:
- **no generic Copilot access** to that system,
- or only carefully scoped, role-specific agents with explicit topic guards.
Not “never”, but “only with a very conscious design”.
## 4\. Graph connectors: powerful, but ACLs are everything
Graph connectors extend the Microsoft Search/Copilot index to external content sources. They’re great when:
- content is mostly read-only,
- you can express permissions as ACLs,
- and you’re okay with near-real-time instead of per-request freshness.
The security story:
- you push items as `externalItem` into an `externalConnection`,
- each item carries an `acl` array,
- Graph uses that ACL when answering searches and Copilot requests.
If your ACLs are wrong, your security is wrong.
Example (TypeScript, simplified):
```ts
import fetch from 'node-fetch';
const GRAPH_BASE = 'https://graph.microsoft.com/v1.0';
const CONNECTION_ID = 'contosoConfluence';
async function getAppToken(): Promise {
// client credentials flow for your app registration
return '';
}
type SourcePage = {
id: string;
title: string;
url: string;
body: string;
allowedUsers: string[]; // AAD IDs or UPNs
forbiddenUsers?: string[]; // optional explicit deny list
};
export async function pushExternalItem(page: SourcePage) {
const token = await getAppToken();
const grantAcl = page.allowedUsers.map(userId => ({
type: 'user',
value: userId,
accessType: 'grant' as const
}));
const denyAcl = (page.forbiddenUsers ?? []).map(userId => ({
type: 'user',
value: userId,
accessType: 'deny' as const
}));
const item = {
id: page.id,
properties: {
title: page.title,
url: page.url
},
content: {
type: 'text',
value: page.body
},
acl: [...grantAcl, ...denyAcl]
};
const res = await fetch(
`${GRAPH_BASE}/external/connections/${CONNECTION_ID}/items/${page.id}`,
{
method: 'PUT',
headers: {
'Content-Type': 'application/json',
'Authorization': `Bearer ${token}`
},
body: JSON.stringify(item)
}
);
if (!res.ok) {
console.error('Failed to push externalItem', await res.text());
throw new Error('graph_error');
}
}
```
If you take the time to map your external permissions into these ACLs properly, Graph will do the trimming for you. If you don’t, you’re back to square one.
## 5\. Custom agents: your backend *is* the security model
For live data and actions (“create ticket”, “get current balance”, “trigger deployment”), Graph connectors aren’t enough. You need an agent that calls your APIs.
The architecture looks like this:
```mermaid
flowchart LR
U[User] -- ask --> C[Copilot]
C -- call tool --> A[Agent]
A -- HTTP --> B[Your Backend]
B --> SYS[Systems]
```
Here, your backend is the entire security model.
Minimal pattern in Node/Express:
```ts
// permissions.ts
export type UserContext = {
email: string;
roles: string[];
groups: string[];
};
export async function getUserPermissions(email: string): Promise {
const entry = await directoryLookup(email); // Entra / IAM lookup
if (!entry) return null;
return { email, roles: entry.roles, groups: entry.groups };
}
```
```ts
// acl.ts
import { UserContext } from './permissions';
export type DocumentAcl = {
allowedRoles?: string[];
allowedGroups?: string[];
forbiddenRoles?: string[];
};
export type ExternalDoc = {
id: string;
title: string;
url: string;
content: string;
acl: DocumentAcl;
};
function hasAccess(doc: ExternalDoc, user: UserContext): boolean {
const { allowedRoles, allowedGroups, forbiddenRoles } = doc.acl;
if (forbiddenRoles && forbiddenRoles.some(r => user.roles.includes(r))) {
return false;
}
if (!allowedRoles && !allowedGroups) {
// Default: visible to all employees
return true;
}
if (allowedRoles && allowedRoles.some(r => user.roles.includes(r))) {
return true;
}
if (allowedGroups && allowedGroups.some(g => user.groups.includes(g))) {
return true;
}
return false;
}
export function filterDocsByAcl(docs: ExternalDoc[], user: UserContext): ExternalDoc[] {
return docs.filter(doc => hasAccess(doc, user));
}
```
Then your agent endpoint:
```ts
// agentHandler.ts
import { Request, Response } from 'express';
import { getUserPermissions } from './permissions';
import { filterDocsByAcl, ExternalDoc } from './acl';
import { buildAnswerFromDocs } from './rag';
interface AskRequest {
question: string;
userEmail: string;
}
interface AskResponse {
answer: string;
sources: { title: string; url: string }[];
}
function isForbiddenQuestion(question: string, userRoles: string[]): boolean {
const lower = question.toLowerCase();
const sensitivePatterns = [
'salary',
'compensation',
'bonus',
'layoff',
'termination list',
'performance review',
'investigation',
];
const isSensitive = sensitivePatterns.some(p => lower.includes(p));
if (!isSensitive) return false;
const privilegedRoles = ['HR', 'HR_ADMIN', 'LEGAL', 'C_LEVEL'];
const isPrivileged = privilegedRoles.some(r => userRoles.includes(r));
return !isPrivileged;
}
export async function copilotAgentHandler(req: Request, res: Response) {
const body = req.body as AskRequest;
if (!body.question || !body.userEmail) {
return res.status(400).json({ error: 'question and userEmail are required' });
}
const user = await getUserPermissions(body.userEmail);
if (!user) {
return res.status(403).json({ error: 'unknown_user' });
}
// 1) Topic guard: block certain questions for non‑privileged roles
if (isForbiddenQuestion(body.question, user.roles)) {
return res.json({
answer: "I’m not allowed to answer this type of question for your role.",
sources: []
} satisfies AskResponse);
}
// 2) Fetch docs from your system
const rawDocs: ExternalDoc[] = await rawSearchDocs(body.question);
const docs = filterDocsByAcl(rawDocs, user);
if (docs.length === 0) {
return res.json({
answer: `I couldn't find any documents you are allowed to see that answer "${body.question}".`,
sources: []
} satisfies AskResponse);
}
// 3) Use an LLM to build the final answer
const { answer, usedDocs } = await buildAnswerFromDocs(body.question, docs);
const response: AskResponse = {
answer,
sources: usedDocs.map(d => ({ title: d.title, url: d.url }))
};
return res.json(response);
}
```
Two important observations:
- you can say “no” at the question level (topic guard),
- and you can say “no” at the data level (ACL filter).
## 6\. A simple decision table for BYO data
| Scenario | Approach | Security trimming | My default stance |
| --------------------------------------------- | ---------------------------------- | -------------------------------------------- | ---------------------------------------------------------- |
| Docs already in SharePoint/OneDrive/Teams | Let Graph handle it | Graph ACLs based on M365 permissions | ✅ Good starting point, focus on cleaning permissions. |
| External wiki / KB | Graph connector | ACLs you attach per item | ✅ Do it, if you can map permissions cleanly. |
| On‑prem file shares | File share / Azure Files connector | Connector maps existing ACLs | ✅ Good bridge if moving to M365 is not trivial. |
| Live business data (status, metrics, actions) | Custom agent + backend API | Backend enforces roles/groups + topic guards | ✅ With care; design security into the API. |
| HR / compensation / legal investigations | Generic Copilot access | N/A | 🚫 Default “no”; only very scoped agents if really needed. |
## 7\. Guardrails I’d put in place
Independent of the technical path, I’d hard-code a few rules into any “bring your own data” story:
- **No global service accounts without filters**
If an agent uses an account that can see everything, you must filter aggressively in your backend.
- **Logging and auditing**
Log which user asked what, and which systems were queried. You don’t need to store content, but you should know when someone repeatedly pokes around sensitive areas.
- **Topic-level deny lists**
It’s okay to hard-block certain topics in generic agents (“salary”, “layoff list”, “investigation”). For those, build a separate, role-specific agent if needed.
- **Start with low-risk sources**
Bring in policies, guidelines, runbooks, KB articles first. Leave HR/Legal/Security data for last – or never.
## 8\. Conclusion: BYO data is not about dumping everything into Copilot
“Bring your own data” for Copilot should not mean “dump every system we have into a single model and hope for the best.”
Instead, I’d frame it like this:
- Use native M365 content where possible and fix your permissions.
- Use Graph connectors for read‑mostly knowledge sources where you can express ACLs cleanly.
- Use custom agents for live systems, but treat your backend as the security boundary and enforce roles, groups and topic guards there.
- Accept that some data is better handled by dedicated, role-specific tools – not a general company-wide Copilot.
If you get those basics right, “bring your own data” stops being ein Buzzword und wird zu etwas, das deinen Kolleg:innen echte Antworten liefert – ohne, dass sie Dinge sehen, die sie nie hätten sehen sollen.
### OpenClaw in 2026: Power, Risk, and How to Keep Your Self-Hosted AI Agent in Check
URL: https://blog.bajonczak.com/openclaw-in-2026-power-risk-and-how-to-keep-your-self-hosted-ai-agent-in-check/
Last updated: 2026-08-02T10:14:14.000Z
OpenClaw looks harmless when you first meet it. A chat interface, a few tools, a self-hosted control plane, some skills. Nice for power users, maybe useful for side projects, maybe something you could replace with a handful of scripts and a hosted LLM.
That view changes the moment you connect it to the things you actually care about: your repos, your blog, your servers, your notifications, your home lab, your APIs.
At that point OpenClaw is no longer “just another chatbot”. A more honest description is this:
> OpenClaw is a CI/CD and operations runner with a personality. It just happens to talk back in natural language.
That is why I like the idea. It is also why I would not run it casually.
In this post I want to look at OpenClaw from the angle that actually matters in 2026: what it is in practice, why self-hosting is not a security pass, which risk patterns show up quickly, how I would harden it, where it helps in DevOps and home-lab workflows, and where I would draw a hard line.
## What OpenClaw is in practice
If you strip away the AI label, OpenClaw is basically:
- a daemon running under a specific user on a machine you control,
- a toolbox for automation: shell, HTTP, file I/O, cron, browser automation, messaging, and similar tools,
- a skills system for repeatable workflows,
- and a control surface through chat, CLI, web UI, or APIs.
That makes it feel a lot like a personal automation runner glued to a chat interface.
The important part is not the chat. The important part is the permission model:
> The agent can do what its host user can do, plus whatever external APIs and tokens you wire into it.
If the user can read a repo, the agent can read that repo. If the user can call a deployment script, the agent can call that script. If the user has access to a directory full of notes, keys, logs, exports, or customer data, the agent is close to that data too.
That can be genuinely useful:
- ask it to inspect logs and summarize what changed since yesterday,
- let it draft documentation from code comments,
- have it check side-project health endpoints,
- use it to prepare Ghost drafts or collect links for a post,
- wire it into Jira, M365, Home Assistant, or custom APIs.
But the mental model should not be “friendly assistant”. The mental model should be “automation account with language skills”. If you would not give a human the same shell, directories, and API keys, you should not give them to an unconstrained agent either.
## Self-hosted does not automatically mean safe
A lot of people hear “self-hosted” and mentally translate it to “secure”. That is too simple.
Self-hosting removes some risks:
- your control plane lives on a machine you manage,
- your local context does not sit inside a random SaaS product by default,
- you can decide where logs, files, and skills live,
- you can put the whole thing behind your own network controls.
But it also adds work:
- you have to harden the host,
- you have to manage firewall rules and exposed ports,
- you have to protect secrets and tokens,
- you have to review what skills can do,
- you have to notice when something behaves strangely.
There is no magic vendor boundary that saves you from a bad sudoers rule, an exposed admin port, or a token with global write permissions.
The real security posture is:
> OpenClaw is as safe as the machine it runs on, the account it runs as, the network path to it, and the capabilities you allow.
That can be a good setup. A locked-down VM with limited scopes, private access, clear logs, and conservative skills can be a reasonable personal automation layer.
A public VPS running as root with broad API keys in environment variables is a remote incident waiting for a trigger.
## Risk patterns I would watch first
Most OpenClaw risk is not exotic AI science-fiction. It is normal automation risk, made more interesting because a model can choose actions from messy natural-language input.
### 1\. Exposed control surfaces
The obvious failure mode is exposing the control interface directly to the internet.
If the agent has shell access and the control surface has weak auth, a bug, or a bad reverse proxy setup, you have created something close to a remote shell endpoint. Even if the software itself is fine, scanners, credential stuffing, and bad defaults become your problem.
My baseline:
- bind local services to `127.0.0.1` unless there is a clear reason not to,
- use WireGuard, Tailscale, or SSH tunnelling for remote access,
- if HTTP access is unavoidable, put it behind a reverse proxy with HTTPS, strong auth, IP restrictions where possible, and rate limiting,
- do not expose experimental instances on a public IP “just for a quick test”.
### 2\. Running with too much privilege
Running OpenClaw as root is the classic mistake. Running it as your main desktop user with full access to your home directory can be almost as bad.
The agent inherits the host user’s world:
- readable files,
- writable project folders,
- SSH config,
- cloud CLIs,
- kubeconfig files,
- local credentials,
- browser profiles if you are careless,
- sudo rights.
I would run it under a dedicated user such as `openclaw` or `ai-agent`, with no broad sudo rights and only the directories it actually needs.
### 3\. Secrets dropped into skills
Hardcoded tokens in scripts are already a bad habit. With agents, the habit gets worse because people want the agent to “just handle it”.
Do not give one agent all the keys to everything.
Prefer:
- per-service tokens,
- read-only scopes where possible,
- separate tokens per skill or workflow,
- short-lived credentials if your platform supports them,
- a minimal `.env` or a proper secrets store,
- no access to password vault exports, banking, HR, health, or other high-impact data unless there is a strong reason and a tight design.
### 4\. Letting the model invent dangerous commands
For low-risk exploration, free-form shell can be useful. For anything that matters, I prefer “script first, AI second”.
The model should not be asked to improvise a production cleanup, firewall change, migration, or deployment command from scratch. It should call a known script with clear parameters, show what it plans to do, and wait for approval if the action is sensitive.
A good skill says: “Here are the allowed operations.”
A risky skill says: “Run whatever command seems right.”
### 5\. Confusing read access with no risk
Read-only access still has risk. An agent that can read logs, emails, tickets, customer exports, or internal notes can leak context into prompts, summaries, screenshots, files, or outbound API calls.
For personal use, this may be acceptable. For company systems, you need to think like a data owner: what can the agent see, where can it send that data, and who reviews that decision?
## How I would harden an OpenClaw deployment
Here is the checklist I would start with before giving OpenClaw anything important.
### Use a dedicated user and a bounded workspace
Run OpenClaw as a dedicated user with limited file access.
For example:
```text
/home/openclaw/workspace
/home/openclaw/logs
/srv/openclaw-skills
```
Then explicitly mount or grant access to only the project folders it needs. Do not hand it your entire home directory because it is convenient.
The account should not have passwordless sudo. If a workflow really needs privileged actions, move that into a narrow script with a controlled interface, or keep it in your normal CI/CD platform.
### Keep the control plane private
My preferred access pattern is boring:
- local bind,
- private network,
- VPN,
- no public admin port.
If you need browser-based access from outside, use a real reverse proxy setup. Add OIDC or another strong auth layer. Keep logs. Rate-limit. Make the route explicit, not accidental.
### Scope skills by risk level
I would tag skills like this:
```yaml
skills:
summarize_logs:
risk: safe
access: read-only
confirm: false
create_jira_ticket:
risk: sensitive
access: write-ticket
confirm: true
restart_home_lab_service:
risk: sensitive
access: limited-service-control
confirm: true
rotate_cloud_keys:
risk: dangerous
access: privileged
confirm: two-step
```
The exact syntax does not matter. The discipline matters.
A useful split is:
- **safe**: read-only queries, summaries, documentation drafts,
- **sensitive**: writes to tickets, repos, calendars, posts, service restarts,
- **dangerous**: deploys, destructive cleanup, key rotation, firewall changes, financial actions, anything with customer impact.
Safe actions can run with little friction. Sensitive actions need explicit confirmation. Dangerous actions either need a second confirmation path or should live somewhere else.
### Prefer explicit scripts over open shell
For important workflows, make the skill call a script you already understand:
```bash
./scripts/check-project.sh my-service
./scripts/summarize-errors.sh /var/log/my-service/app.log 24h
./scripts/create-draft.sh --source notes/openclaw.md
```
The agent can choose the workflow, pass parameters, summarize output, and ask follow-up questions. It should not need to invent the whole operating procedure every time.
This is the same thinking I use for CI/CD. Pipelines are safer when they run known steps, not when every deploy is a fresh improvisation.
### Log the boring details
Log at least:
- who triggered the skill,
- which skill ran,
- which command or API call was executed,
- which directory it ran in,
- whether confirmation was required,
- whether it succeeded,
- the relevant output or a pointer to it.
You do not need an enterprise SIEM for a home lab. A timestamped log file is already better than guessing. For team use, central logging becomes more important.
### Separate lab and serious use
Have two instances if you need both modes:
- a playground instance for new skills and experiments,
- a locked-down instance for workflows that touch real services.
Do not test a new browser automation skill on the same agent account that can reach production secrets, deployment tokens, or your personal vault.
## Concrete DevOps and home-lab workflows
This is where OpenClaw becomes interesting. The sweet spot is the long tail of operations work that is too small for a full platform but annoying enough to automate.
### Local project pre-flight checks
Before starting work on a repo, OpenClaw can run a known set of checks:
- pull latest changes,
- check dependency state,
- run tests or lint,
- inspect container status,
- summarize failures in plain language.
The command still comes from your scripts or Makefile. The agent makes it easier to trigger and interpret:
> “Run the pre-flight checks for the Ghost tooling repo and tell me what needs attention.”
That is a good OpenClaw workflow because the action is bounded and the result is useful.
### Log review and incident summaries
For side projects and internal tools, OpenClaw can inspect logs and summarize patterns:
- error spikes in the last 24 hours,
- failed cron jobs,
- unusual HTTP status codes,
- container restarts,
- database connection errors.
I would keep the first version read-only. Let it summarize and suggest next steps. Do not let it auto-fix production issues until the remediation path is narrow and tested.
### Documentation and changelog help
OpenClaw is a good fit for boring documentation work:
- update README sections from code comments,
- summarize recent commits,
- draft changelog entries,
- collect TODOs from issues and notes,
- prepare pull request descriptions.
The important boundary: it can draft and stage, but a human reviews before merge.
### Blog and knowledge workflows
For a personal blog or knowledge base, OpenClaw can help with:
- turning rough notes into a draft,
- collecting links and source snippets,
- checking older posts for overlap,
- preparing a Ghost draft,
- generating a short summary for social posts.
This is one of the lower-risk areas if the source material is not sensitive. It is also a good playground for new skills because mistakes are visible and usually recoverable.
### Home-lab glue
In a home lab, OpenClaw can sit between scripts, monitoring, and chat:
- check whether services are up,
- summarize Docker or systemd status,
- remind you about expiring certificates or tokens,
- verify backups ran,
- restart a non-critical side-project service after confirmation.
That last phrase matters: after confirmation. Restarting a test container is one thing. Touching storage, firewall rules, cameras, locks, or anything family members rely on is a different risk class.
### “Keep me honest” automation
I like OpenClaw for small recurring checks:
- “Which projects have stale dependencies?”
- “Which domains or certs expire soon?”
- “Which API keys have not been rotated in a while?”
- “Which backups have not produced a fresh file this week?”
These are not glamorous workflows. They are useful because they reduce the number of things you forget.
## Where I would not use OpenClaw
There are places where I would deliberately keep OpenClaw out of the direct execution path.
### Customer-critical production deployments
OpenClaw can help prepare a release, summarize checks, draft release notes, or open a PR. I would not make it the only path to production for customer-critical systems.
Production deployments belong in systems with clear approvals, rollbacks, audit trails, environment protection, and boring repeatability: GitHub Actions, GitLab CI, Azure DevOps, Jenkins, or whatever your team already operates well.
### Highly regulated data flows
HR, health, finance, legal, and regulated customer data need tighter design than “agent on a dev box can read files and call APIs”.
If OpenClaw has to interact with that world, put a narrow API in front of it. Let the agent request a permitted action or create a ticket. Do not give it broad direct access.
### Anything auditors need to understand quickly
“Our deployment pipeline runs here, with these approvals and these logs” is easy to explain.
“An AI agent sometimes runs operational commands when someone asks in chat” is not.
That does not make OpenClaw bad. It means you should choose the right layer for the job.
### Personal high-risk systems
I would be very careful with:
- password managers,
- banking,
- private mailboxes,
- cameras,
- locks,
- family calendars,
- personal document archives.
Convenience is not enough of a reason to connect everything.
## How OpenClaw fits into a broader stack
I would not position OpenClaw as a replacement for Copilot, Microsoft Foundry, MCP-based enterprise agents, or classic CI/CD.
I see the stack more like this:
- **Copilot** for the inside-M365 experience: documents, meetings, mail, Teams, Office workflows.
- **Foundry and MCP-style agents** for governed enterprise integrations across systems, with identity, policy, and observability built into the platform design.
- **Classic CI/CD** for production-grade build, test, deploy, rollback, and approval flows.
- **OpenClaw** for personal and team-level automation on infrastructure you own: scripts, side projects, home lab, local DevOps chores, draft preparation, operational summaries.
OpenClaw sits close to your machine, your scripts, and your working style. That is its strength. It can cover the messy gap between “I should automate this” and “this deserves a full platform”.
But it deserves the same respect as any system that can run commands and call APIs on your behalf.
## My take
OpenClaw is powerful because it turns ordinary automation into something you can steer conversationally. You can ask it to check logs, prepare a draft, inspect a repo, summarize service health, or run a bounded workflow without jumping between terminals and dashboards.
The danger is the same reason it is useful: it sits near real access.
So I would run OpenClaw like this:
- dedicated user,
- private control plane,
- limited directories,
- scoped tokens,
- explicit skills,
- confirmation for writes and destructive actions,
- logs I can review,
- separate playground and serious instances.
Used that way, OpenClaw can be a very useful DevOps and home-lab companion.
Used casually, as a friendly bot with access to everything, it is only a matter of time until you shoot yourself in the foot. The agent may be clever, but the blast radius is still yours.
### Bringing Your Own Data into Microsoft 365 Copilot (Without Breaking Security)
URL: https://blog.bajonczak.com/bringing-your-own-data-into-microsoft-365-copilot-without-breaking-security/
Last updated: 2026-08-02T10:15:28.000Z
“Bring your own data” sounds harmless until someone asks Copilot a question it should never be able to answer.
That is the real problem. Not whether Copilot can technically reach another system. In most enterprise setups you can build a connector, index content, expose an API, or put an agent in the middle. The hard part is deciding which data deserves to be reachable, under which identity, with which permissions, and with which answer limits.
I would not treat BYOD for Copilot as a data ingestion project. I would treat it as a security design.
The boring rule is still the right one:
> Copilot should only answer from data the user is allowed to see, for a purpose the system is allowed to support.
If that sounds obvious, good. Most failures in this area come from ignoring exactly that sentence.
## The three realistic paths
When companies say “we want Copilot to use our data”, they usually mean one of three things.
| Path | Good for | Main risk |
| ---------------------------- | -------------------------------------------------------------------- | ---------------------------------------------------- |
| Native Microsoft 365 content | SharePoint, OneDrive, Teams, mail and files already governed in M365 | bad existing permissions become visible very quickly |
| Microsoft Graph connectors | external content that should become searchable in Microsoft 365 | wrong or lazy ACL mapping |
| Custom agents or plugins | live business systems, APIs, SAP, ticket systems, product data | your backend becomes the security boundary |
Those paths are not equal. They have different operational costs and different failure modes.
If your data is already in Microsoft 365 and permissions are clean, Copilot gets a lot of trimming behavior from the platform. If you index an external system with Graph connectors, you need to carry the permission model with the content. If you build a custom agent, the backend must enforce the rules every single time.
That last point matters. A prompt is not a permission check.
## Path 1: Microsoft 365 content
This is the safest starting point, but only if the tenant is not already a permission landfill.
Copilot can work well with content in SharePoint, OneDrive, Teams and other Microsoft 365 surfaces because the platform already has a permission model. If a user cannot access a document, Copilot should not use that document as a source for that user.
That is the good news.
The bad news: Copilot makes hidden permission problems visible.
Before rolling Copilot into more data, I would check:
- overly broad SharePoint site permissions
- old Teams with sensitive files
- “Everyone except external users” used too casually
- stale project sites
- orphaned files from former owners
- HR, legal or finance documents in normal collaboration spaces
- guest users who still have access after a project ended
Copilot is not the villain there. It just removes the friction that previously hid the mess.
A user might not have known that a sensitive file existed in a forgotten SharePoint folder. Copilot can make that discoverable through a normal question. That feels like a Copilot issue, but the root cause is usually tenant hygiene.
My first BYOD recommendation is therefore boring:
> Fix the Microsoft 365 permission model before celebrating external data connectors.
## Path 2: Graph connectors
Graph connectors are useful when you want external content to appear in Microsoft 365 search and Copilot experiences.
The important part is not pushing text into the index. The important part is pushing the ACL with it.
A simplified external item might look like this:
```ts
// src/graphItems.ts
import fetch from 'node-fetch';
const GRAPH_BASE = 'https://graph.microsoft.com/v1.0';
const CONNECTION_ID = 'contosoConfluence';
async function getAppToken(): Promise {
// client credentials flow for your app registration
return '';
}
type SourcePage = {
id: string;
title: string;
url: string;
body: string;
allowedUsers: string[]; // AAD IDs or UPNs
forbiddenUsers?: string[]; // optional explicit deny list
};
export async function pushExternalItem(page: SourcePage) {
const token = await getAppToken();
const grantAcl = page.allowedUsers.map(userId => ({
type: 'user',
value: userId,
accessType: 'grant' as const
}));
const denyAcl = (page.forbiddenUsers ?? []).map(userId => ({
type: 'user',
value: userId,
accessType: 'deny' as const
}));
const item = {
id: page.id,
properties: {
title: page.title,
url: page.url
},
content: {
type: 'text',
value: page.body
},
acl: [...grantAcl, ...denyAcl]
};
const res = await fetch(
`${GRAPH_BASE}/external/connections/${CONNECTION_ID}/items/${page.id}`,
{
method: 'PUT',
headers: {
'Content-Type': 'application/json',
'Authorization': `Bearer ${token}`
},
body: JSON.stringify(item)
}
);
if (!res.ok) {
console.error('Failed to push externalItem', await res.text());
throw new Error('graph_error');
}
}
```
That is the line I care about most:
```ts
acl: [...grantAcl, ...denyAcl]
```
Without that, BYOD becomes “dump external content into Copilot and hope the prompt behaves”. I would not ship that.
### The god-mode service account trap
The classic shortcut is a service account that can read everything in the source system.
It feels convenient:
- one account
- one connector
- one sync job
- no messy permission mapping
It is also exactly how you turn Copilot into a polite insider threat.
The connector should not simply know everything. It should know what the user is allowed to know. If the source system has permissions, map them. If the source system does not have usable permissions, fix that first or build a smaller, safer data product.
## Path 3: Custom agents and plugins
Custom agents are where things get powerful and dangerous.
A rough flow looks like this:
```mermaid
flowchart LR
U[User] -- ask --> C[Copilot]
C -- call tool --> A[Agent]
A -- HTTP --> B[Your Backend]
B --> SYS[Systems]
```
With a custom backend, Microsoft 365 is no longer the only security model. Your service has to do the work:
- identify the user
- resolve roles and groups
- check source-system permissions
- filter search results
- block sensitive topics where needed
- log the decision
- return sources that the user can actually open
A minimal permission context might look like this:
```ts
// permissions.ts
export type UserContext = {
email: string;
roles: string[];
groups: string[];
};
export async function getUserPermissions(email: string): Promise {
const entry = await directoryLookup(email); // Entra ID / IAM lookup
if (!entry) return null;
return { email, roles: entry.roles, groups: entry.groups };
}
```
And the backend needs a boring ACL function, not just a nice system prompt:
```ts
// acl.ts
import { UserContext } from './permissions';
export type DocumentAcl = {
allowedRoles?: string[];
allowedGroups?: string[];
forbiddenRoles?: string[];
};
export type ExternalDoc = {
id: string;
title: string;
url: string;
content: string;
acl: DocumentAcl;
};
function hasAccess(doc: ExternalDoc, user: UserContext): boolean {
const { allowedRoles, allowedGroups, forbiddenRoles } = doc.acl;
if (forbiddenRoles && forbiddenRoles.some(r => user.roles.includes(r))) {
return false;
}
if (!allowedRoles && !allowedGroups) {
return true;
}
if (allowedRoles && allowedRoles.some(r => user.roles.includes(r))) {
return true;
}
if (allowedGroups && allowedGroups.some(g => user.groups.includes(g))) {
return true;
}
return false;
}
export function filterDocsByAcl(docs: ExternalDoc[], user: UserContext): ExternalDoc[] {
return docs.filter(doc => hasAccess(doc, user));
}
```
This is not fancy. That is the point. The security boundary should be understandable.
## Data that should trigger a hard “why?”
Some data should not be added to a generic Copilot experience just because it is technically possible.
I would challenge these categories hard:
- salaries and compensation planning
- performance reviews
- disciplinary or investigation data
- legal strategy
- M&A documents
- unreleased financial results
- medical or health-related HR data
- security incidents and vulnerability details
- customer secrets, tokens, passwords or private keys
- raw support tickets with personal data
- private messages or meeting transcripts without a clear retention model
That does not mean “never use AI around this data”. It means the access path should be narrow, auditable and purpose-built.
For example, an HR analytics agent that answers approved aggregate questions is very different from a generic Copilot connector that can summarize every salary spreadsheet in a tenant.
The first can be designed. The second is usually an incident waiting for a demo.
## A simple decision model
This is how I would decide which path to use.
| Scenario | My default choice |
| ----------------------------------------------- | ----------------------------------------------------------- |
| Normal project documents already in SharePoint | Clean permissions, then use native M365 content |
| External wiki with usable per-page ACLs | Graph connector with mapped ACLs |
| External wiki with messy or missing permissions | Fix source permissions first, or index only approved spaces |
| SAP or ERP data | Custom agent/API with narrow tools and audit logs |
| HR or finance data | Purpose-built agent, not broad indexing |
| Data with legal or investigation risk | Usually out of scope for generic Copilot |
| High-volume structured data | Data product/API, not raw document dump |
The question is not “can we connect it?”
The better question is:
> Can we explain, test and audit why this user got this answer from this source?
If the answer is no, I would not connect it yet.
## Guardrails I would put in place
For a real rollout, I would want these guardrails before adding external data to Copilot.
### 1\. Data source register
Keep a small register of connected data sources:
- owner
- purpose
- data categories
- permission model
- sync frequency
- retention expectations
- review date
- escalation contact
Not a 40-page governance monster. Just enough that nobody has to guess why a connector exists.
### 2\. Permission tests
For every connector or agent, test with at least three users:
- a user who should see the data
- a user who should not see the data
- a user with weird edge-case access
If the third one sounds unnecessary, that is usually where the bug is.
### 3\. Source visibility
Copilot answers should show usable sources. If the answer cites a document the user cannot open, something is wrong.
I would rather return “I found no accessible source” than produce a confident answer from a hidden document.
### 4\. Sensitive topic blocks
Some topics should be blocked before retrieval, not after generation.
For example, if a non-HR user asks about layoffs, compensation bands or performance reviews, the backend should refuse or route to an approved workflow. Do not retrieve the documents first and hope the model does the right thing.
### 5\. Logging without leaking
Log access decisions, not secrets.
Useful logs:
- user ID
- connector/tool called
- source system
- allowed or denied
- reason category
- correlation ID
Bad logs:
- full prompt with sensitive data
- full retrieved documents
- raw salaries, tokens or personal data
### 6\. Owner review
Every connector needs an owner. If nobody owns the source, nobody owns the risk.
I would review connected sources regularly, especially after reorganizations, project closures and permission model changes.
## What I would not do
I would not:
- connect a system with a god-mode service account and no per-user trimming
- index HR, legal or finance content just because search would be convenient
- use prompts as the only guardrail
- return answers without sources
- log raw sensitive prompts and retrieved documents
- let every team create connectors without a central register
- treat “Copilot did it” as an explanation during an audit
Again, Copilot is not the villain here. Bad integration design is.
## My take
BYOD for Microsoft 365 Copilot can be useful. It can make internal knowledge easier to find and reduce the gap between Microsoft 365 and the systems where work actually happens.
But I would not sell it as “feed Copilot everything”. That framing is exactly backwards.
The mature version is smaller and more deliberate:
- connect fewer sources
- map permissions properly
- use custom agents for live or sensitive systems
- keep sources visible
- log decisions
- review the setup regularly
The win is not that Copilot knows everything.
The win is that Copilot can answer from the right data, for the right user, without turning old permission debt into a new security incident.
## Related articles
- [Security Trimming with Microsoft 365 Copilot: Asking the Right Data in the Right Context](https://blog.bajonczak.com/security-trimming-with-microsoft-365-copilot-asking-the-right-data-in-the-right-context/)
- [Copilot Governance Playbook: Who Owns What in 2026?](https://blog.bajonczak.com/enterprise-agent-governance-on-azure-in-2026-registry-identity-guardrails-observability/)
### Orchestrating SAP and Entra ID with MCP: A Practical Sync & Insights Agent
URL: https://blog.bajonczak.com/orchestrating-sap-and-entra-id-with-mcp-a-practical-sync-insights-agent/
Last updated: 2026-03-07T17:00:46.000Z
In many enterprises, SAP (especially SuccessFactors) is still the **source of truth** for people and org data, while Entra ID (formerly Azure AD) is the **front door** for apps and services.
Bridging both worlds is usually done with brittle custom scripts, point-to-point sync jobs, or black-box connectors that are hard to debug.
In this post I will show how to use the **Model Context Protocol (MCP)** as a thin orchestration layer between SAP and Entra ID:
- to **compare** what exists in both systems,
- to generate a **delta report**,
- and to provide **safe hooks** for remediation (tickets, follow-ups) – without giving an agent god-mode access.
I will keep it concrete and code-backed, not just architecture diagrams.
## 1\. What we want to achieve
The goal is a small MCP server that exposes tools like:
- `sap_list_users` – fetch users from SAP/SuccessFactors
- `entra_list_users` – fetch users from Entra ID
- `report_mismatches` – compute and return deltas:
- users in SAP but not in Entra
- users in Entra but not in SAP
- users with mismatched attributes (e.g. department, manager)
An LLM/agent (Copilot or any MCP-aware client) can then ask:
> “Check if there are mismatches between SAP and Entra ID for the Engineering department and give me a summary plus CSV.”
The agent does the orchestration, but all hard security and connectivity lives in your backend, not in the model.
## 2\. High-level architecture
At a high level, the setup looks like this:
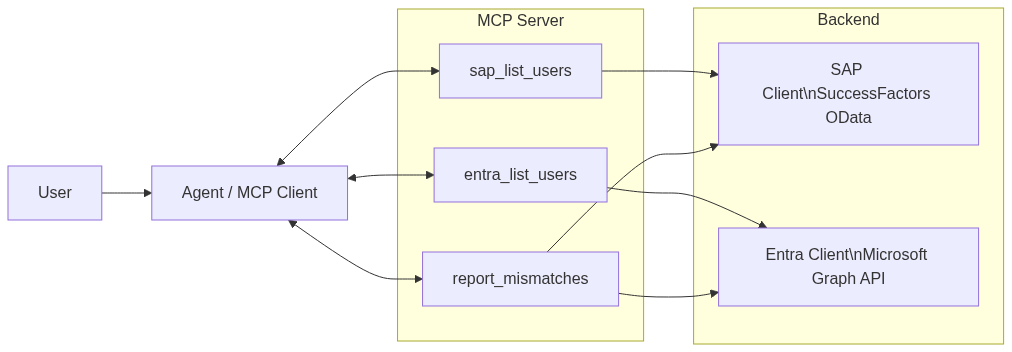
The MCP server exposes tools, tools delegate to typed backend clients for SAP and Entra. The agent only sees high-level operations; it never touches raw credentials.
## 3\. Project setup
We will build a minimal Node.js / TypeScript project:
```bash
mkdir mcp-sap-entra-agent
cd mcp-sap-entra-agent
npm init -y
npm install typescript ts-node @types/node axios
npm install @modelcontextprotocol/sdk
npx tsc --init
```
Folder structure:
```
mcp-sap-entra-agent/
src/
config.ts
sapClient.ts
entraClient.ts
mismatches.ts
mcpServer.ts
.env
package.json
tsconfig.json
```
Environment (`.env`, never commit this):
```env
SAP_BASE_URL="https://api.successfactors.eu/odata/v2"
SAP_USERNAME="..."
SAP_PASSWORD="..." # or OAuth token
ENTRA_TENANT_ID="..."
ENTRA_CLIENT_ID="..."
ENTRA_CLIENT_SECRET="..."
```
## 4\. Configuration helper
```ts
// src/config.ts
import 'dotenv/config';
export const SAP_BASE_URL = process.env.SAP_BASE_URL!;
export const SAP_USERNAME = process.env.SAP_USERNAME!;
export const SAP_PASSWORD = process.env.SAP_PASSWORD!;
export const ENTRA_TENANT_ID = process.env.ENTRA_TENANT_ID!;
export const ENTRA_CLIENT_ID = process.env.ENTRA_CLIENT_ID!;
export const ENTRA_CLIENT_SECRET = process.env.ENTRA_CLIENT_SECRET!;
if (!SAP_BASE_URL || !SAP_USERNAME || !SAP_PASSWORD) {
console.warn('[WARN] SAP config incomplete – SAP tools will not work until configured.');
}
if (!ENTRA_TENANT_ID || !ENTRA_CLIENT_ID || !ENTRA_CLIENT_SECRET) {
console.warn('[WARN] Entra config incomplete – Entra tools will not work until configured.');
}
```
## 5\. SAP client (SuccessFactors via OData)
```ts
// src/sapClient.ts
import axios from 'axios';
import { SAP_BASE_URL, SAP_USERNAME, SAP_PASSWORD } from './config';
export type SapUser = {
userId: string;
email: string | null;
firstName: string | null;
lastName: string | null;
department: string | null;
};
export async function listSapUsers(limit = 500): Promise {
if (!SAP_BASE_URL) {
throw new Error('SAP_BASE_URL not configured');
}
const url = `${SAP_BASE_URL}/User?$format=json&$top=${limit}&$select=userId,email,firstName,lastName,department`;
const resp = await axios.get(url, {
auth: {
username: SAP_USERNAME,
password: SAP_PASSWORD,
},
});
const results = resp.data?.d?.results ?? [];
return results.map((r: any) => ({
userId: r.userId,
email: r.email || null,
firstName: r.firstName || null,
lastName: r.lastName || null,
department: r.department || null,
}));
}
```
## 6\. Entra ID client (Microsoft Graph)
```ts
// src/entraClient.ts
import axios from 'axios';
import {
ENTRA_TENANT_ID,
ENTRA_CLIENT_ID,
ENTRA_CLIENT_SECRET,
} from './config';
export type EntraUser = {
id: string;
userPrincipalName: string;
mail: string | null;
displayName: string | null;
department: string | null;
};
async function getAccessToken(): Promise {
const url = `https://login.microsoftonline.com/${ENTRA_TENANT_ID}/oauth2/v2.0/token`;
const params = new URLSearchParams();
params.append('client_id', ENTRA_CLIENT_ID);
params.append('client_secret', ENTRA_CLIENT_SECRET);
params.append('scope', 'https://graph.microsoft.com/.default');
params.append('grant_type', 'client_credentials');
const resp = await axios.post(url, params);
return resp.data.access_token as string;
}
export async function listEntraUsers(limit = 500): Promise {
const token = await getAccessToken();
const url = `https://graph.microsoft.com/v1.0/users?$top=${limit}&$select=id,userPrincipalName,mail,displayName,department`;
const resp = await axios.get(url, {
headers: { Authorization: `Bearer ${token}` },
});
const value = resp.data?.value ?? [];
return value.map((u: any) => ({
id: u.id,
userPrincipalName: u.userPrincipalName,
mail: u.mail || null,
displayName: u.displayName || null,
department: u.department || null,
}));
}
```
## 7\. Computing mismatches
```ts
// src/mismatches.ts
import { SapUser } from './sapClient';
import { EntraUser } from './entraClient';
export type SyncMismatch = {
type: 'MissingInEntra' | 'MissingInSap' | 'AttributeMismatch';
sapUser?: SapUser;
entraUser?: EntraUser;
details?: string;
};
function normalizeEmail(email: string | null): string | null {
if (!email) return null;
return email.trim().toLowerCase();
}
export function computeMismatches(
sapUsers: SapUser[],
entraUsers: EntraUser[],
): SyncMismatch[] {
const mismatches: SyncMismatch[] = [];
const entraByEmail = new Map();
const entraByUpn = new Map();
for (const e of entraUsers) {
const emailNorm = normalizeEmail(e.mail);
if (emailNorm) {
entraByEmail.set(emailNorm, e);
}
entraByUpn.set(e.userPrincipalName.toLowerCase(), e);
}
// 1) SAP -> Entra
for (const s of sapUsers) {
const emailNorm = normalizeEmail(s.email);
let match: EntraUser | undefined;
if (emailNorm) {
match = entraByEmail.get(emailNorm);
}
if (!match && s.userId) {
match = entraByUpn.get(s.userId.toLowerCase());
}
if (!match) {
mismatches.push({
type: 'MissingInEntra',
sapUser: s,
details: `No Entra user matching SAP userId=${s.userId}, email=${s.email}`,
});
continue;
}
// compare attributes
const sapDept = (s.department || '').trim();
const entraDept = (match.department || '').trim();
if (sapDept && entraDept && sapDept !== entraDept) {
mismatches.push({
type: 'AttributeMismatch',
sapUser: s,
entraUser: match,
details: `Department mismatch: SAP="${sapDept}" vs ENTRA="${entraDept}"`,
});
}
}
// 2) Entra -> SAP
const sapEmails = new Set(
sapUsers.map(s => normalizeEmail(s.email)).filter((e): e is string => !!e),
);
const sapUserIds = new Set(
sapUsers.map(s => s.userId.toLowerCase()),
);
for (const e of entraUsers) {
const emailNorm = normalizeEmail(e.mail);
const upn = e.userPrincipalName.toLowerCase();
const emailInSap = emailNorm && sapEmails.has(emailNorm);
const idInSap = sapUserIds.has(upn);
if (!emailInSap && !idInSap) {
mismatches.push({
type: 'MissingInSap',
entraUser: e,
details: `No SAP user for Entra UPN=${e.userPrincipalName}, mail=${e.mail}`,
});
}
}
return mismatches;
}
```
## 8\. Wiring it into an MCP server
```ts
// src/mcpServer.ts
import { createMcpServer, ToolDefinition } from '@modelcontextprotocol/sdk';
import { listSapUsers } from './sapClient';
import { listEntraUsers } from './entraClient';
import { computeMismatches } from './mismatches';
const tools: ToolDefinition[] = [
{
name: 'sap_list_users',
description: 'List users from SAP / SuccessFactors. Optional: limit.',
inputSchema: {
type: 'object',
properties: {
limit: { type: 'number', minimum: 1, maximum: 2000 },
},
required: [],
},
handler: async (input) => {
const limit = input.limit ?? 500;
const sapUsers = await listSapUsers(limit);
return { users: sapUsers };
},
},
{
name: 'entra_list_users',
description: 'List users from Entra ID (Azure AD). Optional: limit.',
inputSchema: {
type: 'object',
properties: {
limit: { type: 'number', minimum: 1, maximum: 5000 },
},
required: [],
},
handler: async (input) => {
const limit = input.limit ?? 500;
const entraUsers = await listEntraUsers(limit);
return { users: entraUsers };
},
},
{
name: 'report_mismatches',
description:
'Compare SAP and Entra ID users and return mismatches (missing users, attribute mismatches).',
inputSchema: {
type: 'object',
properties: {
limitSap: { type: 'number', minimum: 1, maximum: 2000 },
limitEntra: { type: 'number', minimum: 1, maximum: 5000 },
},
required: [],
},
handler: async (input) => {
const sapUsers = await listSapUsers(input.limitSap ?? 1000);
const entraUsers = await listEntraUsers(input.limitEntra ?? 2000);
const mismatches = computeMismatches(sapUsers, entraUsers);
return {
totalSap: sapUsers.length,
totalEntra: entraUsers.length,
mismatchCount: mismatches.length,
mismatches,
};
},
},
];
async function startServer() {
const server = createMcpServer({
tools,
});
await server.listen(3000);
console.log('[MCP] SAP/Entra agent listening on :3000');
}
startServer().catch((err) => {
console.error('[MCP] Failed to start server', err);
process.exit(1);
});
```
## 9\. Hardening and next steps
- Scope your Graph permissions carefully (no unnecessary Directory.Read.All in production).
- Add logging & auditing around which user triggered which comparison.
- Keep remediation (creating/updating users) as a separate, well-controlled flow.
- Consider adding department filters or project keys to narrow down the comparison.
In a follow-up, you could plug this MCP server into an agent that not only generates the delta report, but also opens Jira tickets or compiles a weekly summary for your identity team.
### How to Enable Microsoft 365 eSignature in Your Tenant
URL: https://blog.bajonczak.com/how-to-enable-microsoft-365-esignature-in-your-tenant/
Last updated: 2026-03-06T11:17:28.000Z
In my [last post](https://blog.bajonczak.com/security-trimming-with-microsoft-365-copilot-asking-the-right-data-in-the-right-context/) I looked at **why** Microsoft 365 eSignature is interesting: you can request and collect electronic signatures directly in SharePoint, OneDrive and Word, without sending your documents off to a separate platform.
This follow-up is for a different audience:
- Microsoft 365 admins,
- SharePoint admins,
- and technically inclined people who get asked: “Can you please turn this on for us?”
In other words: this is the **“how do I actually enable this in a tenant?”** post.
I’ll keep it business-friendly at the top and concrete at the bottom, with screenshots replaced by clear descriptions and some PowerShell where it makes sense.
## 1\. What you’re enabling – in business terms
Before touching any admin portal, it helps to be able to explain in one sentence what you’re doing:
> “We’re enabling a Microsoft 365 feature that lets people request and sign documents directly in SharePoint / OneDrive / Word, with usage billed via Azure.”
Key points you can use when talking to stakeholders:
- **No extra platform** for many scenarios – signing happens where the files already live.
- **Existing providers can stay** – if you use Adobe Sign or DocuSign, you can plug them in behind the M365 eSignature UI.
- **Pay-per-use** via Azure – no new fixed M365 plan, but a usage-based service you can monitor and cap.
- **Same identity model** – signers are M365 users or guests, so you stay inside your existing compliance and audit framework.
Once people are comfortable with that, you can move to the actual steps.
## 2\. High-level architecture
Early on, I found this mental model helpful:
```mermaid
flowchart LR
subgraph M365
SP[SharePoint / OneDrive]
W[Word]
end
M365 -- uses --> ESig[eSignature Service]
ESig -- billed via --> AZ[Azure Subscription]
```
From the tenant’s perspective:
- Users trigger sign requests from SharePoint / Word.
- Behind the scenes, the eSignature service runs and bills usage to an Azure subscription.
- Signed documents land back in your libraries.
## 3\. Prerequisites checklist
Before doing anything else, make sure these boxes are ticked:
- **Azure subscription** with a valid billing setup (credit card, CSP, etc.).
- **Microsoft 365 tenant** with SharePoint Online and OneDrive for Business.
- **Office apps for Enterprise** if you want the Word integration (desktop/web).
- **External collaboration policy** that allows guests, if you plan to have external signers.
I strongly recommend doing the initial enablement in a **test tenant** or at least on a test site collection before you roll this out to everyone.
## 4\. Linking Microsoft 365 to Azure pay-as-you-go
The eSignature feature is part of the broader “pay-as-you-go services for Microsoft 365”. You need to link your M365 tenant to an Azure subscription so usage can be billed.
High-level steps:
1. Sign in to the Azure portal as a subscription owner.
2. Verify that you have a subscription ready for pay-as-you-go services (or create one).
3. Sign in to the **Microsoft 365 admin center** as a global admin.
4. Navigate to the section for **pay-as-you-go services** (typically under Settings → Org settings → SharePoint / SharePoint Premium).
5. Choose the Azure subscription you want to link to your M365 tenant for document processing.
Once this link is in place, SharePoint/M365 can start using eSignature and other document processing features against that Azure subscription.
### 4.1\. Verifying with PowerShell (optional)
If you like to double-check settings via script, you can use the SharePoint Online Management Shell:
```powershell
# Connect to your tenant
Connect-SPOService -Url https://-admin.sharepoint.com
# Check if SharePoint Premium is enabled (naming may vary by SKU)
Get-SPOTenant | Select-Object IsSharePointPremiumEnabled
# Enable SharePoint Premium if required
Set-SPOTenant -IsSharePointPremiumEnabled $true
```
Always cross-check the exact property names with the latest Microsoft documentation; they sometimes change between previews and GA.
## 5\. Guest access and sharing – don’t skip this
Because eSignature uses secure share links and M365 identities, external signers need to exist as guests and be allowed to sign in.
Two places to review:
### 5.1\. External collaboration settings (Entra ID / Azure AD)
- In the Entra ID portal, go to **External identities → External collaboration settings**.
- Confirm that guests are allowed.
- Check who is allowed to invite guests (admins only, members, specific roles).
- Review any domain allow/block lists – make sure you’re not blocking the domains you want to sign with.
### 5.2\. SharePoint / OneDrive sharing policies
- In the SharePoint admin center, go to **Policies → Sharing**.
- For the tenant and for the specific sites you will use, ensure at least “Existing guests” or “New and existing guests” are allowed.
- You do not need anonymous links for eSignature, and I’d recommend keeping them off for sensitive libraries.
Without this, sign requests to external people will fail in confusing ways (“link doesn’t work”, “I can’t access the document”). Better to align with your security team upfront.
## 6\. Enabling eSignature in the M365 admin experience
With billing and guest access ready, you can finally flip the actual feature switch.
1. In the Microsoft 365 admin center, go to the **SharePoint admin center**.
2. Look for **SharePoint Premium** or content services settings.
3. Find the section for **eSignature**.
4. Enable eSignature for your tenant and confirm it can use the linked Azure subscription.
If your organisation already uses Adobe Sign or DocuSign and you want to keep them in the loop:
- connect your Adobe/DocuSign tenant as a provider in the eSignature settings,
- grant the required API permissions so M365 can orchestrate sign requests via that provider.
From a user’s perspective, they will see “Request signature” in M365; under the hood, the actual signature may still be processed by Adobe/DocuSign.
## 7\. Where users will see eSignature once it’s enabled
After the switches are on, you can validate the setup by looking in three places.
### 7.1\. SharePoint document libraries
- Go to a test document library.
- Upload a sample Word/PDF file.
- Open the context menu or command bar → you should see an option like “Request eSignature” or similar.
### 7.2\. Word (desktop / web)
- Open a document stored in SharePoint/OneDrive.
- Look for a “Sign” / “Request signatures” entry in the ribbon or File menu.
Note: this may depend on your Office build and licensing; make sure you test with an account that has the right SKU.
### 7.3\. Power Automate
- Open Power Automate and create a new flow.
- Search for eSignature-related actions or for your provider connector (Adobe Sign, DocuSign) if you integrated one.
- You should see actions to start a signing process, check status, etc.
## 8\. A minimal end-to-end flow to prove it works
Before you tell everyone “it’s live”, I’d build at least one simple end-to-end flow to prove the whole chain.
Example:
```text
Trigger: When a file is created in Library "Contracts/Pending"
Action: Get file metadata
Action: Start eSignature request (document = file, signers from a column or manual list)
Action: Wait until eSignature status = Completed
Action: Copy or move signed file to Library "Contracts/Signed"
Action: Post message in Teams channel "Legal" with link to the signed file
```
This doesn’t have to be your final production flow, but it gives you confidence that:
- billing works,
- guest access is configured correctly,
- and your users will actually see signed files where you expect them.
## 9\. Admin checklist before rolling out broadly
In tenant projects I like to ask a few questions before we roll eSignature out to everyone:
- Do we know which document types should use M365 eSignature and which stay on specialised providers?
- Have we defined who can request signatures and from which sites/libraries?
- Is guest access configured in line with our security policy?
- Do we have monitoring in place for Azure usage/costs for eSignature?
- Do we know how to quickly disable eSignature if something unexpected happens?
Once those are answered, the technical enablement is straightforward – and you can point your colleagues to the previous article for the “why” and this one for the “how”.
### Electronic Signatures in Microsoft 365: Using eSignature Without Leaving Your Tenant
URL: https://blog.bajonczak.com/electronic-signatures-in-microsoft-365-using-esignature-without-leaving-your-tenant/
Last updated: 2026-06-22T16:13:03.000Z
Watching people in 2026 still print out Word documents, sign them by hand, scan them and send them back by email feels a bit surreal. We have video calls with AI live captions, but contracts still travel as PDFs that bounce between inboxes.
For a long time the default answer was: “Just use DocuSign / Adobe Sign / whatever, upload the PDF and let people sign there.” That works. But it also means:
- another platform, another login,
- extra subscriptions just for signatures,
- and documents leaving your Microsoft 365 environment.
Since late 2025, there’s another option that a lot of people seem to miss: **Microsoft 365 eSignature**. It lets you request and collect electronic signatures directly in M365 – and it can even sit on top of existing providers like Adobe Sign and DocuSign.
In this post I’ll walk through:
- what M365 eSignature actually is,
- what you need to use it, and where the limits are,
- a simple, practical signing flow with Power Automate,
- and how I’d think about security and identity when you modernise your signing process.
## What Microsoft 365 eSignature actually is
eSignature is a feature in the SharePoint Premium / Microsoft 365 ecosystem that lets you:
- request signatures,
- sign documents,
- and store the signed versions
*directly inside* Microsoft 365:
- SharePoint document libraries,
- OneDrive,
- and the desktop/web versions of Word (Enterprise).
The core idea is simple:
> You shouldn’t have to upload your contract to a third-party website just to get a legally valid electronic signature.
On top of that, if your company already uses **Adobe Acrobat Sign** or **DocuSign**, you don’t have to throw them away. M365 eSignature can use them as providers under the hood:
- users stay in the M365 UI,
- your existing eSignature provider still handles the actual signing workflow and compliance,
- and you avoid a tool zoo from the end-user perspective.
## Requirements and the guest-account catch
The basic requirements to use eSignature are:
- an **Azure subscription with billing enabled** (pay-as-you-go for document processing),
- Enterprise Office apps if you want to start signing directly from Word.
Pricing is usage-based; you pay per document/signature transaction. Microsoft has a dedicated pricing page for that on Learn.
There’s one important catch that the docs sometimes mention only briefly:
> People who sign via M365 eSignature need to be **users or guests** in your tenant.
In other words:
- Internal staff: no issue, they’re already in Azure AD / Entra ID.
- External signers: need a guest account (B2B) to access the document and sign it.
For some organisations that’s totally fine – they already collaborate with partners via guests in Teams/SharePoint. For others, guest access is tightly locked down or historically disabled, so this becomes an organisational and security conversation before it becomes a technical one.
## A simple signing flow in M365
Let’s look at a practical scenario:
> “We have a contract as a Word document in SharePoint. We want it signed by one or more people. Once it’s signed, it should live in a ‘Signed Contracts’ library and relevant people should be notified.”
On a high level, the flow looks like this:

### Option 1: start directly from Word / SharePoint
This is the simplest option:
- Author saves the document in a specific SharePoint library.
- In the UI, they choose something like “Request eSignature”.
- They select signers (internal users and/or guests).
- M365 eSignature sends out the sign requests and tracks completion.
The final signed document ends up back in the same place (or a configured destination), with an audit trail.
## Sign up for Sascha's Blog
Ideas, Solutions and Best practises1
Subscribe free
Email sent! Check your inbox to complete your signup.
No spam. Unsubscribe anytime.
### Option 2: embed it into a Power Automate process
If you want to treat signing as just one step in a longer business process, Power Automate is the natural place to glue things together.
Very simplified:
```text
Trigger: When a file is created or modified in Library "Contracts"
Action: Get file metadata
Action: Start eSignature request (document = file, signers = metadata.Signers)
Action: Wait for eSignature status = Completed
Action: Copy signed document to Library "Signed Contracts"
Action: Post message in Teams channel "Legal" with link to signed file
```
Depending on your license and the eSignature provider you use (native M365 vs. Adobe/DocuSign connector), the exact actions differ, but the pattern stays the same: document in, signature request out, signed document back in, plus notifications.
## Identity and security: who may see and sign what?
As soon as signatures are involved, identity and security move to the front of the stage.
A few principles I keep in mind:
### 1\. Signatures are only as strong as your identity
The value of an electronic signature depends on:
- how strong the identity verification is,
- how good your audit trail is (who signed what, when, from where),
- and whether you can show that the document didn’t change after signing.
Using M365 identities – including guests – is not a workaround, it’s part of that chain of trust. If you’re serious about compliance, you want signers to be tied to proper identities, not anonymous links.
### 2\. “Can see” and “can sign” are different roles
Someone being allowed to view a file in SharePoint doesn’t automatically mean they should be allowed to sign it.
In practice it helps to distinguish:
- readers (can view the document),
- approvers (can give internal approval, e.g. via Power Automate approvals),
- signers (can legally sign the document).
When you design your libraries and flows, it’s worth taking five minutes to map these roles to groups/permissions instead of letting “whoever can open the file” also be in the signer list.
### 3\. Don’t build God-mode Flows
There’s a similar anti-pattern here as with Copilot connectors: using a single service account that can see and sign everything.
Where possible:
- use dedicated service identities with scoped permissions (e.g. only certain libraries),
- avoid giving Flows blanket rights to every contract library in the organisation,
- log who requested a signature for which document and which signers were added.
It’s very easy to accidentally turn “streamlined signing” into “anyone with access to the Flow can make anyone sign anything”. You want to avoid that.
## How this fits with external providers like Adobe/DocuSign
In a lot of organisations, Adobe Acrobat Sign or DocuSign are already in place for critical contracts, with legal and procurement being comfortable with their processes.
In that case, I wouldn’t see M365 eSignature as a replacement so much as a new front door:
- make the user experience more consistent (requests from SharePoint/Word instead of from a separate portal),
- keep signed docs in your existing SharePoint structures,
- and let Adobe/DocuSign continue doing what they’re already doing well in the background.
For “lighter” internal documents, you might decide the native M365 eSignature path is enough. For high-stakes, high-risk contracts, you keep the dedicated provider and just surface it through M365.
## A quick note on legal aspects
I’m not a lawyer, so this is not legal advice. But roughly:
- Electronic signatures are recognised in many jurisdictions, with different levels (simple, advanced, qualified).
- Which level you need depends on the type of document and local regulations.
- Large providers (including Microsoft + integrated partners) typically have detailed guidance on which of their options meet which legal standards.
The practical takeaway for me:
- don’t over-engineer simple internal approvals – eSignature is often good enough there,
- for critical, regulated use cases, involve Legal and stay on the supported path of your chosen provider.
## My take: where M365 eSignature makes sense
For me, Microsoft 365 eSignature is most interesting in three situations:
1. **Internal agreements and routine contracts**
Stuff like NDAs, internal approvals, standard vendor contracts, where the main pain is the ping-pong of PDFs and email.
2. **Teams that already live in M365**
If your users spend most of their day in Teams, SharePoint and Outlook, keeping the signing flow in that world removes friction.
3. **Organisations with a mix of needs**
You can use native eSignature for “lightweight” cases and still integrate your heavyweight provider for the contracts that really matter.
The main thing I’d keep in mind is the same theme that came up in my Copilot posts: identity and security are not an afterthought.
If you take the time to:
- clean up who is allowed to see and sign what,
- design your libraries and Flows with clear roles,
- and avoid god-mode service accounts,
then M365 eSignature can turn a surprisingly stubborn part of your process – “print, sign, scan” – into something that finally fits the rest of your digital workspace.
### Security Trimming with Microsoft 365 Copilot: Asking the Right Data in the Right Context
URL: https://blog.bajonczak.com/security-trimming-with-microsoft-365-copilot-asking-the-right-data-in-the-right-context/
Last updated: 2026-08-02T10:15:29.000Z
Security trimming is not a Copilot feature you add at the end.
It is the basic rule that decides whether a user may see a piece of information before an answer is built from it. If you get that wrong, Copilot does not become evil. It becomes fast. Fast enough to surface permission mistakes that used to stay hidden behind bad search, tribal knowledge or a folder nobody clicked.
That is why I treat security trimming as part of the connector design, not as a prompt-engineering exercise.
The practical question is simple:
> When this user asks this question, which sources may the system use, and why?
If your implementation cannot answer that, it is not ready for production.
## What security trimming means here
In this context, security trimming means filtering content based on the current user's rights before the content is used for search, retrieval or answer generation.
It is not enough that the backend can access the data. The backend must access it on behalf of the user, or at least enforce a permission model equivalent to what the user should have.
A good trimmed answer has three properties:
1. It only uses sources the user is allowed to access.
2. It refuses or narrows questions that cross sensitive boundaries.
3. It cites sources the user can actually open.
The third point is underrated. If Copilot gives an answer from a source the user cannot open, you either have a citation problem or a permission problem. Both are bad.
## Native Microsoft 365 content
For content already inside Microsoft 365, the platform gives you a useful starting point.
A rough flow looks like this:
```mermaid
flowchart LR
U[User] --> C[Copilot]
C --> G[Microsoft Graph]
G --> D[(M365 Data)]
```
The user asks Copilot. Copilot works through Microsoft Graph and the Microsoft 365 permission model. If the user cannot access a document, that document should not become part of the answer.
That is why tenant hygiene matters before rollout.
Copilot will not fix:
- SharePoint sites with broad member groups
- old Teams with stale guests
- files shared with “everyone” years ago
- confidential documents stored in normal project spaces
- libraries without clear owners
If those permissions are wrong, security trimming will faithfully reflect the wrong model.
My first implementation step is therefore not code. It is permission cleanup.
## External systems are different
External systems are where teams usually get into trouble.
A typical pattern looks like this:
```mermaid
flowchart LR
U[User] --> C[Copilot]
C --> A[AskExternalData / Agent]
A --> B[Backend]
B --> AUTH[Auth / Directory]
B --> EXT[External System]
EXT --> B
B --> C
```
The backend might talk to Confluence, Jira, SAP, SQL, an internal API or a document store. Copilot does not automatically know that system's permissions. Your backend has to enforce them.
The lazy version is this:
1. Copilot calls your API.
2. Your API uses a service account.
3. The service account can read everything.
4. The model answers from everything.
That is not security trimming. That is a god-mode search endpoint with a polite chat interface.
The safer version is:
1. Copilot passes user context.
2. The backend resolves that user against Entra ID or your IAM.
3. The backend searches only allowed spaces, documents or records.
4. The backend filters the results again before answer generation.
5. The response includes only sources the user can open.
6. The decision is logged.
It is more work. That is the cost of connecting real company data.
## API contract
I would keep the tool contract boring and explicit.
```ts
// Request payload from Copilot plugin or custom agent
interface AskExternalRequest {
question: string;
userEmail: string;
projectKey?: string;
}
interface AskExternalResponse {
answer: string;
sources: { title: string; url: string }[];
missingInfo: boolean;
}
```
In a real implementation, I would prefer a trusted identity claim over a free-form `userEmail` string. The example keeps it readable, but do not let clients spoof the user in production.
The important part is that the backend receives enough context to make a permission decision.
## Resolve the user
The backend needs a local view of the user: roles, groups, project assignments, department, maybe region or legal entity depending on the data source.
```ts
// src/permissions.ts
export type UserContext = {
email: string;
roles: string[]; // e.g. ['EMPLOYEE', 'HR', 'ENGINEERING_MANAGER']
groups: string[]; // e.g. ['project-phoenix', 'dept-engineering']
};
export async function getUserPermissions(email: string): Promise {
// In reality: query Entra ID, your IAM, or a domain-specific permission service
const entry = await directoryLookup(email);
if (!entry) return null;
return {
email,
roles: entry.roles,
groups: entry.groups
};
}
```
This should not be a one-off helper buried inside the connector. Treat it as shared security code. If five agents implement permission lookup in five different ways, you will eventually get five different answers.
## Filter documents by ACL
For document-like sources, a simple ACL model is often enough to explain the pattern.
```ts
// src/acl.ts
import { UserContext } from './permissions';
export type DocumentAcl = {
allowedRoles?: string[];
allowedGroups?: string[];
forbiddenRoles?: string[];
};
export type ExternalDoc = {
id: string;
title: string;
url: string;
content: string;
acl: DocumentAcl;
};
function hasAccess(doc: ExternalDoc, user: UserContext): boolean {
const { allowedRoles, allowedGroups, forbiddenRoles } = doc.acl;
if (forbiddenRoles && forbiddenRoles.some(r => user.roles.includes(r))) {
return false;
}
if (!allowedRoles && !allowedGroups) {
return true;
}
if (allowedRoles && allowedRoles.some(r => user.roles.includes(r))) {
return true;
}
if (allowedGroups && allowedGroups.some(g => user.groups.includes(g))) {
return true;
}
return false;
}
export function filterDocsByAcl(docs: ExternalDoc[], user: UserContext): ExternalDoc[] {
return docs.filter(doc => hasAccess(doc, user));
}
```
This is intentionally boring. Security code that nobody understands is not automatically safer.
## Secure handler pattern
The handler should refuse unknown users, trim before generation, and avoid pretending that missing access is missing knowledge.
```ts
// src/secureAsk.ts
import { Request, Response } from 'express';
import { getUserPermissions } from './permissions';
import { searchExternalDocs } from './externalDocs';
import { buildAnswerFromDocs } from './rag';
export async function secureAskHandler(req: Request, res: Response) {
const body = req.body as AskExternalRequest;
if (!body.question || !body.userEmail) {
return res.status(400).json({ error: 'question and userEmail are required' });
}
const user = await getUserPermissions(body.userEmail);
if (!user) {
return res.status(403).json({ error: 'unknown_user' });
}
const docs = await searchExternalDocs(body.question, user, body.projectKey);
if (docs.length === 0) {
return res.json({
answer: `I couldn't find any documents you are allowed to see that answer "${body.question}".`,
sources: [],
missingInfo: true
} satisfies AskExternalResponse);
}
const { answer, usedDocs } = await buildAnswerFromDocs(body.question, docs);
return res.json({
answer,
sources: usedDocs.map(d => ({ title: d.title, url: d.url })),
missingInfo: false
} satisfies AskExternalResponse);
}
```
The sentence in the empty result matters:
> I couldn't find any documents you are allowed to see.
Not:
> This information does not exist.
Those are different claims. In enterprise systems, the difference matters.
## Secure Confluence example
For a wiki source like Confluence, I would not search everything and filter afterwards if I can avoid it. I would restrict the query as early as possible.
```ts
// src/projectSpaces.ts
const projectSpaceMap: Record = {
'project-phoenix': 'PHX',
'project-orion': 'ORI'
};
export function getAllowedSpacesForUser(user: UserContext): string[] {
const spaces = new Set();
for (const group of user.groups) {
const spaceKey = projectSpaceMap[group];
if (spaceKey) spaces.add(spaceKey);
}
spaces.add('COMPANY');
return Array.from(spaces);
}
```
Then use those spaces in the actual search query:
```ts
import { getAllowedSpacesForUser, UserContext } from './permissions';
export async function searchConfluenceSecure(query: string, user: UserContext): Promise {
const spaces = getAllowedSpacesForUser(user);
const cqlParts = [`text ~ "${query.replace(/"/g, '\\"')}"`];
if (spaces.length > 0) {
const spaceFilter = spaces.map(s => `space = "${s}"`).join(' OR ');
cqlParts.push(`(${spaceFilter})`);
}
const cql = cqlParts.join(' AND ');
// Call Confluence with restricted CQL, then still apply local result filtering.
}
```
I still like a second filtering step after retrieval. Defense in depth is not glamorous, but it catches mapping mistakes.
## Topic guards before retrieval
ACLs decide which documents a user may see. They do not always decide whether a question should be answered in that channel.
For some topics, I would block or route before retrieval.
Example:
```ts
function isForbiddenQuestion(question: string, userRoles: string[]): boolean {
const lower = question.toLowerCase();
const sensitivePatterns = [
'salary',
'compensation',
'bonus',
'layoff',
'termination list',
'performance review',
'investigation'
];
const isSensitive = sensitivePatterns.some(p => lower.includes(p));
if (!isSensitive) return false;
const privilegedRoles = ['HR', 'HR_ADMIN', 'LEGAL', 'C_LEVEL'];
const isPrivileged = privilegedRoles.some(r => userRoles.includes(r));
return !isPrivileged;
}
```
This is not a complete policy engine. It is a reminder that retrieval control and topic control are different things.
For sensitive workflows, I would rather route the user to a proper HR, legal or finance process than let a generic assistant improvise around it.
## Common mistakes
These are the mistakes I would actively look for in a review.
### Service account can read everything
This is the big one. If the connector uses a god-mode account and does not enforce user-level trimming, the user interface is lying about security.
### Filtering after answer generation
Do not generate the answer first and then remove sources. The model has already seen the data.
### Returning sources the user cannot open
If the answer cites a page the user cannot open, fix the connector. Either the citation is wrong or the permission check is wrong.
### Treating groups as static
Group membership changes. Project access changes. People move departments. Do not cache permission decisions forever.
### Logging too much
Do not dump full prompts, retrieved documents or sensitive answer payloads into generic logs. Log the decision, not the secret.
### No negative tests
Most teams test with an admin or with a user who should have access. That proves very little. Test with users who must not have access.
## Test cases I would run
Before production, I would run at least these tests:
| Test | Expected result |
| ----------------------------------------------- | ---------------------------------------- |
| User with access asks about allowed project | Answer with allowed sources |
| User without access asks same question | No answer from restricted docs |
| User with old/stale group asks question | Denied if access was removed |
| Non-HR user asks compensation question | Refusal or approved routing |
| HR user asks compensation question | Answer only from approved HR sources |
| User asks broad “summarize everything” question | Scope narrowed or refused |
| Source document is removed | No stale answer after sync/cache refresh |
| Source URL is returned | User can open it |
The last test is simple and useful: if the user cannot open the returned source, the system is not done.
## Developer checklist
Before connecting an external source to Copilot, I would want clear answers to these questions:
- What is the source system?
- Who owns it?
- Which data categories are exposed?
- How is user identity passed to the backend?
- How are roles and groups resolved?
- Where is ACL filtering implemented?
- Are deny rules supported?
- Are sensitive topics blocked before retrieval?
- Are sources returned with the answer?
- Can the user open every returned source?
- What gets logged?
- How long are permissions cached?
- Who reviews access after org changes?
- What happens when the connector fails?
If that checklist feels annoying, good. It is cheaper than explaining later why Copilot answered from a document the user should never have seen.
## My take
Security trimming is not a nice-to-have around Copilot. It is the difference between a useful assistant and a very fast permission leak.
For native Microsoft 365 content, start with tenant hygiene. For Graph connectors, map ACLs properly. For custom agents, make the backend enforce identity, permissions, topic rules and source visibility.
Do not rely on prompts as policy.
Prompts can guide behavior. They cannot replace access control.
## Related articles
- [Bringing Your Own Data into Microsoft 365 Copilot Without Breaking Security](https://blog.bajonczak.com/bringing-your-own-data-into-microsoft-365-copilot-without-breaking-security/)
- [Copilot Governance Playbook: Who Owns What in 2026?](https://blog.bajonczak.com/enterprise-agent-governance-on-azure-in-2026-registry-identity-guardrails-observability/)
### Building an 'Ask the Company' Agent in Microsoft 365 Copilot
URL: https://blog.bajonczak.com/building-an-ask-the-company-agent-in-microsoft-365-copilot/
Last updated: 2026-03-02T12:00:18.000Z
I’ve been playing more and more with Microsoft 365 Copilot lately, and one pattern keeps coming back:
*The interesting part is not “answer my email”, it’s “answer questions about how our company works”.*
Every organisation has the same type of question:
- “How do we do this here?”
- “Where is that documented?”
- “Have we done this before?”
The answers usually live somewhere in Confluence, SharePoint or Teams documents. But most of that knowledge is locked behind search, folder structures and tribal memory.
In this post I want to sketch how I’d build an **“Ask the Company” agent in Microsoft 365 Copilot** that:
- answers questions about a project,
- pulls information from Confluence,
- and notices when something is missing – so it can help you document it.
I’ll go through three pieces:
1. the architecture idea,
2. a simple backend with sample code (Node/TypeScript),
3. and how Copilot can use it as an agent.
## 1\. The idea: “Ask the Company” inside M365
The idea is simple:
- In M365 Copilot you expose a new ability: **Ask the Company**.
- A user types: “How do we handle deployments for Project Phoenix?”
- Copilot calls your own backend (“CompanyAgent API”) with the question plus user/project context.
- The backend:
- searches Confluence for relevant pages,
- extracts the important passages,
- builds an answer,
- and flags when there is no or not enough documentation.
- If nothing is found, the agent suggests:
- creating a new Confluence page draft for this topic,
- based on what the user just asked.
The agent’s role is:
- **Read**: fetch knowledge from Confluence,
- **Answer**: compose a clear answer for Copilot,
- **Learn**: detect gaps and help to close them.
## 2\. The backend: a simple Node/TypeScript example
Let’s build a minimal backend that:
- exposes a `/ask` endpoint,
- searches Confluence via REST,
- and returns an answer plus a `missingInfo` flag.
### 2.1 Basic Express setup
```ts
// src/server.ts
import express from 'express';
import bodyParser from 'body-parser';
import { searchConfluence, getConfluencePageExcerpt } from './confluence';
import { buildAnswerFromPages } from './rag';
const app = express();
app.use(bodyParser.json());
type AskRequest = {
question: string;
projectKey?: string;
userEmail?: string;
};
type AskResponse = {
answer: string;
sources: { title: string; url: string }[];
missingInfo: boolean;
};
app.post('/ask', async (req, res) => {
const body = req.body as AskRequest;
if (!body.question) {
return res.status(400).json({ error: 'question is required' });
}
try {
// 1) Search Confluence
const pages = await searchConfluence(body.question, body.projectKey);
if (pages.length === 0) {
const answer = `I couldn’t find any documentation about "${body.question}" in Confluence. ` +
`It might make sense to create a page for this topic.`;
const response: AskResponse = {
answer,
sources: [],
missingInfo: true
};
return res.json(response);
}
// 2) Fetch excerpts / content
const excerpts = await Promise.all(
pages.map(p => getConfluencePageExcerpt(p.id))
);
// 3) Build an answer
const { answer, usedPages } = await buildAnswerFromPages(body.question, excerpts);
const response: AskResponse = {
answer,
sources: usedPages.map(p => ({ title: p.title, url: p.url })),
missingInfo: false
};
return res.json(response);
} catch (err) {
console.error('Error in /ask', err);
return res.status(500).json({ error: 'internal_error' });
}
});
const port = process.env.PORT || 3000;
app.listen(port, () => {
console.log(`CompanyAgent API listening on port ${port}`);
});
```
### 2.2 Confluence search and excerpts
Confluence offers a REST API that you can call with CQL (Confluence Query Language). Here’s a simplified helper module:
```ts
// src/confluence.ts
import fetch from 'node-fetch';
const CONFLUENCE_BASE_URL = process.env.CONFLUENCE_BASE_URL!;
const CONFLUENCE_USER = process.env.CONFLUENCE_USER!;
const CONFLUENCE_TOKEN = process.env.CONFLUENCE_TOKEN!;
type ConfluencePage = {
id: string;
title: string;
url: string;
};
export async function searchConfluence(query: string, projectKey?: string): Promise {
const cqlParts = [`text ~ "${query.replace(/"/g, '\\"')}"`];
if (projectKey) {
// Example: filter by space
cqlParts.push(`space = "${projectKey}"`);
}
const cql = cqlParts.join(' AND ');
const url = new URL('/rest/api/search', CONFLUENCE_BASE_URL);
url.searchParams.set('cql', cql);
url.searchParams.set('limit', '5');
const res = await fetch(url.toString(), {
headers: {
'Authorization': 'Basic ' + Buffer.from(`${CONFLUENCE_USER}:${CONFLUENCE_TOKEN}`).toString('base64'),
'Accept': 'application/json'
}
});
if (!res.ok) {
console.error('Confluence search error', await res.text());
return [];
}
const data = await res.json() as any;
const results = data.results ?? [];
return results.map((r: any) => ({
id: r.content.id,
title: r.content.title,
url: `${CONFLUENCE_BASE_URL}/pages/${r.content.id}`
}));
}
export async function getConfluencePageExcerpt(pageId: string): Promise<{ id: string; title: string; url: string; text: string }> {
const url = `${CONFLUENCE_BASE_URL}/rest/api/content/${pageId}?expand=body.storage`;
const res = await fetch(url, {
headers: {
'Authorization': 'Basic ' + Buffer.from(`${CONFLUENCE_USER}:${CONFLUENCE_TOKEN}`).toString('base64'),
'Accept': 'application/json'
}
});
if (!res.ok) {
console.error('Confluence get page error', await res.text());
throw new Error('confluence_error');
}
const data = await res.json() as any;
const html = data.body.storage.value as string;
const text = stripHtml(html).slice(0, 5000);
return {
id: data.id,
title: data.title,
url: `${CONFLUENCE_BASE_URL}/pages/${data.id}`,
text
};
}
function stripHtml(html: string): string {
return html.replace(/<[^>]+>/g, ' ').replace(/\s+/g, ' ').trim();
}
```
### 2.3 Building an answer with an LLM
Next we need something that takes the found texts and the user’s question and produces an answer. In a real system you’d likely use RAG with vector search and a local or cloud LLM.
Here’s a minimal example assuming you have a `callLLM()` function somewhere:
```ts
// src/rag.ts
import { callLLM } from './llmClient';
type PageExcerpt = {
id: string;
title: string;
url: string;
text: string;
};
export async function buildAnswerFromPages(question: string, pages: PageExcerpt[]): Promise<{ answer: string; usedPages: PageExcerpt[] }> {
const prompt = `
You are an internal documentation assistant. Answer the question based ONLY on the information below.
If the docs don’t contain a clear answer, say so.
Question:
${question}
Docs:
${pages.map((p, i) => `[#${i + 1}] ${p.title}\n${p.text}`).join('\n\n')}
`;
const answer = await callLLM(prompt);
// Simple heuristic: assume all pages were used
return { answer, usedPages: pages };
}
```
With just these three modules you have a very simple but end‑to‑end working “Ask the Company” backend:
- `POST /ask` receives a question,
- looks up relevant docs in Confluence,
- asks an LLM to summarise them,
- and tells you if nothing was found.
## 3\. Letting Copilot talk to the agent
For Copilot to use this backend, you need to expose it as a function Copilot can call – for example via Copilot Studio, a Graph connector, or an HTTP plugin-style integration.
The conceptual model is always the same:
- you describe what your backend can do,
- Copilot decides when to call it, based on the user’s request.
A simplified JSON description for an HTTP-style tool could look like this:
```json
{
"name": "companyDocumentation",
"description": "Answer questions about internal projects by searching Confluence",
"functions": [
{
"name": "askCompany",
"description": "Get an answer to a company/project-related question from Confluence",
"parameters": {
"type": "object",
"properties": {
"question": {
"type": "string",
"description": "The user's question in plain language"
},
"projectKey": {
"type": "string",
"description": "Optional project/space key used to narrow the Confluence search"
}
},
"required": ["question"]
}
}
]
}
```
From Copilot’s perspective, a conversation might look like this:
- User: “How do we handle hotfix deployments for Project Phoenix?”
- Copilot:
- recognises that this is an internal process question,
- calls `askCompany` with `question` \+ `projectKey = "PHOENIX"`,
- receives `{ answer, sources, missingInfo }`,
- and builds a response such as:
- “According to our docs: …” plus links to the sources,
- or: “I couldn’t find any documentation; we should probably create some.”
If `missingInfo` is true, you can add a second function like:
- `createConfluencePageDraft(title, content)`
Copilot could then propose a draft documentation page based on the question and what is known so far, so that someone can refine and publish it later.
## 4\. What’s missing in a real implementation?
The prototype above deliberately skips a few hard but important topics:
- **Authentication and permissions.**
The agent should act on behalf of the signed‑in user, respect Confluence permissions, and make sure it doesn’t surface pages the user shouldn’t see.
- **Disambiguation.**
If the search returns multiple topics (“deployments for App A vs App B”), the agent should ask follow‑up questions instead of guessing.
- **Feedback into documentation.**
You could log which questions are asked most often and whether there’s good documentation for them – great input for documentation sprints.
But as a starting point, the pattern:
- Copilot → HTTP agent → Confluence + LLM → answer + missingInfo
is already surprisingly powerful.
## 5\. Why this is where Copilot gets interesting
The part of Microsoft 365 Copilot that excites me is not that it can summarise emails or rephrase text – that’s useful, but generic.
It gets interesting when Copilot:
- has access to **your systems** (Confluence, Jira, SharePoint, line-of-business APIs),
- can talk to **your agents**,
- and can answer questions like “How do *we* do X?” instead of just “What does the internet say about X?”.
The “Ask the Company” agent here is a sketch, but it shows the basic idea:
- AI reads what you’ve already documented,
- answers questions from that,
- and highlights where your documentation has gaps.
That’s the kind of pattern I expect to become normal in M365 Copilot over the next years – and the kind of thing I’d rather experiment with now than wait until someone else ships it for me.
### Amazfit Bip 6 vs Garmin Venu 3: Which Long-Battery Smartwatch Makes More Sense?
URL: https://blog.bajonczak.com/amazfit-bip-6-vs-garmin-venu-3-which-long-battery-smartwatch-makes-more-sense/
Last updated: 2026-03-01T07:34:13.000Z
Battery life is the reason I keep coming back to the Amazfit Bip 6\. Most smartwatches want more attention than I do – daily charging, constant nudging, lots of features I don’t need. The Bip 6 is one of the first that feels like a normal watch again: you put it on and mostly forget about it.
To put that into context, I wanted to compare it to a very popular Garmin in a similar “everyday + fitness” category: the **Garmin Venu 3**.
This is a short, practical comparison – not a lab review.
## Quick specs (high level)
[**Amazfit Bip 6**](https://amzn.to/4r9kHt1?ref=blog.bajonczak.com)
- Focus: budget-friendly smartwatch with health tracking
- Battery: roughly 7–14 days depending on usage
- Display: bright colour screen, simple UI
- Tracking: steps, heart rate, sleep, basic sports, GPS
- Price: significantly cheaper than most Garmin models
[**Garmin Venu 3**](https://amzn.to/4tZRKlI?ref=blog.bajonczak.com)
- Focus: health and fitness watch with smartwatch features
- Battery: up to around 14 days in smartwatch mode, \~26 hours GPS (in reviews)
- Display: AMOLED, very good visibility
- Tracking: extensive sports profiles, advanced health metrics, strong ecosystem
- Price: clearly higher, closer to premium segment
## Battery life: both are in the "don’t think about it every day" club
The Bip 6 is impressive because it delivers about a week of battery life without trying too hard. If you’re not hammering GPS every day, it can push towards two weeks. That means you charge it when you notice it’s low – not as a daily ritual.
The Venu 3, like most modern Garmins, also does very well here. Reviews talk about roughly 14 days in normal smartwatch mode and plenty of GPS time for runs and rides. It’s easy to cover 1–2 weeks on a charge if you’re not doing ultra‑distance training every day.
**Bottom line:** both watches are in a different league from devices that barely last two days. If you care about battery, you’re safe with either – with the Bip 6 giving you that feeling at a much lower price.
## Everyday use: simple companion vs. rich ecosystem
The way I see it:
- **Bip 6** is the “simple companion”: steps, sleep, heart rate, basic workouts, notifications. Easy enough to recommend to non‑techy people without turning into their support hotline.
- **Venu 3** is the “serious health tracker”: deeper metrics, better training analysis, strong Garmin Connect ecosystem, more detail for runners, cyclists and people who like to look at graphs.
If you just want to move more, sleep better and not charge your watch all the time, the Bip 6 hits a great sweet spot. If you’re training with intent and already live in Garmin land, the Venu 3 will feel more like a proper tool.
## Who I’d recommend each watch to
**Amazfit Bip 6** is ideal for:
- people who want a low‑maintenance watch that lasts a long time,
- casual users who care about steps, sleep and occasional workouts,
- family and friends where you don’t want to introduce a lot of complexity.
**Garmin Venu 3** is ideal for:
- people who train regularly and want deeper health and performance data,
- anyone already using Garmin devices (bike computer, HR strap, etc.),
- users who are willing to pay more for better analytics and a mature ecosystem.
## My personal bias
Personally, I’m very happy with the Bip 6 because it solves my main frustration: battery life and “too much smartwatch”. For my everyday mix of desk work, walking, light workouts and sleep tracking, it’s exactly enough.
If I ever go back into a focused training phase with clear goals (marathon, structured intervals), I’d look more seriously at a Garmin again – but I’d do it knowing that I’m paying for the extra analysis and ecosystem, not for the battery alone.
For now, the Bip 6 stays on my wrist most days, and the charger stays in the drawer a lot longer than I’m used to from other watches.
### Galaxy S26 vs S26 Ultra: What’s Really New and Who Should Buy Which
URL: https://blog.bajonczak.com/galaxy-s26-vs-s26-ultra-whats-really-new-and-who-should-buy-which/
Last updated: 2026-02-27T19:44:51.000Z
Samsung’s Galaxy launch cycle has become pretty predictable over the years: three flagship phones, same naming scheme, lots of leaks, a big Unpacked event – and then the real question:
**Which one of these devices actually makes sense for me?**
With the [**Galaxy S26**](https://amzn.to/4rM5hfi?ref=blog.bajonczak.com) and [**S26 Ultra**](https://amzn.to/4rB45eF?ref=blog.bajonczak.com), the pattern continues. The Ultra is once again the spec monster, the regular S26 is the smaller, more pocket‑friendly version – and the headlines this year are less about raw hardware jumps and more about Samsung’s push around “Galaxy AI”.
In this post I want to walk through:
- what has actually changed compared to the previous generation,
- the main differences between S26 and S26 Ultra,
- and for which kind of user each device makes sense.
This is not a lab review – it’s a practical look from someone who cares about everyday use and long‑term value more than synthetic benchmarks.
## What’s new in the S26 generation overall?
Looking at early reports and hands‑on impressions, a few themes stand out:
- **Galaxy AI is front and centre.**
Samsung is doubling down on AI‑branded features: advanced photo editing (“Photo Assist”), smarter transcription and summarisation, on‑device suggestions, and tighter integration of AI into system apps.
- **Refinements over revolution.**
The S26 series doesn’t radically change the formula. Screens, cameras and overall design feel like measured iterations over the S25 line rather than a complete redesign.
- **Focus on thermals and efficiency.**
There are rumours about a move away from titanium in favour of an updated aluminium frame (“Armor Aluminum 2.0”) for the S26 series, with better thermal management and slightly lower weight as the main reasons.
If you were hoping for a wild new form factor or a completely different camera setup, this is not that year. The interesting part is in the details – and in how Samsung positions the regular S26 vs the S26 Ultra.
## Galaxy S26 vs S26 Ultra: the headline differences
Without getting lost in every minor spec, here’s how I’d summarise the core differences that matter in daily use.
### Size, screen and pen
The pattern is familiar:
- [**Galaxy S26**](https://amzn.to/4rM5hfi?ref=blog.bajonczak.com)**:** smaller, easier to handle one‑handed, still with a high‑quality display, but not the biggest panel in the line‑up.
- [**Galaxy S26 Ultra**](https://amzn.to/4rB45eF?ref=blog.bajonczak.com)**:** the big canvas – larger display, higher brightness and often slightly better panel specs, plus the usual boxier design.
The Ultra also keeps the **S Pen** story alive. If you like scribbling notes directly on the screen, marking up screenshots or doing quick sketches, the Ultra remains the only choice in the S26 family that really caters to that use case.
### Cameras
According to early coverage, the S26 Ultra sticks with a similar camera hardware configuration as its predecessor:
- 200 MP main sensor,
- 50 MP ultrawide,
- dual telephoto setup with different optical zoom levels.
The regular S26 gets a more standard flagship camera package: plenty good for most people, but without the Ultra’s full telephoto flexibility and headline megapixel numbers.
The more interesting story this year is less about raw camera hardware and more about what **Galaxy AI** does on top of it:
- smarter scene detection,
- more powerful AI‑based editing (removing objects, recomposing photos, upscaling),
- and potentially better low‑light performance through improved processing rather than new sensors.
### Performance and thermals
Both S26 and S26 Ultra run on the latest generation of Samsung’s chosen SoC (details vary by region as always). For everyday tasks, you’re unlikely to feel a huge difference between them.
Where the Ultra tends to pull ahead is:
- sustained performance over longer, heavy workloads (gaming, 4K video, extended camera use),
- and slightly better thermal behaviour thanks to a larger chassis and more room for cooling.
If rumours about the return to an optimised aluminium frame pan out, that should also help with moving heat out of the device more quickly compared to last year’s titanium frame.
### Battery and endurance
Again, the Ultra plays the “bigger phone, bigger battery” card. For most light to moderate users, the regular S26 will be fine for a full day. The Ultra gives you more headroom if you:
- travel a lot,
- watch a lot of video or game on your phone,
- or hammer the camera and AI features throughout the day.
## What feels genuinely new vs. S25?
On the hardware side, the S26 generation feels more like a refinement pass than a revolution. The things that stand out as “newish” or at least more prominent are:
- **Galaxy AI as a first‑class story.**
The branding and feature focus make it clear Samsung sees AI as a differentiator now, not an add‑on.
- **Thermal and material tweaks.**
If the move to an updated aluminium frame is confirmed, that’s a subtle but important shift in how the devices behave under load.
- **More integrated AI workflows.**
Deeper tie‑in of AI into camera, messaging, notes, transcription and assistance flows – especially on the Ultra, where people expect the “full package”.
In short: if you’re coming from an S24 or even S25, the question is less “are the specs higher?” and more “do I care enough about the new AI features, thermals and refinements to justify the upgrade?”
## Who the Galaxy S26 is for
When I look at the regular S26, I picture:
- someone who wants a **high-end phone that doesn’t feel huge**,
- doesn’t care about the S Pen,
- and mostly uses the camera for everyday shots, social media and occasional travel photos.
It’s the “default flagship” for people who like Samsung’s ecosystem and design, but don’t want a brick in their pocket.
In other words:
- most professionals,
- students,
- and anyone upgrading from an older mid‑range or flagship device who doesn’t need the Ultra’s extra features.
## Who the Galaxy S26 Ultra is for
The S26 Ultra continues to be the “no compromise (and no small pockets)” option.
I see it as a good fit for:
- **power users** who live on their phone – productivity, media, multitasking, lots of browser and app use,
- **note‑takers and scribblers** who actually use the S Pen for annotations, quick sketches, marking up PDFs,
- **camera enthusiasts** who want the extra telephoto flexibility and are willing to carry the bigger device for it.
If your phone is effectively your main computer on the go, the Ultra still makes sense. If you mostly message, call, scroll and take a few photos, the regular S26 will probably hit the sweet spot more comfortably.
## Should you upgrade from an older device?
Very rough guidance, based on how I’d think about it personally:
- From an S25 / S25 Ultra: only if you really care about the latest AI features, subtle thermal improvements, or you simply like having the newest thing.
- From an S23 or older: the S26/S26 Ultra will feel like a clear upgrade in camera performance, AI features and long‑term software support.
- From a mid‑range device: both S26 models will be a big step up; choose based on size and whether you’ll actually use the S Pen and extra camera options.
## My take
The Galaxy S26 generation is not the year of wild experimentation. It’s the year of:
- polishing the hardware,
- leaning hard into AI as a selling point,
- and making small but meaningful changes that matter over two to three years of use.
If you like Samsung’s approach and you’re ready to upgrade, the real question is simple:
- Do you want the smaller, more balanced flagship (S26)?
- Or do you want the big, pen‑enabled, spec‑heavy version (S26 Ultra)?
As always, the best choice depends less on the spec sheet and more on how you actually live with your phone day to day.
### Hard-Wired LLMs: What Taalas’ Custom AI Chips Really Mean
URL: https://blog.bajonczak.com/hard-wired-llms-what-taalas-custom-ai-chips-really-mean/
Last updated: 2026-02-26T20:52:39.000Z
Every few months there’s a new headline about some breakthrough in AI hardware. Most of them boil down to one of three things:
- we put more compute on the chip,
- we moved memory closer to the compute,
- we found a better way to run the same models as everyone else.
Recently I stumbled over a different flavour of story:
**“This new AI chipmaker hard-wires AI models into silicon to make them faster and cheaper.”**
The company is called **Taalas**, and their pitch is basically: give us your model, and we’ll turn it into custom silicon – a "hard-wired" version that runs an order of magnitude faster, cheaper and with lower power than a software implementation on GPUs.
That raised exactly the kind of questions I like:
- What does “hard-wired LLM” actually mean in practice?
- When does that make sense, and when is it a terrible idea?
- What could this mean for people building real systems, not just benchmarks?
This post is my attempt to sort through that, in plain language.
## What Taalas is actually claiming
I’m not going to repeat their marketing copy line by line, but the core idea looks like this:
- they built a platform that can take an existing AI model (e.g. a language model) and “compile” it into a custom ASIC,
- from "previously unseen model" to working silicon supposedly in around two months,
- the result is what they call a "Hardcore Model": a chip that runs that specific model much faster and more efficiently than a general‑purpose solution.
The context here is important:
- LLM workloads are very latency‑sensitive, especially in agentic setups where a model calls tools, APIs and other models.
- Token‑per‑second (TPS) figures are a huge differentiator – nobody wants to wait for an agent to finish a chain of thought.
- GPUs are flexible but power‑hungry and expensive at scale.
Other players are pushing in similar directions: bringing SRAM closer to compute, building massive wafer‑scale engines, or optimising compiler stacks for transformers.
Taalas takes a more radical route: instead of general‑purpose chips + smarter software, they move the model itself into custom silicon.
## What “hard-wiring a model” really means
When you train a neural network, you end up with a set of weights and an architecture. Normally you deploy that to a GPU, NPU or CPU and let software (frameworks, kernels, runtime) do the work of applying those weights to inputs.
"Hard-wiring" a model, in the way Taalas describes it, essentially means:
- taking the final, fixed model,
- and mapping its structure directly into circuits and memory on a chip.
Instead of a generic matrix‑multiply engine that can run any model, you end up with:
- a data path tailored to exactly your layers and dimensions,
- weights baked into on‑chip storage in a way the hardware can stream through very efficiently,
- control logic that doesn’t need to handle arbitrary graph structures – just your graph.
From an engineering point of view, that’s not absurd. We’ve done this before:
- fixed‑function video encoders/decoders,
- crypto accelerators,
- DSP blocks for very specific workloads.
The new part is applying that idea to large language models.
## Why you’d even consider doing this
If you have the scale and the right use case, model‑specific silicon can give you three big wins:
### 1\. Lower latency
No generic scheduler, no "one size fits many" kernels. Just one model, mapped tightly onto the hardware.
That means:
- fewer indirection layers,
- less overhead per token,
- and more of the chip’s energy going directly into useful compute.
In agentic environments where an assistant calls multiple models and tools in a chain, shaving tens of milliseconds off each call adds up quickly.
### 2\. Better energy efficiency
If your chip only has to do one thing well, you can:
- optimise data movement patterns aggressively,
- tune memory and compute exactly to your model’s needs,
- drop features and flexibility you don’t need.
That can translate into a much better “tokens per watt” number compared to a big, flexible GPU.
### 3\. Predictable cost per token
If you know how many chips you need to serve a given load, and each chip has a stable performance profile, you can calculate your cost per token more like you’d calculate the cost of a database transaction.
For very large, stable workloads, that kind of predictability can be a big deal.
## When this could make sense
All of this sounds nice in theory, but when would I actually consider something like this?
A few scenarios where it isn’t crazy:
- **You have a very stable, high‑volume model workload.**
You’re not constantly swapping models in and out. You run the same model (or a small family of models) millions or billions of times per day.
- **Latency is a hard requirement.**
You’re in a domain where even tens of milliseconds matter – trading, real‑time control systems, agent chains with strict SLAs.
- **Your model changes infrequently and in controlled ways.**
You’re not shipping a new version every two days. When you do update, you can plan ahead.
Think about:
- a customer service assistant that always uses the same fine‑tuned model,
- a translation engine for a specific set of languages,
- a ranking/model inference service inside a search or recommendation system.
In those cases, you could imagine moving from “generic hardware + model” to “hardware that *is* the model”.
## Why I’d still be careful
As attractive as the performance story is, there are a few obvious trade‑offs.
### 1\. Flexibility and update cycle
Models are changing fast. Architectures evolve, training techniques evolve, input distributions change.
If your model is baked into silicon, you need to answer:
- How often can I update this without losing the benefit?
- What if I discover a subtle issue in the model after it’s in production on hardware?
- Do I need to keep multiple generations of chips around, each tied to slightly different versions?
Companies like Taalas claim they can go from model to chip in a couple of months. That’s impressive if true – but it’s still not the same as deploying a new checkpoint to GPUs this afternoon.
### 2\. Vendor lock‑in and ecosystem
General‑purpose hardware (GPUs, NPUs) benefits from broad ecosystems:
- multiple vendors,
- open toolchains,
- lots of battle‑tested kernels and frameworks.
With model‑specific ASICs you’re much more dependent on:
- a single vendor’s toolchain,
- their ability to stay in business and support the chips,
- their roadmap for new model architectures.
That might be fine for some high‑value, high‑volume workloads. But it’s a strategic bet, not just a technical one.
### 3\. The “good enough” bar for general‑purpose hardware keeps moving
GPUs, NPUs and compiler stacks are not standing still. Every generation brings:
- better support for transformers,
- improved quantisation and kernel fusion,
- clever scheduling and batching.
The question is not “can a custom chip beat a GPU on one benchmark?” – that’s almost always possible. The question is:
> Is the extra performance worth the loss in flexibility and the complexity of a custom hardware pipeline?
## How this fits into the bigger picture
I don’t see hard‑wired LLMs replacing general‑purpose AI hardware. I see them as one more point on the spectrum:
- Cloud GPUs/TPUs: maximum flexibility, high power, high cost, fast iteration.
- On‑device NPUs / edge chips: balanced flexibility and efficiency for a wide range of models.
- Model‑specific ASICs: minimal flexibility, maximum efficiency for a fixed workload.
If you’re building systems in 2026, it’s worth knowing that this option exists – especially if:
- you run a small number of models at very high scale,
- latency and energy use materially affect your business,
- and you’re willing to trade flexibility for performance.
For most projects, we’ll stay in the world of GPUs, NPUs and maybe some edge accelerators. But if the idea of "LLM on a chip" keeps showing up in headlines, it’s good to understand what’s actually behind it – and when it might make sense to hard‑wire intelligence into silicon on purpose.
For more background on Taalas’ positioning and claims, you can check their coverage and materials here:
- [Coverage of Taalas’ "hard-wired" model chips](https://wccftech.com/this-new-ai-chipmaker-taalas-hard-wires-ai-models-into-silicon-to-make-them-faster/?ref=blog.bajonczak.com)
- [Taalas website](https://taalas.com/?ref=blog.bajonczak.com) (if you want to read their own description and specs)
### Why I Built Bag-Tag.de: A Visible, Web-First Tag for Everyday Bags
URL: https://blog.bajonczak.com/why-i-built-bag-tag-de-a-visible-web-first-tag-for-everyday-bags/
Last updated: 2026-02-25T16:40:31.000Z
Sometimes the best ideas start with something small and annoying.
In my case it was luggage.
Suitcases and backpacks all look the same once they’re on a conveyor belt or stacked in a hallway. The usual paper tags tear off, cheap plastic ones break, and even if they survive, nobody actually reads the tiny text unless something goes wrong.
I wanted something different:
- a tag that is **visibly mine** (not just a discreet little label),
- a way for someone to contact me if they find my bag,
- a way for me to manage multiple tags without being locked into one ecosystem,
- and a solution that isn’t restricted to the Apple universe.
That’s how **Bag-Tag.de** started.
In this post I want to tell the story behind it, show how it works from the user’s perspective, and share a few thoughts about where it fits compared to things like AirTags.
## Why I didn’t just buy another AirTag
AirTags are great for what they are: tiny location beacons that piggyback on the Apple device network. But they come with a few constraints:
- they live fully inside the Apple ecosystem,
- they are invisible unless you know they’re there,
- and they solve a different problem: “where is this thing?” – not “who does this belong to and how do I contact them?”.
I was looking for something else:
- a tag that is **obviously visible** and stands out on a bag,
- a **simple contact flow** if someone finds it (scan, see info, get in touch),
- a small **web-based backend** where I can manage multiple tags under one account,
- and the freedom to use it regardless of whether I or the finder are on iOS, Android or something else.
So instead of trying to bend AirTags into something they’re not, I decided to build a system that’s deliberately simple, visible and web-first.
## What a Bag-Tag actually is
A Bag-Tag consists of two pieces:
1. a physical tag that you attach to your bag (with a bold, high-contrast design so it stands out),
2. a small online profile that lives behind a QR code or short URL.
The idea is:
- you customise the tag once (design, colours, maybe a name or icon),
- you attach it to your luggage, backpack, instrument case, kids’ bags – whatever you want,
- if someone finds your bag, they scan the code or open the URL and see exactly the information you chose to share,
- you can update that information later without reprinting the physical tag.
This is what a tag page looks like right now (simplified):
- a clear heading with the tag ID or name,
- some key information about the item (optional),
- contact options (for example an email form or other contact channel),
- and whatever extra hints you want to show (e.g. “this belongs to a child”, “medical equipment”, etc.).
From the outside it’s “just” a QR + website combo. Under the hood there’s a bit more structure.
## Managing multiple tags with one account
One of the design goals was: this should scale beyond a single suitcase.
So Bag-Tag.de lets you create an account and manage multiple tags from one place:
- you can register several tags (for different bags, family members, use cases),
- give each tag its own label and contact info,
- and see which tags are active.
Internally, each tag has a unique ID and is connected to your account. The public URL (like the example you’ve seen) only shows what’s necessary to help the finder reach you – nothing more.
This separation is important: if you lose a bag, you want people to reach you easily. But you probably don’t want to dump all your personal details directly on a piece of plastic that can be photographed and posted anywhere.
## Why the tags are deliberately not subtle
I didn’t want Bag-Tags to be “just another discreet accessory”. I wanted them to be visually loud enough that:
- you can spot your bag quickly on a conveyor belt,
- other people notice there is a tag they can interact with,
- and it feels more like a statement than a hidden technical gadget.
That’s why the designs on the homepage look bold and colourful rather than minimal and grey. In a sea of anonymous black suitcases, a tag that pops is a feature, not a bug.
From a very practical perspective it means:
- you see your stuff faster,
- you reduce the chance that someone grabs your bag by mistake,
- and if something gets lost, the person who finds it has a clear visual signal: “scan me, there’s more info here”.
## How this compares to AirTags and friends
This is not meant to compete with AirTags – it’s solving a complementary problem.
**AirTag / similar:**
- “I don’t know where my bag is right now; show me its approximate location on a map.”
- Works via Apple’s network of devices.
- Great for tracking something that may be far away or stolen.
**Bag-Tag.de:**
- “This bag is physically here, someone has it in front of them; how do they know who I am and how to reach me?”
- Works for anyone with a camera and a browser.
- Great for everyday mistakes: wrong bag taken, bag left behind, kids’ bags, shared spaces.
I actually see them as complementary tools:
- if you’re deep in the Apple ecosystem and you want geolocation, an AirTag makes sense,
- if you want a clear, platform-independent way for people to identify and contact you about your bag, a Bag-Tag is a simple, low-tech layer on top.
And if you really care, you can use both. The tag doesn’t care whether there’s an AirTag hiding inside the suitcase as well.
## Implementation thoughts (for the tech-curious)
This blog isn’t a full technical deep dive into Bag-Tag.de, but a few pieces might be interesting if you’re a developer:
- Each tag is essentially a record in a database with a unique ID and a set of fields (owner reference, display name, contact options, status).
- The public-facing URL resolves that ID, loads the minimal data needed and renders a simple, mobile-friendly page.
- The owner side is an authenticated dashboard where you can:
- see all your tags,
- edit what’s shown on each tag page,
- deactivate tags if they’re lost or no longer needed.
The interesting part for me was less the tech stack (it’s fairly standard web tech) and more the balance between:
- giving finders enough information to help you,
- and giving you enough control so you don’t overshare by default.
## Where I want to take it next
Right now, Bag-Tag.de is deliberately simple. That’s a feature, not a limitation.
Possible future ideas I’m thinking about:
- optional notifications when someone visits a tag page,
- temporary messages on a tag (“I’m travelling, please use email instead of phone”),
- different profiles for different contexts (work, personal, kids),
- integration with simple automations (e.g. logging when a tag was scanned).
But even in its current form, it already does the thing I wanted from the beginning:
- my bags are easier to spot,
- people have a clear way to reach me if something goes missing,
- and I’m not locked into a single vendor ecosystem.
If that sounds useful to you, you can see a live example here:
- [Bag-Tag.de](https://bag-tag.de/?ref=blog.bajonczak.com) – homepage with tag designs
- [Example tag view](https://bag-tag.de/5ea2a017-8976-4d28-a2c0-6c80395858a7?ref=blog.bajonczak.com) – how a tag looks when someone scans it
And if you end up creating your own tags, I’d be curious to see where they end up in the world.
### From Meetings to Actions: Sketching an Agentic Workspace Around Transcripts and Jira
URL: https://blog.bajonczak.com/from-meetings-to-actions-sketching-an-agentic-workspace-around-transcripts-and-jira/
Last updated: 2026-02-24T17:17:46.000Z
Most of the tools we use at work today were designed around one simple assumption: *humans do the thinking and tools store the result*.
We write meeting notes. We type Jira tickets. We copy action items into our task managers. We decide what matters and then we try to push that decision through a handful of disconnected systems.
In 2026, that feels increasingly wrong. We’re sitting on audio, video, chat logs and documents that are rich with context – and most of it evaporates after the meeting ends.
In this post I want to sketch what I call an **agentic workspace**, using one concrete example:
- a project meeting is recorded and transcribed,
- an AI agent analyses the transcript,
- creates Jira tickets and follow-ups,
- tracks decisions, and
- can trigger actions later based on what was agreed.
This is not a full product spec. It’s my way of thinking through how such a system could look if we built it on top of the tools many of us already use today.
## What I mean by “agentic workspace”
The phrase sounds bigger than it should. For me, an agentic workspace is simply this:
> A working environment where AI agents are first-class citizens alongside humans, with their own capabilities, memory and responsibilities.
Not just a chatbot in the corner of your screen. Not just a “copilot” that suggests text. Instead, an agent that:
- has clearly defined tools (APIs, integrations),
- can keep context over longer periods of time,
- and doesn’t only react, but also becomes proactive when certain conditions are met.
Meetings are a great example, because today they are often a black hole for information: we talk, we decide, we forget.
## The meeting problem I actually want to solve
I don’t want pretty transcripts. I want fewer dropped balls.
In a typical project meeting today, this is what happens:
- we discuss problems, ideas and options,
- someone (maybe) takes rough notes,
- someone is supposed to create Jira tickets,
- someone is supposed to “bring this topic up again next week”.
One week later:
- nobody remembers exactly what was agreed,
- tickets are missing or too vague,
- and decisions exist only as “didn’t we say we would…?”
These are exactly the places where an agent can help – not as a meeting replacement, but as:
- a silent listener,
- an analysis layer,
- and an integrator into Jira, Teams, email, etc.
## A high-level architecture sketch
This is roughly how I imagine the setup:
1. **The meeting is recorded** (e.g. in Teams or Zoom).
2. **Audio is transcribed** (Azure Speech, Whisper, whatever you prefer).
3. **An agent** receives the text and metadata (participants, project, date) as input.
4. The agent has access to a few well-defined tools:
5. Jira API (create issues, add comments),
6. a project knowledge store (Confluence, SharePoint, or a vector index),
7. notification channels (Teams, email),
8. its own “Decisions & Actions” database.
9. After the meeting, the agent analyses the transcript:
10. What was discussed?
11. Which tasks were assigned?
12. Which decisions were made?
13. Which questions remain open?
14. Based on that, the agent creates:
15. Jira issues with meaningful descriptions,
16. a meeting summary,
17. a list of decisions,
18. a set of follow-ups with dates or triggers.
The point is: **we don’t want someone to spend two hours doing “admin” after the meeting**. We want that person to only review whether what the agent prepared is correct.
## From transcript to Jira tickets: how an agent could work
The interesting part is the path from a raw transcript to concrete tickets.
A transcript snippet might look like this:
```text
PM: We’ve had three incidents this month where the payment webhook timed out.
Dev: Right, we saw that. The retry logic is still the old version.
PM: Can we create a ticket to refactor that and add better logging?
Dev: Yes, assign it to me in the payments board. We should also add an alert in case the error rate spikes.
```
An agent receiving this transcript could “think” like this (simplified):
1. Recognise that a task was defined (“create a ticket to refactor that and add better logging”).
2. Recognise that this belongs to a specific area (“payments board”).
3. Recognise that there is an additional request (“add an alert…”).
4. Propose two tickets:
5. Refactor payment webhook retry logic and improve logging.
6. Add alerting for payment webhook error rate spikes.
7. Use the Jira API to create draft issues for these.
8. Attach them to the right project/board.
9. Assign them to the mentioned person (“Dev”).
10. Attach the relevant transcript snippet as context.
In code, this might roughly look like (pseudo TypeScript):
```ts
type MeetingAction = {
type: 'ticket' | 'decision' | 'question';
summary: string;
details: string;
assignee?: string;
projectKey?: string;
};
async function processMeetingTranscript(transcript: string) {
// 1) Ask the agent/LLM to extract structured actions
const actions: MeetingAction[] = await agent.extractActions(transcript);
for (const action of actions) {
if (action.type === 'ticket') {
await createJiraIssue({
projectKey: action.projectKey ?? 'PAYMENTS',
summary: action.summary,
description: action.details + '\n\nSource: meeting transcript snippet',
assignee: action.assignee
});
}
if (action.type === 'decision') {
await storeDecisionInDb(action.summary, action.details);
}
}
}
```
The “agentic” part lives inside `agent.extractActions()`: that’s where you use a model (ideally one that knows your project context) to turn free-form language into structured objects.
Jira remains Jira. You’re not building a new ticketing system. You’re building a layer that connects meetings with Jira.
## Tracking decisions separately from tickets
Tickets are important, but for me, a second piece is just as interesting: **decisions**.
A lot of later discussions revolve around what we “thought we had decided”:
- “Didn’t we agree not to ship feature X before Q4?”
- “Who actually gave the go for that new API structure?”
In an agentic workspace, I’d treat decisions as their own data type, for example:
- Decision: “We will deprecate endpoint /v1/orders by end of Q3.”
- Context: project, participants, date, meeting link.
- Related: Jira tickets, PRs, docs.
The agent can extract these decisions from the transcript and store them in a dedicated table:
```ts
type Decision = {
id: string;
summary: string;
details: string;
decidedAt: string;
participants: string[];
meetingUrl?: string;
};
async function storeDecisionInDb(summary: string, details: string) {
const decision: Decision = {
id: crypto.randomUUID(),
summary,
details,
decidedAt: new Date().toISOString(),
participants: [], // from meeting metadata
meetingUrl: '' // link to recording
};
await db.insert('decisions', decision);
}
```
Later, the same or a different agent can use this decision database to:
- push decisions into Confluence/SharePoint pages,
- remind people of previous agreements during new discussions (“we already decided this on 12 Feb…”),
- or generate reports (“what were the major decisions last quarter?”).
## Follow-ups and reminders: where agents become really useful
The last building block is follow-ups. This is the part humans love to postpone – and then forget.
An agent can apply relatively simple rules like:
- “If a follow-up time is mentioned in the meeting (‘next week’, ‘in two days’), create a reminder.”
- “If a ticket created from a meeting is still in ‘To Do’ after X days, remind the participants.”
Technically, this looks like a normal reminder system:
```ts
type FollowUp = {
id: string;
dueAt: string;
description: string;
relatedTicketId?: string;
channel: 'teams' | 'email';
recipients: string[];
};
async function scheduleFollowUp(followUp: FollowUp) {
await db.insert('followups', followUp);
}
async function runFollowUpCron() {
const now = new Date().toISOString();
const due = await db.query('followups').where('dueAt <= ?', now);
for (const f of due) {
await notify(f);
await db.delete('followups', f.id);
}
}
```
The difference compared to a classic reminder system is that:
- the follow-ups don’t have to be entered manually,
- the agent extracts them from the meeting language (“let’s revisit this in two weeks”),
- and the agent has enough context to send meaningful messages.
That could look like this:
> “Two weeks ago you decided to refactor the payment webhook retry logic. The ticket is still in ‘To Do’. Do you want to: (1) bump the priority, (2) change the due date, (3) update the decision log?”
## What I would and wouldn’t trust an agent with
As nice as all this sounds, I still wouldn’t blindly hand everything to an agent, even in an agentic workspace.
Things I would trust an agent with:
- Structuring transcripts into topics, actions and decisions.
- Creating draft tickets that a human quickly reviews.
- Documenting decisions and follow-ups.
- Sending reminders.
Things I’d be careful with:
- Creating and assigning tickets in critical projects without review.
- Formulating binding promises (“we will deliver X by Y”) without human confirmation.
- Making security- or compliance-relevant decisions.
The balance for me is clear: the agent should remove repetitive, boring work and make sure less falls between the cracks – but responsibility and final decisions stay with the team.
## Conclusion: an agentic workspace starts with habits, not tools
For me, the step towards an agentic workspace is not to introduce a big new platform immediately.
It starts with:
- identifying workflows where a lot of context gets lost (meetings are an obvious candidate),
- defining agents that can help there in a meaningful way (transcripts, tickets, decisions, follow-ups),
- and wiring them into existing systems (Jira, M365, SAP, whatever you use) in a clear and limited way.
The meeting example here is just a starting point. The same pattern applies to other areas:
- code reviews (an agent observes recurring themes and suggests improvements),
- infrastructure changes (an agent links changes to incidents and runbooks),
- customer communication (an agent summarises support tickets and feedback per customer).
The core stays the same: **agents shouldn’t just react when we talk to them – they should actively help us work.** And meetings, where we currently say too much and record too little, are a good place to start.
### Amazfit Bip 6 Review: A Practical Budget Smartwatch for Everyday Use
URL: https://blog.bajonczak.com/amazfit-bip-6-review-a-practical-budget-smartwatch-for-everyday-use/
Last updated: 2026-02-23T15:41:16.000Z
Fitness trackers and smartwatches have a problem I don’t like to admit as a tech person: most of them are overkill for what people actually need.
For many use cases you don’t need the latest Apple Watch or a giant Garmin. You need something that:
- shows the time and notifications reliably,
- tracks steps, heart rate and sleep without babysitting it,
- has a battery that doesn’t die every second day,
- and doesn’t cost half your phone.
That’s why the Amazfit Bip line has always been interesting to me. The **Amazfit Bip 6** continues that idea: an inexpensive smartwatch with long battery life, solid fitness tracking and just enough “smart” features.
I haven’t been paid for this review and I didn’t get the watch for free. This is my honest look at the Bip 6 based on my own research, the way I (and people around me) actually use these devices, and how it fits into a realistic setup for everyday use.
Some of the links below are Amazon affiliate links. If you buy through them, I earn a small commission at no extra cost to you.
## What the Amazfit Bip 6 is trying to be
On paper, the Bip 6 sits in a sweet spot:
- budget-friendly price,
- bright color display,
- GPS and multiple sport modes,
- heart rate and sleep tracking,
- up to around two weeks of battery life in normal use (depending on how many features you turn on).
That makes it ideal for three types of people I keep running into:
- People who want to move more and get basic health stats, but don’t care about every advanced metric.
- People who are tired of charging their watch every day.
- People who want something they can actually recommend to parents or non-techy friends without spending an hour on setup.
If you want a mini smartphone on your wrist, this is not it. If you want something that quietly tracks your basic health and doesn’t constantly ask for attention, it’s exactly in that zone.
## Display and comfort: good enough for everyday use
The Bip 6 uses a color display that’s easy to read indoors and fine outdoors as long as you don’t stand in direct, harsh sunlight the whole time. It’s not a flagship AMOLED panel like on more expensive watches, but for the price and the use case (glanceable information) it does its job well.
What I care about here is:
- Can I read the time and my stats without squinting?
- Is the screen responsive enough when I swipe and tap?
- Does it feel okay to wear all day, including during sleep?
The general consensus from reviews and user feedback is:
- yes, it’s readable,
- yes, the UI is responsive enough for normal use,
- and the form factor is light and comfortable enough to wear 24/7.
That last part matters more than people think. A fitness watch that you take off every evening because it’s annoying on the arm is basically useless for sleep tracking, and that’s one of the main reasons to have it.
## Battery life: where the Bip 6 makes a lot of sense
This is the main reason I’m even interested in devices like this: I don’t want to turn my watch into a second thing that constantly needs charging.
The Bip 6 is rated for up to about two weeks of battery life under “normal” mixed use, and closer to a week if you really push GPS and notifications. As always, real life depends on:
- how many workouts you track with GPS,
- whether you use always-on display or not,
- how often the watch lights up with notifications.
But even if you only get one week in your personal setup, that’s a huge difference compared to daily charging. It turns the watch into something you treat more like a normal watch with superpowers, not another gadget to manage.
For people like parents or relatives who are not into tech, this is a big deal: they don’t need to remember another daily charging ritual. In practice, “I charge it every Sunday while I watch TV” is a realistic pattern.
## Health and fitness tracking: enough for most people
On the fitness side, the Amazfit Bip 6 covers the basics well:
- step counting,
- continuous heart rate monitoring,
- sleep tracking (with sleep stages),
- GPS-based outdoor activity tracking,
- multiple sport modes (running, cycling, walking, some indoor workouts, etc.).
From the reviews I’ve read and the data people share, the accuracy is “good enough for normal users”:
- Steps: in line with what you’d expect from a wrist device.
- Heart rate: fine for general health tracking and most workouts, not a medical-grade device.
- GPS: okay for everyday runs and walks, might not match a high-end sports watch exactly, but close enough to see where you went and how far.
If you’re training for a marathon and obsessing over pace and intervals, you might want a higher-end sports watch. If you want to see how much you move, if your resting heart rate goes up after too many late nights, and if you’re actually sleeping as much as you think – the Bip 6 is perfectly fine.
## Smart features: notifications, calls and the basics
Smartwatch-wise, the Bip 6 stays on the simple side, which I actually see as a feature here.
What it does well:
- Notifications from your phone (messages, calls, apps – configurable in the companion app).
- Call alerts and basic call management (depending on your phone/platform).
- Activity reminders (get up and move if you’ve been sitting too long).
- Simple controls like timers, alarms, weather.
What it doesn’t try to do:
- Install a million third-party apps on your wrist.
- Replace your phone for messaging, browsing, etc.
- Offer contactless payment with every possible system.
That’s perfectly fine for many use cases, especially if the Bip 6 is a “health companion” and not your primary smart device.
## Who I think the Amazfit Bip 6 is for
In my head, the Bip 6 is ideal for a couple of specific profiles:
### 1\. The “I just want something that works” person
They don’t care about brands or ecosystems. They want:
- steps,
- heart rate,
- sleep stats,
- a watch that doesn’t die every two days.
The Bip 6 ticks those boxes without being fussy. Once set up, it just runs.
### 2\. The parent or relative you don’t want to overload
If you’ve ever tried to put a high-end smartwatch on the wrist of someone who doesn’t live in tech, you know the pattern:
- too many options,
- too many notifications,
- too many things that can go wrong.
From what I’ve seen in real-world use, the Bip 6 hits a nice point: easy to use, clear interface, enough health data to be useful without overwhelming them.
### 3\. The budget-conscious user who still wants real tracking
There are cheaper no-name trackers out there, but they often come with questionable apps, poor updates and weird behaviour over time.
Amazfit as a brand has been around for a while, their app is decent, and they keep updating devices. For the price range, that’s not a bad deal.
## What I don’t like or wouldn’t expect from the Bip 6
I don’t want to pretend it’s perfect. There are a few things I wouldn’t expect much from at this price point:
- No deep app ecosystem – you’re mostly using what’s built in.
- No full-blown smartwatch experience like on Apple Watch or Wear OS.
- Health metrics are fine for trends, but not a substitute for medical devices.
If you buy it with realistic expectations – as a solid budget health tracker with some smart features – you’re in a good place. If you expect it to replace a 400+ Euro flagship smartwatch, you’ll be disappointed.
## Amazfit Bip 6: my bottom line
For me, the Amazfit Bip 6 is one of those devices that make a lot of sense in the real world, even if they don’t generate big headlines:
- It’s affordable.
- It tracks the things most people care about.
- It has good battery life.
- And it’s simple enough that you can actually recommend it to non-techy people.
If you’re looking for a watch that quietly does its job and doesn’t try to become a second smartphone on your wrist, the Bip 6 is worth a look.
Here are some example links if you want to check it out on Amazon:
- [**Amazfit Bip 6 (standard color)**](https://amzn.to/4tQS6Lx?ref=blog.bajonczak.com)
- [**Replacement straps and accessories**](https://amzn.to/4tQS6Lx?ref=blog.bajonczak.com)
If you buy through these links, you support my work on this blog without paying anything extra. And if you end up trying the Bip 6, I’d be curious to hear how it works for you in everyday life.
### My 2026 Take on MCP and Microsoft Foundry
URL: https://blog.bajonczak.com/my-2026-take-on-mcp-and-microsoft-foundry/
Last updated: 2026-02-22T11:40:48.000Z
When you read Microsoft marketing right now, it’s very easy to lose track of what actually matters.
There is Azure, there is Copilot everywhere, then there are “agents”, Foundry, MCP (Model Context Protocol) and almost every week a new product that promises to automate your entire job.
If you come from an integration and engineering background like I do, a different question pops up:
**What does any of this mean if you already live in SAP, Azure and Microsoft 365 – and you’re not just playing with ChatGPT in a browser tab?**
In this article I try to look at MCP and Microsoft Foundry from exactly that angle:
- not as marketing buzzwords,
- but as a toolbox for people who already use APIs, automation and enterprise systems every day.
I’ll stay practical: how I would think about this as a “SAP/Azure/integration person”, and where I see real use cases.
## What is MCP, in normal language?
Officially, MCP stands for “Model Context Protocol”. The basic idea is simple, even if the docs can get abstract quickly:
- An LLM (or more generally: an “agent”) should be able to talk to external systems – tools, databases, APIs.
- Instead of every integration looking different, there is a **standard protocol** for how a tool/service exposes itself:
- “I am calendar”,
- “I am SAP backend”,
- “I am Azure DevOps”,
- “These are the functions I can perform and the data I can return.”
The LLM no longer needs to understand a bespoke plugin format for each integration. It “speaks MCP” and can talk to all tools that speak MCP.
If you’ve ever built an API gateway or ESB, this feels familiar:
- In the past, you normalised HTTP/REST, SOAP, OData, etc.
- Now you normalise **“tool capabilities” for AI agents**.
So you can think of MCP – a bit roughly – as:
> “OpenAPI for tools an AI agent can work with.”
Microsoft Foundry builds exactly on top of this: it’s an environment where you can define, test and connect such agents to your systems.
## Why this matters if you already live in SAP, Azure and M365
If you’re in the SAP/Microsoft world, you probably know this picture:
- SAP or another ERP as your **system of record**
- Microsoft 365 (Teams, Outlook, SharePoint, OneDrive) as the **place where people actually work**
- Azure as your **integration and automation platform** (Functions, Logic Apps, Event Grid, Storage, etc.)
Today we connect these worlds with:
- classic integrations (REST/OData, SAP BTP Integration Suite, Azure API Management)
- manual workflows (Power Automate, Logic Apps)
- our own services (Node/.NET backends in Azure)
All of that stays. MCP and Foundry do not replace these pieces – they sit **on top** of them.
The difference is this:
Instead of a fixed Power Automate flow, you can tell an agent:
> “When a new order over 100k comes in from SAP:
> – fetch relevant customer data,
> – check open tickets (e.g. in Jira/Azure DevOps),
> – write a summary into a Teams channel,
> – and suggest a next step.”
For that, the agent must talk to:
- SAP,
- your ticketing system,
- Teams/Graph,
- maybe your monitoring stack.
We already know how to integrate those systems. What we didn’t have until now was a **standard way to expose them to AI agents**. MCP is that missing layer.
## How I imagine an MCP/Foundry integration in practice
Let’s walk through a simplified scenario as I would picture it in 2026:
- You have a few existing APIs:
- SAP orders via OData/REST
- Azure DevOps work items
- Microsoft Graph for Teams/notifications
- You put a small layer in front of these APIs (Azure API Management or a custom backend) that speaks MCP.
- This layer offers the agent a set of clearly defined actions, for example:
- `getSalesOrderById(orderId)`
- `listOpenIncidentsForCustomer(customerId)`
- `postTeamsMessage(channelId, text)`
In MCP terms, these are “tools” with functions.
The agent you define in Foundry doesn’t see raw SAP or Graph – it sees these tools:
- `sapOrdersTool`
- `incidentTool`
- `teamsMessagingTool`
Its job is to decide, based on natural language and context:
- which tools to call,
- in which order,
- and how to combine the results into something useful for a human.
The important part: you separate **intelligent orchestration** from **backend plumbing**.
Your backend still has clean APIs and policies. MCP is just the adapter layer for the agent.
## What an MCP tool for SAP might look like
Let’s stay on the idea level. Imagine a small Node/Express service running in Azure that talks to SAP and exposes an MCP tool.
```ts
// sapOrdersTool.ts – simplified
import { createMcpTool } from 'some-mcp-sdk';
import { getOrderFromSap } from './sapClient';
export const sapOrdersTool = createMcpTool({
name: 'sap-orders',
description: 'Read basic order information from SAP',
functions: [
{
name: 'getOrderById',
description: 'Load a sales order by ID from SAP',
inputSchema: {
type: 'object',
properties: {
orderId: {
type: 'string',
description: 'The SAP sales order number'
}
},
required: ['orderId']
},
handler: async ({ orderId }) => {
const order = await getOrderFromSap(orderId);
// Only return what the agent actually needs
return {
orderId: order.id,
customerId: order.customerId,
amount: order.netAmount,
currency: order.currency,
status: order.status
};
}
}
]
});
```
From the agent’s perspective, this is all it needs to know:
- there is a tool called `sap-orders`,
- it has a function `getOrderById(orderId)`,
- it returns a JSON object with the fields above.
The agent doesn’t care whether there is OData, BTP, Destinations, S-Users or HANA behind it. That’s still your job as integration engineer – and that’s exactly where your expertise stays relevant.
## What changes for me as a developer
If you ignore the hype and look at the concrete impact, I see three main changes:
### 1\. Thinking in capabilities instead of endpoints
Instead of “I have a REST API with 10 endpoints”, you start thinking:
“I expose three capabilities to an agent: read orders, list incidents, post messages.”
That mindset shift forces you to design better APIs, because you see them through the agent’s eyes.
### 2\. Decoupling human interaction and system interaction
Before:
- User clicks in a UI → app calls APIs.
With an agent:
- User says or types “What’s going on with customer X?” → agent decides which tools to call and how.
Your job: define tools cleanly, set up logging/monitoring, enforce boundaries.
### 3\. Governance for AI tool access
As soon as an agent has tools that can change SAP or other critical systems, you are in classic governance territory:
- Authentication: which user identity does the agent represent?
- Authorization: what is it allowed to do?
- Audit: who called which function with which parameters and why?
None of this is new (IAM, RBAC, logging, all well-known), but you now have to apply it to agents, not just UIs and services.
## Where MCP/Foundry already make sense – and where I’m cautious
Where I see real value today:
- Whenever you already have several APIs that are wired into multiple places. MCP lets you define them once as tools, and then you can build agents that act as flexible clients.
- For complex, context-heavy workflows. For example: “Summarise all relevant topics for customer X” – the agent can pull SAP orders, tickets, emails, chats, monitoring data. Doing that manually is painful; with well-defined tools it becomes realistic.
Where I’m more cautious:
- Adding MCP/Foundry “for show” when a simple REST client or Power Automate flow would do the job.
- When the underlying APIs and data models are bad. An agent won’t magically fix them.
- When people assume the agent “won’t break much” without doing the security and governance homework.
## How I would start today
If I were to start in a SAP/Azure/M365 landscape today, I’d keep it small and focused:
1. Pick a tiny scenario where a human already does a lot of manual context gathering, for example:
“Customer X calls and I want a one-paragraph summary of everything relevant.”
2. Identify existing APIs:
– SAP: customer, open orders, open invoices
– Azure DevOps / Jira: open tickets
– Exchange/Graph: recent emails (if allowed)
3. Build a small backend that “tool-ises” these APIs:
– one MCP tool per logical capability.
4. Define one agent in Foundry that only knows these tools and has exactly one job:
“Given a customer name or ID, produce a useful summary.”
5. Log everything, keep the scope tight, and watch how the agent behaves before giving it more power.
That’s not about replacing people. It’s about automating the context-gathering part that currently eats a lot of time for developers, consultants and support engineers.
## Conclusion: MCP/Foundry as “AI ESB” for people who already know ESBs
For me, MCP and Microsoft Foundry in 2026 are not magic. They are a logical next step of what we already do:
- design clean APIs and services,
- standardise integration,
- add automation where it creates real value.
The difference is that now we’re not just connecting systems to systems, but also **agents that understand natural language and orchestrate tools**.
If you come from the SAP/Azure/Microsoft world, the real questions aren’t “Do we need this?” but:
- “Which capabilities would I expose to an agent in my context?”
- “Where do I already have APIs that fit well?”
- “How do I keep it secure and auditable?”
Once you answer those, MCP stops feeling like hype and starts looking like just another useful piece in your architecture toolbox – one that happens to speak the same language as modern AI agents.
### How I Use Vibe Coding to Go From Idea to Client-Ready PoC in a Day
URL: https://blog.bajonczak.com/how-i-use-vibe-coding-to-go-from-idea-to-client-ready-poc-in-a-day/
Last updated: 2026-02-22T11:00:13.000Z
A few years ago, building a proof of concept for a client felt like moving a mountain.
You’d spend days or weeks just to get a basic skeleton running:
- auth, routing, a half-decent UI,
- a couple of API calls,
- and in the end it still looked like a developer demo.
The client often didn’t see their world in it. The UI didn’t match their language, the data was generic, and we sometimes didn’t even get to the real conversation: *“Is this the right thing to build together?”*
In 2026 that feels very different. With AI assistance, good UI components and boilerplates, I can put something in front of a client in a day that already feels close to a product – even if the logic behind it is still just “vibe coding”.
In this post I want to write down how I do that: what I mean by “vibe coding”, how I use it to get to PoCs quickly, and where I draw the line.
## What I mean by “vibe coding”
When I say “vibe coding”, I don’t mean “I randomly hack things together and call it AI”.
I mean a specific style of working:
- **Goal:** get to a clickable, good-looking demo in a short time that feels familiar for the client.
- **Focus:** UX, flow, domain language, use case – not perfect architecture.
- **Tools:** AI assistant in the editor, UI kits, generated boilerplate, rapid prototyping frameworks.
The result is not a “finished product”. It’s a strong first draft where:
- the client recognises their own world,
- we can talk about real workflows,
- and we have a base to put proper application logic behind later.
I don’t try to show technical perfection in a vibe-coded PoC. I try to show the **feeling** of a future system.
## Why vibe coding works well for client demos
I use PoCs mostly for three reasons:
**1\. Testing understanding**
The client tells you about their world, but nobody knows at the beginning if you actually share the same picture. A quick PoC is a mirror: “Is this what you meant?”
**2\. Building trust**
When the client sees a clickable UI within a day, using their terms, their processes and maybe even realistic (anonymised) data, the conversation is very different from a deck of slides.
**3\. Reducing risk**
I’d rather find out early that something doesn’t fit than after three months of “real” development.
In the past this was expensive, because getting to a “nice” PoC almost meant building a mini product. Today I can generate a lot of the boring parts (layout, structure, simple components) and spend my time on what actually matters for the client.
## My typical flow when I vibe-code a PoC
Over time I’ve fallen into a pattern that works well for most scenarios, whether it’s about SAP data, Azure services, or Microsoft 365 integration.
### 1\. I capture the story, not a 30-page spec
I start with a short narrative description:
- Who is the user?
- What does their normal day look like?
- What hurts today?
- What would a “good” day look like once this is solved?
That’s usually 10–20 sentences, not a huge requirements document.
I put it into a simple Markdown file inside the repo, e.g.:
```
User: production line lead
Problem: every week they manually pull data from SAP to see utilization.
Current: exports to Excel, manual aggregation, no live view.
Goal:
- dashboard with utilization per line
- filters by time range
- drill-down into orders / machines
- export if needed, but no more Excel as the main source
```
That’s enough context to start shaping a UI.
### 2\. I let AI build the skeleton, not the full body
I use AI to generate the project skeleton: layout, routing, some boilerplate components.
For example, if I use a React/Next.js stack, I might ask my editor assistant:
> “Create a minimal Next.js app with a dashboard layout: sidebar on the left, top bar, main content area with placeholders for charts and a table. Use a modern UI library. Keep the layout clean and responsive.”
That gives me something like:
```tsx
export default function RootLayout({ children }: { children: React.ReactNode }) {
return (
{/* Top bar */}
{children}
);
}
```
Is that perfect code? No. Is it a fast way to get a decent-looking layout I can build on? Absolutely.
The important part: I treat AI output as a starting point, not as something I’d ship to production.
### 3\. I bring the client’s domain into the UI as fast as possible
This is the key step for the “vibe”: I want the client to recognise their world on the screen.
That means:
- real field names (Customer, Order ID, Machine, Status …)
- real process steps (“Approve”, “Schedule”, “Escalate”)
- realistic (but anonymised) data
I often create a quick JSON with example data that fits the domain:
```ts
const exampleOrders = [
{
orderId: '5001234',
customer: 'Meyer Maschinenbau GmbH',
status: 'In Progress',
line: 'Line A',
startDate: '2026-02-20',
endDate: '2026-02-23',
utilization: 87
},
// ...
];
```
Then I wire this into a simple table component:
```tsx
export default function DashboardPage() {
return (
Production Overview
Order
Customer
Line
Utilization %
{exampleOrders.map(order => (
{order.orderId}
{order.customer}
{order.line}
{order.utilization}
))}
);
}
```
It’s not a masterpiece, but after a few hours I have:
- a layout,
- domain-specific labels,
- navigation and click paths the client understands.
The vibe is there.
### 4\. I focus on clickable happy paths, not full business logic
For a PoC I don’t try to cover every edge case. I build:
- one or two end-to-end paths that show:
- how you get from overview to details,
- how you filter and search,
- how you trigger an action (create a work order, notify a team, export something).
The actions in the PoC often still hang off simple mocks, for example:
```ts
async function createWorkOrder(orderId: string) {
// In real life: call SAP or another backend
await new Promise(resolve => setTimeout(resolve, 500));
return { success: true, workOrderId: 'WO-12345' };
}
```
The important thing is that the **flow** is right:
- Which buttons exist?
- Which information does the user see before deciding?
- What happens after an action completes?
The real SAP integration, auth, role model etc. comes later – once we’re sure we’re building the right thing.
## Guardrails so vibe coding doesn’t turn into production code by accident
There are a few rules I try to stick to.
### 1\. I mark PoC code clearly
I keep PoC repos and production repos separate. If I do copy code over, it’s:
- only after a conscious review,
- usually just UI components, not business logic,
- and often after a refactor.
In code and docs I’m explicit that something is a PoC.
### 2\. I never sell a PoC as a finished product
During demos I say upfront:
> “This is a quick prototype so we can see if we’re heading in the right direction. The real solution would have a different backend – properly integrated with SAP/Azure/M365, with security, logging, etc.”
That builds trust instead of unrealistic expectations.
### 3\. I document the path from PoC to a real system
At the end of a PoC I write down briefly:
- what worked well,
- which parts are PoC-only,
- which architecture I’d suggest for a production implementation.
Sometimes that’s just a small diagram, but it helps everyone see the bridge from “cool prototype” to “serious project”.
## How AI fits into this without taking over
AI is my booster during vibe coding, not the autopilot.
I use it for:
- layouts, basic components, routing,
- suggestions for API clients and form handling,
- generating realistic fake data.
I don’t use it for:
- core business logic,
- security-sensitive parts,
- performance-critical sections.
Especially in client projects I care a lot that the code which eventually goes live isn’t just AI output with a logo on top. The PoC can be “vibey”; the real application should be solid.
## Conclusion: vibe coding as a conversation starter
For me, vibe coding is a way to move faster towards the conversations that really matter:
- Clients see something that looks and feels like their world.
- They can say “yes, this is how we imagine it” or “no, this would never work for us”.
- We spend less time guessing in documents and more time iterating on real flows.
As long as it’s clear that:
- a PoC is not a product,
- the prototype doesn’t go to production unchanged,
- and we’ll follow up with proper architecture and implementation,
vibe coding is one of the most useful ways I’ve found to combine AI, modern tools and practical engineering. It saves me time, gives clients a better feeling – and helps us both figure out much faster whether an idea should turn into a real project.
### When Bet365 Goes Dark: What a Betting Outage Says About the Cloud in 2026
URL: https://blog.bajonczak.com/when-bet365-goes-dark-what-a-betting-outage-says-about-the-cloud-in-2026/
Last updated: 2026-02-21T07:33:01.000Z
In February 2026, Bet365 – one of the largest online betting platforms in the world – went down globally. For hours, users reported that they couldn’t log in, pages wouldn’t load, and bets couldn’t be placed. Downdetector spiked, social media filled up with screenshots and complaints, and the company had to acknowledge the issue publicly.
What looks like “just another outage” is actually a good lens on how fragile parts of our online world still are, even in 2026.
In this article, I’ll walk through:
- what we know (and don’t know) about incidents like this,
- why outages at providers like Cloudflare can take a whole cluster of big sites with them,
- how this compares to previous disruptions (including OpenAI being unavailable),
- and what this means for how we design cloud architectures going forward.
I’m not trying to reverse‑engineer Bet365’s internal stack here. Instead, I want to talk about the patterns that keep repeating.
## What we know so far: widespread instability, shared infrastructure
Reports so far describe:
- users unable to access the Bet365 website and mobile app at all,
- errors connecting to servers, timeouts and pages not loading,
- global impact rather than just a local ISP issue.
Some coverage explicitly connects this to a broader Cloudflare outage affecting multiple high‑traffic sites (Bet365, UberEats, Steam, SkyBet and others). Cloudflare has acknowledged “issues with our services and/or network”, and status dashboards show elevated error rates and timeouts.
In other words: this does not look like “just Bet365 messed up their code”. It looks like a shared piece of internet plumbing having a bad day, and everything that relies on it paying the price.
If that sounds familiar, it’s because we’ve seen similar patterns before:
- Cloudflare incidents impacting huge chunks of the internet when a configuration change went wrong.
- DNS providers causing major outages for sites that never “went down” themselves – they merely stopped being findable.
- OpenAI / ChatGPT being unavailable globally because a central control plane or API endpoint had issues.
Different services, same story: centralised dependencies become single points of failure at internet scale.
## Why a CDN or edge provider can take you down
At a high level, providers like Cloudflare sit in front of your origin infrastructure and handle:
- DNS resolution
- TLS termination
- caching and content delivery
- WAF and security filtering
- edge compute and routing
The routing is important: many setups terminate almost all external traffic at the CDN/edge layer. If that layer is misconfigured or unhealthy, users may never reach your origin servers, even if those are perfectly fine.
Common classes of failure in this area include:
1. **Bad configuration rollouts**
A faulty ruleset, routing change or WAF configuration propagates globally.
Suddenly, legitimate traffic is blocked or sent into a black hole.
2. **Network or BGP issues**
A routing change causes traffic to be misrouted or blackholed between regions or ISPs.
From a user’s perspective, “the site is down” – but the origin might still be serving traffic fine to other regions.
3. **Overload or cascading failures**
A spike in load (e.g. a major sporting event in the Bet365 case) pushes parts of the provider’s infrastructure into overload.
Retries and partial failures amplify the problem until timeouts become the norm.
In all those cases, your own application might be perfectly healthy inside its VNet or data center. Your users still can’t reach it, because a shared layer in front of you is failing.
## Bet365, Cloudflare and the illusion of “our uptime”
If you’re Bet365 (or any other high‑traffic service), you might have:
- multiple data centers or cloud regions,
- redundant databases and message queues,
- carefully scaled and tested application clusters.
You might even have a very good internal uptime record.
But if the world reaches you only through one or two DNS/CDN providers, your perceived availability is at most as good as theirs.
That’s not to blame Cloudflare, Akamai, Fastly or any other provider in particular. They do hard work at insane scale. It’s simply the reality of composition:
> The uptime your users experience is the uptime of the weakest critical dependency in the path between them and you.
We’ve seen that with:
- Cloudflare: taking a chunk of the web offline for minutes to an hour with a bad rollout.
- AWS region‑wide incidents: lots of “independent” services failing together because they all sit on the same region.
- OpenAI / ChatGPT outages: entire categories of AI‑powered products becoming unusable because they rely on a single upstream API.
Bet365’s outage (whatever the precise root cause turns out to be) fits this larger pattern.
## What this means for cloud architecture in 2026
So what do we do with this, beyond shrugging and refreshing status pages?
A few practical takeaways for anyone building serious online systems:
### 1\. Treat DNS/CDN as critical infrastructure, not a footnote
Many architecture diagrams still show the app, database and maybe some messaging inside a neat box. DNS and CDN are drawn as small icons at the edge.
In reality, they deserve the same level of thinking as your database:
- Do you have clear incident runbooks for when your DNS/CDN provider has issues?
- Do you know which parts of your functionality could continue via an alternative path (e.g. direct origin access, alternate domain)?
- Do you monitor end‑to‑end from the user’s perspective, not just internal app metrics?
### 2\. Reduce hard coupling to single external providers where feasible
You can’t duplicate everything, and multi‑everything is expensive. But there are realistic steps:
- At least plan for migration: treat provider configuration as code, stored in Git, so you can recreate it with another provider if you have to.
- Avoid deep, proprietary lock‑in for things that don’t need to be proprietary (e.g. standard protocols instead of custom ones).
- For truly critical customer‑facing endpoints, consider active or passive failover strategies across providers.
It won’t be perfect, but even reducing hard single‑provider dependencies for your most critical flows is an improvement.
### 3\. Design with degraded modes in mind
Not every outage needs to be binary (everything fine vs everything down). For example:
- If your edge functions are broken, can you still serve static pages with a simple “we’re degraded, here’s what still works”?
- If ChatGPT or OpenAI is down and your product uses it, can you transparently fall back to a simpler model or a cached result for some features?
- If your primary payment or betting engine is unreachable, can you at least keep read‑only stats, balances and help pages available?
Bet365’s users felt the outage as “I can’t log in or place a bet“. That may be unavoidable in a hard failure – but there’s often more that could still be shown than a generic error page.
### 4\. Run game days that include third‑party failures
Many teams do chaos experiments inside their own environment: kill a pod, break a node, see what happens.
Far fewer teams simulate:
- “What if our CDN returns 5xx for 20 minutes?”
- “What if our primary AI provider returns errors for an hour?”
- “What if DNS resolution fails for our main domain in one region?”
Those are awkward tests – but they’re the ones that match real‑world incidents like Cloudflare or OpenAI going down.
## The bigger picture: centralisation vs. resilience
The Bet365 outage is one story in a larger narrative: a lot of the internet now depends on a small number of central platforms:
- Cloud providers (AWS, Azure, GCP)
- CDN/DNS/edge providers (Cloudflare, Akamai, etc.)
- AI backends (OpenAI, Anthropic, etc.)
- Identity providers (OAuth/OpenID platforms, corporate IdPs)
The upside is clear: huge leverage, global distribution, built‑in security features, speed of delivery.
The downside is that when one of these platforms has a bad day, thousands of “unrelated” services share the same pain.
We’re not going back to everyone running their own bare‑metal everything. But we can:
- be honest about where our single points of failure are,
- design more consciously for degraded modes and fallbacks,
- and avoid building architectures that assume “Cloud X will never meaningfully go down”.
Bet365 being offline for hours is bad for their business and annoying for their users. But for the rest of us, it’s a free post‑mortem: a reminder to re‑examine our own dependency graph before the next “global instability” headline has our name in it.
### Event-Driven Integration in 2026: Connecting Azure and SAP Without Heavy Middleware
URL: https://blog.bajonczak.com/event-driven-integration-in-2026-connecting-azure-and-sap-without-heavy-middleware/
Last updated: 2026-02-21T16:22:10.000Z
In many enterprises, integration still means nightly batch jobs, CSV exports and brittle point-to-point connections. Meanwhile, the rest of the world expects near real-time updates, automated workflows and systems that talk to each other without human glue.
In 2026, we finally have the tools to make this easier — especially in the Microsoft/Azure ecosystem. Event-driven integration is no longer a buzzword from conference talks; it’s a practical way to connect systems like SAP and Microsoft 365 without building another giant ESB.
In this article, I’ll walk through a concrete, reproducible example:
- We assume an event happens in SAP (e.g. a sales order is created or changed).
- This event is exposed via a simple webhook or API proxy.
- Azure receives the event, routes it via Event Grid and triggers an Azure Function.
- The Function enriches the data and posts a message into a Microsoft Teams channel.
This is obviously only one direction (SAP → Azure → M365), but the pattern generalises: once you have a clean event-driven backbone, you can plug in other consumers: data warehouses, monitoring, additional line-of-business apps.
I’ll show you:
1. A high-level architecture
2. A minimal Terraform setup for Event Grid + Function + Storage
3. A simple Azure Function implementation
4. A Copilot prompt you can use to generate a full GitHub repo from this idea
## 1\. High-level architecture
Let’s keep the scenario simple and realistic.
- SAP is the **system of record** for orders.
- We want near real-time notifications in a Teams channel whenever a new high-value order is created.
- We also want a lightweight way to plug additional consumers onto the same event stream later.
The flow looks like this:
1. SAP emits an event when an order is created/changed.
In practice this could be:
- an outbound integration via SAP BTP / Integration Suite
- an OData/REST API call to a small adapter
- an HTTP webhook from SAP into Azure API Management
2. Azure API Management receives the `OrderCreated` event and forwards it to an Azure Function or directly into Event Grid.
3. Azure Event Grid acts as the **event backbone**, fanning out the event to one or more subscribers:
- an Azure Function that posts to a Teams channel
- optionally a second Function that writes to a data store
- maybe a Logic App for non-code workflows
4. The Azure Function formats a message and posts it to a Teams channel via an incoming webhook or Graph API.
**Key idea:** SAP only cares about emitting a clean event once. Azure takes care of routing and fan-out.
## 2\. Terraform: setting up the Azure side
Below is a simplified Terraform configuration that sets up:
- a resource group
- a storage account (for the function app)
- a function app
- an Event Grid topic
- an Event Grid subscription that sends events to the function
> Note: This is intentionally simplified. In a real setup you’d add proper naming conventions, tags, secrets management (Key Vault), etc.
```Terraform
terraform {
required_version = ">= 1.5.0"
required_providers {
azurerm = {
source = "hashicorp/azurerm"
version = "~> 3.100"
}
}
}
provider "azurerm" {
features {}
}
variable "location" {
default = "westeurope"
}
variable "resource_group_name" {
default = "rg-sap-events-demo"
}
variable "project_name" {
default = "sap-events-demo"
}
resource "azurerm_resource_group" "rg" {
name = var.resource_group_name
location = var.location
}
resource "random_string" "sa_suffix" {
length = 6
upper = false
lower = true
numeric = true
special = false
}
resource "azurerm_storage_account" "sa" {
name = "sapevents${random_string.sa_suffix.result}"
resource_group_name = azurerm_resource_group.rg.name
location = azurerm_resource_group.rg.location
account_tier = "Standard"
account_replication_type = "LRS"
}
resource "azurerm_app_service_plan" "plan" {
name = "${var.project_name}-plan"
location = azurerm_resource_group.rg.location
resource_group_name = azurerm_resource_group.rg.name
kind = "FunctionApp"
reserved = true
sku {
tier = "Dynamic"
size = "Y1"
}
}
resource "azurerm_linux_function_app" "func" {
name = "${var.project_name}-func"
location = azurerm_resource_group.rg.location
resource_group_name = azurerm_resource_group.rg.name
service_plan_id = azurerm_app_service_plan.plan.id
storage_account_name = azurerm_storage_account.sa.name
storage_account_access_key = azurerm_storage_account.sa.primary_access_key
identity {
type = "SystemAssigned"
}
site_config {
application_stack {
node_version = "~18"
}
}
app_settings = {
FUNCTIONS_WORKER_RUNTIME = "node"
AzureWebJobsStorage = azurerm_storage_account.sa.primary_connection_string
TEAMS_WEBHOOK_URL = "https://outlook.office.com/webhook/..." # replace
}
}
resource "azurerm_eventgrid_topic" "topic" {
name = "${var.project_name}-topic"
location = azurerm_resource_group.rg.location
resource_group_name = azurerm_resource_group.rg.name
}
resource "azurerm_eventgrid_event_subscription" "func_sub" {
name = "${var.project_name}-func-sub"
scope = azurerm_eventgrid_topic.topic.id
webhook_endpoint {
url = azurerm_linux_function_app.func.default_hostname
}
retry_policy {
event_time_to_live = 1440
max_delivery_attempts = 5
}
}
```
## 3\. Azure Function: from event to Teams message
Next, we implement a simple Azure Function that:
- receives an Event Grid event
- extracts key fields
- posts a formatted message into Teams
```TypeScript
// File: OrderCreated/index.js
const axios = require("axios");
/*
Expected event:
{
"orderId": "12345",
"customerName": "Contoso AG",
"amount": 50000,
"currency": "EUR",
"createdAt": "2026-02-20T18:41:00Z",
"sourceSystem": "SAP"
}
*/
module.exports = async function (context, eventGridEvent) {
context.log("Received Event Grid event:", eventGridEvent);
const data = eventGridEvent.data || {};
const orderId = data.orderId;
const customerName = data.customerName;
const amount = data.amount;
const currency = data.currency;
const createdAt = data.createdAt;
const sourceSystem = data.sourceSystem || "SAP";
if (!orderId || !customerName || !amount || !currency) {
context.log.warn("Missing required fields in event data, skipping");
return;
}
const webhookUrl = process.env.TEAMS_WEBHOOK_URL;
if (!webhookUrl) {
context.log.error("TEAMS_WEBHOOK_URL not configured");
return;
}
const text =
`🚀 New high-value order from ${sourceSystem}
**Order ID:** ${orderId}
**Customer:** ${customerName}
**Amount:** ${amount} ${currency}
${createdAt ? `**Created at:** ${createdAt}` : ""}`;
try {
await axios.post(webhookUrl, { text });
context.log("Posted order notification to Teams");
} catch (err) {
context.log.error("Failed to post to Teams", err);
}
};
function.json
{
"bindings": [
{
"type": "eventGridTrigger",
"name": "eventGridEvent",
"direction": "in"
}
]
}
```
## 4\. How SAP fits into this pattern
On the SAP side, there are multiple ways to emit events:
- SAP S/4HANA eventing
- SAP BTP Integration Suite
- Custom adapter watching table changes
Important:
- Define a clear event schema
- Publish events to Event Grid
- Azure handles routing
Adding new consumers later becomes trivial.
## 5\. The Code
The code for this solution is stored onto my github account [https://github.com/SBajonczak/BlogSapTeams](https://github.com/SBajonczak/BlogSapTeams?ref=blog.bajonczak.com)
## 6\. Closing
The nice thing about this pattern is that it’s not limited to SAP or orders. Once you have an event-driven backbone in Azure, you can:
- plug in other systems as event sources
- add new consumers without touching the source system
- move from nightly batch to near real-time
It’s not the flashiest trend headline, but in 2026 this kind of pragmatic event-driven integration is often where real value hides.
### My 2026 Developer Workflow: Combining Good Engineering Habits with AI Tools
URL: https://blog.bajonczak.com/my-2026-developer-workflow-combining-good-engineering-habits-with-ai-tools/
Last updated: 2026-02-19T10:30:52.000Z
In 2026, it is almost harder to avoid AI than to use it.
Code editors suggest entire functions, terminals talk back, and there is always a model somewhere that promises to “do the rest for you”. At the same time, the systems we build are not magically simpler. The bugs are still real, and production still does not care if your code was written by a human or by a model.
In this article I want to show something very concrete: how my daily developer workflow actually looks in 2026 – including AI, but not owned by it. I will walk through how I structure my work, where AI fits in, and where I deliberately fall back to “old school” engineering.
This is not a “10 tools you must use” list. It is a realistic workflow that tries to balance speed and control.
## 1\. Starting from a problem, not from a tool
The biggest trap with AI is starting from “What can I do with this model?” instead of “What problem am I solving?”
So my day still starts the traditional way:
- What is the outcome I need?
- What parts of the system are affected?
- How does this change show up for users?
I usually jot this down in a simple text or markdown file inside the repo. Something like:
- feature: allow users to export reports as CSV
- constraints: must not block the UI; runs in background; notify user when ready
- touched areas: API, background jobs, notification system
- edge cases: large report size, timeouts, permissions
Only when I have this rough box sketched out do I bring AI into the picture. If I skip this step and go straight to “generate me some code”, I almost always pay for it later.
## 2\. Using AI as a design partner, not a code vending machine
Before I write any code, I often use AI to explore design options.
Typical things I ask:
- “Given this context, what are 2–3 reasonable ways to design this feature?”
- “What are the trade-offs between approach A and B?”
- “Which failure modes should I think about for this kind of change?”
I paste in a short description of my system and the problem (never proprietary secrets, and for sensitive projects I prefer local models) and ask for high-level advice, not code.
What I get back is rarely perfect, but it helps me spot blind spots early. Sometimes it reminds me of patterns I forgot; sometimes it surfaces edge cases I would have discovered only under pressure.
The important part: I use AI to widen my thinking, but I still make the design decisions.
## 3\. Writing the first version of the code: humans first, AI as an accelerator
When it comes to actually writing code, my rule is simple:
- For **small things** (helper functions, straightforward glue code), I am happy to let AI suggest most of the code.
- For **core logic** and complex flows, I prefer to write the structure myself and use AI only to fill in pieces.
A typical pattern:
1. I write the function signature, docstring and a few comments explaining what should happen.
2. I ask the AI in my editor to complete the implementation.
3. I immediately review and “own” the result – I read it as if a junior developer had written it.
If I catch myself just accepting whole files without reading them, that is a warning sign. AI is a fantastic autocomplete, but it does not carry responsibility. I do.
## 4\. Tests first-ish: where AI helps and where it hurts
I am not a perfect “always TDD” person. Sometimes I write tests first, sometimes after the first draft. But I have noticed one thing: in an AI-assisted world, tests are even more important than before.
I use AI in two ways around testing:
- to draft test cases and edge cases I might miss,
- to generate boring boilerplate (fixtures, parameterised test data, etc.).
For example, I might write a short description:
> Write unit tests for a function that generates CSV exports from a list of records. Important cases: empty list, records with special characters in fields, very large lists that should be streamed or chunked.
The AI gives me a starting set of tests. I then:
- prune the ones that are redundant or unrealistic,
- add the cases that are specific to my system,
- make sure the names and structure match the rest of the test suite.
The goal is not to let AI decide what “done” means. The goal is to use it to reach meaningful coverage faster.
## 5\. Using AI for refactoring and explanations
Once something works and is covered by tests, I often use AI again to improve it.
Concrete things I ask for:
- “Refactor this function to make the control flow clearer.”
- “Extract the validation logic into a separate helper and suggest a good name.”
- “Explain this block of code in plain English so I can add a helpful comment.”
Sometimes I paste a gnarly function into an assistant and ask it to explain the behaviour. This is especially useful when I am working in older parts of a codebase that I did not write.
But there is a hard rule: refactors go through the same process as if a human wrote them.
- I run the tests.
- I skim the diff and look for surprising changes.
- I reject refactorings that make things cleverer but less clear.
AI is great at renaming and reshaping code. It is terrible at understanding your team’s sense of “too clever”.
## 6\. AI in the DevOps loop: scripts, configs and incidents
Beyond the editor, I also use AI around DevOps tasks – but again with boundaries.
Examples:
- **Shell one-liners and small scripts:**
“Write a bash script that finds all log files larger than 1 GB in /var/log and compresses them, leaving a timestamped backup.”
I then review the script before running it, or run it in a safe environment first.
- **CI/CD config fragments:**
“Show me a GitHub Actions workflow that runs tests on push and builds a Docker image on main.”
I adapt it to the project, rather than blindly copying it.
- **Incident notes and summaries:**
After an incident, I paste the raw chat log and notes into an AI and ask it to draft a structured incident report that I then fix and complete.
What I do not do is let AI execute changes directly on production systems without explicit human review and guardrails.
## 7\. Keeping boundaries: where I deliberately do not use AI
Just like in my previous article about AI boundaries, there are areas of my developer workflow where I stay very cautious or avoid AI entirely:
- **Sensitive code and data:**
Anything that would be a problem if it leaked stays away from generic cloud models. For that I either use local models or no AI at all.
- **Security-critical logic:**
I am okay with AI helping me think about threat models and test cases, but I do not let it write auth, crypto or payment logic end-to-end.
- **Performance-sensitive hotspots:**
For a tight loop or a critical performance path, I might ask AI for ideas, but I want full control over the final implementation.
## 8\. Daily habits that matter more than any tool
The longer I work with AI tools, the more I appreciate the boring basics. The habits that actually make or break a developer workflow have not changed that much:
- Small, focused commits with clear messages
- Tests that are fast and reliable
- Code reviews that are honest, not just “LGTM”
- Simple, readable code over clever one-liners
- Regular refactoring instead of big-bang “cleanup weeks”
AI can support all of these:
- It can help you write better commit messages.
- It can suggest tests.
- It can comment on your code review and highlight things you might miss.
But none of that works if the underlying habits are broken.
So my 2026 workflow is basically this:
- Think clearly about the problem.
- Use AI early for design and exploration.
- Use AI in the editor as an accelerator, not an autopilot.
- Protect quality with tests and reviews.
- Use AI around the code (scripts, docs, incidents) to reduce glue work.
- Keep hard boundaries where mistakes would really hurt.
If you treat AI as a powerful assistant inside an already solid workflow, it will feel natural to work with. If you try to build your workflow around AI from scratch, you will spend more time fighting the tool than shipping useful code.
### My 2026 AI Development Setup: Hardware and Gadgets I Actually Use Every Day
URL: https://blog.bajonczak.com/my-2026-ai-development-setup-hardware-and-gadgets-i-actually-use-every-day/
Last updated: 2026-02-18T09:51:27.000Z
AI tools are fun to talk about, but they sit on top of something much more boring – your hardware setup.
If your machine is struggling, your screen is cramped, your mouse hurts your wrist and your audio is bad, no amount of clever AI will fix that. So instead of writing another abstract “AI tools” post, I want to show you the setup I actually use every day in 2026 for AI-enhanced development.
This article contains Amazon affiliate links. If you buy through them, I earn a small commission at no extra cost to you. I only recommend things I either use myself or would recommend to a friend.
## 1\. The main machine: an AI-friendly laptop with headroom
My primary machine right now is a powerful XMG laptop. The exact model is less important than the characteristics:
- enough CPU cores to handle builds, containers and local models at the same time
- plenty of RAM so I don’t start swapping every time I open another project or model
- fast NVMe storage for code, containers and AI weights
As a rule of thumb, I’d consider this the baseline if you want to work comfortably with AI tools and some local models:
- 32 GB RAM (64 GB if you can afford it)
- at least 1 TB NVMe SSD
- a recent multi-core CPU (modern Intel i7/i9 or AMD Ryzen 7/9)
If you’re looking for something similar, check this type of configuration:
> **AI-capable developer laptop (32 GB RAM, fast SSD)**
> A solid workhorse for coding, containers and local AI experiments.
> [https://amzn.to/46aeo0K](https://amzn.to/46aeo0K?ref=blog.bajonczak.com)

For me, the idea is simple: I want a machine that doesn’t force me to close apps or avoid local models just to keep the system responsive.
## 2\. The widescreen monitor: room for code, browser and AI
The thing I notice most about my setup when I sit at someone else’s desk is the screen.
I use a **widescreen monitor**, which gives me enough horizontal space to:
- keep my IDE on one side,
- put browser and docs in the middle,
- and keep an AI assistant window or logs visible on the other side.
That alone dramatically reduces context switching. Instead of constantly alt-tabbing between code, docs and AI, I can see everything I care about at once.
If you want something in the same spirit:
> **34" (approx.) ultrawide monitor**
> Great for having IDE, browser and AI side-by-side on a single panel.
> [https://amzn.to/4aoP3Th](https://amzn.to/4aoP3Th?ref=blog.bajonczak.com)

I don’t think everyone needs an ultrawide, but having one good, big screen is one of the best upgrades you can make if you work with AI tools all day.
## 3\. Mouse and keyboard: MX Master Combo
For input, I’ve settled on something that’s pretty common among developers, but still worth calling out: the **Logitech MX Master mouse** and the matching keyboard.
### Logitech MX Master mouse
The MX Master line is popular for a reason:
- comfortable ergonomic shape for long days
- smooth scroll wheel (especially nice when you’re scrolling through logs or long code files)
- extra buttons you can map to your most-used shortcuts
I use it as my daily driver – for coding, browsing, AI prompts, everything.
> **Logitech MX Master mouse**
> Ergonomic, precise and great for long coding sessions.
> [https://amzn.to/4s2SJQB](https://amzn.to/4s2SJQB?ref=blog.bajonczak.com)

### Matching Logitech MX keyboard
To go with it, I use the **Logitech MX keyboard**. The reasons are similar:
- solid typing feel
- good layout for developers
- backlighting that helps in low light
> **Logitech MX mechanical/office keyboard**
> Comfortable keyboard with backlight, pairs nicely with the MX Master mouse.
> [https://amzn.to/3MLg6iq](https://amzn.to/3MLg6iq?ref=blog.bajonczak.com)

It’s not the flashiest “mechanical keyboard setup on earth”, but it’s something I can type on for hours without thinking about it – and that’s exactly what I want.
## 4\. Headset: a wired Poly headset (because batteries always die)
For calls, pair programming and quick ad-hoc meetings, I use a **wired Poly headset**.
I know wireless is trendy, but I have one simple reason for going wired: I don’t want to think about batteries. When I join a call, I want the headset to just work.
The wired Poly headset gives me:
- reliable audio without worrying about charging
- a boom mic that keeps my voice clear
- plug-and-play simplicity
> **Wired Poly office headset**
> No batteries, good voice quality, reliable for daily calls.
> [https://amzn.to/4rrXO51](https://amzn.to/4rrXO51?ref=blog.bajonczak.com)
If you’re like me and you constantly forget to charge devices, a wired headset is the less glamorous but more reliable option.
## 5\. Desk lamp with USB: small light, big quality-of-life upgrade
I often work in the evening or at night, and having a bright ceiling lamp on the whole time is not exactly cozy.
So I added a **desk lamp with USB power** to my setup. It sounds trivial, but it helps with:
- reducing eye strain in the evening
- lighting up the keyboard area when the room is otherwise dim
- keeping the workspace usable without turning the room into daylight
Because it’s USB-powered, I can plug it directly into my dock or laptop.
> **USB-powered desk lamp**
> Adjustable light for evening sessions, makes it easier to work in a dim room.
> [https://amzn.to/4rnykpf](https://amzn.to/4rnykpf?ref=blog.bajonczak.com)

It’s one of those „cheap but high impact“ items that you forget about until you don’t have it.
## 6\. Laptop stand and monitor arm: a clean, ergonomic setup
To keep the setup physically comfortable and visually clean, I use two more pieces:
- a **laptop stand**,
- and a **monitor arm**.
### Laptop stand
The laptop stand lifts the XMG off the desk, which:
- improves airflow and cooling,
- puts the screen at a more ergonomic height if I ever use it as a second monitor,
- frees up desk space underneath.
> **Laptop stand**
> Raises the laptop, improves airflow and keeps the desk less cluttered.
> [https://amzn.to/4tENXu0](https://amzn.to/4tENXu0?ref=blog.bajonczak.com)

### Monitor arm
The **monitor arm** gives me freedom to position the widescreen exactly where I want it:
- centered at eye height,
- pushed back to create more desk depth,
- or pulled closer when I need it.
It also makes the desk look much cleaner without a bulky monitor stand.
> **Monitor arm for widescreen displays**
> Lets you position your ultrawide exactly where it feels best and keeps the desk tidy.
> [https://amzn.to/46b6STb](https://amzn.to/46b6STb?ref=blog.bajonczak.com)
> Combined, the stand and arm make the whole setup feel more intentional and less like „laptop and random monitor on a table“.
## 7\. How this setup supports AI-enhanced work
None of this is „AI hardware“ in the sense that it has “AI” written on the box. But together, it makes AI-enhanced work feel natural:
- The **XMG laptop** has enough headroom to run local models, containers and tools without constantly fighting for resources.
- The **widescreen monitor** lets me keep IDE, browser and AI assistant visible at the same time.
- The **MX Master mouse and keyboard** make long sessions of typing prompts, refactoring code and jumping between windows comfortable.
- The **wired Poly headset** means calls just work – no battery anxiety.
- The **USB desk lamp**, **laptop stand** and **monitor arm** keep the physical environment comfortable and clean, even during late-night sessions.
I’m not claiming this is the perfect setup for everyone, but it’s a configuration I’m happy to sit down at every day – and that’s ultimately what matters.
If you’re thinking about upgrading your own setup, feel free to use this as a starting point. And if you pick up anything through the Amazon links above, you’re directly supporting this blog at no extra cost to you.
### From Alerts to Actions: How Agentic AI Is Changing DevOps in 2026
URL: https://blog.bajonczak.com/from-alerts-to-actions-how-agentic-ai-is-changing-devops-in-2026/
Last updated: 2026-02-17T19:51:02.000Z
For most teams I talk to in 2026, outages are no longer the main problem. Alert fatigue is.
We have more dashboards, more metrics and more „intelligent“ alerts than ever before. Every monitoring tool claims to reduce noise, yet most on-call engineers still wake up at 03:00 for issues that could have been auto-resolved – or at least auto-triaged.
At the same time, there’s a new buzzword in the air: agentic AI. Vendors promise „self-healing infrastructure“, „autonomous operations“ and all kinds of magic. In practice, you mostly see two extremes:
- slides with spectacular architecture diagrams, or
- fragile scripts glued to an LLM prompt that you will never trust in production.
In this article I want to take a more grounded approach. I’ll walk through how I think about agentic AI in DevOps, and show a few concrete patterns where it actually makes sense today:
1. Turning noisy alerts into structured, contextual incidents
2. Delegating well-defined runbook steps to an AI-powered agent
3. Using AI to coordinate existing tools (chat, tickets, status pages) instead of reinventing them
I’ll use OpenClaw as an example for the „agent“ layer in some places, but the concepts apply to any system where an AI can call tools in a controlled way.
## From dashboards to decisions: what „agentic“ really adds
Traditional monitoring and observability stacks are very good at one thing: telling you that something looks weird.
- A threshold was crossed.
- A latency SLO is breaching.
- An error rate spiked.
What they don’t do is answer questions like:
- „Is this likely a known issue or something new?“
- „What is the minimal action I can safely try right now?“
- „Who needs to know if this goes wrong, and where should I update them?“
This is where I see agentic AI fit in: not as a replacement for monitoring, but as a decision and orchestration layer on top of it.
An agent is different from a chatbot. It doesn’t just answer questions; it has explicit tools it’s allowed to use:
- run a command on a host (or via an automation system),
- query logs or metrics,
- create or update tickets,
- post in an incident channel,
- update a status page.
The trick is to define those tools clearly, and then let the AI combine them in flexible ways – with guardrails. Let’s look at a few concrete examples.
## Example 1: From raw alert to contextual incident
Imagine a simple but common case: your monitoring system (Prometheus, Dynatrace, Datadog, whatever) fires an alert: „Error rate on service X above 5% for 5 minutes“.
The traditional flow looks like this:
1. Alert goes to PagerDuty/Teams/Slack.
2. Someone wakes up, opens dashboards, checks logs, maybe restarts something.
3. They create or update a ticket, write a summary, ping other teams.
Now add an agentic AI layer in the middle.
**Step 1: Alert → agent entry point**
Instead of sending the alert directly to humans, your alerting system can also send a webhook to an agent (e.g. via OpenClaw), with payload like:
```Json
{
"service": "checkout-api",
"environment": "prod",
"errorRate": 0.09,
"threshold": 0.05,
"region": "westeurope",
"since": "2026-02-17T15:02:00Z"
}
```
### Step 2: Agent runs a standard triage routine
The agent has a few tools available, defined by you:
- get\_logs(service, time\_range)
- get\_recent\_deployments(service, time\_range)
- get\_known\_incidents(service)
- create\_incident(summary, details)
- post\_to\_incident\_channel(message)
Its first instructions might be something like:
When you receive an error-rate alert, always:
1. Fetch logs for the last 10 minutes.
2. Check if there were deployments in the last 30 minutes.
3. Search known incidents for similar patterns.
4. Create a structured summary of what you see.
5.Propose the minimal safe next step.
The agent might then call:
- get\_logs("checkout-api", last\_10\_minutes)
- get\_recent\_deployments("checkout-api", last\_30\_minutes)
- get\_known\_incidents("checkout-api")
Based on that, it can generate a short report like:
Initial triage for checkout-api error spike (prod)
- Error rate: 9% (threshold: 5%), since 15:02 UTC
- Last deployment: 14:57 UTC, version 2.3.1 → 2.3.2
- Logs show many Timeout calling payment-provider errors
- Similar incident: #INC-2043 on 2025-11-03 (payment provider latency, mitigated by reducing timeout and enabling circuit breaker)
Hypothesis: External payment provider is slow/unavailable after recent deploy.
Suggested next step (requires human approval): Toggle feature flag payment\_provider\_retry\_strategy to conservative mode, and reduce request rate by enabling „degraded checkout“-banner.
### Step 3: Human stays in the loop – but starts from context
The first thing the on-call sees is not a raw alert, but a context-rich incident summary in the incident channel or ticketing system. They can then:
- quickly sanity-check the agent’s hypothesis,
- approve the suggested action,
- or ask the agent to dig deeper („check logs from the payment-provider side“).
The key value here is not „AI fixed the incident“. It’s that routine triage work is done before you even open your laptop.
### Example 2: Delegating safe runbook steps
In almost every team, there’s a set of runbooks that are boring but necessary:
- „Restart service X in environment Y“
- „Fail over read traffic to replica cluster“
- „Scale deployment Z from N to M replicas“
Right now, many of these are implemented as wiki pages, shell scripts, or automation playbooks that humans trigger manually.
Agentic AI can help here by becoming a kind of „smart dispatcher“ for those runbooks.
**Guardrails first: defining what the agent can do**
The most important design decision is what you do not let the agent do.
Good candidates for „allowed actions“ are:
- operations that are idempotent and reversible,
- actions that are already codified and tested in your automation tools,
- steps you would be comfortable automating via a button in your dashboard.
Instead of giving the agent SSH access everywhere, you expose high-level tools like:
- run\_playbook(name, parameters)
- trigger\_pipeline(name, environment)
- scale\_service(service, replicas)
Each of these tools internally calls your existing Ansible, Terraform, Kubernetes, Azure, etc. pipelines.
**Example: AI-triggered scaling with human confirmation**
Let’s say CPU and latency alerts indicate that search-api is underprovisioned in production. The agent might:
1. Receive the alert.
2. Confirm via metrics that high CPU correlates with increased latency and no obvious error pattern.
3. Propose:
> „Increase search-api replicas from 6 to 9 in prod, then re-evaluate metrics after 5 minutes.“
1. Call scale\_service("search-api", 9) only after a human in the incident channel approves with a simple command, e.g.:
```java
@incident-bot approve scaling
```
1. After scaling, the agent keeps an eye on metrics and reports back:
> „After scaling to 9 replicas, p95 latency returned below SLO within 4 minutes. CPU utilisation now at \~55%. No further action suggested.“
Again, the value is not in „AI did something magical“, but in:
- bridging the gap between observation and action,
- not forcing humans to manually look up and execute the right runbook,
- keeping a structured log of what was proposed and what was done.
### Example 3: Coordinating communication and documentation
A huge chunk of incident pain is not technical at all. It’s coordination:
- opening the right channel,
- inviting the right people,
- keeping status updates in sync between ticket system, Teams/Slack and status page,
- writing the post-mortem.
Agentic AI can take over a lot of this „glue work“.
Example flow: from alert to well-documented incident
1. Alert received
- Agent creates an incident record in your ticket system (e.g. Jira, ServiceNow).
- It opens or reuses an incident channel in Teams/Slack.
- It posts the initial triage summary (see Example 1).
1. During the incident
- Whenever someone posts a relevant message in the incident channel, the agent can tag it internally: „hypothesis“, „decision“, „mitigation“, „rollback“, etc.
- On request (e.g. @incident-bot status), it generates a current status summary for stakeholders.
1. Status page updates
- If the incident meets certain criteria (impact on customers, SLAs), the agent proposes a status page update text:
> „We are currently investigating increased error rates in our checkout service. Some customers may experience failed transactions. Next update in 30 minutes.“
- A human approves, and the agent calls the status page API.
1. After the incident
- The agent collects the incident timeline, key messages, actions and metrics.
- It drafts a post-mortem document:
- What happened
- Impact
- Root cause (if known)
- Timeline
- What went well / what didn’t
- Follow-up actions
- The responsible engineer reviews and edits that draft instead of starting from a blank page.
You don’t need futuristic technology for this. Most of it is pattern recognition and summarisation on top of existing tools. But together, it saves hours per incident and produces better documentation almost for free.
### Implementation notes: starting small without burning everything down
A few lessons I’ve learned playing with agentic AI in this space:
1. Instrument your tools before you „add AI“
If your monitoring, logging and automation are messy, an agent will just amplify that. Make sure your core signals and runbooks exist and are reasonably reliable.
2. Treat agent actions like any other automation
Version control, code review, testing and approvals still apply. The AI doesn’t get a free pass to do things you wouldn’t trust a junior engineer with.
3. Start in assist mode
Let the agent propose actions and summaries, but require human approval for anything that changes systems. Over time, you’ll find a subset of actions that can be fully automated.
4. Log everything the agent does and sees
Every tool call and decision should be traceable. Not just for debugging, but also to build trust.
5. Don’t chase „fully autonomous“ too early
Most of the value is in semi-automation: better triage, better coordination, fewer manual clicks. Full autonomy will only make sense for parts of your stack where you already have a strong handle on failure modes.
### Closing thoughts
Agentic AI in DevOps is not about building a robot SRE that replaces your team. It’s about giving your existing tools a brain and some hands.
Your monitoring stack continues to do what it does best: produce high-quality signals. Your automation continues to run the scripts and pipelines you trust. On top of that, an AI agent:
- connects the dots faster than a sleepy human at 03:00,
- takes over repetitive triage and coordination steps,
- and suggests the smallest safe actions you can take right now.
If you approach it that way – as an assistant that turns alerts into actions – agentic AI stops being a buzzword and becomes a very practical part of your 2026 DevOps toolkit.
### SAP and Microsoft Power Platform: Practical Integration Use Cases for 2026
URL: https://blog.bajonczak.com/practical-use-cases-for-combining-sap-with-the-microsoft-power-platform-in-2026/
Last updated: 2026-07-09T09:37:32.000Z
If you look at how many companies are set up in 2026, you’ll notice a familiar pattern: SAP runs the core processes in the background, while almost everyone’s day-to-day work happens in Microsoft 365 – in Outlook, Teams, Excel, PowerPoint and maybe some Power BI dashboards.
On paper, these worlds are „integrated“. In reality, a lot of people still copy data from SAP screens into Excel, send screenshots in Teams and chase approvals via email threads.
In this article, I want to focus on something very specific and practical: how to use the Microsoft Power Platform to make SAP data and processes actually usable for the people who live in Microsoft 365 all day. No multi-year migration, no „strategic transformation roadmap“ – just concrete use cases that you can start with.
I’ll walk through three scenarios I’ve seen again and again:
Surfacing SAP data in Teams and Outlook using Power Automate
Building lightweight Power Apps on top of SAP for the people who never want to see an SAP GUI
Using Power BI to turn SAP data into living dashboards instead of monthly Excel snapshots
Each of these can stand on its own, but together they turn „SAP as a backend“ into something much closer to „SAP as part of the flow“.
## Surfacing SAP data in Teams with Power Automate
Let’s start with the most immediately visible win: getting SAP events and updates into the place where people actually talk – which, for most companies, is Microsoft Teams.
A typical scenario looks like this: sales orders are created or changed in SAP, but the sales team lives in Teams. Right now they either log into SAP, ask someone in the back office or wait for an email. None of that feels modern.
### Example use case: new high-value SAP sales orders → Teams channel
Imagine the following flow:
- Whenever a new sales order above a certain value (say, 50k) is created in SAP,
- a message is posted in a specific Teams channel used by the sales and account team,
- including key details (customer, amount, product group, responsible sales rep) and quick links.
You don’t have to go crazy with architecture for this. A very pragmatic setup could look like this:
1. **Expose SAP order data via an API**
This can be an OData service or a custom REST endpoint from SAP (via SAP Gateway, SAP BTP, CAP etc.).
The important part: the API can be called from outside and returns the fields you care about: order number, customer, net amount, currency, date, sales rep.
2. **Trigger an event when a new order is created**
You’ve basically got two main options:
- SAP pushes an event to an intermediate layer (e.g. Azure Function, Webhook, Event Hub).
- Or you start simpler: a scheduled Power Automate flow polls the API every X minutes and only reacts to new orders (not elegant, but often good enough for a first iteration).
1. **Build a Power Automate flow that posts to Teams**
In Power Automate, the logic might look like this (simplified):
Trigger:
`Recurrence` → every 5 or 10 minutes
```text
🚀 New high-value order in SAP
Customer: @{items('Apply_to_each')?['customerName']}
Amount: @{items('Apply_to_each')?['amount']} @{items('Apply_to_each')?['currency']}
Sales Rep: @{items('Apply_to_each')?['salesRep']}
SAP Order: Open in SAP
```
Textually, you can imagine a screenshot here of the Power Automate „flow overview“: on the left the trigger and actions, on the right the Teams message preview.
The result: instead of someone asking „has the order already come in?“ in a random chat, the relevant people automatically get notified with all important fields, in the tool they already use.
## Power Apps as lightweight frontends on top of SAP
The second pattern I like is using Power Apps as a thin UI layer for parts of SAP that are too heavy or unfriendly for occasional users.
A classic example: people in the warehouse or field service who need to look up or update SAP data occasionally, but don’t live in SAP all day. Giving them full-blown SAP GUI or complex web transactions is often overkill.
**Example use case: simple material / product lookup app**
Imagine a small mobile-friendly app where someone can:
- search for a material by number, barcode or description,
- see current stock, storage location and basic attributes,
- optionally flag something (e.g. „stock discrepancy“), which then triggers a small process.
A realistic implementation path could look like this:
1. **Expose material data from SAP as a data source**
Again, OData is the usual suspect. You make sure your service exposes at least: material number, description, base unit, stock quantity, plant, storage location, and maybe an image URL
1. **Create a Canvas Power App**
In Power Apps Studio:
- Add a data connection to your SAP OData service.
- Create a search screen with a text input („Search“) and a gallery bound to your SAP entity.
Use the `Items` property of the gallery to filter:
```code
Filter(
SAP_Materials,
TextSearchBox1.Text in MaterialNumber
|| TextSearchBox1.Text in Description
)
```
1. **Detail screen for a selected material**
When a user taps on a material in the list, navigate to a detail screen that shows the key fields and maybe a product image:
```
Navigate(DetailScreen, ScreenTransition.Fade, { selectedMaterial: ThisItem })
```
On the detail screen, labels are bound to `selectedMaterial.MaterialNumber`, `selectedMaterial.Description`, `selectedMaterial.StockQuantity`, etc.
1. **Optional: flagging an issue back into SAP**
Add a button „Report stock issue“. When clicked, it triggers a Power Automate flow that:
- receives the material number and a user comment,
- writes an entry into SAP (e.g. via a custom API that creates a notification / record in a Z-table),
- sends a confirmation back (which the app displays with `Notify("Issue reported", NotificationType.Success)`).
In a real article, this is where you could show:
- a screenshot of the Canvas App designer with the gallery and detail screen,
- and maybe a mobile screenshot of the app on a device.
From the user’s perspective, they never see SAP. But under the hood, they are reading and writing SAP data through a controlled, purpose-built interface.
## Power BI dashboards on top of SAP data
The third use case is so common that it almost sounds boring, but done well it’s a huge value-add: using **Power BI** to turn SAP data into living dashboards instead of monthly Excel exports.
### Example use case: order intake & backlog dashboard
Most companies have some kind of reporting around order intake and backlog. In many cases, someone runs an SAP report, exports to Excel, cleans it up and sends a PDF.
Instead, you can do something like this:
1. **Connect Power BI to SAP**
There are multiple options:
The details depend on your landscape, but the idea stays the same: you get a reliable, refreshable feed of order data into Power BI.
- DirectQuery or import via SAP BW/4HANA or SAP HANA connector
- OData via SAP Gateway
**2 . Build a model that matches how the business thinks**
Rather than reflecting every single SAP table, create a semantic model that aligns with how people ask questions: by region, sales rep, product group, month, status.
1. **Create a dashboard that answers real questions**
For example:
- „How much order intake did we have this month vs last month?“
- „Which customers are trending up or down?“
- „Where is backlog piling up?“
In Power BI Desktop, you might create visuals like:
- a line chart of order intake over time,
- a bar chart by region or product group,
- a table with drill-through to customer details.
1. **Publish and integrate with Teams / SharePoint**
Once published to the Power BI Service, you can:
- pin key visuals to a dashboard,
- embed the report in a Teams channel tab („Reports“), or add it to a SharePoint page.
For users, the difference between „here’s the latest Excel attachment“ and „open the Orders dashboard in Teams“ is huge. And because the data refresh is automated, you don’t depend on someone remembering to run a report.
## Where AI fits into all of this (without taking over the plot)
Because AI is such a dominant topic right now, it’s worth mentioning how it fits into the SAP + Power Platform story – without making everything „about AI“.
Once you have SAP data and processes exposed via APIs and wired into the Power Platform, you can incrementally add AI in meaningful places:
- Use AI Builder or Azure OpenAI in Power Automate to generate summaries of SAP error logs or long order comments and push them to Teams.
- Let an AI model highlight anomalous orders or customers in Power BI, instead of just showing static thresholds.
- Offer a „Explain this SAP error in normal language“ button in a Power App that calls an AI model with the technical message and returns a user-friendly explanation.
The important part: **AI sits on top of a clean integration**, not as a magic overlay on a broken landscape.
## Closing thoughts
The integration between SAP and Microsoft technologies is not a new topic. What changed in the last few years is how approachable it has become for teams that don’t want to build yet another heavy middleware project. With the Power Platform, you can start small:
- one Power Automate flow that posts high-value orders into Teams,
- one Power App that shields users from a painful SAP transaction,
- one Power BI report that replaces a manual Excel export.
From there, you can iterate. If something proves valuable, you harden it, add proper error handling, monitoring and governance. If not, you throw it away and try the next idea.
The key is to stop treating SAP and Microsoft 365 as separate planets and start thinking in terms of **flows**: Where does information originate? Who needs to see it? In which tool are they already working? And how can we connect the dots with the least amount of friction?
That, more than any buzzword, is what „integration“ actually looks like in 2026.
### AI Everywhere – But Not Everywhere Useful: Where I Use AI in 2026 (and Where I Don’t)
URL: https://blog.bajonczak.com/ai-everywhere-but-not-everywhere-useful-where-i-use-ai-in-2026-and-where-i-dont/
Last updated: 2026-02-16T11:07:11.000Z
2026 is the year where you can’t really ignore AI anymore. It writes your emails, drafts your contracts, comments your code and happily plans your next weekend trip – at least according to the marketing pages.
At the same time, a lot of people are quietly asking themselves a different question: How much AI is actually healthy? Where does it really take work off your plate, and where are you just outsourcing your own thinking and responsibility?
In this article I want to share my personal rulebook. Not as an AI researcher or a hype marketer, but as someone who actually uses this stuff every day – at work, in side projects and in my private life. I’ll walk you through the areas where AI genuinely shines in my daily routine, the grey zones where I stay cautious, and the parts of my life where I deliberately say “no”, even though I technically could automate it.
Quick note before we start: some links in this article are affiliate links, mostly to Amazon. If you buy through them, I earn a small commission at no extra cost to you. I only recommend things I either use myself or would genuinely recommend to a friend.
## Healthy skepticism instead of all-or-nothing thinking
When people talk about AI, I mostly see two extremes. On one side, there are the “AI will do everything” folks. They want an agent that writes all their emails, does their job, picks their investments and somehow also cleans the kitchen. On the other side are the “AI is evil” people who block anything that looks remotely like automation, even if it would save them hours of boring work.
I don’t fully agree with either camp. For me, AI is a tool – a very powerful one – but still just a tool. The key is to be honest about what you’re delegating and what you’re not. I don’t want an AI to take over my judgment. I do want it to take over a lot of the boring glue work: drafting, summarising, restructuring, and sometimes even writing glue code for repetitive tasks.
So when I say “healthy skepticism”, I mean two things. First, I don’t assume AI is harmless or neutral. I’m careful with what data I feed it, especially when it lives in the cloud. Second, I don’t assume AI is magic. If something goes out with my name on it, I am responsible – not the model behind the screen.
## Where AI really shines in my daily work
The area where AI brings me the most value is anything that starts with an empty page. Emails, blog posts, internal documentation, sometimes even tricky Slack replies – I rarely write those from scratch anymore. A very simple, practical example: I often start with a quick brain dump in plain text. It might look like this:
```markdown
- tell customer that bugfix is done
- explain why it took longer (dependency upgrade)
- mention that we added a small bonus improvement
- ask them to confirm everything works on their side
- keep it friendly but not overly formal
```
I paste that into an AI assistant and ask for a first draft in my tone of voice. What comes back is usually 70–80% there. I then spend a couple of minutes editing phrases, adjusting details and making sure everything is actually correct.
The most important part for me: I never send AI-generated text “as is”. I always do a human pass. AI gives me speed and structure, but the responsibility and nuance stay with me.
The same is true for more public content like this blog. Sometimes I ask AI to suggest three different hooks or titles for a topic I already know I want to write about. I don’t let it decide whether I write the article – only how I might present it more clearly.
If you write a lot, the setup around AI matters more than yet another tool. A comfortable keyboard and a decent monitor often do more for your productivity than the tenth writing app. I’m currently using a mechanical keyboard that feels good for long sessions – nothing flashy, just reliable.
[https://amzn.to/4tEGhYE](https://amzn.to/4tEGhYE?ref=blog.bajonczak.com)
On the screen side, having enough space to see my editor, browser and AI assistant side by side makes a difference. A 27" monitor with at least 1440p resolution is a sweet spot for me.
[https://amzn.to/4tTy0jU](https://amzn.to/4tTy0jU?ref=blog.bajonczak.com)
The combination of a good physical setup and an AI assistant turns writing from “ugh, I have to start” into “okay, let’s rough it out and polish it”.
## AI as an “exoskeleton” for coding and scripting
The second area where AI earns its place for me is in programming. I don’t want an AI to build entire systems unsupervised, but I absolutely want help with small scripts, boilerplate and debugging.
Take a simple automation example. Let’s say I receive structured emails every day and want to save a summary into a markdown file. I might start by telling an AI something like:
> “Write a small Python script that reads all .eml files from a folder, extracts subject and date, and appends a one-line summary into a daily-notes.md file.”
The AI will give me a starting point that looks roughly like this:
```python
import os
from email import policy
from email.parser import BytesParser
from datetime import datetime
import email.utils
INPUT_DIR = "emails"
OUTPUT_FILE = "daily-notes.md"
with open(OUTPUT_FILE, "a", encoding="utf-8") as out:
for filename in os.listdir(INPUT_DIR):
if not filename.endswith(".eml"):
continue
path = os.path.join(INPUT_DIR, filename)
with open(path, "rb") as f:
msg = BytesParser(policy=policy.default).parse(f)
subject = msg["subject"]
date = msg["date"]
date_obj = email.utils.parsedate_to_datetime(date)
line = f"- {date_obj.isoformat()} — {subject}\n"
out.write(line)
```
Is this production-ready? No. But it gets me 80% of the way in seconds. From there I can tighten it up, add proper error handling, adapt it to my folder structure and drop it into a cronjob or an automation framework.
The same applies to refactoring. Sometimes I paste a noisy function into an AI and ask it to separate concerns or suggest more meaningful names. I don’t blindly accept the diff, but it often pushes me out of my own tunnel vision.
For code and scripts, AI is like an exoskeleton: it amplifies my abilities, but I still decide where to walk.
## Grey zones: where I use AI carefully, not blindly
Then there are areas where I do use AI, but with extra guardrails.
Finances are a good example. I’m absolutely happy to let AI help me summarise PDFs from banks or insurers, explain weird fee structures or give me a plain-language summary of a contract. However, I don’t ask it “where should I invest?” and blindly follow the answer. Instead, I might ask it to explain how a specific ETF works, what the risks are or what certain terms mean. The decision of whether I actually put money into something stays with me.
Health is another grey zone. If I have a lab report or a medical article that’s full of jargon, I sometimes paste parts into an AI and ask: “Explain this to me like I’m not a doctor.” That can be incredibly helpful. But I try not to fall into the trap of using AI as a remote doctor. I might ask for questions I should bring to a real doctor, but not for a diagnosis or treatment plan.
Finally, there is family and kids. AI can be great for generating stories, explaining complex topics at different age levels or creating learning material. But I’m careful about letting an unsupervised AI chat directly with children, especially in a generic cloud app. If I do use AI in that context, I prefer setups where I sit in the middle, copy/paste the answers and filter them, or I use local models I control myself.
In all these grey zones, AI is allowed to inform me, structure things and translate jargon. It is not allowed to make decisions for me.
## Where I deliberately don’t use AI
Now to the controversial part: the places where I consciously avoid AI, even if it would make things “easier”.
The first category is deeply personal decisions: relationships, family, big career moves. I might journal with an AI occasionally, treating it like a sounding board to get my thoughts out of my head. But when it comes to “Should I quit my job?” or “Should I move to another country?”, I don’t ask AI for a yes or no. It doesn’t know my full context, and even if it did, I don’t want to outsource my identity to a probability distribution.
The second category is security-critical actions. I’m fine with AI helping me write scripts or infrastructure definitions, but when it comes to actions like “transfer money if condition X is met” or “automatically click confirmation links in emails”, I always keep a human in the loop. AI is allowed to propose, never to silently execute. If I generate passwords or secrets, I store them in a proper password manager, not in some random chat window.
The third category is emotional support as a replacement for real people. AI can be surprisingly good at mirroring your feelings and offering kind words. Used carefully, that can help on a rough day. But I pay attention to whether it becomes a replacement for human contact. If I catch myself preferring a chat with an AI over talking to a friend because it’s “easier”, that’s a red flag for me.
In all these cases, the rule is simple: if a mistake or a drift would hurt deep parts of my life, I’d rather move slower without AI.
## Local vs. cloud AI: why I care where it runs
Most mainstream AI tools are cloud-based. You open a website, type something, and your text goes to a server somewhere. For a lot of everyday tasks, I’m okay with that. If I’m drafting a generic email or brainstorming a conference talk, I don’t lose sleep over it.
However, there are categories of data where I don’t want to rely on “we care about your privacy” marketing lines. Private notes, family records,
anything related to health or finances – for that, I prefer to use local or self-hosted models whenever possible.
Running AI locally means you need a bit more hardware. In my experience, 32 GB of RAM and a fast NVMe SSD are where things start to feel usable for medium-sized models. You don’t need a monster GPU to experiment with smaller models, although it obviously helps for heavier workloads.
If you want to go this route, a compact mini PC can be a good starting point: small form factor, quiet, but powerful enough to run a few services and models.
[https://amzn.to/4tEvKwG](https://amzn.to/4tEvKwG?ref=blog.bajonczak.com)
Pair that with a decent 1–2 TB NVMe SSD, and you have enough room for multiple models and projects.
[https://amzn.to/4rknAb5](https://amzn.to/4rknAb5?ref=blog.bajonczak.com)
For me, this isn’t about paranoia. It’s about having the option to keep some things entirely in my own infrastructure. Cloud AI is great for quick experiments and “low-risk” tasks. Local AI is where I put the parts of my digital life that I don’t want to spray across a dozen vendors.
## The simple rules I try to live by
To make this less abstract, here are the simple rules I actually use day to day – not as theory, but as a quick gut check whenever I’m unsure.
If a mistake would be expensive or painful, I don’t rely on AI alone. I might let it draft or propose something, but I double-check and take responsibility for the final result.
If the topic is deeply personal or emotional, I see AI as a mirror, not as a compass. It can help me articulate my thoughts, but it doesn’t get to tell me who I am or what I should do.
If the work is repetitive, boring and low-risk, I happily throw AI at it. Summaries, first drafts, skeleton code, boilerplate – that’s exactly what machines are good at.
If the data is sensitive, I prefer local tools or self-hosted setups over cloud services whenever it’s realistic. If I have to use cloud AI, I strip the data down as much as possible.
And whenever I’m really not sure, I ask myself one more question:
“Would I be okay if this entire conversation – prompt and response – leaked publicly?”
If the answer is no, I either rethink what I’m about to paste, or I move it to local tools.
That’s how I try to navigate an “AI everywhere” world without giving up control over my own life.
### Claude Code Swarm Mode: When Your AI Stops Being a Helper and Starts Acting Like a Team
URL: https://blog.bajonczak.com/claude-code-swarm-mode-when-your-ai-stops-being-a-helper-and-starts-acting-like-a-team/
Last updated: 2026-02-15T12:34:04.000Z
I’ll be honest: for a long time I treated “AI coding assistants” like a fancy autocomplete with attitude. Useful, sometimes brilliant, sometimes confidently wrong — and always a bit… *linear*. You ask. It answers. You paste. You fix. Repeat.
Then I stumbled into the idea behind **Swarm Mode** in Claude Code, and my brain did that little “wait… that actually makes sense” flip.
Because Swarm Mode isn’t about making one assistant smarter.
It’s about turning one assistant into a *team*.
And if you’ve ever tried to ship anything non-trivial — a new feature, a refactor, a migration, a messy integration with a legacy API — you already know why that matters: real work is rarely a single-threaded problem.
So let’s talk about what Swarm Mode is, how it feels in practice, what it’s good at, what it’s bad at, and how you can replicate the same pattern even without the “official” tooling.
And yes — there will be code. Not just bullet points.
## The moment you realize: one AI is not enough
You know the situation.
You start with something innocent like:
> “Add authentication to this API.”
And five minutes later you’re juggling:
- middleware decisions,
- token handling,
- refresh flows,
- tests,
- docs,
- edge cases,
- and suddenly your “quick change” has become a mini-project.
A single AI assistant can help — but it also becomes the bottleneck. It can’t *really* parallelize. It can’t “split itself” into roles. It tries to do everything in one stream, and you end up babysitting it like a junior dev on their first day with production access.
Swarm Mode basically says:
**Stop forcing one model to be the architect, developer, QA, and documentation writer at the same time.**
Instead: give those responsibilities to different agents — and coordinate them.
That’s the core shift.
## What “Swarm Mode” actually means (without marketing fluff)
Swarm Mode is the multi-agent workflow idea applied to coding:
- A **Manager** agent breaks work into tasks and keeps the bigger picture.
- One or more **Builder** agents implement things.
- A **QA** agent tests, pokes holes, tries to break assumptions.
- A **Docs** agent writes the docs (so you don’t have to “later”, because later never happens).
The big win is not that the AI becomes magical. The win is that the workflow becomes structured:
1. **Plan**
2. **Split**
3. **Execute in parallel**
4. **Validate**
5. **Merge**
6. **Document**
That’s how teams ship software. Swarm Mode is basically trying to copy that pattern with AI actors.
And once you see it, you can’t unsee it.
## Why the Git Worktree idea is actually genius
One of the clever parts in the Swarm approach is isolation: each agent works in its own sandbox so they don’t step on each other constantly.
If you’ve ever tried to have two humans work in the same file at the same time — you already know the pain. With multiple agents it’s even worse.
So the workflow leans on **Git worktrees** (or an equivalent isolation mechanism):
- Agent A gets a clean working directory
- Agent B gets another one
- They both modify code independently
- You only merge what passes tests and actually makes sense
In human terms: *multiple branches with a strict merge gate*.
This is the part where it stops being “toy AI demo” and starts feeling like an engineering workflow.
## A practical starting point: define your swarm rules (CLAUDE.md style)
If you want multi-agent workflows to not degrade into chaos, you need rules.
Not “maybe do tests if you feel like it” rules. Real rules.
Here’s a **practical example** of what a swarm protocol file could look like (you can adapt the naming, but the structure is what matters):
```python
# Swarm Protocol
## Triggers
- "Activate Swarm Mode"
- "Start swarm"
## Roles
- Manager: plans tasks, assigns work, merges results, does NOT write production code
- Builder: implements code changes
- QA: writes and runs tests, hunts for edge cases
- Docs: updates README / docs / changelog
## Rules
- Each agent works in an isolated worktree/branch
- No code is merged without passing tests
- Builder must add or update tests if behavior changes
- QA must provide at least 3 edge cases per task
- Docs must include a short "How to use" snippet for new features
## Output format
- Manager produces: task list, acceptance criteria, merge plan
- Builder produces: PR-ready code + notes
- QA produces: test results + failure reproduction steps
- Docs produces: markdown updates + examples
```
This looks boring. It’s not.
This is the difference between “AI that kinda helps” and “AI that behaves like a process”.
## What it feels like when it works
When Swarm Mode works well, it’s almost unsettling.
You don’t ask:
> “Write this module.”
You ask:
> “Here’s the goal. Build it. Test it. Document it. Don’t break anything.”
And instead of one wall of output, you get:
- a plan,
- parallel progress,
- tests and edge cases,
- docs updates,
- and a merge summary.
That’s not a chatbot experience. That’s a mini delivery pipeline.
But… there’s a catch.
## The hidden cost: coordination and “token burn”
Multi-agent workflows are not free.
Even if you run locally, you pay in:
- CPU/GPU time,
- context duplication,
- coordination overhead,
- and yes: more tokens if you use APIs.
This is why Swarm Mode is not something you use for everything.
If your task is:
> “Rename a variable and update a comment.”
Do not spawn four agents. That’s like inviting a full Scrum team to change a button color.
Swarm Mode shines when the task is:
- broad,
- multi-step,
- easy to split,
- and expensive to debug later.
## A real-world style example: shipping a feature without losing your weekend
Let’s imagine a feature request that sounds simple but is not:
> Add JWT authentication to a REST API, include refresh tokens, add tests, and update docs.
A single assistant will often:
- implement a happy path,
- skip tests,
- forget docs,
- and leave you with security foot-guns.
A swarm workflow can split it like this:
### Manager task breakdown
- Task 1: Add auth middleware + JWT validation
- Task 2: Add login endpoint + token issuing
- Task 3: Add refresh token flow + storage strategy
- Task 4: Add test suite + edge cases
- Task 5: Update docs + examples
And then the workers run in parallel.
That’s the point: you stop doing “one conversation marathon” and start doing “task execution”.
## Example code: A lightweight swarm orchestrator (DIY, local-friendly)
Now to the fun part: you can build the *same pattern* yourself.
Below is a minimal swarm-style orchestrator in Python that works nicely with a local model endpoint (e.g., Ollama-like HTTP APIs). The goal is not to be perfect — it’s to show the architecture.
### 1) A basic Agent abstraction
```pthony
import asyncio
import json
import aiohttp
from dataclasses import dataclass
@dataclass
class Agent:
name: str
role: str
model: str
endpoint: str = "http://localhost:11434/api/generate"
async def run(self, task: str, context: str = "") -> str:
prompt = f"""
You are {self.name}. Role: {self.role}.
Context:
{context}
Task:
{task}
Output:
Return ONLY your contribution. Be concrete. If code is needed, include it.
"""
payload = {"model": self.model, "prompt": prompt, "stream": False}
async with aiohttp.ClientSession() as session:
async with session.post(self.endpoint, json=payload) as resp:
data = await resp.json()
return data.get("response", "").strip()
```
### 2) The orchestrator that coordinates the swarm
```python
class Swarm:
def __init__(self, manager: Agent, builders: list[Agent], qa: Agent, docs: Agent):
self.manager = manager
self.builders = builders
self.qa = qa
self.docs = docs
async def execute(self, goal: str) -> str:
# Step 1: Manager creates a plan + acceptance criteria
plan = await self.manager.run(
task=f"Break down this goal into tasks with acceptance criteria: {goal}",
context=""
)
# Step 2: Builders implement in parallel (each gets the plan)
builder_tasks = [
b.run(task=f"Implement the solution for: {goal}", context=plan)
for b in self.builders
]
builder_results = await asyncio.gather(*builder_tasks)
# Step 3: QA reviews + suggests tests and edge cases
qa_result = await self.qa.run(
task="Review the proposed implementation. Provide tests and edge cases. Point out risks.",
context=plan + "\n\n" + "\n\n".join(builder_results)
)
# Step 4: Docs writes usage docs
docs_result = await self.docs.run(
task="Write documentation updates and a short usage example.",
context=plan + "\n\n" + "\n\n".join(builder_results) + "\n\n" + qa_result
)
# Step 5: Manager produces a merge-ready summary
final = await self.manager.run(
task="Produce a final, merge-ready output: summary, code snippets, test plan, and doc changes.",
context=plan + "\n\n" + "\n\n".join(builder_results) + "\n\n" + qa_result + "\n\n" + docs_result
)
return final
```
### 3) Running it
```python
async def main():
manager = Agent("ManagerAI", "Tech Lead / Planner", model="phi3")
builders = [
Agent("BuilderA", "Backend Developer", model="phi3"),
Agent("BuilderB", "Implementation Assistant", model="phi3"),
]
qa = Agent("QA-AI", "Test Engineer", model="phi3")
docs = Agent("Docs-AI", "Technical Writer", model="phi3")
swarm = Swarm(manager, builders, qa, docs)
result = await swarm.execute("Add JWT auth + refresh tokens to a FastAPI app, with tests and docs.")
print(result)
if __name__ == "__main__":
asyncio.run(main())
```
This is the “poor man’s Swarm Mode”, but it already gives you:
- planning,
- parallel code proposals,
- testing mindset,
- documentation output,
- and a final consolidation.
Is it perfect? No.
Is it wildly better than a single long chat thread for complex tasks? Often, yes.
## The part nobody tells you: swarms need guardrails or they become noise
If you just spawn agents and let them freestyle, you’ll get:
- conflicting implementations,
- duplicated effort,
- mismatched assumptions,
- and a lot of text that feels productive but isn’t.
Here are the guardrails that make swarms actually useful:
### 1) Acceptance criteria are non-negotiable
If the Manager doesn’t define “done”, you’re building vibes, not software.
### 2) Keep roles strict
If your QA agent starts coding and your Builder starts writing docs, you’ve lost the structure.
### 3) Force a merge gate
No tests = no merge. It sounds strict. It saves you later.
### 4) Start small
Don’t begin with “rewrite my entire backend”.
Start with one feature that’s easy to slice.
### 5) Don’t over-swarm
More agents ≠ more value.
Past a certain point you’re just generating extra coordination overhead.
## So… should you use Swarm Mode?
If you mostly do:
- tiny edits,
- quick scripts,
- small refactors,
then Swarm Mode will feel like overkill.
But if you regularly touch:
- bigger codebases,
- multi-step integrations,
- features where tests and docs matter,
- complex bug hunts,
- migrations,
then Swarm Mode is the first AI workflow that actually feels like it respects how real engineering works.
It turns “AI helped me type faster” into:
**“AI helped me ship.”**
And that’s a different category.
## Closing thoughts
I like tools that reduce chaos.
Swarm Mode — or the swarm pattern in general — is interesting because it doesn’t promise a smarter model. It promises a smarter *process*.
And process is what usually kills projects, not lack of intelligence.
If you try it, my honest recommendation:
- define roles,
- write your rules,
- enforce tests,
- and treat it like a team.
Because the moment you treat your AI like a team, you’ll start building like a lead — not like a prompt jockey.
If you want, paste me one real task you’re currently doing (something annoying but realistic), and I’ll rewrite it into a “swarm-ready” task breakdown + a CLAUDE.md protocol tailored to your setup.
### Amazfit or Whoop Strap
URL: https://blog.bajonczak.com/amazfit-or-whoop-strap/
Last updated: 2026-02-15T12:22:57.000Z
I honestly thought this would be a two-tab purchase: open a [WHOOP](https://amzn.to/4b6gbHi?ref=blog.bajonczak.com) page, open an [Amazfit](https://amzn.to/4qu0A9d?ref=blog.bajonczak.com) page, compare a few numbers, buy the “better” one, done. Instead I got stuck in that familiar place where both options are good, but the differences are the kind that show up only after week three—when the novelty is gone and the device either becomes part of your life or ends up in a drawer.
The shortlist was simple: [**WHOOP**](https://amzn.to/4b6gbHi?ref=blog.bajonczak.com) on one side, and [**Amazfit’s Helio world**](https://amzn.to/4qu0A9d?ref=blog.bajonczak.com) on the other—specifically the [**Helio Strap**](https://amzn.to/4qu0A9d?ref=blog.bajonczak.com), because that’s the fair comparison. No screen, no notifications, just a wrist strap that tries to make sense of your day and your night.
And that’s when I noticed: this wasn’t about “which sensor is best.” It was about which philosophy I can live with.
## What I Actually Wanted (and What I Didn’t)
I wasn’t looking for a smartwatch. I don’t need another screen buzzing during meetings, and I’m not trying to turn my wrist into a second phone. I wanted the boring part: 24/7 tracking, sleep, recovery, trends over time, and a way to connect the dots without obsessing over it.
But I also had a hard rule from day one: **no subscription as the core requirement**. I’ll pay for hardware. I’m not paying forever just to keep seeing my own metrics.
That rule didn’t immediately decide the winner—but it framed every feature comparison in a very different way.
## The Only Fair Comparison: Strap vs. Strap
People love comparing [WHOOP](https://amzn.to/4b6gbHi?ref=blog.bajonczak.com) to smartwatches because it creates dramatic charts. But the real decision is simpler: [WHOOP](https://amzn.to/4b6gbHi?ref=blog.bajonczak.com) is a **screenless strap**, and the [Amazfit](https://amzn.to/4qu0A9d?ref=blog.bajonczak.com) equivalent is the [**Helio Strap**](https://amzn.to/4qu0A9d?ref=blog.bajonczak.com). Everything else—rings, watches, “smart” features—is a different category. Useful, yes. Comparable, not really.
So I compared them like this: how good is the strap, and how good is the app behind it?
## Hardware Features: What You Wear Every Day
### Amazfit Helio Strap — what it brings

As you he [Helio Strap](https://amzn.to/4jOmAJo?ref=blog.bajonczak.com) is Amazfit’s “no screen, all signal” device. It’s lightweight, uses a nylon strap, and it’s designed to be worn constantly. The most practical feature is simply battery life: you can go about your routine without thinking about charging every other day. That matters more than people admit, because charging is where tracking breaks.
On the sensor side, [Amazfit’s Helio Strap](https://amzn.to/4qu0A9d?ref=blog.bajonczak.com) is built around their current-generation optical heart rate sensor (BioTracker 6.0 in their marketing), plus the usual motion sensors and temperature sensing. In normal life this translates to the obvious stuff—heart rate and sleep detection—but also to the “useful if you stick with it” stuff: recovery patterns, resting heart rate changes, stress signals, and trend tracking.
And the [Helio Strap’s](https://amzn.to/4qu0A9d?ref=blog.bajonczak.com) biggest advantage isn’t that it tries to be everything. It’s that it plugs into a bigger ecosystem. If you later want a watch for workouts and GPS, you can add one without changing your data platform.
### WHOOP — what it brings

[WHOOP](https://amzn.to/4b6gbHi?ref=blog.bajonczak.com) hardware is basically a data module with a strap. It’s comfortable, minimal, and very clearly designed for the “always on” lifestyle. The big headline on newer generations is battery convenience—charging becomes less of a constant background task, which is exactly what you want for something that’s supposed to live on your wrist.
But hardware is not where [WHOOP](https://amzn.to/4b6gbHi?ref=blog.bajonczak.com) wins. [WHOOP](https://amzn.to/4b6gbHi?ref=blog.bajonczak.com)’s real hardware feature is simply that it’s tuned to support the membership model: always on, constant stream of data, consistent wear, and minimal friction. The device exists to keep the app fed.
## App Features: Where the Real Product Lives
This is the section that actually decides the winner for most people. Two straps can track similar raw signals. But the app determines whether those signals turn into something you use—or something you ignore.
### WHOOP App — the “coach loop”
[WHOOP](https://amzn.to/4b6gbHi?ref=blog.bajonczak.com)’s app is opinionated. It’s not just “here are your charts,” it’s “here’s what you should do today.” The core loop is simple and powerful: sleep drives recovery, recovery influences strain, strain pushes you toward better sleep. In practice, it means you wake up and immediately get a narrative: how ready your body is, how hard you can push, and how yesterday affected today.
[WHOOP](https://amzn.to/4b6gbHi?ref=blog.bajonczak.com) also leans heavily into structured interpretation. You get daily scores that feel like a coach’s verdict. If you’re the kind of person who thrives with external feedback and a system that nudges your behavior, [WHOOP](https://amzn.to/4b6gbHi?ref=blog.bajonczak.com) is addictive in a good way. It turns your body into a dashboard with a clear “recommended action.”
The downside is also obvious: if you hate being scored, you’ll hate [WHOOP](https://amzn.to/4b6gbHi?ref=blog.bajonczak.com). And if you hate paying subscriptions, you’ll resent it—even if you like the app.
### Zepp App (Amazfit) — the “toolbox”
[Amazfit](https://amzn.to/4qu0A9d?ref=blog.bajonczak.com)’s Zepp app feels like a platform rather than a doctrine. You get plenty of metrics—sleep, readiness-style indicators, stress, trends—without the same “you must follow the program” vibe. It’s more like: here’s what happened, here are the insights, decide what matters to you.
That’s both its strength and its weakness. If you want strict coaching, Zepp can feel less intense. But if you want ownership—hardware you buy once, data you can keep using without a bill—then the Zepp approach is easier to live with. It gives you information without turning your wearable into a subscription identity.
The other big point: Zepp isn’t just a [Helio Strap](https://amzn.to/4qu0A9d?ref=blog.bajonczak.com) app. It’s the hub for watches, rings, and straps. So if you’re someone who might add a watch later for workouts or GPS, you’re not starting over.
## Feature-by-Feature: What Actually Matters in Daily Life
This is how I ended up comparing them, not as a spec-sheet war, but as “what will annoy me in real usage?”
**Sleep tracking:** both are built to do this well enough to be useful. The difference is presentation. [WHOOP](https://amzn.to/4b6gbHi?ref=blog.bajonczak.com) makes sleep part of its coaching story. Zepp presents sleep as a set of metrics you can interpret. If you want a daily verdict, [WHOOP](https://amzn.to/4b6gbHi?ref=blog.bajonczak.com). If you want the data without the verdict, Amazfit.
**Recovery/readiness:** [WHOOP](https://amzn.to/4b6gbHi?ref=blog.bajonczak.com) is famous for this because it’s the centerpiece. It’s front and center, and it actively influences what the app recommends. Amazfit does recovery-style insights too, but it doesn’t shove them into your face with the same intensity. Again, coach vs toolbox.
**Training load / strain:** [WHOOP](https://amzn.to/4b6gbHi?ref=blog.bajonczak.com)’s strain concept is clean and sticky: it gives you an understandable score that ties directly into recovery. Amazfit can track workouts and load trends too—especially if you pair the Helio Strap with an Amazfit watch—but it’s more modular. [WHOOP](https://amzn.to/4b6gbHi?ref=blog.bajonczak.com) is one tightly bound model. Amazfit is a set of components you can combine.
**Comfort and compliance:** this is the silent killer feature. The best wearable is the one you actually keep wearing. [WHOOP](https://amzn.to/4b6gbHi?ref=blog.bajonczak.com) is designed for constant wear. Helio Strap aims for the same “forget it’s there” vibe. The real differentiator here ends up being your tolerance for charging and your tolerance for subscription pricing.
**Ecosystem:** [WHOOP](https://amzn.to/4b6gbHi?ref=blog.bajonczak.com) is intentionally narrow. That’s part of why it’s good. Amazfit is intentionally broad. That’s part of why it’s flexible. If you like mixing devices—strap now, watch later, maybe a ring for sleep—Amazfit makes that easy.
## The Moment It Became Obvious
I tried to justify [WHOOP](https://amzn.to/4b6gbHi?ref=blog.bajonczak.com) like this: “If I use it daily, the subscription is worth it.” And that’s not a stupid argument. But I noticed what I was doing: I was trying to talk myself into a model I fundamentally don’t like.
I don’t want my body metrics behind a yearly paywall. I don’t want the best part of the product to disappear if I cancel. I want to buy hardware and keep using it. That’s it.
With Amazfit, I didn’t need a motivational speech. The model matched my rule: buy it once, use it, expand later if I want.
## What I Bought (and Why)
I chose [**Amazfit Helio Strap**](https://amzn.to/4qu0A9d?ref=blog.bajonczak.com).
Not because [WHOOP](https://amzn.to/4b6gbHi?ref=blog.bajonczak.com) is a bad product—it isn’t. But because [WHOOP](https://amzn.to/4b6gbHi?ref=blog.bajonczak.com) is a product you rent, and I didn’t want that. The Helio Strap gives me the strap-style tracking I wanted, inside an ecosystem where I can add a watch later without changing platforms, and without waking up to a subscription invoice in the background.
If you love being coached and you don’t mind paying for that coaching continuously, [WHOOP](https://amzn.to/4b6gbHi?ref=blog.bajonczak.com) will probably make you happy. If you want ownership and flexibility, the Amazfit route makes more sense.
---
## Final Verdict (English)
I didn’t choose Amazfit because WHOOP is weak. I chose Amazfit because I don’t want a subscription wearable. WHOOP is a polished coaching system that you keep paying for. Amazfit is a set of tools you own, with a strap that finally makes a fair comparison possible. After the spec sheets fade into the background, that ownership difference is the thing you feel every single month—and that’s why it decided it for me.
### ARM Resource Aliases with Terraform
URL: https://blog.bajonczak.com/arm-resource-aliases-with-terraform/
Last updated: 2026-07-21T11:40:47.000Z
*Small correction to the usual confusion around this topic: ARM aliases are not friendly names for Azure resources. They are paths that Azure Policy uses to target resource properties. That makes them useful with Terraform, but not in the way many people first expect.*
When people hear "resource alias" in Azure, it is easy to think of a pointer to a resource. Something like `alias-storage-main` that redirects to a real storage account ID.
That is not what ARM aliases are.
In Azure Resource Manager, aliases are mostly used by Azure Policy. They map a policy-friendly name to a property path inside a resource type. For example, a policy can use an alias to check whether a storage account allows public access, whether a tag exists, or whether a specific property has the expected value.
So the practical Terraform use case is not "create an alias and point it to a resource".
The practical use case is:
> use ARM aliases inside Azure Policy definitions that you manage with Terraform.
That is less flashy, but much more useful.
## What ARM aliases actually are
An ARM alias is a reference to a property on an Azure resource type.
You can think of it as a stable-ish policy path that Azure Policy understands. Instead of writing custom logic for every resource shape, Azure Policy can evaluate aliases exposed by the resource provider.
Examples of things aliases are used for:
- checking tags
- enforcing locations
- auditing storage account settings
- requiring secure transfer
- blocking public network access
- validating diagnostic settings or SKU choices where supported
They are not DNS aliases. They are not endpoints. They are not a shortcut resource ID. They do not let you move a storage account and magically keep all dependent resources working.
That distinction matters, because otherwise the Terraform design goes in the wrong direction.
## Why they matter with Terraform
Terraform is often used to manage Azure Policy definitions, policy initiatives and assignments.
That is where ARM aliases become useful.
You can write a custom policy definition in Terraform and use aliases in the policy rule. Then you assign the policy to a management group, subscription or resource group.
This helps when you want to enforce rules like:
- storage accounts must not allow public blob access
- resources must have required tags
- only approved regions are allowed
- insecure configurations should be denied or audited
- specific resource properties must match your platform baseline
In other words: aliases are not an IaC refactoring tool. They are a governance tool.
## Finding aliases
Before writing a policy, check which aliases Azure exposes for the resource type.
With Azure CLI, you can inspect aliases like this:
```bash
az provider show \
--namespace Microsoft.Storage \
--expand "resourceTypes/aliases" \
--query "resourceTypes[?resourceType=='storageAccounts'].aliases[].name" \
--output table
```
For a broader look:
```bash
az provider show \
--namespace Microsoft.Storage \
--expand "resourceTypes/aliases" \
--output json
```
The exact aliases depend on the provider and API surface. Do not guess them. Check what Azure exposes, then use that in the policy.
## Terraform example: deny public blob access
Here is a small example that manages a custom Azure Policy definition with Terraform.
The policy denies storage accounts where public blob access is enabled.
```hcl
provider "azurerm" {
features {}
}
resource "azurerm_resource_group" "rg" {
name = "rg-policy-demo"
location = "westeurope"
}
resource "azurerm_policy_definition" "deny_public_blob_access" {
name = "deny-public-blob-access"
policy_type = "Custom"
mode = "Indexed"
display_name = "Deny public blob access on storage accounts"
description = "Denies storage accounts that allow public blob access."
policy_rule = jsonencode({
if = {
allOf = [
{
field = "type"
equals = "Microsoft.Storage/storageAccounts"
},
{
field = "Microsoft.Storage/storageAccounts/allowBlobPublicAccess"
equals = true
}
]
}
then = {
effect = "deny"
}
})
}
resource "azurerm_resource_group_policy_assignment" "deny_public_blob_access" {
name = "deny-public-blob-access"
resource_group_id = azurerm_resource_group.rg.id
policy_definition_id = azurerm_policy_definition.deny_public_blob_access.id
}
```
The important line is this one:
```hcl
field = "Microsoft.Storage/storageAccounts/allowBlobPublicAccess"
```
That field value is the alias Azure Policy evaluates.
## Example: require a tag
For tag rules, the alias pattern is simpler.
This policy denies resources that do not have an `owner` tag:
```hcl
resource "azurerm_policy_definition" "require_owner_tag" {
name = "require-owner-tag"
policy_type = "Custom"
mode = "Indexed"
display_name = "Require owner tag"
policy_rule = jsonencode({
if = {
field = "tags['owner']"
exists = false
}
then = {
effect = "deny"
}
})
}
```
This is the kind of policy I actually like to manage through Terraform, because the definition, assignment and scope can be reviewed like normal infrastructure code.
## Common mistake: treating aliases like resource pointers
This is the part I would be careful with.
There is no normal Terraform pattern where you create something like this and use it as a movable pointer to a storage account:
```hcl
resource "azurerm_resource_alias" "example" {
name = "alias-storage-main"
target_resource_id = azurerm_storage_account.sa.id
}
```
That is not how ARM aliases work.
If you need stable references between Terraform modules, use normal Terraform outputs, remote state, data sources, naming conventions, or a platform registry pattern. If you need traffic redirection, use DNS, Private DNS, Front Door, Application Gateway, Traffic Manager or service-specific endpoints.
ARM aliases solve a different problem: policy evaluation.
## Practical workflow
My workflow for this is usually:
1. Decide which Azure property you want to govern.
2. Check whether the resource provider exposes an alias for it.
3. Write a small custom policy definition.
4. Manage the policy definition and assignment in Terraform.
5. Test the policy in `audit` mode first.
6. Switch to `deny` only when the false positives are understood.
That last step is important. A broken deny policy can block deployments in annoying ways. Start with audit unless you are completely sure.
## Pitfalls
A few things to watch:
- Alias support is not identical for every resource type.
- Some properties are only available in certain API versions.
- `Indexed` mode and `All` mode behave differently.
- Deny policies can break pipelines if tested poorly.
- Tags are easy to enforce badly, especially on inherited or generated resources.
- Policy evaluation and Terraform planning are separate worlds. Terraform may plan successfully and Azure Policy may still deny the deployment.
That last one catches teams often. Terraform tells you what it wants to create. Azure Policy decides whether Azure will allow it.
## My take
ARM aliases are useful, but the name is misleading if you come from an infrastructure refactoring mindset.
They are not friendly names for resources. They are not a way to swap out a storage account behind a stable alias. They are Azure Policy property paths.
Used correctly, they are valuable. You can manage custom policies in Terraform, use aliases to target specific Azure properties, and keep governance rules versioned with the rest of your platform code.
Used incorrectly, they lead to fake abstractions and Terraform examples that look nice but do not map to how Azure actually works.
So my rule is simple: use ARM aliases for policy. Use Terraform outputs, data sources, DNS or service-specific endpoints for resource references.
## References
- Azure Policy definition structure: [https://learn.microsoft.com/en-us/azure/governance/policy/concepts/definition-structure-policy-rule](https://learn.microsoft.com/en-us/azure/governance/policy/concepts/definition-structure-policy-rule?ref=blog.bajonczak.com)
- Azure Policy alias basics: [https://learn.microsoft.com/en-us/azure/governance/policy/concepts/definition-structure-alias](https://learn.microsoft.com/en-us/azure/governance/policy/concepts/definition-structure-alias?ref=blog.bajonczak.com)
- Terraform `azurerm_policy_definition`: [https://registry.terraform.io/providers/hashicorp/azurerm/latest/docs/resources/policy\_definition](https://registry.terraform.io/providers/hashicorp/azurerm/latest/docs/resources/policy%5Fdefinition?ref=blog.bajonczak.com)
- Terraform `azurerm_resource_group_policy_assignment`: [https://registry.terraform.io/providers/hashicorp/azurerm/latest/docs/resources/resource\_group\_policy\_assignment](https://registry.terraform.io/providers/hashicorp/azurerm/latest/docs/resources/resource%5Fgroup%5Fpolicy%5Fassignment?ref=blog.bajonczak.com)
### Building My Own TRMNL-Style Desk Display
URL: https://blog.bajonczak.com/building-my-own-trmnl-style-desk-display/
Last updated: 2026-01-09T21:10:27.000Z
I like having information at a glance. Not on my phone, not buried in tabs, but **physically present on my desk**.
Bitcoin price. Weather. Calendar week. A few fun facts. Things that quietly update while I work.
That was the motivation.
I discovered TRMNL and loved the concept immediately, but instead of buying a finished device, I wanted full control: my own hardware, my own firmware tweaks, and my own backend. I wanted to understand *why* it works, not just *that* it works.
So I built my own TRMNL-style screen from scratch using a **7.5″ Waveshare ePaper display**, the **official TRMNL firmware**, and a **self-hosted Laravel server running in Docker Compose**.

My TRMNL
This article documents the full journey: hardware choices, firmware compilation, flashing, backend setup, configuration, and—most importantly—the fix for a nasty **B/W/R display refresh issue** that caused visible stripes until I patched the panel refresh logic.
If you want to rebuild this yourself, you can.
# Why ePaper on the desk still makes sense
n ePaper display is slow, monochrome, and completely silent. That sounds like a disadvantage—until you realize that’s exactly what you want for passive information.
No notifications. No distractions. No glowing pixels.
The display refreshes every few minutes, pulls fresh data from my server, and then just *exists*. Bitcoin moves, the weather changes, the calendar week rolls over—and I never have to think about it.
Power usage is negligible. Once the image is drawn, the display consumes almost nothing.
# My Hardware selection
I chose a [**7.5″ Waveshare ePaper display**](https://amzn.to/3LBO20k?ref=blog.bajonczak.com), available in both **BW** and [**B/W/R (black/white/red)**](https://amzn.to/3LlaGdq?ref=blog.bajonczak.com) variants.
You *can* use both. But I’ll be blunt:
- **BW displays** are forgiving, easy, and robust
- **B/W/R displays** look nicer, but are much more sensitive to initialization and refresh order
That difference becomes important later.
The display is driven by an **ESP32-based Waveshare ePaper Driver Board**, which simplifies wiring dramatically. If you try to wire a raw ESP32 DevKit yourself, you *must* get SPI timing, BUSY pin handling, and voltage levels exactly right—or you’ll chase ghosts for hours.
For power, don’t cheap out. ePaper displays draw short but real current spikes during refresh. A weak USB supply can cause random artifacts that look like firmware bugs but aren’t.
At this point you can already add affiliate links for:
- [the 7.5″ Waveshare display inkl HAT](https://amzn.to/3LBO20k?ref=blog.bajonczak.com)
- [An ESP32 DevKit (I will recommen the one from WaveShare)](https://amzn.to/4pCYPp3?ref=blog.bajonczak.com)
- [a stable 5V power supply](https://amzn.to/4swNNo3?ref=blog.bajonczak.com)
# Firmware: TRMNL as a base, not a black box
I used the official **TRMNL firmware** as a starting point. That’s important: I didn’t reinvent the wheel. I extended it.
The firmware is built with **PlatformIO**, which means setup is straightforward if you already work with embedded systems:
```shell
git clone https://github.com/usetrmnl/trmnl-firmware
cd trmnl-firmware
pio run
pio run -t upload
```
Serial output is invaluable during first boot:
```shell
pio device monitor -b 115200
```
At this stage, the device boots, connects to Wi-Fi, and starts talking to… nothing yet. That’s where configuration comes in.
## Pointing the device to your own server
The firmware contains a configuration header (usually `config.h` ). This is where the device learns **where “home” is**.
In my case, that’s my own Laravel backend:
```c++
#define API_BASE_URL "http://trmnl.yourdomain.com"
```
Use an IP address or DNS name the device can actually reach. So what url you need to set? Let's first setup the Server.
## The server side: I use TRMNL BYOS Laravel
At first I thought I’d just spin up a Laravel app and expose a `/screen` endpoint. That works for experiments, but it’s not the smooth way to do this long-term. TRMNL already has a BYOS ecosystem — and there’s a **Laravel-based BYOS server** that’s basically the sweet spot if you like PHP and want something you can run in Docker without turning your weekend into a framework project. [GitHub+1](https://github.com/usetrmnl/byos%5Flaravel?utm%5Fsource=blog.bajonczak.com)
The project is called **`usetrmnl/byos_laravel`**. It’s a self-hostable TRMNL server built in Laravel with device management, screen generation, and support for “Recipes” (community screen definitions / layouts) — so you’re not starting from zero. [GitHub+1](https://github.com/usetrmnl/byos%5Flaravel?utm%5Fsource=chatgpt.com)
The important mental model is: **the device doesn’t talk to “your custom endpoints”**. It talks to a TRMNL-compatible server, and BYOS Laravel *is* that server. You get a dashboard, device onboarding, and a structured way to generate screens without constantly touching firmware. [GitHub+1](https://github.com/usetrmnl/byos%5Flaravel?utm%5Fsource=blog.bajonczak.com)
### Running it (Docker Compose, the boring reliable way)
BYOS Laravel comes with a production-ready Docker Compose setup in the repo, so you don’t need to design your own container stack. You basically clone it and bring it up. [GitHub+1](https://github.com/usetrmnl/byos%5Flaravel?utm%5Fsource=blog.bajonczak.com)
Conceptually, the flow is:
```code
git clone https://github.com/usetrmnl/byos_laravel
cd byos_laravel
# follow the repo's docker/prod setup
docker compose up -d
```
Once it’s up, you’ll access the **dashboard** in the browser and do the “human part” of the setup there: registering the device, checking connectivity, and selecting/creating what the device should display. One BYOS Laravel user guide I found referenced a default dashboard URL like `http://localhost:4567/dashboard` in a typical local run, but your exact port depends on the compose file / your reverse proxy.
If you already run a reverse proxy (Traefik / nginx proxy manager / Caddy), this is where you map it to something like:
- `https://trmnl.yourdomain.com`
…and from then on you stop thinking about container ports at all.
## Pointing the TRMNL firmware at BYOS Laravel
This is the part people sometimes overcomplicate: the firmware simply needs to know **the base URL of your BYOS server**.
In your firmware `config.h`, you set the server/base URL to your BYOS Laravel host (as you seen above).
And that’s it. From that moment, the device is no longer tied to any cloud dependency — it’s “BYOS mode”: Buy/Build your device, then point it at your own server.
# The problem: stripes on the B/W/R display
Everything worked.
Except it didn’t.
On the **B/W/R 7.5″ panel**, I started seeing **horizontal striping and scanline artifacts**. The image data itself was correct. The logic was correct. And yet, the display looked broken.

Scalines / Ghosting Image
This is the moment where most people blame:
- the panel
- the SPI bus
- cosmic radiation
In reality, the issue was much simpler—and much more subtle.
## The real cause: incorrect pane refresh sequencing
The 7.5″ B/W/R display internally uses **multiple memory planes** (often referred to as panels or panes). Writing image data and *refreshing* the display are **not the same thing**.
My original code refreshed the display **too early**—before the full pane was written. On BW panels this often “works anyway”. On B/W/R panels, it absolutely does not.
The fix was to explicitly control **which panel is written, and when it is refreshed**.
Conceptually, the correct flow looks like this:
1. Clear or initialize the display properly
2. Write **all** black/white data to `PANEL_0`
3. Refresh `PANEL_0`
4. Write red layer data to `PANEL_1` (if used)
5. Refresh `PANEL_1`
6. Finalize the update
In pseudocode:
```code
selectPane(PANEL_0);
writeBlackWhiteBuffer();
refreshPane(PANEL_0);
selectPane(PANEL_1);
writeRedBuffer();
refreshPane(PANEL_1);
```
Once I moved the refresh logic **out of the middle of the write cycle**, the stripes disappeared completely. So You can find my PR here: [https://github.com/usetrmnl/trmnl-firmware/pull/272](https://github.com/usetrmnl/trmnl-firmware/pull/272?ref=blog.bajonczak.com)
# One more hard truth about B/W/R panels
Partial refresh is tempting. It’s also dangerous. B/W/R panels **accumulate ghosting** over time if you only do partial updates. My solution was simple and effective:
- Full clear on boot
- Partial updates for normal operation
- Full clear every N updates (e.g. every 10–15 cycles)
That single decision eliminated long-term drift and visual degradation.
## The result
I now have a silent, low-power desk display that:
- shows live Bitcoin prices
- displays weather and calendar week
- rotates small fun facts
- runs entirely on my infrastructure
- Extendable
No cloud dependency. No vendor lock-in. No unexplained behavior.Just a screen that does exactly what I want.
## Final thoughts
This project looks simple from the outside. It isn’t.
But it’s **deeply satisfying**, especially once you understand where the sharp edges are.
If you:
- respect the hardware
- control refresh timing explicitly
- keep the backend boring
…the setup is rock solid.
If you want, next steps could include:
- OTA firmware updates
- multiple screen layouts per device
- device registration & authentication
- image caching & delta updates
But even in its current form, it’s already doing exactly what I built it for:
quietly showing me what matters, without demanding attention.
### Using the Dymo Labelwriter on your Network
URL: https://blog.bajonczak.com/using-dymo-labelwriter-450-duo-on-your-network/
Last updated: 2025-11-17T12:00:53.000Z
If you print labels frequently, you know the struggle:
Your label printer sits on one desk, connected via USB, and every time you need a label from another device, you have to move cables around. Annoying.
I’m using the **DYMO LabelWriter 450 Duo**, a reliable workhorse that prints both normal and continuous labels. The device has served me well for years — and with a bit of setup, you can turn it into a fully accessible **network label printer** using a Raspberry Pi and CUPS.
# What is a Dymo Label Wirter
The [**DYMO LabelWriter 450 Duo**](https://amzn.to/4oMAJbV?ref=blog.bajonczak.com) is a compact, versatile label printer designed for quick and efficient labeling tasks at home or in the office. It supports both standard paper labels and durable continuous labels, making it ideal for organizing storage boxes, shipping packages, office documents, cables, and even small inventory systems. With fast thermal printing, no ink required, and a wide variety of label types, the 450 Duo is a practical tool for anyone who needs clean, reliable labels on demand. When combined with a network setup, it becomes even more powerful — allowing multiple devices to print labels effortlessly from anywhere in your local environment
## What you need
- **DYMO LabelWriter 450 Duo**
- **Raspberry Pi** (I’m using Ubuntu, but Raspberry Pi OS works perfectly too)
- USB cable for connecting the printer
- A local network
## What is CUPS?
**CUPS** (Common Unix Printing System) is a printer server for Unix-based systems.
It allows you to share USB printers across your network — in other words, CUPS turns your Raspberry Pi into a small print server.
# Installing and configuring cups
Installation is straightforward:
```shell
sudo apt install cups
```
To make the printer reachable from other devices in your network, edit the config file:
```
sudo nano /etc/cups/cupsd.conf
```
Find this line:
```
Listen localhost:631
```
Replace it with:
```
Listen 0.0.0.0:631
```
For simplicity, you can open up admin access within your network (you can lock this down later):
```config
Order allow,deny
Allow all
# Restrict access to the admin pages...
Order allow,deny
Allow all
# Restrict access to configuration files...
AuthType Default
Require user @SYSTEM
Order allow,deny
Allow all
```
Now to a restart of this service
```
sudo service cups restart
```
And you can now open up the admin portal in your browser by navigating to **http://{IP OF THE PI}:631/admin**
At this point, you must attached the dymo device to the usb port. So when you open up after that the admin portal. Within the Administration you now see your Label Writer 450 just select this and hit "continue"
> Hint! When you will be prompted for alogin, use the ssh user (root) or a dedicated user that is in the lpadmin group.
Next you can add some metadata and hit "continue"
Now review the settings and Add the printer
# Integrate the printer now
Now it's time to add this printer to the laptop / pc as printer. open up the printer settings and you will see the device now and you can add this as a printer in your system.
Now when you open the Dymo Lable Utility you will see "remote" printer and you can use it to print some labels.
### Watching YouTube Anonymously: How I Route Media Traffic over Mullvad VPN with OPNsense
URL: https://blog.bajonczak.com/watching-youtube-anonymously-how-i-route-media-traffic-over-mullvad-vpn-with-opnsense/
Last updated: 2026-08-13T04:03:43.000Z
I don’t want YouTube to know who I am or where I watch from. I want to enjoy videos without feeding the profile machine. Full-tunnel VPN for everything? Overkill. The smarter move is **policy-based routing**: only YouTube traffic goes through Mullvad; everything else goes out normally.
This guide shows exactly how I built that on **OPNsense** with **Mullvad (WireGuard)**. It’s practical, fast, and honest about the trade-offs (dynamic CDNs, DNS leaks, and “smart” TVs that hardcode DNS).
---
## My network in a nutshell
- **OPNsense** as the edge device (between ISP modem and my LAN) running on my protectli.
- **VLANs** for separation:
- `LAN` → everyday clients
- `MEDIA` → TV, streaming box, media PC (the targets for YouTube policy routing)
- (optional) `GUEST` / `IOT`, etc.
- **WireGuard** client on OPNsense, connected to **Mullvad** → creates a VPN gateway I can use in rules.
- **Unbound DNS** on OPNsense as the central resolver. Client devices are forced to use OPNsense for DNS (to avoid leaks).
> You can apply the YouTube rule to all clients, or just the `MEDIA` VLAN. I prefer the VLAN approach: fewer surprises, easy to test.
---
## Why I Use a Protectli Box for OPNsense
Running OPNsense on consumer hardware is fine for testing, but if you’re serious about routing, VLANs, VPN, and policy-based routing, you’ll want something more reliable. I’ve been using a **Protectli Vault** as my OPNsense box — and honestly, it’s one of the best decisions I’ve made for my homelab.
It’s fanless (so completely silent), runs cool, and is built specifically for firewall/router use cases. WireGuard performance is excellent, and even with multiple VLANs, intrusion detection, and VPN tunnels, it doesn’t break a sweat.
👉 If you’re looking for a rock-solid device to run OPNsense or pfSense on, check out the [Protectli Vault on Amazon](https://amzn.to/4nuOnQ1?ref=blog.bajonczak.com) (affiliate link).
With this, you don’t have to worry about your firewall being the bottleneck when you push YouTube traffic through Mullvad or when you start segmenting your home network further.
---
## Prerequisites
- OPNsense installed and working.
- A Mullvad account and a WireGuard config (keys + endpoint).
- Admin access to OPNsense.
- Basic comfort with Firewall rules and NAT.
---
## Step-by-step setup
### 0) Housekeeping (worth the 2 minutes)
- **Update** OPNsense to a current release.
- **Backup**: `System → Configuration → Backups → Download configuration`.
---
### 1) Set up Mullvad (WireGuard) on OPNsense
1. **Install WireGuard plugin** if not present.
2. **Create a Local instance**:
`VPN → WireGuard`
- Add a **Local** with your private/public key pair (from Mullvad).
- Set a **Tunnel Address**, e.g. `10.64.0.2/32` (Mullvad examples vary; follow the config Mullvad generated).
3. **Add Peer (Mullvad)**:
- Public key = from Mullvad
- Endpoint address/port = from Mullvad
- Allowed IPs: `0.0.0.0/0` (we’ll steer only selected traffic with firewall rules later).
4. **Enable** the instance.
5. **Assign interface**:
`Interfaces → Assignments` → add the WireGuard device (e.g. `wg0`) as an OPT interface; enable it, give it a name like `WG_MULLVAD`.
6. **Gateway**: OPNsense usually auto-creates it. If not, create one under
`System → Routing → Gateways`, name it **`WG_MULLVAD_GW`**.
- Tip: if the gateway monitor flaps, either set a stable monitor IP reachable via the tunnel or **disable monitoring** for this gateway.
---
### 2) Outbound NAT for the tunnel
Policy-based routing still needs NAT out the tunnel.
- Go to `Firewall → NAT → Outbound`.
- Switch to **Hybrid** (or **Manual**) mode.
- Add a rule:
- **Interface:** `WG_MULLVAD`
- **Source:** your `MEDIA` network (or `LAN` if you’ll apply policy there)
- **Translation / Address:** **Interface address** (the WG interface)
- Save & Apply.
> If you already use automatic outbound NAT, Hybrid is safer: you add only what you need for WG while keeping defaults.
---
### 3) DNS hygiene (no leaks)
YouTube policy routing is pointless if your clients leak DNS to the ISP or public resolvers.
1. **Force clients to use OPNsense DNS**:
- DHCP: hand out OPNsense’s IP as DNS server.
- Then **block/redirect** any direct DNS (port 53) from clients to the internet.
- Easiest: **NAT Port Forward** on `LAN`/`MEDIA`:
- From: `LAN net` (or `MEDIA net`)
- To: `any`, Port: `53 (TCP/UDP)`
- **Redirect target IP:** Firewall / This firewall
- **Redirect target port:** `53`
This silently hairpins rogue DNS to Unbound.
2. **Run Unbound** (`Services → Unbound DNS`) as your central resolver.
- Optional: enable DNS-over-TLS upstreams or Mullvad DNS if you want **all** DNS to egress via the tunnel.
- Minimal viable setup: keep Unbound local; the key is simply “no direct DNS from clients to WAN”.
> Smart TVs often hardcode DNS (8.8.8.8, etc.). The redirect above neutralizes that.
---
### 4) Build a YouTube destination alias
We’ll match on destination **domains** (OPNsense resolves them to IPs for the firewall table). Start small; you can extend later.
- `Firewall → Aliases → +`
- **Type:** FQDN (or Host(s), depending on UI)
- **Name:** `YOUTUBE_DEST`
- **Entries (one per line):**youtube.com
www.youtube.com
m.youtube.com
youtubei.googleapis.com
ytimg.com
s.ytimg.com
r.youtube.com
googlevideo.com
- Save.
> **Reality check:** YouTube/CDNs shift a lot. The key domains are **`googlevideo.com`** (actual media streams) and **`ytimg.com`** (assets). You may need to add more over time.
---
### 5) Policy rule: send YouTube to Mullvad
On the interface where the clients live (I use `MEDIA`):
- `Firewall → Rules → MEDIA` (or `LAN`)
- Add a **Pass** rule **above** your general allow rule:
- **Source:** `MEDIA net` (or specific hosts)
- **Destination:** **`YOUTUBE_DEST`** (the alias)
- **Protocol:** any
- **Advanced → Gateway:** **`WG_MULLVAD_GW`**
- Description: `Route YouTube via Mullvad`
- Save & Apply.
- Make sure your default “allow to any” rule stays **below** this new rule.
> Order matters. pf evaluates top-down. If your generic allow fires first, your policy route won’t.
---
### 6) (Optional) A quick sanity blocker for DNS
On `MEDIA`, add a rule **above** everything that **blocks** dest port **53** to `! This Firewall` (negate “This Firewall”), so only the NAT-redirect to Unbound works. It’s belt-and-suspenders against weird client behavior.
---
### 7) Test & verify
- **Traceroute** from a client to `googlevideo.com`
- Windows: `tracert googlevideo.com`
- Linux/macOS: `traceroute googlevideo.com`
The path should go out through the Mullvad tunnel (you’ll typically see an extra hop consistent with WG egress).
- **OPNsense Live View**:
`Firewall → Log Files → Live View` → filter by your rule description or by destination hostnames. You should see matches tagged with the WG gateway.
- **Packet Capture**:
`Interfaces → Diagnostics → Packet Capture` on `WG_MULLVAD` → filter `host googlevideo.com` → start a YouTube stream and confirm you see packets.
- **Reality test**: start a video, then check your visible IP on a separate tab that loads media from YouTube (ads/CDN checks can help). For deeper checks, inspect connections on the client (e.g., `netstat`, `tcpdump`).
---
## How it works (under the hood)
- **Policy-based routing (pf “route-to”)**
OPNsense uses FreeBSD’s `pf`. When a rule matches and you set a **Gateway**, pf adds a **route-to** directive for that state. That means: packets in this state are **pinned** to the specified gateway/interface — here, the WireGuard tunnel. Replies follow the same state, so back-and-forth stays in the tunnel.
- **FQDN aliases → IP tables**
Your `YOUTUBE_DEST` alias is **not** “DNS at runtime per packet”. OPNsense **resolves** the FQDNs on a schedule and builds an IP table. If YouTube/CDN IPs move, the alias refresh must catch up. That’s why YouTube routing is “mostly right”, not perfect.
- **NAT on WG**
Outbound NAT on the WG interface ensures your internal client IPs translate to the WG interface address when going out the tunnel. Without this, upstream would drop or misroute your traffic.
- **DNS leaks**
If clients send DNS directly to the internet, YouTube (and others) can still see your real network location via DNS logs — even if the media stream rides the VPN. The NAT redirect (or explicit block) forces all client DNS to Unbound on OPNsense, which you control.
- **Why `googlevideo.com` matters**
The actual video segments are almost always served from `*.googlevideo.com` CDN names. If you only route `youtube.com` and skip `googlevideo.com`, the watch page might go via VPN but the **video** won’t.
---
## Maintenance & gotchas
- **CDN churn**: Expect to occasionally add hostnames. Start with the list above; add regional variations if you see misses in logs.
- **Smart TV DNS**: Many TVs hardcode 8.8.8.8 or vendor DNS. The NAT redirect fixes this. If a TV also uses DoH/DoT, you may need additional blocks or force it into the `MEDIA` VLAN where egress is tightly controlled.
- **Gateway monitoring**: If the WG gateway shows as “down” but traffic still works, it’s just a monitor problem. Either set a known, reachable monitor via the tunnel or disable monitor for that gateway.
- **Performance**: WireGuard on OPNsense is fast enough for 4K on decent hardware. If things stutter, try a nearer Mullvad exit or different port.
```
youtube.com
www.youtube.com
m.youtube.com
youtubei.googleapis.com
ytimg.com
s.ytimg.com
r.youtube.com
googlevideo.com
```
Add more as you observe them in logs (regional edges, `*.c.youtube.com`, etc.).
---
## TL;DR
- Set up Mullvad (WireGuard) on OPNsense and get a `WG_MULLVAD_GW`.
- Force all client DNS to Unbound on OPNsense (block/redirect port 53).
- Create a `YOUTUBE_DEST` alias (FQDNs above).
- Add a top-ordered firewall rule on your client network that **routes** `Destination: YOUTUBE_DEST` via `WG_MULLVAD_GW`.
- Test with traceroute, Live View, and packet capture.
YouTube now plays over Mullvad. Everything else stays normal. Clean, targeted, and under your control.
*I keep a short overview of the practical posts that still get the most use here:* [*Technical Field Notes*](https://blog.bajonczak.com/technical-field-notes/)*.*
### Extending Azure AD with Custom User Attributes via Microsoft Graph API
URL: https://blog.bajonczak.com/extending-azure-ad-with-custom-user-attributes-via-microsoft-graph-api/
Last updated: 2026-06-15T16:21:17.000Z
This post walks you through adding custom attributes to Azure Active Directory users via Microsoft Graph API and a certificate-based authentication flow. We’ll also examine why it's needed, where to attach these extensions, and how to fetch them securely inside tokens.
## Why You Might Need Custom Attributes in Azure AD
Azure AD is great out of the box, but it doesn’t always cover your application-specific needs. Sometimes you need to store metadata like `BusinessArea`, `CompanyID`, or internal `employeeType` flags—data for role-based access control, personalization, or downstream automation.
Azure AD doesn’t allow you to arbitrarily modify its schema for built-in user properties. That’s where *directory schema extensions* come into play: you define your own fields, attach them to users, and they live in your tenant under your app’s namespace.
## The Gotcha: Custom Attributes Are Tied to Applications
You can't just drop custom attributes directly onto a user object and be done with it. These attributes must be registered under an **application registration** in Azure AD. That app acts as a namespace container. This:
- will scopes your extension attributes to your solution
- Allows Microsoft Graph to associate and manage them securely
- Prevents attribute name collisions with other extensions
Once registered, they show up in user objects like this:
```json
"extension__": "value"
```
## Script Walkthrough: Certificate-Based Graph API Call
Let’s walk through a production-grade Python script that does all the heavy lifting (script will be listed at the end):
### 1\. Authenticate with Microsoft Graph
We authenticate using a certificate (pfx), not a client secret. This is safer in enterprise environments.
```python
# Build and sign a JWT with RS256
# Exchange it for an OAuth2 access token
```
Why it matters:
- Client secrets are static and vulnerable.
- Certificates are time-bound and revocable.
- JWT assertions let you go passwordless.
### 2\. Define and Register Extension Properties
Once authenticated, we hit this Graph endpoint:
```
POST https://graph.microsoft.com/beta/applications/{app_id}/extensionProperties
```
Each property looks like:
```json
{
"name": "Company",
"dataType": "String",
"targetObjects": ["User"]
}
```
You can define up to 100 extension properties per app.
### 3\. Example Payload:
```python
custom_properties = [
{"name": "BusinessArea", "dataType": "String", "targetObjects": ["User"]},
{"name": "Company", "dataType": "String", "targetObjects": ["User"]},
...
]
```
Each one gets registered, stored under the app, and becomes available for read/write on user objects.
## How to Fetch Extension Attributes in an Access Token
Once the attributes are set on a user, you probably want them inside your JWT access token to use in downstream apps.
1. In your **app registration**, configure the **token configuration**.
2. Add a **directory schema extension** claim:
- Name: `extension__`
- Source: Directory schema extension
- Emit in token type: ID token or Access token (depends on your use case)
Example output inside the token:
```json
{
"extension_2d5a6f22f9a14321b23b5226531dc607_Company": "Contoso",
"extension_2d5a6f22f9a14321b23b5226531dc607_EmployeeType": "Contractor"
}
```
## TL;DR
- Azure AD lacks app-specific user attributes by default.
- Custom attributes let you fill that gap, but they must be registered under an app.
- Certificate-based auth > client secret for automation.
- You can surface the attributes in tokens by modifying the app registration.
This is not optional if you're building identity-aware apps that depend on enriched user context. It’s essential. So, have fun using this script as a template:
```python
import json
import base64
import uuid
import time
import requests
from cryptography.hazmat.primitives import hashes
from cryptography.hazmat.primitives.asymmetric import padding
from cryptography.hazmat.primitives.serialization import load_pem_private_key
from cryptography.hazmat.backends import default_backend
# Define your Azure AD tenant ID, client ID, and certificate path
tenant_id = "....-ae7f-d420adbc7dff"
client_id = "....-437e61ad1f82"
cert_path = "C:/Path/to/Your/Cert/certificate.pfx"
cert_password = b"SUPER_SECRET_PASSWORD"
# Define the application object ID (as container)
app_id = "...-5226531dc607"
# Load the certificate and private key
from cryptography.hazmat.primitives.serialization.pkcs12 import load_key_and_certificates
with open(cert_path, "rb") as cert_file:
private_key, certificate, additional_certs = load_key_and_certificates(cert_file.read(), cert_password, default_backend())
# Create a JWT token for authentication
now = int(time.time())
exp = now + 3600 # Token valid for 1 hour
jwt_header = {
"alg": "RS256",
"typ": "JWT",
"x5t": base64.urlsafe_b64encode(certificate.fingerprint(hashes.SHA1())).decode().rstrip("=")
}
jwt_payload = {
"aud": f"https://login.microsoftonline.com/{tenant_id}/oauth2/v2.0/token",
"iss": client_id,
"sub": client_id,
"jti": str(uuid.uuid4()),
"nbf": now,
"exp": exp
}
# Encode the JWT token
header_encoded = base64.urlsafe_b64encode(json.dumps(jwt_header).encode()).decode().rstrip("=")
payload_encoded = base64.urlsafe_b64encode(json.dumps(jwt_payload).encode()).decode().rstrip("=")
token_to_sign = f"{header_encoded}.{payload_encoded}"
# Sign the JWT token using the certificate's private key
signature = private_key.sign(
token_to_sign.encode(),
padding.PKCS1v15(),
hashes.SHA256()
)
signature_encoded = base64.urlsafe_b64encode(signature).decode().rstrip("=")
client_assertion = f"{token_to_sign}.{signature_encoded}"
# Define the resource and scope
scope = "https://graph.microsoft.com/.default"
# Define the URL for obtaining the access token
url = f"https://login.microsoftonline.com/{tenant_id}/oauth2/v2.0/token"
# Define the body for the API request
body = {
"client_id": client_id,
"scope": scope,
"client_assertion": client_assertion,
"client_assertion_type": "urn:ietf:params:oauth:client-assertion-type:jwt-bearer",
"grant_type": "client_credentials"
}
# Send the API request and store the response
response = requests.post(url, data=body)
response.raise_for_status()
access_token = response.json()["access_token"]
# Display the access token
print(f"Access Token: {access_token}")
# Define the Graph API URL for extensionProperties
url = f"https://graph.microsoft.com/beta/applications/{app_id}/extensionProperties"
# Define the headers for the API request
headers = {
"Authorization": f"Bearer {access_token}",
"Content-Type": "application/json"
}
# Define the body for the API request
custom_properties = [
{"name": "CompanyId", "dataType": "String", "targetObjects": ["User"]},
]
for body in custom_properties:
response = requests.post(url, headers=headers, json=body)
response.raise_for_status()
print(response.json())
# Send the API request and store the response
#response = requests.get(url, headers=headers, json=body)
response = requests.post(url, headers=headers, json=body)
response.raise_for_status()
# Display the response
print(response.json())
```
### TweakCN + shadcn/ui MCP Server with Claude Code: My AI UI Workflow
URL: https://blog.bajonczak.com/mcp-server-shadcn-ui-automation/
Last updated: 2026-08-13T04:03:33.000Z
ShadCN looked great on paper, Cursor seemed smart enough, and I thought I could skip the boring frontend parts. just tell it what to build and let it do the rest.
Wrong.
Instead of a clean UI, I ended up with messy layouts, clashing styles, and components that just didn’t work together.
I almost gave up on building beautiful interfaces, until I discovered a new workflow powered by something called the [**ShadCN UI MCP server**](https://github.com/Jpisnice/shadcn-ui-mcp-server?ref=blog.bajonczak.com).
[GitHub - Jpisnice/shadcn-ui-mcp-server: A mcp server to allow LLMS gain context about shadcn ui component structure,usage and installationA mcp server to allow LLMS gain context about shadcn ui component structure,usage and installation - Jpisnice/shadcn-ui-mcp-serverGitHubJpisnice](https://github.com/Jpisnice/shadcn-ui-mcp-server?ref=blog.bajonczak.com)
And it completely changed everything.
# Why Most AI + UI Workflows Fail (And What Nobody Tells You)
Let’s get real: tools like Cursor and Claude Code are impressive, but when it comes to UI, they **lack one critical thing, context**.
They don’t understand how ShadCN components are *meant* to be used. So unless you guide them with a tight process, they’ll spit out half-baked UIs that barely hold together.
That’s what was happening to me over and over. Until I implemented a three-part system:
1. **Use the ShadCN UI MCP server** for context and structure
2. **Leverage demo patterns** for foolproof component usage
3. **Customize with TweakCN** for unique, beautiful design
Let’s walk through it step by step.
# Step 1: Set Up the MCP Server
The `shadcn-ui-mcp-server` fixes one of the biggest issues with AI-generated UIs: they often look off because they lack real context. This tool brings that missing context back, so your components actually work and look the way they’re supposed to.
Once it’s connected, you’re ready to build UIs that actually work the first time.
# Installation Tips:
- Use your [**GitHub personal access token**](https://github.com/settings/tokens?ref=blog.bajonczak.com) to bump up your request limit (5,000/hr vs. 60/hr)
- Don’t forget to **save your token,** you won’t see it again

[GitHub Access Token](https://github.com/settings/tokens?ref=blog.bajonczak.com)
- Install `shadcn-ui-mcp-server`using npx (Recommended) the fastest way to get started.
\# Basic usage (rate limited to 60 requests/hour)
```
npx @jpisnice/shadcn-ui-mcp-server
```
\# With GitHub token for better rate limits (5000 requests/hour)
```
npx @jpisnice/shadcn-ui-mcp-server --github-api-key ghp_your_token_here
```
- Plug it into Cursor via settings (Cmd/Ctrl + Shift + j) → tools & integrations → New MCP Server
- Add MCP Server Configuration:
```
{
"mcpServers": {
"shadcn-ui": {
"command": "npx",
"args": ["@jpisnice/shadcn-ui-mcp-server", "--github-api-key", "ghp_your_token_here"]
}
}
}
```
Once installed, you unlock these tools:

- `get_component:` Get component source code
- `get_component_demo:`Get component usage examples
- `list_components:` List all available components
- `get_component_metadata:` Get component dependencies and info
- `get_block:` Get block implementations (dashboard-01, calendar-01, etc...)
- `list_blocks:` List all available blocks with categories
The real secret? I wrote **rule files** that tell my AI agent *how* to behave when working with ShadCN.
```
I want to build a modern web interface using ShadCN components.Goal:
- A login page with standard email/password authentication.
- After login, a dashboard displays a grid of cards — each representing an MCP server.
- Clicking a card opens a detailed view with:
- A header image
- Metadata (name, status, region, version)
- Installation steps shown as bubble cards or collapsible UIPlease generate an implementation plan:
- List the key components and pages to build
- Suggest how to structure the project modularly
- Recommend the tools/hooks/layout strategies to use for optimal UX
```

Claude generate implementation plan
After brainstorming you can create your rule file for cursor `rule.mdc`

rule.md file
So here’s what I did next:

I asked Claude to **take the entire structure and drop it into a `task.md` file**.
Then, I triggered the next phase with this simple instruction inside my Cursor project:
```
@rule.mdc
```
Please implement the UI plan outlined @task.md for our next.js app.
You can begin building directly from the defined structure.

And that’s when the magic happened.
Because the rule file had already been set up to pull in ShadCN components through the MCP server, Cursor followed the entire logic tree:
1. Parsed the structure from `task.md`
2. Identified each ShadCN component needed
3. Called the `get_component_demo` tool to check correct usage
4. Began assembling the full UI **block by block**
It literally turned a spec sheet into a living frontend without me lifting a finger.
This UI wasn’t cobbled together. It followed every rule and planning artifact we built into the system.
The result? A frontend that was not only fast to build but structurally sound and easy to extend.
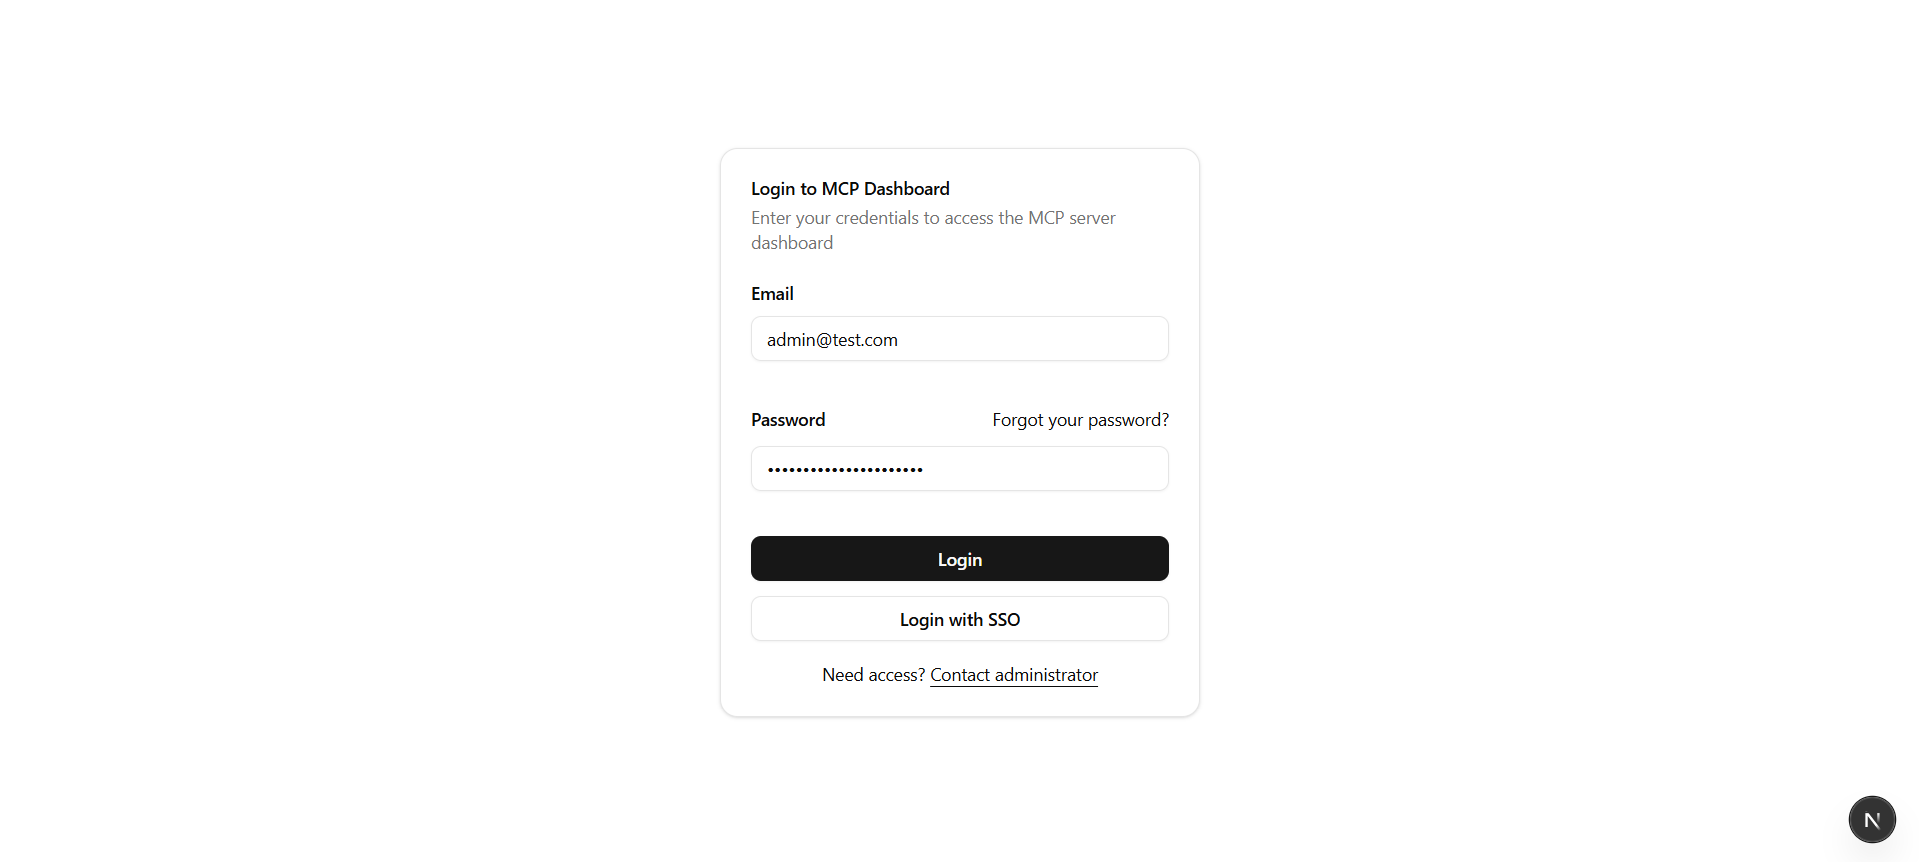


# Step 3: Customize Everything with TweakCN
Let’s be honest, a lot of ShadCN sites look the same.
[To break out of that cookie-cutter mold, I used **TweakCN**. It’s a visual theming tool for ShadCN components that lets you create a **custom UI look** in seconds.](https://tweakcn.com/?source=post%5Fpage-----190d0bf4a7db---------------------------------------)
You can:
- Change colors, spacings, borders, typography
- Preview every tweak live
- Export a theme and install it directly into your project

[TweakCN](https://tweakcn.com/editor/theme?ref=blog.bajonczak.com)
If Cursor struggles to install it directly, just copy the custom code and paste it manually. Every variable you need is clearly listed.
# Real Talk: Why This Workflow Works (and Why You Should Try It)
Here’s what used to happen:
- I’d ask AI to build a UI → It’d mess up component usage
- I’d waste hours fixing CSS or rewriting layouts
- My site looked like a ShadCN clone factory
Now?
- I plan every UI with structured files
- I implement with context-rich tools
- I design with a visual editor
- And I rarely debug UI anymore
The result? My sites **look custom, feel professional**, and work across devices, the first time.
# Final Thoughts
We’re entering an era where **context-driven AI workflows** are the only way to build fast and at scale. You wouldn’t write backend logic without testing and structure, so why treat your UI like it doesn’t matter?
Start with the MCP server. Design with intent. Let the AI assist you *with guardrails.*
Your users will notice. Your projects will look legit. And you’ll finally feel like your UI matches the quality of your code.
*I keep a short overview of the practical posts that still get the most use here:* [*Technical Field Notes*](https://blog.bajonczak.com/technical-field-notes/)*.*
### Hot to add a custom Cert to a Service Principal for passwordless Authentication
URL: https://blog.bajonczak.com/hot-to-add-a-custom-cert-to-a-service-principal-for-passwordless-authentication/
Last updated: 2025-06-11T11:00:33.000Z
In a world where security is becoming more critical and traditional passwords are increasingly seen as weak links, passwordless authentication is a powerful advancement. One often overlooked yet effective method to implement this in Azure environments is by binding a custom certificate to an Azure App Registration (App Principal). In this post, I’ll walk you through how to configure this setup, using a developer-centric approach.
## Why Go Passwordless?
Let’s start with the core question: *why should you care?*
Passwordless authentication improves security posture by eliminating the risks associated with password reuse, phishing attacks, and credential leaks. When combined with strong cryptographic identities like certificates, it ensures that only devices with a valid private key can access your Azure resources.
## Use Case
We want an application (or automation script) to authenticate securely to Microsoft Graph or any other Azure service—without using a client secret or user credentials. Instead, we’ll use a certificate installed locally.
This is especially useful for:
- Automation tools (e.g., PowerShell or Python scripts),
- CI/CD pipelines,
- Background services that require continuous access to Microsoft resources.
## Step-by-Step Guide
### 1\. Generate or Obtain a Certificate
You can either generate a self-signed certificate or use an existing one issued by a trusted CA.
#### Option A: Create a Self-Signed Certificate via PowerShell
```PowerShell
$cert = New-SelfSignedCertificate `
-Subject "CN=MyAppCert" `
-CertStoreLocation "Cert:\CurrentUser\My" `
-KeyExportPolicy Exportable `
-KeySpec Signature `
-KeyLength 2048 `
-NotAfter (Get-Date).AddYears(3)
```
Export the `.cer` (public) and `.pfx` (private) files:
```PowerShell
Export-Certificate -Cert $cert -FilePath "C:\temp\MyAppCert.cer"
Export-PfxCertificate -Cert $cert -FilePath "C:\temp\MyAppCert.pfx" -Password (ConvertTo-SecureString -String "yourPassword" -Force -AsPlainText)
```
### 2\. Add the Certificate to Your App Registration
Navigate to the **Azure Portal** → **Azure Active Directory** → **App registrations** → Your App → **Certificates & secrets**.
Upload your `.cer` file under "Certificates". Azure will extract the thumbprint and associate it with the App.
> 📌 Only the public part of the certificate is stored in Azure. Keep your private key secure!
### 3\. Configure Application Permissions
Depending on what your app needs to do, go to **API permissions** and add either:
- **Delegated** permissions (on behalf of a user), or
- **Application** permissions (app-only access).
Don't forget to click "Grant admin consent" if required.
### 4\. Acquire a Token Using the Certificate
Here’s an example using PowerShell and the Microsoft.Identity.Client (MSAL) library:
```PowerShell
$tenantId = "your-tenant-id"
$clientId = "your-app-id"
$certPath = "C:\temp\MyAppCert.pfx"
$certPassword = ConvertTo-SecureString -String "yourPassword" -AsPlainText -Force
$cert = New-Object System.Security.Cryptography.X509Certificates.X509Certificate2($certPath, $certPassword)
$app = [Microsoft.Identity.Client.ConfidentialClientApplicationBuilder]::Create($clientId)
.WithCertificate($cert)
.WithAuthority("https://login.microsoftonline.com/$tenantId")
.Build()
$token = $app.AcquireTokenForClient(@("https://graph.microsoft.com/.default")).ExecuteAsync().Result
$token.AccessToken
```
### 5\. Call the Microsoft Graph API
Now that you have the token, you can use it in your API calls:
powershellKopierenBearbeitenInvoke-RestMethod -Uri "https://graph.microsoft.com/v1.0/users" \`
\-Headers @{Authorization = "Bearer $($token.AccessToken)"} \`
\-Method GET
And just like that, your application is running without any passwords involved.
## Common Pitfalls
- ❌ **Wrong Certificate Format**: Make sure you use `.cer` for Azure and `.pfx` for your app.
- ❌ **Time Skew**: Certificates have time-based validity. Ensure your local clock is synced.
- ❌ **Insufficient Permissions**: Don’t forget to configure and consent to API permissions.
## Final Thoughts
This setup not only eliminates secrets from your configuration files but also strengthens your application’s security. In times where secrets get leaked in Git repos and attackers automate credential spraying, passwordless authentication via certificates is the future-proof approach every technical team should adopt.
If this guide helped you or sparked ideas on hardening your authentication architecture, feel free to share it with your team or let’s connect to discuss advanced identity management strategies.
🛡️ Stay secure and code smart.
### Success Story: How AI can help to rescue lives
URL: https://blog.bajonczak.com/success-story-how-ai-can-help-to-rescue-lives/
Last updated: 2025-03-21T11:27:57.000Z
I think this blog post is a very different one and a new type of Post. Not every reader will know this issue; it's not a very common issue. So, I must create the ground for this blog post.
It's a very sensitive post, and I think it is nice to know where AI helps. Not only does it summarize numbers together and increase the output or s.th, but it also helps with other tasks.
No, it is more like helping humans and rescuing lives. Yep, you read right—rescuing lives.
## The Problem
Let's assume you are a non-native-speaking foreigner in a different country. English is also not the best-trained language. But you have had an accident. Who are you calling? Yes, the emergency call.
So the operator tries to get the following question answered
- Where are you?
- What has happened?
- Who is involved?
Sometimes, more, but these questions must be answered quickly, depending on the criticality of the accident. So, times matter.
Let's assume the operator cannot understand. I might try to get some colleagues on the phone to better understand, or you might have a noisy background or any other scenario.
It's hard for an operator to understand and get answers to the questions above.
Again! Time matters!
## The Idea
Today, with AI being very popular and, in some cases, very helpful, it is time to use AI as a companion.
The Idea is that an AI will also listen to the phone call and identify the key points on demand, so the operator can review and acknowledge the data.
It is a real game-changer, especially for communication issues, and the operator can take action to send the firefighters, the ambulance, or both.
So, in fact, the following requirements are set:
- An AI must be fast enough to get a nearly real-time voice chat transcribed
- It will then create a summary (continuously written) on a tablet nearby
- It must be done in real time
- The collected data must be handled very secure and avoiding data leakage
## The setup
First, there is no demolish environment; this system must be adaptively developed. In my opinion, there is only one solution. It must be connected to the VOIP as a listener. This has no effect only because one more muted listener is on the line.
So, every time the system is active, it gets called. So we created a new calling plan like this:
[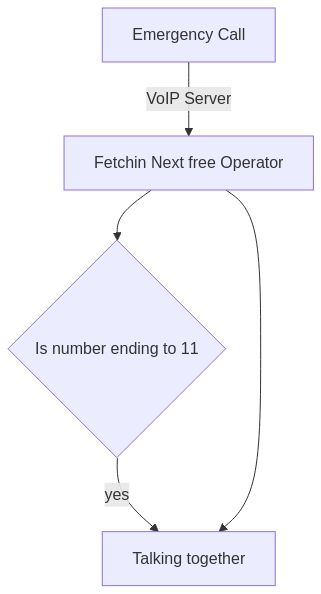](https://mermaid.live/edit?ref=blog.bajonczak.com#pako:eNo9kUlvgzAQhf%5FKaM4kCkvYDpWSkko5dJES9VDIwYVhUcGOjGlDCf-9DkT1afTe-Hv2zICpyAhDzGvxk5ZMKjhGCQd9NvGuIVkQT3t4ZHV9gsXiAa7vYv8GB5LfJK%5Fb-IlUWlYcXuiiIJdE8HomyZSQp4mynS5Fw74F3jWfJIF4VvEClADTHOekaCb31F5hF2-UYmkJmz2wFuqqVcTpToPtrXEXH1n9NUMKUuW%5FiwbqFzesyvSHhpuWoLYbSjDUZUY562qVYMJH3co6JQ49TzFUsiMDu3PGFEUVKyRrMMxZ3Wr1zDiGA14wNC136ViWszKDte1bgW9gr1XXW9pu4Pie6wWuG1ijgb9CaMBq6Tq26Xm-Vu21Z0-sj8maAymr9Jye5%5FlPazBQiq4o7-HjH51HgNs)
The critical thing is that the AI may be down or otherwise inoperable, but it does not interfere with the operator's calling line. This process is bulletproof.
So, the setup and the calling line are set, and now it is time to talk about AI.
## Which AI?
So we compared many AIs, and there are plenty of them. We thought about a local-hosted AI, but we lack the resources (Money and space) to host a local server for that, which can also scale out. We are coming out to Azure AI. Yep, there are many more providers, but I am very familiar with this, and the decision was made to this.
## The Infrastructure
Let me enlist the used components
### The Voip System (3CX)
This handles incoming calls, supports routings, and more. It also supports SIP and WebRTC.
I use SIP because it's a well-known standard for streaming audio, and the AI service does not need HD Audio.
### Azure Speech to Text
[Azure Speech to Text](https://learn.microsoft.com/en-us/azure/ai-services/speech-service/speech-to-text?ref=blog.bajonczak.com) is a service that has the possibility to transcript spoken words in real time. It supports many languages, and it will set a solid base for getting the spoken word as text. This is required for further processing. But more on that later.
### Azure conversational language Understanding
What's that? [In short, it offers a tool to extract key facts from a spoken dialog.](https://learn.microsoft.com/en-us/azure/ai-services/language-service/conversational-language-understanding/overview?ref=blog.bajonczak.com)
This tool will extract the information to answer the question (set above). Extracting the relevant information will deliver me a technologically friendly output as JSON so that other services can work with them.
### Azure AI Service
Azure Open AI Service is a standard service that hosts the others, too. This will connect everything, but we need more. We need an AI Service to advise the operator to display the right questions on the tablet. So, initially, we decided on a GPT-4o model, but it was not fast enough, so our discussion ended up with using the GPT-4 Turbo (with some custom instructions).
### Azure Translator
The [Azure translator Service](https://azure.microsoft.com/en-us/products/ai-services/ai-translator?ref=blog.bajonczak.com#Features-1) is a component that will translate every spoken language into the target language in real time too.
### Azure Webapp and SignalR
To get the real-time updates onto the tablet (without installing an app), I use a small React app that uses signalR for real-time communications with the server. The final infrastructure is designed like this:
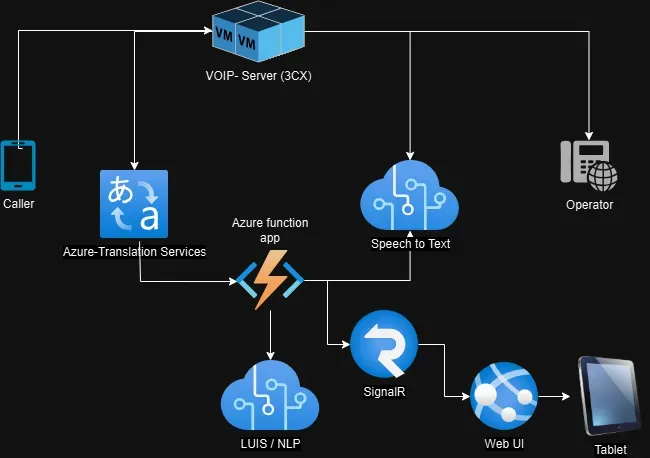
System Image
## The Process
I will not show the full-blown Process. So I keep it very, very easy to follow.
First, there is the incoming call. This audio stream will be redirected from Audiostreaming (our Voip Server) using the SIP protocol to the Speech-to-Text service.
[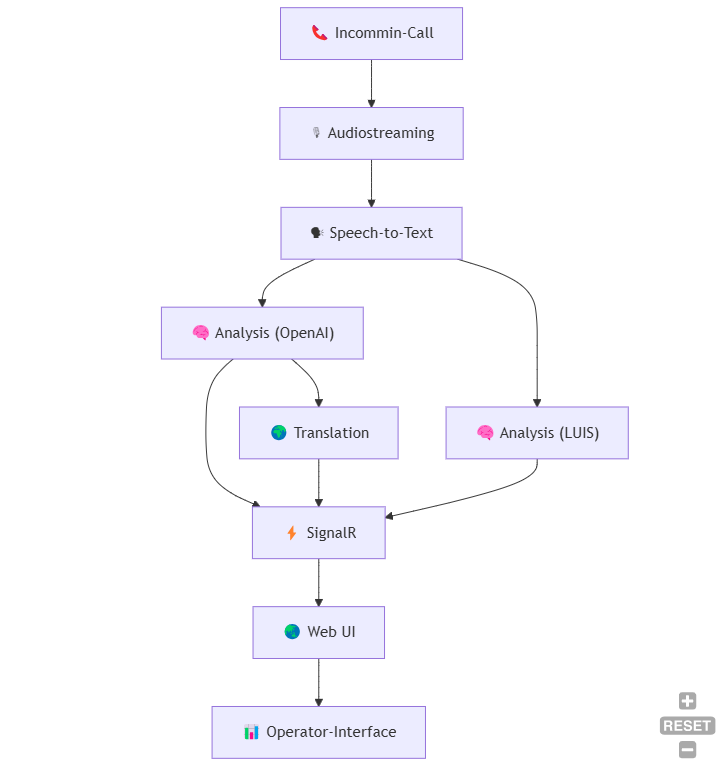](https://mermaid.live/edit?ref=blog.bajonczak.com#pako:eNplUc1Kw0AQfpVlTgqJmBZrzUFIm9oGFMG0CHY9rMm2DSSzZbPB1tIXEH8OHkQP%5FuDB9%5FIJfASnTcSDe9hvZr5vv1lmFhCpWIILo1RdRhOhDev7HBkdb%5Fj9-vDCAoxUliVot0WanpdUi6i7J-YVcaJyo6UgflxxbeIeP1g4lTKa2EbZfTkzFec7Qw7fr59vzEORzvMkZxvHU4lesMnhV1P7rzkcBOGforw71OfmlvW1wDwVJlFY0Qerf18z8tXCKG0HaKQeiUhWfHf49fzOwmRM9idVrbcyu2en8oINAqpx9Gx7v8WxRdDm2CbwnQprHH2Hgi5hrcJV3uHYKdMuQY9jj-AALMikzkQS05QXq3YczERmkoNLYSxHokgNB45LkorCqHCOEbhGF9KCYhoLI%5F1EjLXIwB2JNKfqVCC4C5iB6-zUt3brzUZzu9ms1fechgVzcLeXFlwpRQ-ctfhsHZeOMk5oKkfl1tfLt0CrYjyp3Jc%5Fn8WwZA)
This will transcribe the caller's dialog ...monolog ( 😄 ). From now on, we can work with texts.
Now, this will be done a little bit asynchronously.
The text will be transferred to the Luis Service to extract relevant information from the spoken sentences. This information will be sent via Signal R to the web interface to show the operator the extracted data.
The other (parallel running) process will send it to the GPT Model, together with the question of how to get the information right from the caller. This answer will immediately be sent via signalR to the web UI itself.
So, that is the straightforward process of how the system works. Many facets and input data are involved, such as knowledge bases, GPS coordinates, etc. But I want to show here what AI can do when used correctly.
This system has a maximum latency of up to 500ms from spoken words to getting the information. Sometimes, it will take longer, up to one second.
## Recap
This post was a new experience for me. Normally, I try to make a copy-paste-ready solution, but this one is very special, so it is not possible to get a solution-ready instance.
Anyway, I decided to share this.
"Why?" you ask.
I saw in different posts many use cases to get only funny things out of AI and only business-relevant things, and many (or all) of them were chat prompts. I am bored with the chat prompt. I think that AI won't help you with a prompt. It will help you in your process, so it must not be present, and you must not interact with an AI directly. I think this example is a good one that will support the operator in his /her calls.
If you have more questions about this topic, please contact me. I am also interested in your opinions. What do you think about this?
### How to: Build resilient applications patterns and best practices
URL: https://blog.bajonczak.com/build-resilient-applications-2/
Last updated: 2025-03-16T12:00:17.000Z
The Hype about building large Applications and distributed Systems may be over. However, resilient services are required more than in the past.
Let's dive deep into the topic of resilient applications. But first, some basics:
## Understanding resilient applications
What are resilient applications? So here a simple sentence describing resilient applications:
> Resilient applications are designed to withstand failures, adapt to changing conditions, and continue providing essential functionality despite disruptions.
This means that these applications are built with fault tolerance, graceful degradation, and self-healing mechanisms to ensure high availability and reliability.
### Why Do We Need Resilience?
Resilience is critical due to increasing complexity, distributed systems, and reliance on third-party services. Without resilience, even minor failures can cascade into major system outages, leading to downtime, data loss, and poor user experience. Businesses demand high availability, making resilience a non-negotiable aspect of application design. These are horror scenarios for developers who must bug hunt on Sunday morning, caused by a small error like an erroneous regex or something similar.
But what are the main techniques?
## Key Techniques for Application Resilience
Resilience strategies vary depending on application architecture. Let's compare monolithic and distributed architectures using bus systems, highlighting Azure services and practical implementation examples (because Azure has good services for building resilient applications).
### 1\. Resilience in Monolithic Applications
Monolithic applications run as a single unit, where failure in one component can impact the entire system.
In fact, I use standard libraries to support the patterns like [Polly.net](https://github.com/App-vNext/Pollyhttps://github.com/App-vNext/Polly?ref=blog.bajonczak.com). I learned to love this project, because it seamlessly integrate into projects also when it's already shipped.
Let's come back to the techniques. this includes:
#### Circuit Breaker Pattern
The circuit breaker prevents cascading failures by detecting slow or failing dependencies and halting requests until recovery.
**Example in .NET (Polly Library):**
```
var policy = Policy
.Handle()
.CircuitBreakerAsync(3, TimeSpan.FromSeconds(30));
await policy.ExecuteAsync(async () =>
{
await httpClient.GetAsync("https://api.example.com/data");
});
```
#### Retry Mechanism
The other part is the retry mechanism. This can be combined with the circuit breaker pattern. It retries to help handle transient failures by reattempting operations before failing.
**Example in .NET (Polly Library):**
```
var retryPolicy = Policy
.Handle()
.RetryAsync(3);
await retryPolicy.ExecuteAsync(async () =>
{
await httpClient.GetAsync("https://api.example.com/data");
});
```
#### Fallback Strategy
Providing a default response when a service is unavailable ensures continuity.
**Example:**
```
var fallbackPolicy = Policy
.Handle()
.FallbackAsync("Fallback Response");
```
### 2\. Resilience in Distributed Architectures with Bus Systems
In distributed environments, applications communicate over message buses (e.g., Azure Service Bus). Ensuring resilience involves additional strategies.
#### Event-Driven Architecture
Using message queues decouples components, allowing services to function independently.
**Example in TypeScript with Azure Service Bus:**
```
import { ServiceBusClient } from "@azure/service-bus";
const client = new ServiceBusClient("");
const sender = client.createSender("my-queue");
await sender.sendMessages({ body: "Hello, world!" });
await sender.close();
await client.close();
```
#### Idempotent Message Processing
To avoid duplicate processing, services should handle retries idempotently. For that, their standard (in every bus system) will deliver a message ID. To avoid duplicate executions, you must track this ID to prevent duplicate processing. Or use a rollback scenario to enable multiple executions. In total, you must be idempotent 😄.
**Example:**
```
function processMessage(messageId: string, data: any) {
if (isAlreadyProcessed(messageId)) return;
storeAsProcessed(messageId);
// Process data
}
```
#### Azure Functions with Durable Entities
Using [Durable Functions (blog post)](https://blog.bajonczak.com/durablefunctions/) ensures stateful workflows for fault-tolerant execution.
**Example in .NET:**
```
[FunctionName("DurableFunctionExample")]
public static async Task Run([OrchestrationTrigger] IDurableOrchestrationContext context)
{
var result = await context.CallActivityAsync("ActivityFunction", "input");
return result;
}
```
## Different Resilience Patterns
The patterns above are for the service communication itself, to prevent DoS attacks or other wild running services. For Business processes and keeping services in the healthy state you must use other patterns that I will describe here
### Bulkhead Pattern
This pattern isolates different components or services to prevent failures from affecting the entire system. This will avoid a total outage due to the domino effect of failing services. Polly has a nice function for thst
**Example in .NET:**
```
var bulkheadPolicy = Policy.BulkheadAsync(10, 20);
```
The policy limits the number of concurrent operations to **10**. If more than 10 concurrent tasks are requested, the extra tasks will be queued up to a maximum of **20**. Once there is a free slot in the concurrent task pool. When the maximum of **20 queued tasks** is exceeded, any new requests will be blocked or rejected, depending on how the policy is configured.
### Timeout Pattern
Limits the time a service spends waiting for a response to avoid indefinite hangs. This will ensure that the service will answer quick, in best case with an HTTP 200\. This will be used in requests that may use a huge amount of resources. To prevent to overload the server(s) you can set a timeout value.
**Example in .NET:**
```
var timeoutPolicy = Policy.TimeoutAsync(TimeSpan.FromSeconds(2));
```
This example will set the timeout to 2 seconds.
### Saga Pattern
Used in distributed systems for managing long-running transactions by breaking them into smaller compensable transactions. I like a simple definition of workflow for the business process. In this, it doesn't matter if the code was executed by a message bus handler or if it was called remotely. The main advantage of this pattern is that you can quickly react to the faults and redesign the business process.
**Example in TypeScript:**
```
async function sagaTransaction() {
try {
await stepOne();
await stepTwo();
} catch (error) {
await compensateStepOne();
}
}
```
In this example, the Process executes two steps. When any error occurs, the elements from step one rolls back.
### Strangler Fig Pattern
Gradually replaces parts of a legacy system with new functionality without disrupting operations.
**Example in .NET:**
```
if (useNewService)
{
NewService.ProcessRequest(request);
}
else
{
LegacyService.ProcessRequest(request);
}
```
### Shadow Traffic Pattern
This pattern will be mainly used when you want to run an A/B deployment. So avoid missing production data onto the new node. It simplify routes a copy of production traffic to a new system without impacting users. This scenario will also be used for mirroring production data into the test environment.
**Example in TypeScript:**
```
async function handleRequest(request) {
await sendToProduction(request);
await sendToShadowSystem(request);
}
```
This example is a very simple example, but you can use also an API management layer that will send the data also into the second system too.
## Conclusion
Resilience is an essential aspect of modern application design. Whether building monolithic or distributed applications, techniques such as circuit breakers, retries, event-driven architectures, and Azure services like Service Bus and Durable Functions enhance reliability. By implementing these best practices and resilience patterns, organizations can ensure high availability, fault tolerance, and a seamless user experience.
### Mastering Semantic Versioning in NPM: Smooth Releases Without the Chaos!
URL: https://blog.bajonczak.com/versioning-in-npm/
Last updated: 2026-08-13T04:03:37.000Z
In my .net world I use often nuget packages. These are straight forward versioned with major minor and beta versions and so on. For now I work with nodejs and also npm packages. Often I must create some packaged to get a "framework" for some functions and methods that other applications can use too. In this case versioning is very important. So every time I released a new feature or fixed a pesky bug, I worried:
> *Will this break everything for my users?*
In this post, I’m excited to share my journey into the world of semantic versioning, pre-releases, and smooth release processes. Grab your favorite beverage, and let’s dive in!
## The Moment of Truth: Why Versioning Matters
There was a time when I simply bumped a number in my `package.json` and hoped for the best. It worked—until it didn’t. Then came the realization: versioning isn’t just a number; it’s a way to communicate the story of your project.
- **Stability & Compatibility:** Imagine telling your users, “Hey, nothing will break if you update!” That’s what a well-structured version number does.
- **Dependency Management:** Tools like NPM use version ranges to ensure that everyone is playing nice together.
- **Release Tracking:** With a clear version history, tracking down bugs or features becomes like following breadcrumbs.
---
## My Journey to Semantic Versioning Nirvana
NPM embraces [Semantic Versioning (SemVer)](https://semver.org/?ref=blog.bajonczak.com) with its familiar format:
> MAJOR.MINOR.PATCH
- **MAJOR:** Breaking changes—like when I had to rip out legacy code that just wouldn’t play nice anymore.
- **MINOR:** New features that don’t break the old stuff. Think of it as adding a cool new gadget without messing with the existing setup.
- **PATCH:** Small fixes. Like that time I squashed a bug that was causing my charts to render sideways!
### A Peek at My package.json
Here’s what a snippet of my `package.json` looked like once I embraced SemVer:
```json
{
"name": "my-awesome-package",
"version": "1.2.3",
"description": "A package that grew up with me, from a rough sketch to a polished masterpiece.",
"main": "index.js",
"scripts": {
"test": "echo \"Error: no test specified\" && exit 1"
},
"author": "Your Name",
"license": "ISC"
}
```
I learned that by thoughtfully bumping these numbers, I was telling a story with every release.
---
## The Secret Weapon: Pre-Releases
Before going live with new features, I also asked me
> *Is this ready for the world?*
That’s where pre-release versions (like beta or alpha) come in handy. They let you invite a few brave souls to test drive your updates before you hit the big red “publish” button.
### How I Publish a Pre-Release
Let’s say I’m working on a new feature and I want to get some feedback. I simply run:
```bash
npm version prerelease --preid=beta
```
If I was at `1.2.3`, this command bumped my version to `1.2.4-beta.0`. It’s like labeling your creation “work in progress” before showing it off.
Then, to share it without disturbing everyone’s day-to-day, I publish it with a special tag:
```bash
npm publish --tag beta
```
This way, only the adventurous can try out my beta version:
```bash
npm install my-awesome-package@beta
```
## Integrating Versioning into My Workflow
Once I got the hang of versioning, I started automating my release process. It was liberating to know that every commit, every change was neatly packaged and ready to be shared.
### Automated Version Bumping
I leaned heavily on NPM’s commands:
- **Patch Release** :
```bash
npm version patch
```
- **Minor Release:**
```bash
npm version minor
```
- **Major Release:**
```bash
npm version major
```
### A Glimpse at My Release Script
Here’s a simplified version of my release process script:
```bash
#!/bin/bash
# Make sure there are no uncommitted changes
git status
# Bump version (patch/minor/major based on the change)
npm version patch
# Publish to NPM
npm publish
# Push changes and tags to GitHub
git push origin main --follow-tags
```
This script became my best friend. Every time it ran, it reminded me how far I’d come from manually editing numbers and praying for the best.
## A Real-World Tale: The Evolution of lorem.js
Let me share a case study from my own projects—lorem.js.
### The Bug Fix Saga
- **Starting Version:** `2.1.3`
- **Problem:** A subtle bug was causing charts to misbehave on mobile.
- **Solution:** I decided it was time for a patch. I ran:bashCopyEditnpm version patch
Instantly, my version bumped to `2.1.4` and I published the fix. With Git tagging, users running `^2.1.0` automatically received the update, and the mobile issues? Poof—gone!
### Rolling Out a New Feature as Beta
**Next Up:** A new npm feature component.
1. I started with a pre-release:
```bash
npm version prerelease --preid=beta
```
1. I published it with:
```bash
npm publish --tag beta
```
1. Enthusiastic users began testing the beta version by installing it with:
```bash
npm install dataviz.js@beta
```
### The Final Leap: From Beta to Stable
After gathering feedback and refining the component, I was ready for the final push. I bumped the version to a stable release:
```bash
npm version minor
```
This upgraded lorem.js to `2.2.0`. With one final publish command:
```bash
npm publish
```
My users were delighted to see a polished, stable version featuring the new interactive charts.
## Wrapping Up
Learning to version my NPM packages properly wasn’t just a technical upgrade—it was a journey in communication, reliability, and craftsmanship. By embracing semantic versioning, leveraging pre-releases, and automating my workflow, I transformed the chaotic release process into a smooth, predictable, and even enjoyable ritual.
If you’re wrestling with versioning in your projects, I hope my journey inspires you to take control. Trust me: once you master this art, every release feels like unveiling a well-crafted piece of your heart and soul.
Happy coding, and may your versions always tell the right story!
*I keep a short overview of the practical posts that still get the most use here:* [*Technical Field Notes*](https://blog.bajonczak.com/technical-field-notes/)*.*
### How to use Azure Storage account with CAP (Solution without Destinations)
URL: https://blog.bajonczak.com/how-to-use-azure-storage-account-with-cap-solution-without-destinations/
Last updated: 2025-02-08T11:29:20.000Z
I work in a new field with SAP Cloud Foundry, so I think I can take you with me on my journey with SAP behavior. This will all be hosted within the BTP (Business Technology Platform).
## The requirement
The following requirements are set
1. The files will be managed within the Application (hosted in BTP)
2. The files are stored in a dedicated storage
3. The storage must be configured from any business Admin
4. The files must be accessed by other suppliers (with Windows tools)
5. The files can only securely be accessed
So I thought about using the BTP's document store. But the problem with that is that it's not accessible externally, and it becomes a hard dependency on the system. Because some kind of endpoint (in Cloud Foundry) must be writtenfor that.
The decision was then to use an external Store (I am an MS guy, and I prefer the Azure tools ;)), so we used an Azure Storage account for that.
So, How do I connect to that? I asked some SAP dev Guys, and they taught me something about a thing called "destinations" in SAP. These are ... yeah.. let's say ... proxies with benefits that can be configured centrally.
The problem is that the business admin cannot set this setting, and it can get a bit complicated for them.
So I advised accessing the storage account itself via the Blob Store SDK. For that, we need to store the settings within our system. We have an Administration section for our business administrators. So, the required settings, especially the access keys (ClientID / Secret), are stored there.
So let do a recap to check if we got every requirement covered:
## Requirement Checklist
- ✅ The files will be managed within the Application (hosted in BTP)
- ✅The files are stored in a dedicated storage
- ✅The storage must be configured from any business Admin
- ✅The files must be accessed by other suppliers (with Windows tools)
- ✅The files can only securely be accessed
Looks good! So next, let's do some implementation. But first, we need
# The setup
First, before we do some coding, we need the possibility to access the Storage account. For that, we need a service principal from Azure. Here is a small PowerShell script that creates a new service principal
```PowerShell
# Install required module
Install-Module -Name Az -AllowClobber -Scope CurrentUser
# Connect to Azure Account
Connect-AzAccount
# Set variables
$principalName="StorageAccountPrincipal"
# Create Service Principal
$sp= New-AzADServicePrincipal -DisplayName $principalName
$credential = New-AzADAppCredential -ObjectId $sp.Id -Password (New-Guid).Guid -DisplayName "TheSecret"
#Display ClientID and Secret
$clientId = $sp.AppId
$clientSecret = $credential.SecretText
Write-Output "Application (Client) ID: $clientId"
Write-Output "Client Secret: $clientSecret"
```
New the Service Principal must granted access to the file storage itself
```Powershell
# Variables
$resourceGroupName = "MyResourceGroup"
$storageAccountName = "MyStorageAccount"
# Get storage account scope
$storageAccount = Get-AzStorageAccount -ResourceGroupName $resourceGroupName -Name $storageAccountName
$scope = $storageAccount.Id
# Get service principal ID
$principal = Get-AzADServicePrincipal -DisplayName $principalName
$principalId = $principal.Id
# Assign the role
New-AzRoleAssignment -ObjectId $principalId -RoleDefinitionName "Storage Blob Data Contributor" -Scope $scope
New-AzRoleAssignment -ObjectId $principalId -RoleDefinitionName "Storage Account Contributor" -Scope $scope
# Verify the assignment
Get-AzRoleAssignment -Scope $scope -ObjectId $principalId
```
After that, you will have access to the storage account with the service principal to create containers and files within containers.
## Working with the files
Now, after we set up anything, we can start coding with these. Let's assume you have already created a CAP Service in Cloud Foundry.
Within that, I created a small Class that will handle the write and read from the file storage these will derive from the interface:
```Typescript
/**
* Interface representing a cloud file repository.
*/
export interface ICloudFileRepo {
/**
* Uploads a file to the cloud storage.
*
* @param content - The binary content of the file to be uploaded.
* @param bucket - The name of the bucket where the file will be stored.
* @param directoryName - The name of the directory within the bucket where the file will be stored.
* @param fileName - The name of the file to be uploaded.
* @param referecneId - The reference ID associated with the file.
* @returns A promise that resolves to the URL of the uploaded file.
*/
doFileUpload(content: Buffer, bucket: string, directoryName: string, fileName: string, referenceId: string): Promise;
/**
* Retrieves the binary content of a file from the cloud storage.
*
* @param bucket - The name of the bucket where the file is stored.
* @param directoryName - The name of the directory within the bucket where the file is stored.
* @param fileName - The name of the file to be retrieved.
* @returns A promise that resolves to the binary content of the file.
*/
getFileBinary(bucket: string, directoryName: string, fileName: string): Promise;
/**
* Checks if a file exists in the cloud storage.
*
* @param bucket - The name of the bucket where the file is stored.
* @param directoryName - The name of the directory within the bucket where the file is stored.
* @param fileName - The name of the file to check.
* @returns A promise that resolves to a boolean indicating whether the file exists.
*/
fileExists(bucket: string, directoryName: string, fileName: string): Promise;
/**
* Retrieves the name of the container used for cloud storage.
*
* @returns The name of the container.
*/
getContainerName(): string;
}
```
You can upload, download, and check if the file exists. Very simple, the class implementation for completion is here:
```TypeScript
/**
* CloudFileRepo class implements the ICloudFileRepo interface and provides methods to upload files to a cloud storage.
*/
export class CloudFileRepo implements ICloudFileRepo {
/**
* Client ID for authentication.
*/
private clientId: string;
/**
* Secret key for authentication.
*/
private secret: string;
/**
* Storage account name.
*/
private storageAccount: string;
private containername: string;
private tenantId: string;
/**
* Initializes a new instance of the CloudFileRepo class.
*/
constructor(tenantId: string, clientId: string, secret: string, storageAccount: string, constainername: string) {
this.tenantId = tenantId;
this.clientId = clientId;
this.secret = secret;
this.storageAccount = storageAccount;
this.containername = constainername;
}
/**
* Retrieves a client credential using the tenant ID, client ID, and secret.
*
* @returns {ClientSecretCredential} The client secret credential.
*/
private getClientCredential(): ClientSecretCredential {
return new ClientSecretCredential(this.tenantId, this.clientId, this.secret);
}
public getContainerName(): string {
return this.containername;
}
/**
* Uploads a file to the specified cloud storage bucket and directory.
* @param content - The binary content of the file to upload.
* @param bucket - The name of the storage bucket.
* @param directoryName - The name of the directory within the bucket.
* @param fileName - The name of the file to upload.
* @returns A promise that resolves to a success message when the file is uploaded.
* @throws An error if the file upload fails.
*/
public async doFileUpload(content: Buffer, bucket: string, directoryName: string, fileName: string, referenceId: string): Promise {
try {
if (!content)
throw new Error("File content is missing");
const blobServiceClient = new BlobServiceClient(`https://${this.storageAccount}.blob.core.windows.net/`, this.getClientCredential());
// Get a reference to the container client
const containerClient = blobServiceClient.getContainerClient(this.containername);
if ((await containerClient.exists()) == false) {
await containerClient.create();
}
const containerPath: string = `${bucket}/${directoryName}/${fileName}`;
// Get a reference to the block blob client
const blockBlobClient = containerClient.getBlockBlobClient(containerPath);
// Perform upload
const uploadResponse: BlobUploadCommonResponse = await blockBlobClient.upload(content, content.byteLength);
// Set metadata reference ID
await blockBlobClient.setMetadata({ "referenceId": referenceId, "type": bucket });
if (uploadResponse._response.status != 201) {
throw new Error("File upload failed");
}
return containerPath;
} catch (error) {
throw new Error("File upload failed");
}
}
/**
* Retrieves the binary content of a file from a specified container in Azure Blob Storage.
*
* @param containerName - The name of the container where the file is stored.
* @param fullpathWithFileName - The full path including the file name within the container.
* @returns A promise that resolves to a Buffer containing the binary content of the file.
* @throws Will throw an error if the file is not found.
*/
public async getFileBinary(bucket: string, directoryName: string, fileName: string): Promise {
const blobClient: BlobClient = await this.getBlobClient(bucket, directoryName, fileName);
if (await blobClient.exists()) {
const content: Buffer = await blobClient.downloadToBuffer();
return content;
}
throw new Error("File not found");
}
/**
* Checks if a file exists in a specified container in Azure Blob Storage.
*
* @param containerName - The name of the container where the file is stored.
* @param fullpathWithFileName - The full path including the file name within the container.
* @returns A promise that resolves to a boolean indicating whether the file exists.
*/
public async fileExists(bucket: string, directoryName: string, fileName: string): Promise {
const blobClient: BlobClient = await this.getBlobClient(bucket, directoryName, fileName);
return await blobClient.exists();
}
/**
* Retrieves a BlobClient object for a specified container and file.
*
* @param containerName - The name of the container where the file is stored.
* @param fullpathWithFileName - The full path including the file name within the container.
* @returns A promise that resolves to a BlobClient object.
*/
private async getBlobClient(bucket: string, directoryName: string, fileName: string): Promise {
const blobServiceClient = new BlobServiceClient(`https://${this.storageAccount}.blob.core.windows.net/`, this.getClientCredential());
const containerClient = blobServiceClient.getContainerClient(this.containername);
if ((await containerClient.exists()) == false) {
await containerClient.create();
}
const containerPath: string = `${bucket}/${directoryName}/${fileName}`;
const blobClient: BlobClient = containerClient.getBlobClient(containerPath);
return blobClient;
}
}
```
So for downloading or uploading a file within a cap service, you will be able to use it like this
```Typescript
const repo: ICloudFileRepo = new CloudFileRepo(
"YOUR_TENANT_ID",
"YOUR_CLIENT_ID",
"YOUR_CLIENT_SECRET",
"TARGET_CONTAINER_NAME")
const content= Buffer.from("test");
const uploadedDirectory:string= await repo.doFileUpload(content,"Rootdirectory", "Subdirectory","File.txt","YourReferenceID");
```
Is that easy? You now have a nice and small toolkit that you can use for interacting with the azure blob store, without using any destinations.
# Advantages / Disadvantages
So you ask me, why do I not use the destination variant?
The problem is that you cannot directly grant external users access to the storage account.
Let's say you have a tester who will check if your generated document is ready. You must provide an extra endpoint to download only for a specific test case.
This will cause ( in my opinion) a small data leak because these documents can be downloaded by everyone (who has access to this endpoint). So, instead, you can provide limited access through a SAS Token or to a direct credential. So you are very independent from a provider. Also, you can switch easily within some sort of env variables or set the region of the blob storage (maybe due to governance policy).
The next advantage is that you are not dependent on any other IT department. So you are very flexible about changing or modifying the settings because you set this in your own application.
## Final Word
Yes, I am not a professional in SAP CAP development, but I can write some sort of TypeScript. So, I come from a world that is open-minded and not bound to a specific provider. So I think I bring my very own spirit and new thoughts and impulses to this SAP World. ;) What do you think? How can I improve my solution? What are your thoughts about this solution? Do you have any recommendations?
### How I used my 3D Printer to create replacement parts for my refrigerator
URL: https://blog.bajonczak.com/how-i-used-my-3d-printer-to-create-replacement-parts-for-my-refrigerator/
Last updated: 2025-01-04T11:00:24.000Z
My [refrigerator](https://amzn.to/4a0ri21?ref=blog.bajonczak.com) features a lip piece designed to channel condensation water away through a drainage outlet. This piece is typically secured in place by a glass plate. However, one of the joints holding this lip piece in position has broken, causing the drainage system to malfunction.
As a result, condensation water is unable to flow out properly. Instead, the water accumulates in a single area within the refrigerator. Over time, this stagnant water freezes, forming ice. The growing ice layer lifts the lip piece further, exacerbating the issue and disrupting the refrigerator’s drainage mechanism entirely. This eventually leads to creating a large ice plate (not for skating purposes;)) at the bottom of the refrigerator, which can affect its overall performance and efficiency.
The issue requires a solution to securely fix or replace the broken joint, restoring proper water drainage and preventing ice buildup.
I own a 3d Printer from Bambulab (Modell A1). So why not use this to print a replacement part for this or a feature part? I'll take you to my journey how I create the repalcement part.
# Step 1: Taking pictures with a ruler
First, I needed to get the exact measurements for my parts, so I created some pictures that I can use as references. Beside the broken part, I lay down a ruler so I can look at it to get the required measurements. In total, I took about 10 pictures, here are some of them. First of all from the top, here you will see the missing holder part (broken one)

Top view of the broken end
And from the side, where the holder is intact. That is now missing at the other side.

Side view of the not broken end
Now to the next step
# Step 2: Thinking about the solution
Before I start creating the model, the first thing is to think about a solution. When I tried to print the whole thing in one place (for replacement), I faced the problem that the printing plate from the printer was not large enough. A replacement part for the holder must be glued, but that will get messy, and I think it will be unreplaceable in the future.
Instead, I thought to use the trapeze holes to create a featured holder. This can be replaced every time, and I can then make some adjustments. And if I must replace the other side, It can be printed again for this ;).
Here a little paint sketch

The double red strikes are the holder and the horizontal line symbols the holding plate.
So to get the exact measurements I need some helping lines, for that I loaded some images into [InkScape](https://inkscape.org/de/?ref=blog.bajonczak.com). In that I can add some helping lines (blue ones) to get the exact point on the rulers and the measurements from that.

to get a model to print, we need a CAD system.
## Step 3: Constructing the model
I will use [Fusion360 (it's free for personal use, really!).](https://www.autodesk.com/products/fusion-360/personal?msockid=192f56d59a786993353742519bf36879&ref=blog.bajonczak.com) It's very intuitive and you can construct very easy some models. You are free to use alternative ones like openscad or so. It doen't matter.
At first I create a new sketch. Sketches are the first place to construct the outline of one particular think. The first step in the sketch is to build a trapeze with the measurements from the images.

This will fit into the trapeze hole. Next I construct the holding joint, in that will slide in the glass later on.
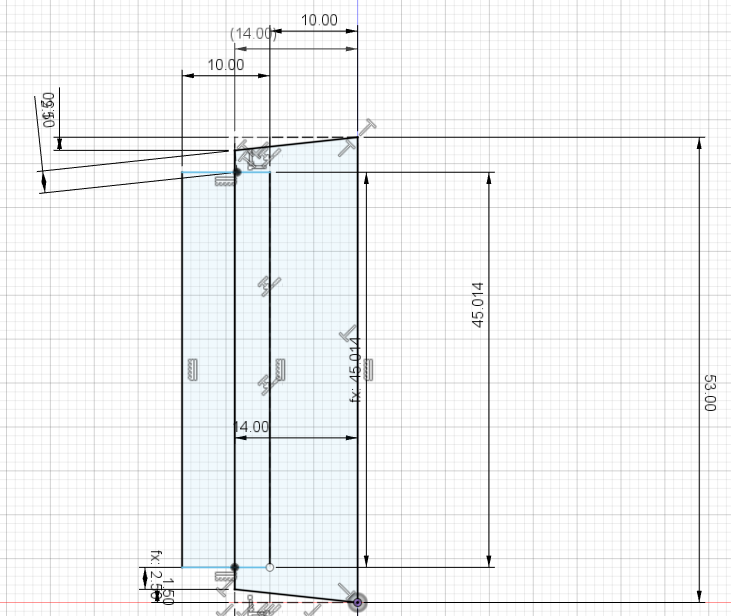
At this time, you must use your imagination power!
Trust me, those are the exact sizings that will be met. So, actually, I got the same sizes, but this won't help me. Because the trapeze will be held in the whole, and the holding joint will printed as a block. So I decided to add some borders to it. For that, there exists a tool in Fusion 360

With this, I can add a 1 mm border to all sizes. So that is my result now.
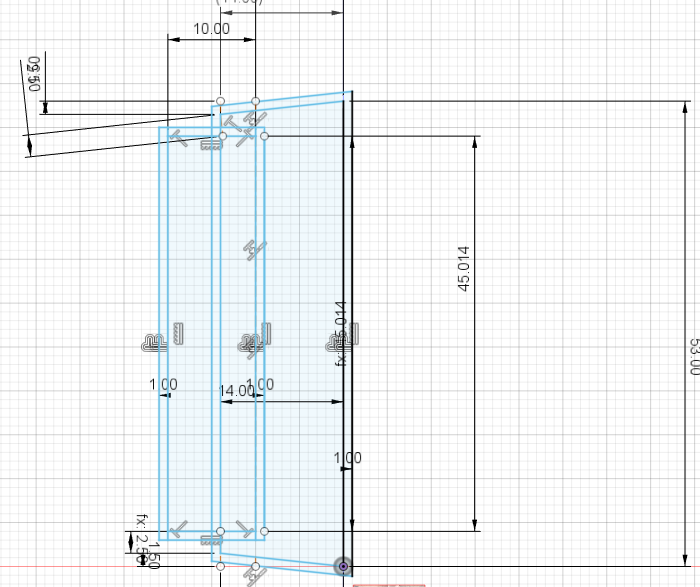
Yep, that looks nice. It's time to create a nice object from it. The magic is that you must extrude (positive and negative) the planes.
I start with the Trapeze.

Next, I will exude the holding joint; this is two steps. At first, I exude the back plate, and the next step is to extrude the holding plates. So that is my result.

Perfect, but now I must ensure that the device will fit and hold in place. For that, I added some boarders to the trapezoid. This will be negatively extruded so that it will get a nice outline into the back. The final result is this for now.

## Step 4: Print
Now, it's time to print out the model. Fusion 360 has a built-in functionality that allows you to create a 3mf or stl file.
Just go to Tools-> Create

Now select all objects in your area, select the format to export (in my case, 3MF; you can also export an STL), and hit "OK."
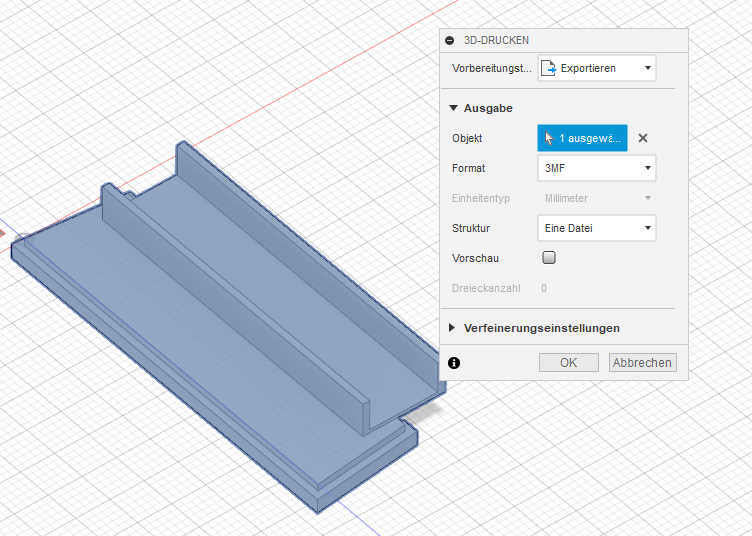
After exporting this, you can load it into your slicer tool. In my case it's Bamboolab. After slicing it, you will se that there will generate some support structures, because there are some hanging parts.
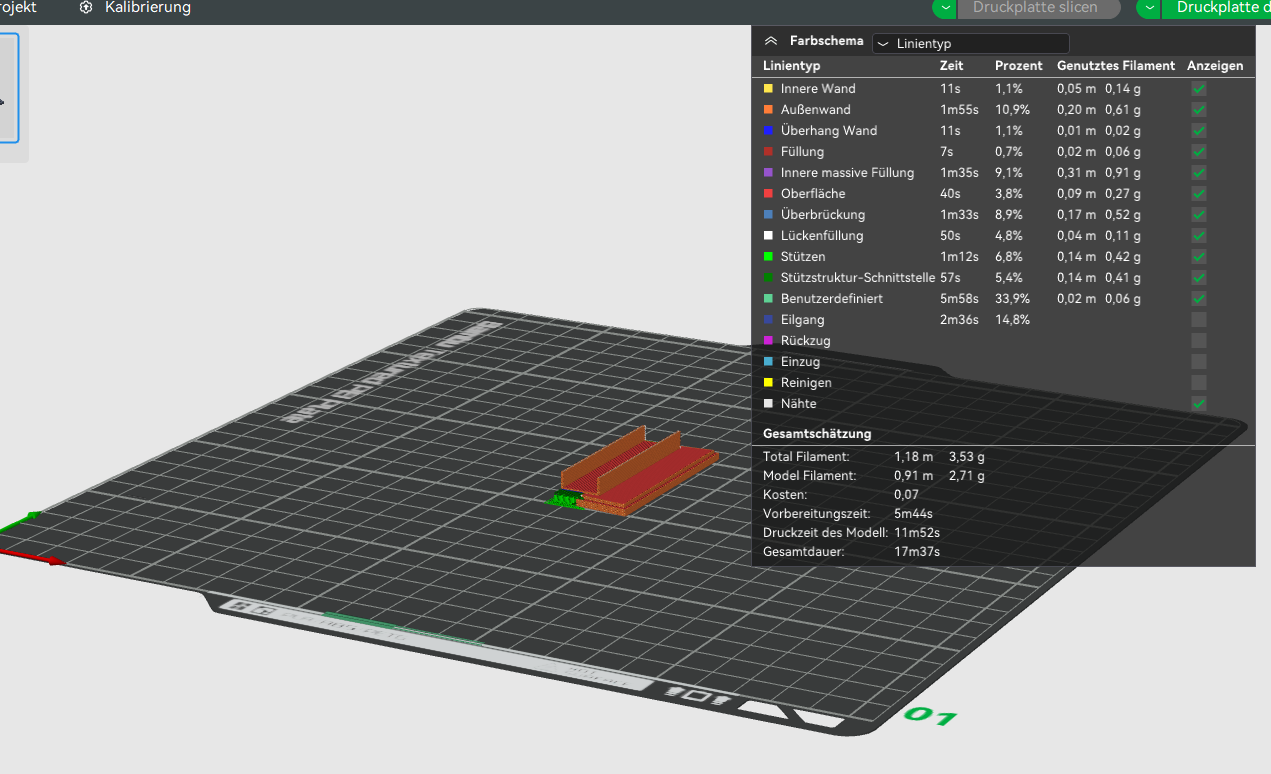
Next, I print the object, and sometime later (about 11 min), It will be ready for the first try.
## Step 5: First use
After a little bit of adjusting and pressing it into the hole, it snapped in into the part

So now, at the moment of truth, I inserted it into the fridge (sorry for the bad resolution).

But It seems to fit right into the place. Now, the test with the glass. It slides smoothly into the holder, and it fits very well.

Cool now, the lid will be held down, and the condensation water will run off.
## Conclusion
This project has been a fantastic example of how technology and creativity can come together to solve everyday problems. Using my 3D printer and Fusion 360, I designed and produced a custom replacement part that not only fixed my refrigerator but also offered an improved, modular solution for potential future issues.
The process of measuring, designing, printing, and testing was both challenging and rewarding. It highlighted the value of modern tools like CAD software and 3D printers in addressing minor but impactful household repairs. What started as a frustrating inconvenience became an exciting DIY journey, leaving me with a sense of accomplishment and a functional refrigerator.
If you're facing similar challenges, I encourage you to explore creative solutions using the tools you have. You might just be surprised at what you can achieve!
### First steps with the Shelly Wall display and adding Homeassistant functionality
URL: https://blog.bajonczak.com/first-steps-with-the-shelly-wall-display-and-adding-homeassistant-functionality/
Last updated: 2026-08-13T04:03:34.000Z
I bought these wall displays during a Black Friday offer/sale. Since I use Shelly in many switches at the moment, why not give it a try?
Shelly offers a nice-looking wall display that fits into a standard plug socket. So, I have many switches that are not "Shellyfied" ;), especially in our bedroom. The challenge is that I installed 2 other ambient lights powered by WLED, and their power is controlled by Shelly. But the problem is that I cannot turn it on via a switch.
I propose replacing the old-style switch with the Shelly Display. This room is a "safe place" to test this out.
But what can this display do for me? So let's get started.
## The Shelly wall display
#### [Shelly Wall displa](https://amzn.to/3ZtN8XZ?ref=blog.bajonczak.com)y
[Shelly Wall displa](https://amzn.to/3ZtN8XZ?ref=blog.bajonczak.com)
The Shelly Wall Display ([link to Amazon](https://amzn.to/3ZtN8XZ?ref=blog.bajonczak.com)) is a compact, versatile control hub for smart home enthusiasts. Its sleek design and bright, responsive touchscreen blend seamlessly into any modern home. Installation is straightforward, requiring only a standard flush-mounted box and a power connection.
In common, I have Pro and Cons gathered together for a quick overview
## Pros
- ✅ Intuitive Operation: The touchscreen is highly responsive, and the interface is well-organized and user-friendly.
- ✅ Flexibility: It supports a wide range of Shelly devices and third-party integrations via MQTT and HTTP.
- ✅ Customizability: Users can personalize the interface to control scenarios or devices with a single touch.
- ✅ Works also with low temperatures
- ✅ Compact Design: Its unobtrusive design fits neatly into any environment
- ✅ Integreated switch that can be used a thermostat also.
- ✅ ships with an internal temperature and humidity sensor
## Cons
- ❌ Limited Third-Party Apps: While Shelly supports many protocols, dedicated apps for more complex automation are lacking.
- ❌ Price Point: Some users might find it pricey compared to simpler wall controllers.
- ❌ No Battery Option: A constant power supply is required, limiting placement options.
- ❌ No camps for mounting it into regular plug sockets
Since the new beta is out, you can add a dashboard from your Homeassistant. More on this later in this article
## Mounting
The Shelly mounting plate looks like this:

You will see that the wire connectors are now directed to the back, so it is (in my opinion easier to mount the cables and put it back in to the socket.
To mount the plate itself to the wall you have two options .
1. Using the holes within the plug sockets
2. Drill two holes and mount it to this outside the socket
I wonder why no camp fits it into the plug socket. Then, you would be free to use it in regular sockets.
My only option was to mount two small holes to mount the socket to the wall instead of the plug socket. Because the mounting holes are covered with cement. Finally, I drilled the holes and mounted them onto the wall, but wait! There is one important thing! The wiring ;).
## Wiring the Shelly Wall Display
I will replace a regular wall switch with the wall display. So, instead of the regular wiring with an attached switch like this
I use these wiring (thank you, [paint.net](https://www.getpaint.net/download.html?ref=blog.bajonczak.com) :)):
Finally, I wired this to the wall display socket, and you will see that a small red LED lights up. This indicates that the socket is now ready to use.
I screwed the socket at the wall (to the previously mounted holes), and I was ready to go.
## Mounting the display
Finally, you are able to mount the display to the socket. There is nothing wrong with this, so just plug it into the wall socket, and you will see that the display lights up immediately.
I screwed the socket at the wall (to the previously mounted holes), and I was ready to go.
## First impressions
After the wall display is ready to use, you can turn on and off the internal switch by just touching it. This works seamlessly, so the touch panel is very sensitive. Even when the panel is dark or in "sleeping" mode, you can touch the display, and it will then toggle the switch state.
Seriously, I was a little bit afraid of the touch display's reaction time, but that is not a problem now.
The internal temperature and humidity sensor data will also be displayed on the initial screen.
So the reaction time was quite good in my opinion.
## Customizable UI
The Wall Device is primarily designed to work with every other Shelly device. After you connect via the Shelly Cloud, you can add new devices to the home screen you want to control. See this
You have only one Homescreen, but if you have added many devices, you can scroll right and left to "navigate" between them.
## The settings
The settings are mostly the same as in the app itself. You can control the connectivity, and especially for the wall display, you can make settings to the wall display itself, like turning off the screen.
## Homeassistant integration
The Homeassistant integration is not a secret anymore. To enable the Homeassistant integration, you must update to the latest firmware version (beta)
After this update, the Wall display restarts, and you can activate Homeassistant
In the Network setting, you will see the new Homeassistant setting
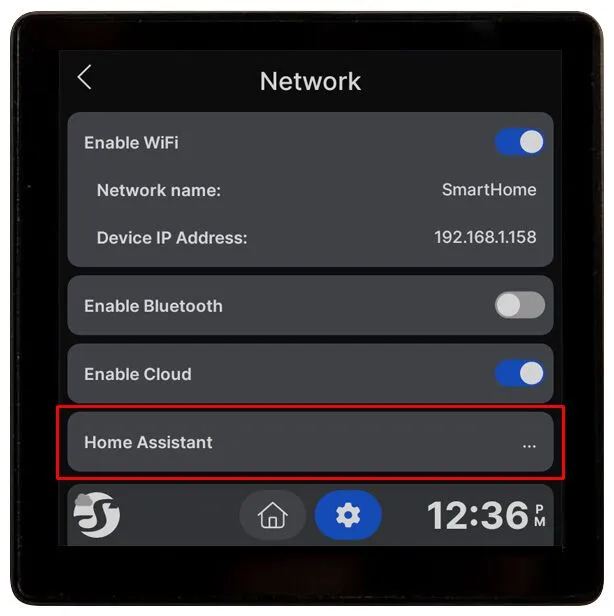
Before you can do anything, it must download some required components to support the connection to the homeassistant instance.
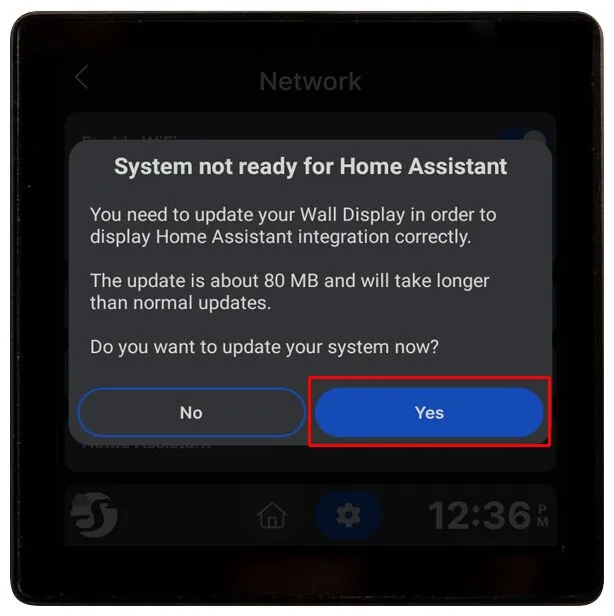
Finally after a little bit of waiting time passes away, you can configure the connection.
It then scans for homeassistant servers, but you can add your server manually. After that, you will see you Instance in the list and you must activate it. Don't forget to save this setting.
> Please keep in mind that you must enter the dashboard to display in the Homeassistant tab.
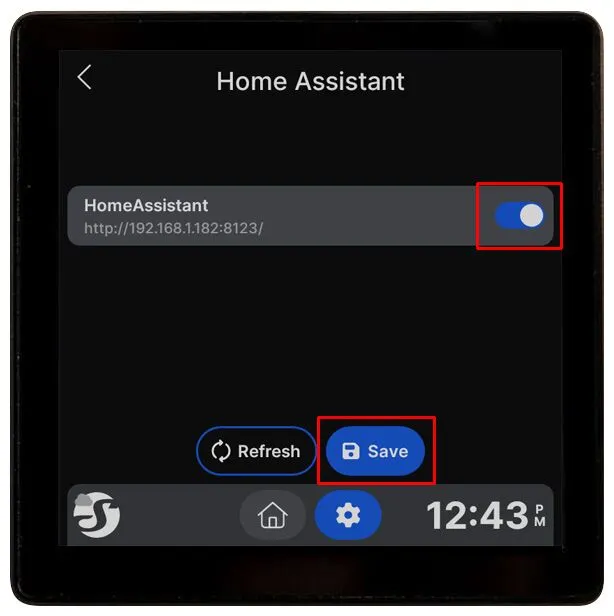
Now you can tap on the homeassistant logo and be redirected to the entered dashboard (Please login to the Homeassistant instance with your account).
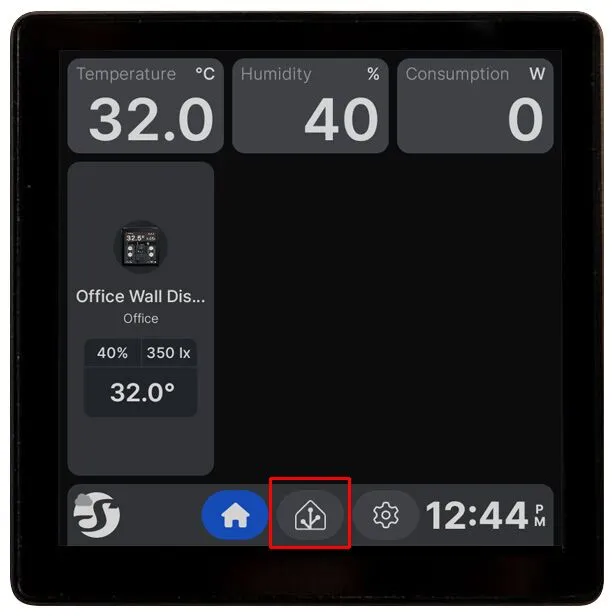
Finally it looks like this:
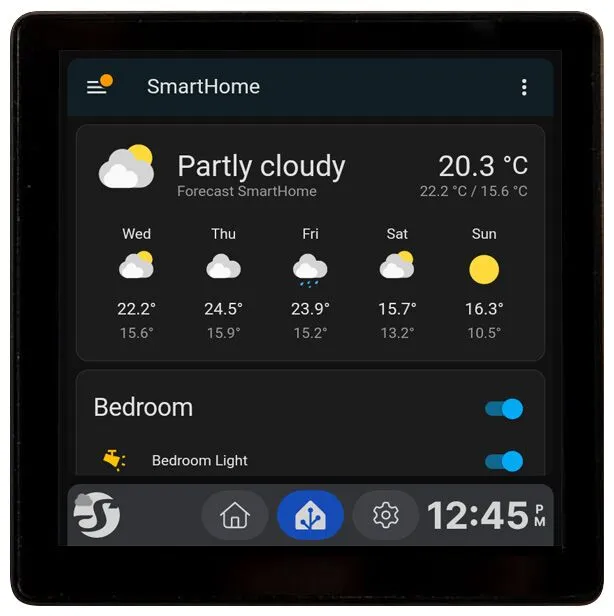
Finally the Homeassistant allows you to control throd party devices. In my case I added in my homeassistant a live stream from my front door camera to quickly look who is at the door when it rings.
Here is a small video that shows you how responsive the display is.
## Final thoughts
The Shelly Wall Display offers a practical and visually appealing solution for smart home enthusiasts who want more control over their connected devices. My journey of replacing an outdated switch with this modern display highlights its potential and versatility, but also reveals a few limitations.
### What I Loved
The Wall Display's intuitive operation and sleek design are standout features. Installation was relatively straightforward, and its responsive touchscreen exceeded my expectations. The integration with the Shelly ecosystem and compatibility with Home Assistant opened up a world of possibilities for managing my smart home. Toggling lights, monitoring environmental data, and even viewing live camera feeds from a single device felt incredibly convenient.
### Challenges I Faced
That said, the mounting process left room for improvement. The lack of a proper adapter for regular plug sockets meant I had to resort to drilling, which could deter less experienced users. Additionally, while the display’s feature set is robust, the price and the absence of a battery-powered option might not appeal to everyone.
### A Bright Future for Shelly?
The recent beta firmware update introducing Home Assistant integration adds significant value to the device. This functionality allows seamless control of third-party devices, transforming the Wall Display into a central hub for a smart home. Shelly has set a solid foundation, but refinements—such as better mounting options and more flexible configurations—would make it even more compelling.
### Is It Worth It?
If you're already invested in the Shelly ecosystem or exploring advanced smart home setups, this display is a fantastic addition. However, for those new to smart home technology or working within a tight budget, it’s worth weighing the pros and cons carefully.
*I keep a short overview of the practical posts that still get the most use here:* [*Technical Field Notes*](https://blog.bajonczak.com/technical-field-notes/)*.*
### Creating Sunrise routine in Homeassistant for my Stair light with WLED
URL: https://blog.bajonczak.com/creating-sunrise-routine-in-homeassistant-for-my-stair-light-with-wled/
Last updated: 2026-08-13T04:03:36.000Z
It's now more indoor time, so I want to adjust my lights for the stairs. I switch them on after sunset and turn them off at a specific time. So the turnoff will be done when I/we go into bed. But I wanted a smoother turn-on light. So, my idea was to identify the sunset and turn the light slowly on like a sunrise.
As Light, I use WLED, which is also integrated into my homeassistant. I can control the complete stuff from WLED via Homeassistant now.
# Why the transition cannot be used
Sure, you can say that I can use a transition with a specific runtime, but that is limited to a maximum of 20 seconds. To be clear, in Germany, a sunrise or sunset is not done in 20 seconds. So, another solution must be created to support longer transitions so that I can simulate a sunrise.
# What was required?
In my Homeassistant instance, I created a counter helper that stores the light's brightness value. You can find this in Settings-> Devices-> Helpers.
0:00
/0:08
1×
I called my helper "StairsBrightness" with the following settings
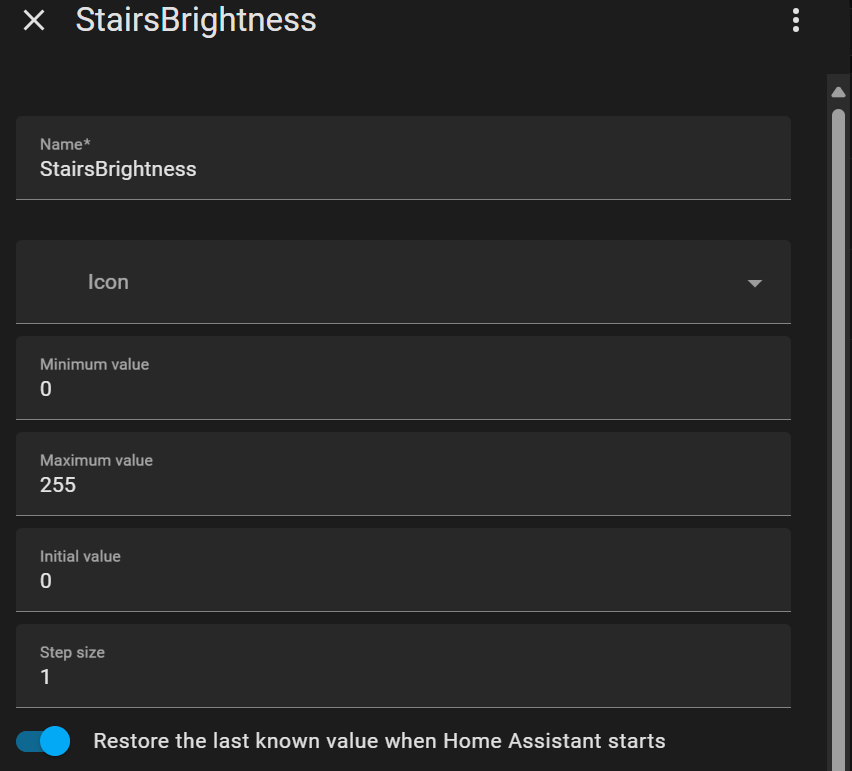
Now, we must create a new automation that will do the following:
1. React when there is a sunset happening
2. Increate the counter
3. Wait a few seconds and repeat
For that I created an automation the trigger is mandatory, it is only a reaction on the sunset event. The most important part is the loop within the automation.
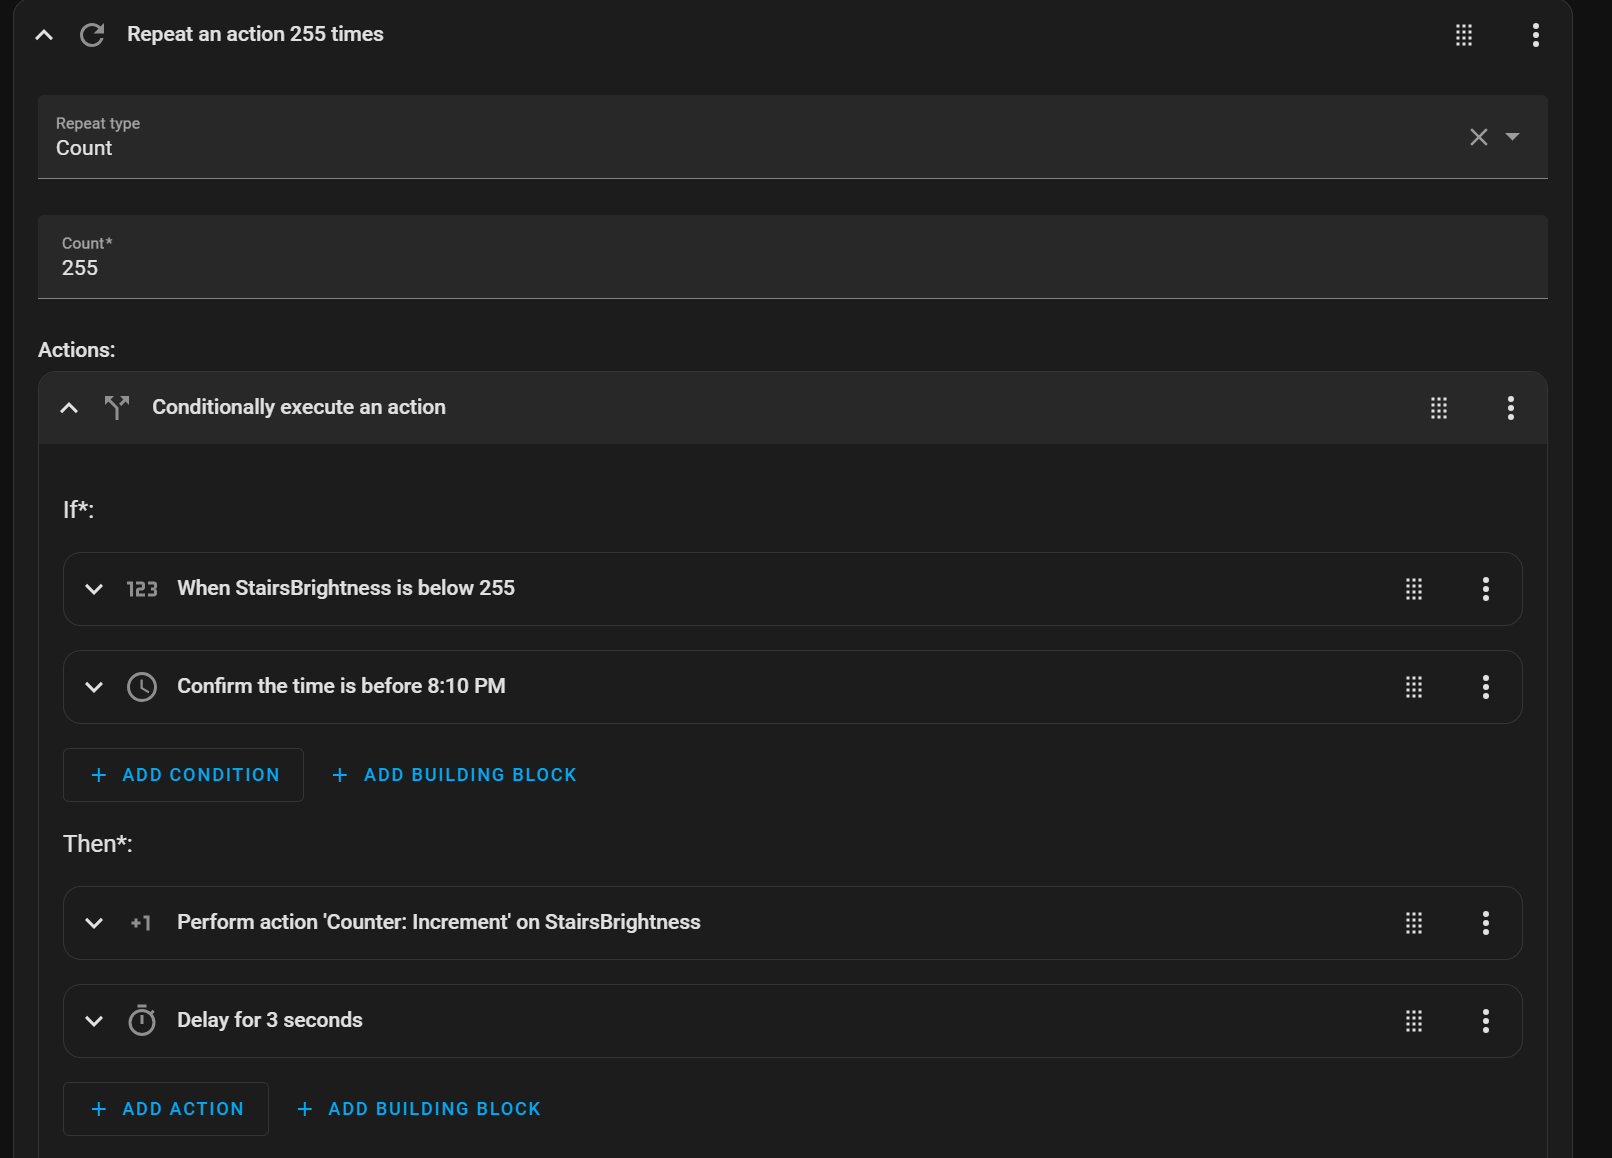
This will check if the counter value is below the maximum 255 because the WLED Device will throw an error. Next, I will check if the time is before 8:10 PM because, at this time, another automation will turn off the lights.
The loop will increase the helper with 1 and wait for 3 seconds. I figured out that 3 seconds would be smooth enough. You can adjust this to your needs. So, I am here with my YAML configuration.
```yaml
alias: Sonnenuntergang
description: ""
trigger:
- platform: time_pattern
minutes: "*"
enabled: false
- platform: sun
event: sunset
condition:
- condition: sun
after: sunset
action:
- repeat:
count: 255
sequence:
- if:
- condition: numeric_state
entity_id: counter.treppe_helligkeit
below: 255
- condition: time
before: "20:10:00"
then:
- action: counter.increment
target:
entity_id: counter.treppe_helligkeit
data: {}
- delay:
hours: 0
minutes: 0
seconds: 3
milliseconds: 0
mode: single
```
# Controlling WLED
We increased the counter, but I didn't send the value directly to the WLED Device. This is only why I use the WLED Device for other automation definitions. I use a trigger that will listen to change events from the counter helper. My automation will look like this.
```yaml
alias: Setze WLED Helligkeit basierend auf Counter
description: >-
Setzt die Helligkeit der WLED-Instanz auf den Wert des Counters bis maximal
250.
trigger:
- platform: state
entity_id:
- counter.treppe_helligkeit
condition:
- condition: time
before: "20:10:00"
- condition: sun
after: sunset
action:
- target:
entity_id: d790004af9e666f1b0b3072a2b2d145a
data:
brightness: "{{ states('counter.treppe_helligkeit') | int }}"
action: light.turn_on
- action: light.turn_on
metadata: {}
data: {}
target:
entity_id: light.wled_treppe
mode: single
```
So I set the brightness. Now it's time to test
# Testing
I adjusted the wait time to one second for demonstration purposes. Then, I started to simulate a sunset, and the magic would happen.
0:00
/0:48
1×
# My thoughts
So my idea was to get a little sunrise at my stairs. This works now like a charm. But that's not all, you are free to add more routines like night light at a specific time, so that you must not work down in the dark and not brighten up the light.
What are your thoughts about that?
*I keep a short overview of the practical posts that still get the most use here:* [*Technical Field Notes*](https://blog.bajonczak.com/technical-field-notes/)*.*
### Using declarative Copilot Agent for accessing "static" data
URL: https://blog.bajonczak.com/using-declarative-copilot-agent-for-accessing-static-data/
Last updated: 2024-10-07T10:10:01.000Z
In my [Last post, I described how to add custom data to your declarative Copilot](https://blog.bajonczak.com/adding-your-data-to-m365-declarative-copilot-agent/). This post will focus on a topic that will not be so sophisticated. So, it is an easy-to-read post. It's all about the implementation of static data. But in a very declarative way
## How to add external "static" -data
You can provide things like SharePoint lists, OneDrive folders, and web searches as external or "static data" (in my opinion). However, no data extension is configured by default, so when you check the copilot to generate answers about specific topics in your organization, it will not give you the correct answer.
### Adding web Data
So, the easiest way is to add a web search.
```JSON
{
"capabilities": [
{
"name": "WebSearch"
}
]
}
```
After deploying, you can ask the copilot something. It will search the web and present the data results copilot-style
this looks like this
But I won't recommend assigning the web search because when you want to add a custom copilot, you may intend to add YOUR custom data to the declarative copilot.
### Adding OneDrive or SharePoint Data
For example, let's assume your organization has some data hosted on a SharePoint site. You may then configure this as follows.
```JSON
{
"capabilities": [
{
"name": "OneDriveAndSharePoint",
"items_by_url": [
{
"url": "https://contoso.sharepoint.com/sites/ProductSupport"
}
]
}
]
}
```
This will query against the SharePoint site, and the result will be aggregated to the user. So, it's grounded in the data provided on the SharePoint site.
> This approach consider the access rights, so you will not get any data, on whom you don't ahve any acces to it.
Here's an example output.
### Adding Graph Data
You can also add graph data, especially a Graph connector. This will allow you to add Graph data to your copilot. A Graph connector will be mostly used if you have data that will be periodically updated and not used in real-time. The data must be provided (inserted) into the graph data space.
You will be able to add a graph connector like this
```JSON
{
"capabilities": [
{
"name": "GraphConnectors",
"connections": [
{
"connection_id": "foodstore"
}
]
}
]
}
```
You must set only the connection ID (that will be defined in a setup of the graph connector), and the copilot can access the data.
> Please be sure that the Access controll will be fetched from the graph connector, so it will be secure, when you provide the scuring information to the graph data ;)
And here's an example.
## Final words
It's now relatively easy to add external data to the copilot; you can also mix up the external data and build your declarative copilot. So, it opens up new possibilities for people without knowledge of development. Because this is a very low code scenario here 😄. So what do you think about this? Is that nice or not needed, in your opinion?
My opinion is that fact that you shouldn't use the web search to get better-focussed search results. Maybe you have another opinion about this.
### How To: Integrate Copilot into WhatsApp
URL: https://blog.bajonczak.com/how-to-integrate-copilot-into-whatsapp/
Last updated: 2024-10-03T08:45:00.000Z
Everyone (or most people) uses Copilot. I thought about integrating copilot into my WhatsApp. To be clear, I don't use the Copilot for the Business guys; it's targeting Bing's Copilot ;)
The steps are quite easy!
# The Steps to Add Copilot
So the simple steps are only
1. Adding the following Number as contact +1 (877) 224-1042
2. Open Up the contact
3. Accept the Terms and Policies
# First chat
So simple: Start a new chat with Copilot, then ... type :) Here is an example:
0:00
/0:23
1×
Demo Copilot integration into what app
What are your Thoughts? Must or Nice to have?
# Final words
Meanwhile, I use it to get more information about specific topics during meetings or other events. Instead of googling for a couple of minutes, it's easier to find the relevant information via Copilot.
### Logitech MX Master 3S Review: Still worth for Developers?
URL: https://blog.bajonczak.com/review-logitech-mx-master-3s/
Last updated: 2026-08-13T04:03:45.000Z
It's time to create a review again! Why? Because I am fascinated with my mouse. So, I try to make a nice review about this nice mouse. Here you are:
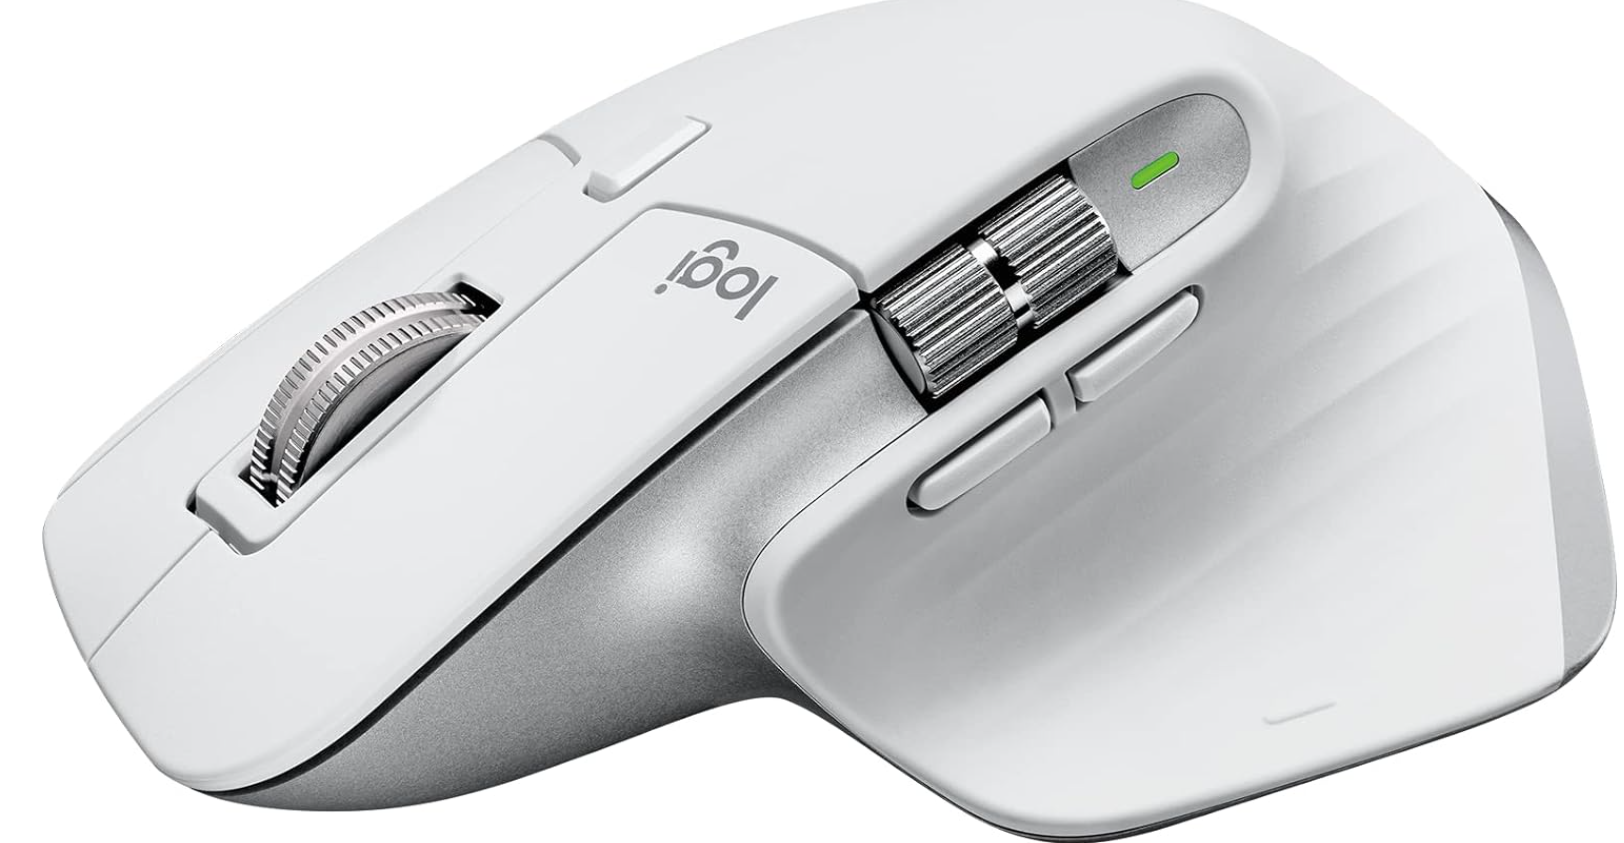
#### [Logitech MX Master 3s](https://amzn.to/4dkai6V?ref=blog.bajonczak.com)
[Logitech MX Master 3s](https://amzn.to/4dkai6V?ref=blog.bajonczak.com)
## Pros
- ✅ Remarkable comfort and battery life
- ✅ Perfectly precise electromagnetic scroll wheel
- ✅ Ultra-customizable for different apps
- ✅ Works with multiple devices and operating systems
## Cons
- ❌ Lefties need not apply
- ❌ No place to store the USB dongle
- ❌ Fans of tactile clicks may prefer the older version
| Logitech MX Master 3S Wireless Mouse Specs | |
| ------------------------------------------ | ------------------ |
| Hand Orientation | Right-Handed |
| Interface | Bluetooth |
| Interface | RF Wireless |
| Number of Buttons | 8 |
| Power Source | Internal Battery |
| Sensor Maker and Model | Logitech Darkfield |
| Sensor Maximum Resolution | 8000 |
| Warranty (Parts and Labor) | 1 Year |
| Weight | 5 oz |
# What is so special about that?
The **Logitech MX Master 3S** is a refined version of its predecessor, designed to provide seamless functionality, advanced ergonomics, and top-tier handling for professionals. Known for its precision and comfort, this mouse is engineered with cutting-edge technology, ensuring high performance for everyday and specialized tasks. The main difference between the MX Master 3 and 3s is the size, which is nothing more, in my opinion. So, the MX Master 3s will be delivered in two main variants:
- [MX Master 3s for Mac](https://amzn.to/3Boi7v1?ref=blog.bajonczak.com)
- [MX Master 3s](https://amzn.to/4gWxFGL?ref=blog.bajonczak.com)
The MX Master 3S also sets a high bar for wireless convenience. It uses either a low-power Bluetooth connection or the included Logi Bolt USB receiver (except in the Mac version). The latter plugs into (and barely sticks out of) a Type-A USB port to provide a 2.4GHz link, like Logitech's older Unifying receiver. Together with the Logitech MX keyboards, [MX keyboards](https://uk.pcmag.com/keyboards/140897/logitech-mx-mechanical-keyboard?ref=blog.bajonczak.com) it will be a nice setup.
As known, the mouseweel works continuously or step by step. With a single click on the button at the top, you can toggle between these modes. Scrolling tons of document text will be a lot easier, and you can switch to the step-by-wheel when you are near the final position. That's very awesome, in my opinion. I created a recording so that you can hear the difference. First, I activated the step-by-step mode. After pressing the button, it ran endlessly.
0:00
/0:02
1×
The mouse's top button lets you switch to three devices with different Bluetooth or USB connections. Logitech's Flow technology allows you to move the mouse cursor from one screen to another (for example, from a Windows machine to a Mac).

Please remember that the 3S does not have a place to carry the Bluetooth receiver if you are packing it for travel. However, most modern laptops or PCs do have an onboard Bluetooth receiver, and this will connect seamlessly with the mouse.

You can charge it with the USB Type-C port on the mouse's nose or the delivered USB-C-to-A cable. Logitech says a one-minute charge time is equivalent to up to three hours of use, and a full charge will give you 70 days of running time. At the left side of the mouse, you will have an LED indicator that tells you if the battery runs empty. Green means full, and red means empty.

In my experience, it depends on the usage. If you use it excessively daily, then the running time decreases a lot. If not, you will not charge it very often. I use it very often during the day, and I must charge it mostly every three or four weeks.
Speaking of Options+, it offers nearly limitless customization. You can remap buttons or use the side scroller to move through browser tabs.
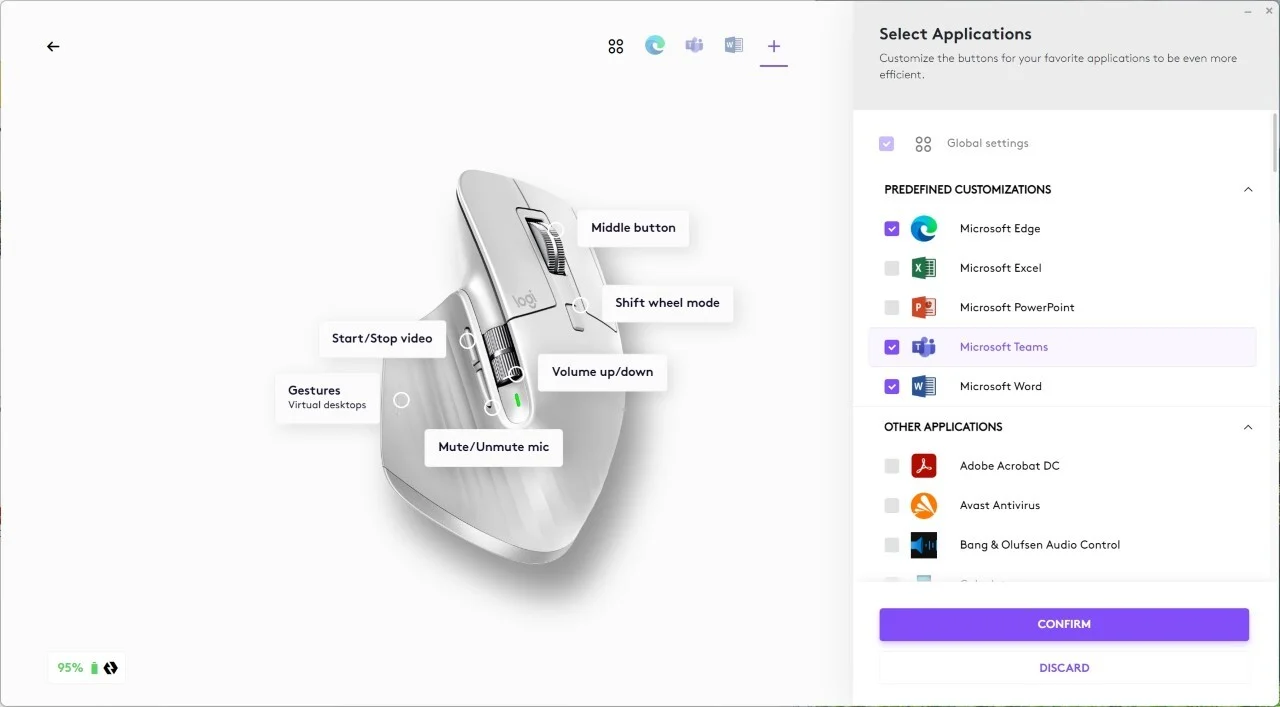
The key benefit is that you can assign different button actions for various applications. So, when you work in Word, you may have other actions on the right button, as if you are in Visual Studio. Again, you are free to assign the actions.
# Remarks
So please remember that Logitech doesn't offer an MX Master 3S for left-handed users. At 83,00 Euro (28.09.2024), it's not the cheapest mouse, and most standard users don't need it.
Yet until that future day, when we move our cursors merely by thinking, it's hard to imagine a better pointer (due to higher resolution). Whether you're scrolling 1,000 lines in a second or snapping windows and applying Undo and Paste commands at the speed of thought, it doesn't get any better than this.
Let me tell you, if you use a better, well-designed mouse, you will never change this setup anymore.
## FAQ
### Is the Logitech MX Master 3S good for developers?
Yes, especially because of the ergonomic shape, horizontal scrolling and customizable buttons.
### Can the MX Master 3S be used wired?
It can be charged via USB-C, but the mouse is mainly designed for wireless usage.
### Does the MX Master 3S work well for video calls and office work?
Yes, it is quiet, comfortable and works well for long office sessions.
*I keep a short overview of the practical posts that still get the most use here:* [*Technical Field Notes*](https://blog.bajonczak.com/technical-field-notes/)*.*
### Adding YOUR Data to M365 declarative Copilot Agent
URL: https://blog.bajonczak.com/adding-your-data-to-m365-declarative-copilot-agent/
Last updated: 2024-10-06T10:29:04.000Z
Yep, Copilot Wave 2 was already announced. The main takeaways are Copilot Pages, Python in Excel with scripts generated from Copilot, and, yes, declarative Copilot.
I will create a blog post about these new fancy features soon. For now, I will concentrate on the declarative copilot and how to add your custom data.
In my [post](https://blog.bajonczak.com/how-to-integrate-your-sap-hcm-data-into-you-ai-model-part-2/) on integrating custom data into Copilot, I must create a plugin with pro-code, but I can assure you that this is no longer necessary for simple solutions. Before we start, we need something done before we can dive into creating a declarative Copilot.
# Prerequisites
First of all, the declarative copilot is in private preview. So, you must execute some PowerShell commands to enable the preview.
```PowerShell
[Environment]::SetEnvironmentVariable("TEAMSFX_DECLARATIVE_COPILOT", 'true', "User")
[Environment]::SetEnvironmentVariable("KIOTA_CONFIG_PREVIEW", "true", "User")
$env:Path = [System.Environment]::GetEnvironmentVariable("Path","Machine") + ";" + [System.Environment]::GetEnvironmentVariable("Path","User")
```
Now, after that, you must install the required node package that will enable the teamsapp cli.
```Shell
npm install -g @microsoft/teamsapp-cli
npx teamsapp -h
```
Then, you must install the [Teams toolkit](https://marketplace.visualstudio.com/items?itemName=TeamsDevApp.ms-teams-vscode-extension&ref=blog.bajonczak.com) extension using Visual Studio code. Please pay attention to installing the preview version.
Finally you must install the kiota runtimes with
```
dotnet tool install --global Microsoft.OpenApi.Kiota
```
Now you are ready to go! Let's create the declarative copilot.
# Creating a declarative copilot
You can use the wizard to create a starting point for the scaffolded template.
0:00
/0:22
1×
Creating a declarative copilot
After that, you have the stater template loaded into the Visual Studio Code. In the folder appPackage you will see the file declarativeAgent.json with the following content:
```JSON
{
"$schema": "https://aka.ms/json-schemas/copilot/declarative-agent/v1.0/schema.json",
"version": "v1.0",
"name": "MyTestDeclarativeCopilot",
"description": "Declarative agent created with Teams Toolkit",
"instructions": "$[file('instruction.txt')]",
}
```
Now, you will be able to create the following:
- Conversation starters
- Add external "static" data
- Add Graph Connectors
- Add a custom plugin
I will focus only on adding the custom plugin
First, some points on to deploy these declarative copilots:
# Deployment
I deploy the definition with the Teams Toolkit (Prerelease version). The only step is to provision the copilot within your tenant.
After that, you can open the [copilot chat](https://www.microsoft365.com/chat?ref=blog.bajonczak.com). You will see the chat drawer next to the "New Chat" button. There will be places where our extension.
From here, you can select YOUR Copilot and work with it. Now, let's dive deep into adding your custom data as a data source.
### Adding custom data
You must provide an open API definition to attach your data via a plugin. To keep it simple, I used the demo instance from Microsoft: [https://aka.ms/repairshub/openapi.json](https://aka.ms/repairshub/openapi.json?ref=blog.bajonczak.com) . In this definition you will a definition to get information of repairs. To use this definition, you can use the installed tool kiota.
```
kiota plugin add --openapi https://aka.ms/repairshub/openapi.json --plugin-name "RepairsHub" --type apiplugin --output appPackage
```
This will produce the following output
Output when adding pluing with kiota tool
You will notice two new files within the project folder.

4
The JSON is the downloaded copy of the server, and the "yml" File contains the YAML translated representation.
The final step is to add an action into the declarativeAgent.json - File to enable the endpoint as a datasource. The modified one looks like this:
```JSON
{
"$schema": "https://aka.ms/json-schemas/copilot/declarative-agent/v1.0/schema.json",
"version": "v1.0",
"name": "Teams Toolkit declarative copilot",
"description": "Teams Toolkit declarative copilot",
"instructions": "$[file('instruction.txt')]",
"actions":[
{
"id": "repairsPlugin",
"file": "repairshub-apiplugin.json"
}
]
}
```
Modified JSON with custom plugin
Now, you can deploy and test the agent within the Chat Promt. I will try to get all reports from the endpoint. After a little bit of gathering time, you will be prompted with the results.
Done! That was quick!
#
### Integrate charging point metrics in Homeassistant with modbus
URL: https://blog.bajonczak.com/integrate-charging-point-metrics-in-homeassistant/
Last updated: 2024-09-17T17:34:34.000Z
Since I have an EEV for driving, I own a charger at home. My device is from the manufacturer Daheimladen, a German company, and I think it is very cheap and straightforward. Here is an image of the "wallbox" Modell that I use:
#### DaheimLaden
11KW Wallbox for home use
[Click for more details](https://amzn.to/4emtstM?ref=blog.bajonczak.com)
# The problem
The problem in my case is, that I cannot figure out when my car has completed his charging. Yes I can use the app from my car instead. But I think that I can switch my care more often as the wallbox, so my wallbox will be more resident at my home.
I figured out the specs of the wallbox, and thanks to the cool support of the manufacturer, I figured out how I can get the required data out of it. But unfortunately there is no specific API for that, you must use the modbus protocol.
# What is modbus?
Modbus operates on a master-slave architecture, where a master device (such as a PLC or computer) controls communication with multiple slave devices (e.g., sensors or actuators). The master requests a specific slave, which then processes and returns the response. This communication happens over a serial or Ethernet network, and only one device can communicate at a time, ensuring no data collisions. Modbus is often used in industrial automation due to its simplicity and reliability for controlling and monitoring devices.
Modbus is used in various industries, including manufacturing, energy, water treatment, and building automation, to control and monitor devices like motor drives, meters, valve controllers, and other field devices. In my case, the charger also.
I also figured out that many devices that have an ethernet port will use the Modbus protocol. So my heater at home will also use it, and maybe I will connect it too.
# The first step in Modbus
My first steps are in the Linux command shell, so it will be possible to create requests to read out the registers. For that, we need some information about the data frame format. Luckily, there exists some information about that.
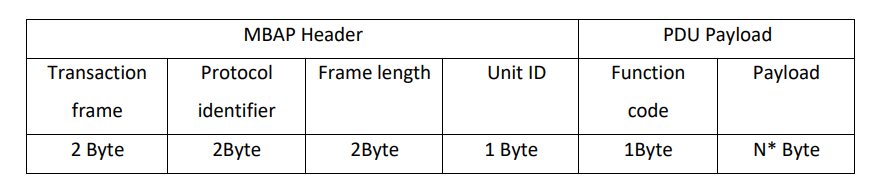
So you will see that the message will be constructed with a header and its payload. Let me introduce the Header. This is very simple. Please keep in mind that we must set that all as Hexadecimal values
- Transaction
This will be set every time to a number of your choice because this will identify YOUR transaction number, in our case 0x0001
- Protocol
This will everytime set to 0x0000 this is specific to modbus.
- Frame Length
The length is set to the length of bytes. I will send a 6 Bytes command it is set to 6\. Please be careful to use the 2 Bytes notation, so it will be set to 0x0006
- Unit ID
This ID will be declared by the manufacturer. So in my case, it's "0xff"
Now, the values for the Payload
- Function code
This code will indicate what action the device must execute, this is standardized. I will request a read of the registers. So I set it to "0x03".
- Payload
Now the Payload this will tell the device to start to read from register 100 and read the next 2 register.
I will use Netcat to send the data. So my command will look like that
```shell
echo -ne '\x00\x01\x00\x00\x00\x06\xff\x03\x00\x64\x00\x02' | nc 192.168.178.123 502
```
Here you will see the result:
0:00
/0:04
1×
It works, so the device sends me something back. I will see the values from that in the register. The next step is to get information about the available registers for the information that I need. I connected with the manufacturer, and he handed me over the registration specifications.
It is a huge list of registers and their meanings, and it looks like this
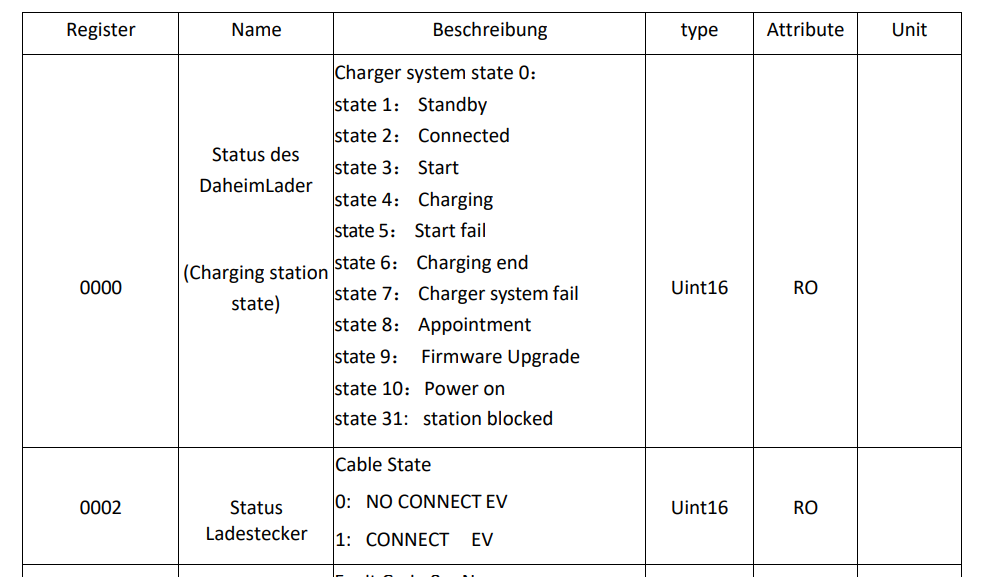
So, in this case, I know that the connection works, and the data will be returned.
The example above introduced how communication works. Plenty of tools will gather the registers and their contents, too. So I use one of them: "mobustester." That will get the information out of the device, and I can check it against the lists, too.
This looks for example, like this:
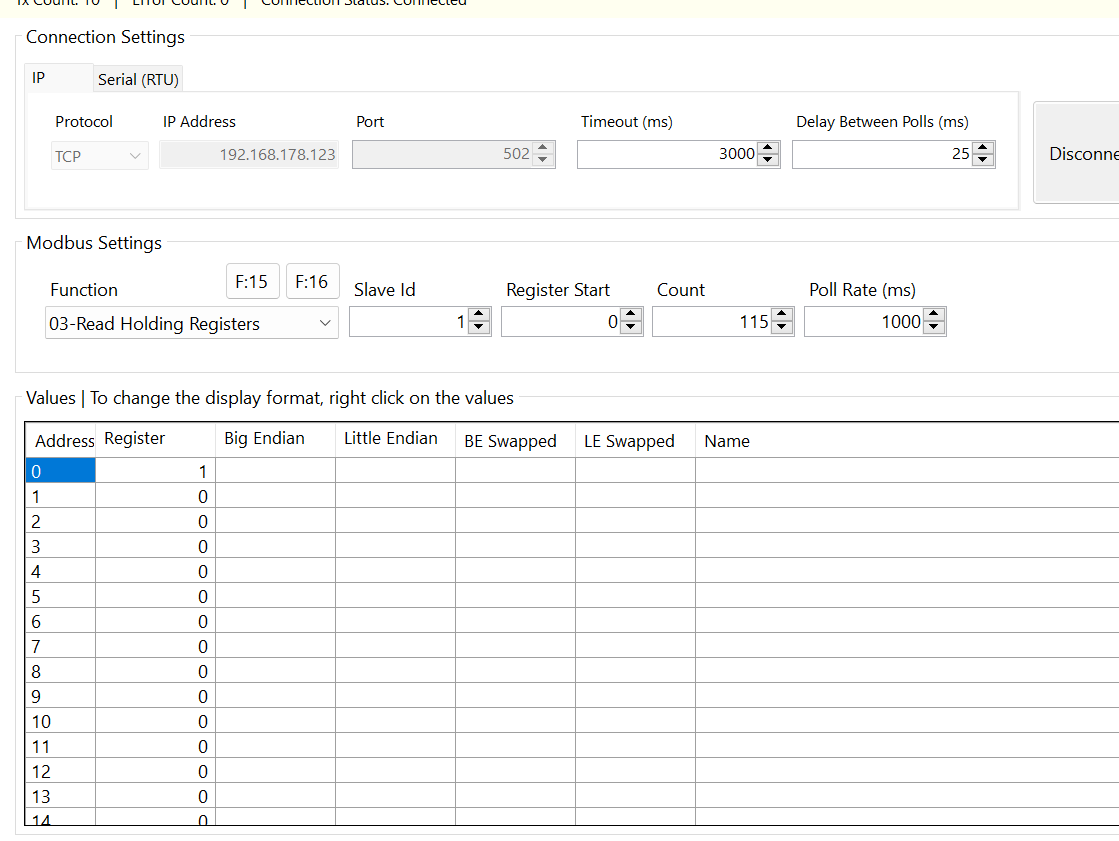
So the next step is more work effort.
# Using Modbus in Homeassistant
So Homeassistant has a ready-to-use Modbus extension for that. I saw several implementations that use node-red, and now I know why. Its documentation is... yeah... very limited and hard to understand at first. But it is possible to get the data with that extension.
So, to get the final result like
I must get the information out of the Modbus registers. The first step is to configure the Modbus connection. I use this configuration
```Yaml
modbus:
- name: DaheimLaden
type: tcp
host: 192.168.178.123
port: 502
delay: 25
message_wait_milliseconds: 30
timeout: 5
```
I use the Modbus extension. In that, I set the internal name to DaheimLaden and the connection type to TCP because I want to access the data via Ethernet / Wi-Fi. Since TCP is set as the type, you must enter the host IP and, optionally, the port. So, in my case, I set it to the IP for the charger and the Port to 502\. That's the default port.
The delay is significant because when you request the data too often, it can get very unstable in fetching the right data. The message\_wait\_milliseconds parameter tells how long it will be waiting for a message. Also the timeout is mandatory, it tells the timeout of the complete process.
> Important, every change to modbus will require a restart of the complete homeassistant instance.
Now that the common configuration is set, we must fetch the registers. Let's explain this with the state of the charger.
```yaml
timeout: 5
sensors:
- name: DaheimLaden_State
data_type: int16
input_type: holding
address: 0000
```
The timeout is copied as reference to the YAML above. So you have now the node sensors. Below that, you will define the name, datatype and the address of the value. The name will be used later in Homeassistant itself. Important is the input\_type, set it to holding. Because otherwise you will get the values only one time not more.
Now restart Homeassistant and you will see the new sensor and the fetched value:
You are able to add more sensors for each register. So finally, my configuration looks like this
```yaml
host: 192.168.178.123
port: 502
delay: 25
message_wait_milliseconds: 30
timeout: 5
sensors:
- name: DaheimLaden_State
data_type: int16
input_type: holding
address: 0000
- name: DaheimLaden_CableState
data_type: int16
input_type: holding
address: 2
- name: DaheimLaden_Charge_FaultCode
data_type: int16
input_type: holding
address: 4
- name: DaheimLaden_L1_Current
data_type: int16
input_type: holding
address: 6
- name: DaheimLaden_L2_Current
data_type: int16
input_type: holding
address: 8
- name: DaheimLaden_L3_Current
data_type: int16
input_type: holding
address: 10
- name: DaheimLaden_Charge_ActivePowerTotal
data_type: int32
input_type: holding
address: 12
- name: DaheimLaden_EnergyMeter
data_type: int16
input_type: holding
address: 28
- name: DaheimLaden_EVSE_maxCurrent
data_type: int16
input_type: Holding
address: 34
- name: DaheimLaden_Cable_maxCurrent
data_type: int16
input_type: holding
address: 36
- name: DaheimLaden_UserID
data_type: int16
input_type: holding
address: 38
- name: DaheimLaden_CardID
data_type: int16
input_type: holding
address: 54
- name: DaheimLaden_Charge_energy
data_type: int16
input_type: holding
address: 72
- name: DaheimLaden_StartTime_hh
data_type: int16
input_type: holding
address: 74
- name: DaheimLaden_StartTime_mm
data_type: int16
input_type: holding
address: 75
- name: DaheimLaden_StartTime_ss
data_type: int16
input_type: holding
address: 76
- name: DaheimLaden_RawData
data_type: int16
input_type: holding
address: 78
- name: DaheimLaden_Charging_time
data_type: int16
input_type: holding
address: 79
- name: DaheimLaden_EndTime_HH
data_type: int16
input_type: holding
address: 82
- name: DaheimLaden_EndTime_MM
data_type: int16
input_type: holding
address: 83
- name: DaheimLaden_EndTime_SS
data_type: int16
input_type: holding
address: 84
- name: DaheimLaden_Max_LoadinPower
data_type: int16
input_type: holding
address: 87
- name: DaheimLaden_ConTimeOut
data_type: int16
input_type: holding
address: 89
- name: DaheimLaden_L1_Voltage
data_type: int16
input_type: holding
address: 109
- name: DaheimLaden_L2_Voltage
data_type: int16
input_type: holding
address: 111
- name: DaheimLaden_L3_Voltage
data_type: int16
input_type: holding
address: 113
```
With this, I am able to fetch every value I need. Yes, the names are not very nice, but it works, and I can use it right. Please be careful when using the right data\_type. Otherwise, you will get the wrong data.
# Creating a custom Sensor
Above, you saw a nice informative card. This is a predefined card instance that I reused. But first, I created a custom template sensor because I wanted one sensor that would keep all data as an attribute.
Especially the states and decimal numbers. These must be formatted or translated into human-readable values.
Here is my full template yaml definition (German one ;) ).
```yaml
sensors:
wallbox:
friendly_name: DaheimLaden
unique_id: DaheimLaden
value_template: >-
{{ states("sensor.DaheimLaden_State") }}
attribute_templates:
StateText: >
{% set status = states("sensor.DaheimLaden_State") %}
{% if status == '1' %}
Standby
{% endif%}
{% if status == '2' %}
Verbunden
{% endif%}
{% if status == '3' %}
Start
{% endif%}
{% if status == '4' %}
Lade
{% endif%}
{% if status == '5' %}
Fehler starten
{% endif%}
{% if status == '6' %}
Laden abgeschlossen
{% endif%}
{% if status == '7' %}
Ladesystem Fehler
{% endif%}
{% if status == '8' %}
Termin
{% endif%}
{% if status == '9' %}
Firmware upgrade
{% endif%}
{% if status == '10' %}
Power On
{% endif%}
Charge_energy: >
{{(states("sensor.daheimladen_charge_energy") | float)*0.1 | round(2)}}
Charge_FaultCode: >
{{states("sensor.DaheimLaden_Charge_FaultCode") }}
Charge_ActivePowerTotal: >
{{states("sensor.DaheimLaden_Charge_ActivePowerTotal") }}
L1_Voltage: >
{{(states("sensor.DaheimLaden_L1_Voltage") |float |round(2)) *0.1 | round(2) }}
L2_Voltage: >
{{(states("sensor.DaheimLaden_L2_Voltage") |float) *0.1 | round(2) }}
L3_Voltage: >
{{(states("sensor.DaheimLaden_L3_Voltage") |float) *0.1 | round(2)}}
L1_Current: >
{{(states("sensor.DaheimLaden_L1_Current") |float) *0.1 | round(2)}}
L2_Current: >
{{(states("sensor.DaheimLaden_L2_Current") |float) *0.1 | round(2)}}
L3_Current: >
{{(states("sensor.DaheimLaden_L3_Current") |float) *0.1 | round(2)}}
CableMaxCurrent: >
{{(states("sensor.DaheimLaden_Cable_maxCurrent") |float) *0.1 | round(2)}}
EVSEMaxCurrent: >
{{(states("sensor.DaheimLaden_EVSE_maxCurrent") |float) *0.1 | round(2)}}
EVSEMinCurrent: >
{{(states("sensor.DaheimLaden_EVSE_minCurrent") |float) *0.1 | round(2)}}
Max_LoadingPower: >
{{states("sensor.DaheimLaden_Max_LoadinPower") }}
State: >
{{states("sensor.DaheimLaden_State") }}
EnergyMeter: >
{{states("sensor.DaheimLaden_EnergyMeter") }}
CableState: >
{{states("sensor.DaheimLaden_CableState") }}
CableStateText: >
{% set status = states("sensor.DaheimLaden_CableState") %}
{% if status == '1' %}
Verbunden
{% endif %}
{% if status == '0' %}
Nicht Verbunden
{% endif %}
Charging_time: >
{{ states("sensor.DaheimLaden_Charging_time")}}
StartTime: >
{% set hours = states("sensor.DaheimLaden_StartTime_hh") %}
{% set minutes = states("sensor.DaheimLaden_StartTime_mm") %}
{% set seconds = states("sensor.DaheimLaden_StartTime_ss") %}
{{ '%02d' % hours }}:{{ '%02d' % minutes }}:{{ '%02d' % seconds }}
UserId: >
{{ states("sensor.DaheimLaden_UserID") }}
CardId: >
{{ states("sensor.DaheimLaden_CardID") }}
EndTime: >
{% set hours = states("sensor.DaheimLaden_EndTime_HH") %}
{% set minutes = states("sensor.DaheimLaden_EndTime_MM") %}
{% set seconds = states("sensor.DaheimLaden_EndTime_SS") %}
{{ '%02d' % hours }}:{{ '%02d' % minutes }}:{{ '%02d' % seconds }}
ChargeEnergy: >
{{(states("sensor.DaheimLaden_Charge_energy") |float) *0.1 | round(2)}}
ConnectionTimeout: >
{% set total_seconds = states("sensor.DaheimLaden_ConTimeOut") %}
{% set hours = (total_seconds|int // 3600) %}
{% set minutes = (total_seconds|int % 3600) // 60 %}
{% set seconds = (total_seconds |int% 60) %}
{{ '%02d' % hours }}:{{ '%02d' % minutes }}:{{ '%02d' % seconds }}
ChargingTimeFormated: >
{% set total_seconds = states("sensor.DaheimLaden_Charging_time") %}
{% set hours = (total_seconds|int // 3600) %}
{% set minutes = (total_seconds|int % 3600) // 60 %}
{% set seconds = (total_seconds |int% 60) %}
{{ '%02d' % hours }}:{{ '%02d' % minutes }}:{{ '%02d' % seconds }}
FaultCode: >
{{ states("sensor.DaheimLaden_Charge_FaultCode") }}
FaultCodeText: >
{% set status = states("sensor.DaheimLaden_Charge_FaultCode") %}
{% if status == '0' %}
Kein Fehler
{% endif %}
{% if status == '11' %}
Spannungsfehler (CP-Control)
{% endif %}
{% if status == '12' %}
Notaus gedrückt gedrückt (EStop)
{% endif %}
{% if status == '13' %}
Unterspannung (Under Voltage)
{% endif %}
{% if status == '14' %}
Überspannung (Over Voltage)
{% endif %}
{% if status == '15' %}
Überhitzungsschutz aktiv (Over temperature)
{% endif %}
{% if status == '17' %}
Fehlerschutzschalter aktiv (Leakage Fault)
{% endif %}
{% if status == '16' %}
Stromzähler Fehler (Meter Fault)
{% endif %}
{% if status == '18' %}
Kurzschluss (Output short)
{% endif %}
{% if status == '19' %}
max. Ladeleistung Überschritten (Over Current)
{% endif %}
{% if status == '21' %}
Kommunikationsfehler mit inaktivem Farhzeug (Vehicle communication)
{% endif %}
{% if status == '22' %}
Identifikation der Ladeparameter des Fahrzeugs fehlgeschlagen (Vehicle unrecongizable)
{% endif %}
{% if status == '23' %}
Fehlerschutzschalter aktiv (Relay Adhesion)
{% endif %}
{% if status == '24' %}
Messsystem kalibrierung Fehlgeschlagen (Leakage Check Device)
{% endif %}
{% if status == '25' %}
Erdungsfehler (PE Fault)
{% endif %}
{% if status == '26' %}
Ladevorgang konnte nicht gestartet werden (Startup charging fault)
{% endif %}
```
This will create a custom sensor called wallbox with all required attributes. If you applied that correctly, the sensor entity will be appear (also with the configured attributes)
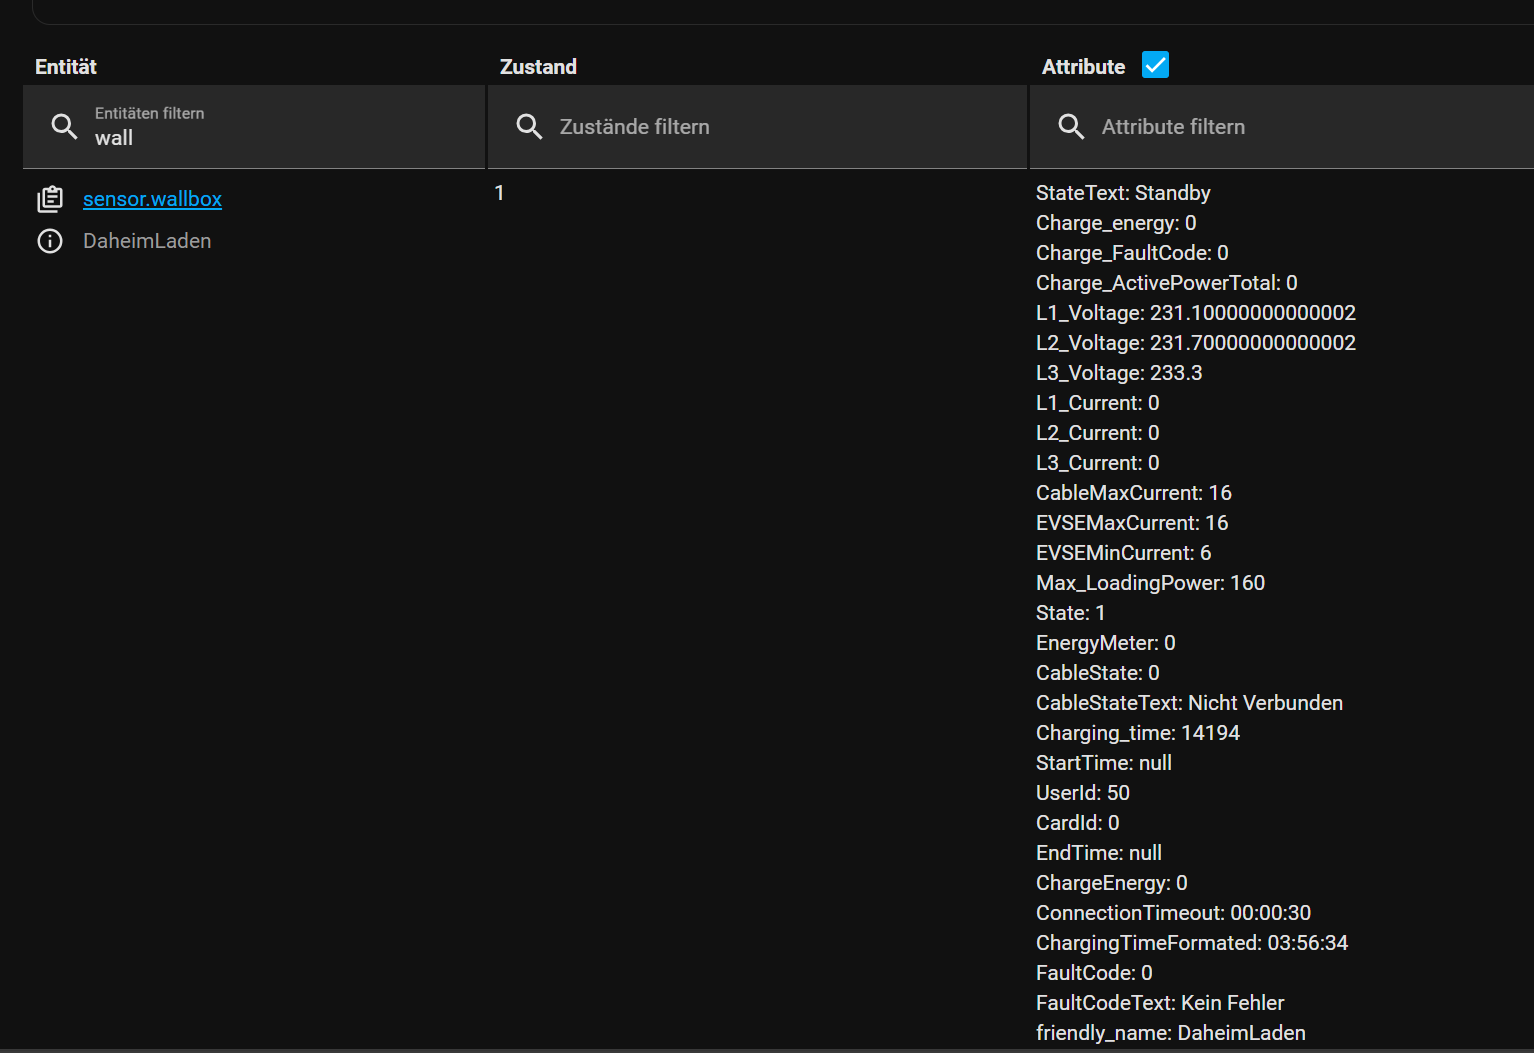
# Apply the data to the card
As I mentioned, I use an existing UI extension called [charger-card](https://github.com/tmjo/charger-card/?ref=blog.bajonczak.com). You can install it with HACS.
When you apply the values, you cannot use it out of the box. You must configure every information on your own. But thy to me... I can share my config for that.
```yaml
type: custom:charger-card
entity: sensor.wallbox
details:
status:
entity_id: sensor.wallbox
attribute: StateText
substatus:
entity_id: sensor.wallbox
attribute: CableStateText
collapsiblebuttons:
group1:
text: Leistungs Information
icon: mdi:current-ac
group2:
text: Allgemeine Information
icon: mdi:cogs
group3:
text: Fehlercodes
icon: mdi:alert-circle-outline
stats:
default:
- entity_id: sensor.wallbox
attribute: Charge_energy
text: Gelandene Energie
unit_show: true
unit: KwH
- entity_id: sensor.wallbox
attribute: Charge_ActivePowerTotal
text: Ladeleistung gesamt
unit_show: true
unit: W
- entity_id: sensor.wallbox
attribute: ChargingTimeFormated
text: Dauer der letzten Ladung
group1:
- entity_id: sensor.wallbox
attribute: L1_Voltage
icon: mdi:sine-wave
unit_show: true
unit: V
- entity_id: sensor.wallbox
attribute: L2_Voltage
icon: mdi:sine-wave
unit_show: true
unit: V
- entity_id: sensor.wallbox
attribute: L3_Voltage
icon: mdi:sine-wave
unit_show: true
unit: V
- entity_id: sensor.wallbox
attribute: L1_Current
icon: mdi:flash
unit_show: true
unit: A
- entity_id: sensor.wallbox
attribute: L2_Current
icon: mdi:flash
unit_show: true
unit: A
- entity_id: sensor.wallbox
attribute: L2_Current
icon: mdi:flash
unit_show: true
unit: A
group2:
- entity_id: sensor.wallbox
text: Maximaler Ladestrom des Kabels
attribute: CableMaxCurrent
icon: null
unit: A
unit_show: true
- entity_id: sensor.wallbox
text: Maximaler Ladestrom
attribute: EVSEMaxCurrent
icon: null
unit: A
unit_show: true
- entity_id: sensor.wallbox
text: Minimaler Ladestrom
attribute: EVSEMinCurrent
icon: null
unit: A
unit_show: true
group3:
- entity_id: sensor.wallbox
text: FaultCodeText
attribute: FaultCodeText
icon: mdi:alert
```
Now you can apply this and the Information will show immediately.
# Final words
I love Homeassistant. I worked several years ago with io broker. It was very powerful, but Homeassistant has the same features, and you have a nice-looking UI, too. Also, you can use special topics to implement very quickly.
After I figured out that my wallbox supports the Modbus protocol, I could use it in my Homeassistant instance with a little bit of trial and error. I hope that you can take a little bit benefit from this post. Leave me a comment with feedback.
### Fetching Data from SAP SuccessFactors via OData and OAuth
URL: https://blog.bajonczak.com/fetching-data-from-sap-successfactors-via-odata-and-oauth/
Last updated: 2026-08-13T04:03:38.000Z
In a [few posts](https://blog.bajonczak.com/tag/sap/) in the past, I described the integration of the SAP Data in Copilot. So, the big question was, how can it get the data from the SuccessFactors instance? In fact, it may be simple. Creating a technical user and accessing the data. That's it. But I do not want the easy thing; I want safe access because we work with susceptible data here. So, I must find a way to access it on behalf of a user. Yes, I pointed out a way to create an on-reside request about OAuth in my [post about OAuth](https://blog.bajonczak.com/oauth-complete-guide/). But here, SAP will do a slightly different way to do this. So I tell you in this post the way to do this.
## How to get the Data out of the System
The answer is quite simple: use OData. I'm on the MS Path; there, it is very simple: I create an AppRegistration thingy, grant access, and then I can call the system.
The answer is quite simple: use OData. I'm on the Microsoft path; there, it is very simple: I create an app registration, grant access, and then I can call the system.
But after building this kind of integration more than once, I started asking a different question: should every Power Platform or Microsoft 365 scenario really rebuild the same SAP SuccessFactors access layer again? That is why I later wrote about [why I built a Microsoft 365 connector for SAP SuccessFactors](https://blog.bajonczak.com/why-i-built-a-microsoft-365-connector-for-sap-successfactors/).
## Requirements
## Requirements
Before we start, the following information must be fetched.
- The CompanyID
- A registered OAuth Client (in SF)
- The private key that will be generated in SF
You will get this within the SuccesFactors instance. Please make sure that you are logged in as an administrator to get these informations.
## The Process
So, In SAP SuccessFactors is a little bit more complex. Let show me the gross process of the authentication and fetching the data.
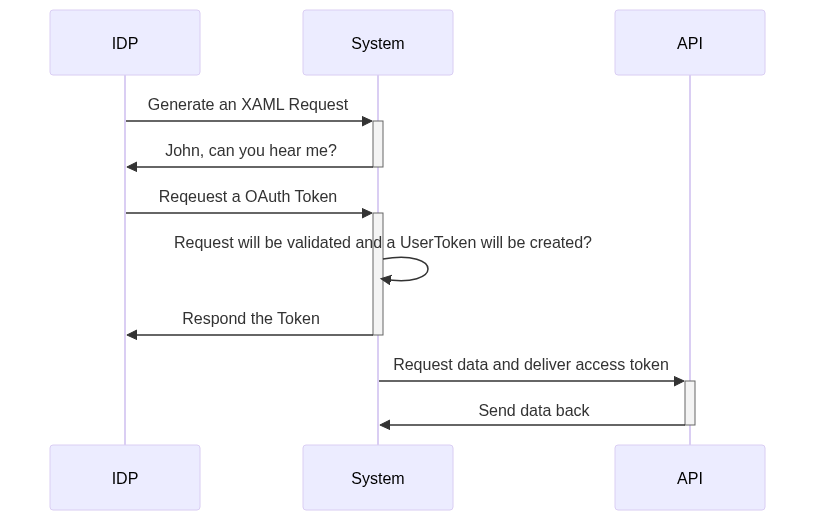
Source: [here](https://mermaid.live/edit?ref=blog.bajonczak.com#pako:eNptkd1qAjEQhV9lyK3rC-yFIgjFUlG0hVL2ZkyO7uJuYvNjEfHdO1ltLcVAID%5FfOWeSOSvtDFSpAj4TrMa04Z3nrrIkYzZdDkejwfoUIrqSnmDhOYLY0vtk%5FkKrLArxCl8p4YciK-nZ1bYgLejJJarBnjqMH%5FqKDbIPMS0mKdb06vaw%5F1z%5FwD371bQtbUBHbhsjRRmpSia9Bfhe%5F0toj3w%5FznYPS10hHJyIY42H0YPJcnYPljDuswza5ghPrDVCoHhXCp%5FNf0peI9NZtmG9V4Xq4DtujHz7OQsqJckdKlXK0mDLqY2VquxFUE7RrU9WqzL6hEKlQ37srUuq3HIb5PTA9sO5-x6mic7Pr63tO1wo79KuvhGXbwRBpvY)
[](https://giphy.com/gifs/mrw-week-job-4xpB3eE00FfBm?ref=blog.bajonczak.com)
Don't get confused about that... Let's do it step by step.
## Step 1: Creating a XAML request
First, we must create an XAML Request to tell the IDP later which user we will use for the system. This will be done by making a POST call to this endpoint.
```html
POST /oauth/idp HTTP/1.1
Host: {{identity-base-url}}
Content-Type: application/x-www-form-urlencoded
Content-Length: 2320
client_id=MzAyZGZjOTg5Y2M0YWQ2YmU3YmFjZTY4YmFjMw&user_id=sfadmin&token_url=%7B%7Bidentity-base-url%7D%7D%2Fouth%2Ftoken&private_key=
```
You will see some parameters in the body.
| Parameter | Description |
| ------------ | ------------------------------------------------------------------------------ |
| client\_id | Here you will insert the client ID that you gathered in the requirements |
| user\_id | This will contains the user id like sfadmin. These must be known in the system |
| token\_url | Here you will se the token url like {{identity-base-url}}/oauth/token |
| private\_key | This will contains the private key that ouy gathered before |
You can create the XAML Request at your own, that's also the best way to do. But it's more complex and I would recommend to use a tool for that. For this demo purpose, I will use the idp endpoint.
You will then get back an XAML Request token encoded in base 64\. Mine looks like this (I removed the essential parts)
```xml
www.successfactors.com/oauth/idp
xxxx
xxxxx
xxxxxsfadminwww.successfactors.com
urn:oasis:names:tc:SAML:2.0:ac:classes:PasswordProtectedTransportXXXXX
```
The imported part is this
```xml
sfadmin
```
This tells the IDP later which user to impersonate. So, we create an impersonate request.
## Step 2: Generate a token
Now we got a XAML request Token. It is only a request token, to it don't provide any access to anything. This token will tell the IDP "Hey here is a prevalidated request, so generate me an access token for this requested user".
So, to do this, you must make a call to the IDP to create an access token
```html
POST /oauth/token HTTP/1.1
Host: {{identity-base-url}}
Content-Type: application/x-www-form-urlencoded
Content-Length: 69
company_id=YOURCOMPANYID&client_id=&grant_type=urn:ietf:params:oauth:grant-type:saml2-bearer&assertion=&new_token=true
```
So, it will perform an assertion request and take the following parameters.
| Parameter | Description |
| ----------- | ----------------------------------------------------------------------------------------------------------------- |
| company\_id | This will contain the companyid that was gathered before |
| client\_id | Here, you will insert the same client id that you have in the requirements section |
| grant\_type | In this, you MUST set the value 'urn:ietf:params:oauth:grant-type:saml2-bearer' |
| assertion | Here, you will paste the result in the previous request |
| new\_token | Optional, you can set it to true, to get every request a new token otherwise, you will get the actual valid token |
After performing this request, you will get a token response like this
```json
{
"access_token": "eyJ0b.......",
"token_type": "Bearer",
"expires_in": 86399
}
```
Cool! A token... let's look into this
```json
{
"tokenContent": {
"apiKey": "....",
"sfPrinciple": "sfadmin#DIV#.....",
"issuedFor": "OData-Test",
"scope": "",
"issuedAt": 1725175828353,
"expiresAt": 1725262228353
},
"signature": "E3hwoX5Bn++...."
}
```
It's not a typical OAuth token, but that doesn't matter. Because the necessary information is included. So, you see that I requested the token for sfadmin.
## Step 3: Using this Token
Now, it's time to use this token. So, in my large [blog post about OAuth](https://blog.bajonczak.com/oauth-complete-guide/), you learned to set this token into the Authorization header. In fact, it will look like this.
```html
GET /odata/v2/EmployeeTime?$top=10000&$filter=timeType eq 'DEU-ANNL'
HTTP/1.1
Host: apisalesdemo2.successfactors.eu
Authorization: Bearer {{bearer}}
Accept: application/json
```
S
This will perform a request against the OData endpoint and gather the information about the German absences. I set the Accept header so that I only get JSON Response, and it will result in this:
```json
{
"d": {
"results": [
{
"__metadata": {
"uri": "https://apisalesdemo2.successfactors.eu/odata/v2/EmployeeTime('e8bf3db2866d4d48901833ddd3218e87')",
"type": "SFOData.EmployeeTime"
},
"externalCode": "e8bf3db2866d4d48901833ddd3218e87",
"lastModifiedDateTime": "/Date(1519356175000+0000)/",
"absenceDurationCategory": "MULTI_DAY",
"endDate": "/Date(1534464000000)/",
"entityUUID": "2C46792DA8A64AC9A63FEB266EEF7034",
"loaActualReturnDate": null,
"mdfSystemEffectiveEndDate": "/Date(253402214400000)/",
"createdDateTime": "/Date(1519355904000+0000)/",
"mdfSystemVersionId": null,
"timeType": "DEU-ANNL",
.......
```
[](https://giphy.com/gifs/mrw-week-job-4xpB3eE00FfBm?ref=blog.bajonczak.com)
Now, you will get the required data. The cool part is that you access it as a user you provide; you won't get access to other data that this particular user cannot access.
## Final words
Yes, SAP is very special, especially when you want to access its services. I think that is related to their license topic. But hey, when you know how to do it, it will be straightforward to access the data.
I created a Postman collection for those who want to try it out of the box.
[SF.postman\_collectionSF.postman\_collection.json14 KBdownload-circle](https://blog.bajonczak.com/content/files/2024/09/SF.postman%5Fcollection-1.json "Download")
*I keep a short overview of the practical posts that still get the most use here:* [*Technical Field Notes*](https://blog.bajonczak.com/technical-field-notes/)*.*
### OAuth the complete guide! Including all 8 specified auth processes
URL: https://blog.bajonczak.com/oauth-complete-guide/
Last updated: 2024-08-09T11:56:35.000Z
This article contains a full description of OAuth and its Authentication and Authorization. In my project, I learned that some people don't understand OAuth Authentication, especially the Authentication Flows.
This article will describe the complete OAuth procedure and the different flows, the meaning of a token, the different token types, and how to handle special scenarios. I cover all scenarios that exist "in the wild."
So please leave a comment if anything is unclear, and I will describe it to improve the article.
## What is OAuth?
For those who do not know OAuth, here is a small summary of OAuth
> OAuth (Open Authorization) is an open standard for token,based authentication and authorization on the Internet. It allows third-party services to exchange and use information without exposing user credentials. OAuth is widely used in scenarios where users want to grant websites or applications access to their information without sharing passwords.
So, in fact, it's, in general, an exchange for accessing other Systems without leaking the user's login. You will know this as "Login with Google" or s.th. This is a simple OAuth flow that will propagate your user details (no security details) to third-party applications. So that it can create an internal user, with, for example, your name and email address. In each Login "Flow" it will create some Tokens.
## Explaining the Tokens
There are three types of tokens
- Access token
- Refresh token
- Id token
#### Token structure in OAuth
It's important to understand that these tokens are always JSON objects. Every token structure contains three parts
1. Header
2. Body
3. Signature
##### Header
The header defines the token type
The header typically consists of two parts:
- Type of Token
- Signing Algorithm
This will tell how the token was signed (For example, SHA256, RSA, or HMAC)
The header can look like this
```JSON
{
"alg": "RS256",
"typ": "JWT"
}
```
Header example for a Token
#### Payload
The payload contains the claims. Claims are statements / Properties about an entity (typically, the user) and additional metadata. There are some default claims, like issuer, but you are free to add more claims for the target application.
There are three types of claims:
- **Registered Claims**: Predefined claims which are optional but recommended, such as `iss` (issuer), `iat` (issued at the time),`exp` (expiration time),`nbf` (not before time), `sub` (subject), and `aud` (audience).
- **Public Claims**: Custom claims that can be defined by those using JWTs.
- **Private Claims**: Custom claims agreed upon between two parties that use the JWT.
Example Payload (Base64-encoded JSON):
```JSON
{
"sub": "1234567890",
"name": "John Doe",
"admin": true,
"iat": 1516239022
}
```
#### Signature
To create the signature part, you must take the encoded header, the encoded payload, a secret, and the algorithm specified in the header and sign that. For example, if you want to use the HMAC SHA256 algorithm, the signature will be created in the following way:
```bash
HMACSHA256(
base64UrlEncode(header) + "." +
base64UrlEncode(payload),
secret)
```
The result looks like this
```Mathematica
SflKxwRJSMeKKF2QT4fwpMeJf36POk6yJV_adQssw5c
```
These parts will not be delivered separately, instead the base64 encoded parts will be concatenated together and will be separated by a dot '.'. This representation is called **JWT-Token Format**. A result can look like this:
```Text
eyJhbGciOiJSUzI1NiIsInR5cCI6IkpXVCJ9.eyJzdWIiOiIxMjM0NTY3ODkwIiwibmFtZSI6IkpvaG4gRG9lIiwiaWF0IjoxNTE2MjM5MDIyfQ.SflKxwRJSMeKKF2QT4fwpMeJf36POk6yJV_adQssw5c
```
> PROTIP: NAvigate to https://jwt.ms and you can paste your value onto this site
This will not only decode the Base64 encoded strings, but it will also display and describe the known claims; for example, I used the token above, and the result will look
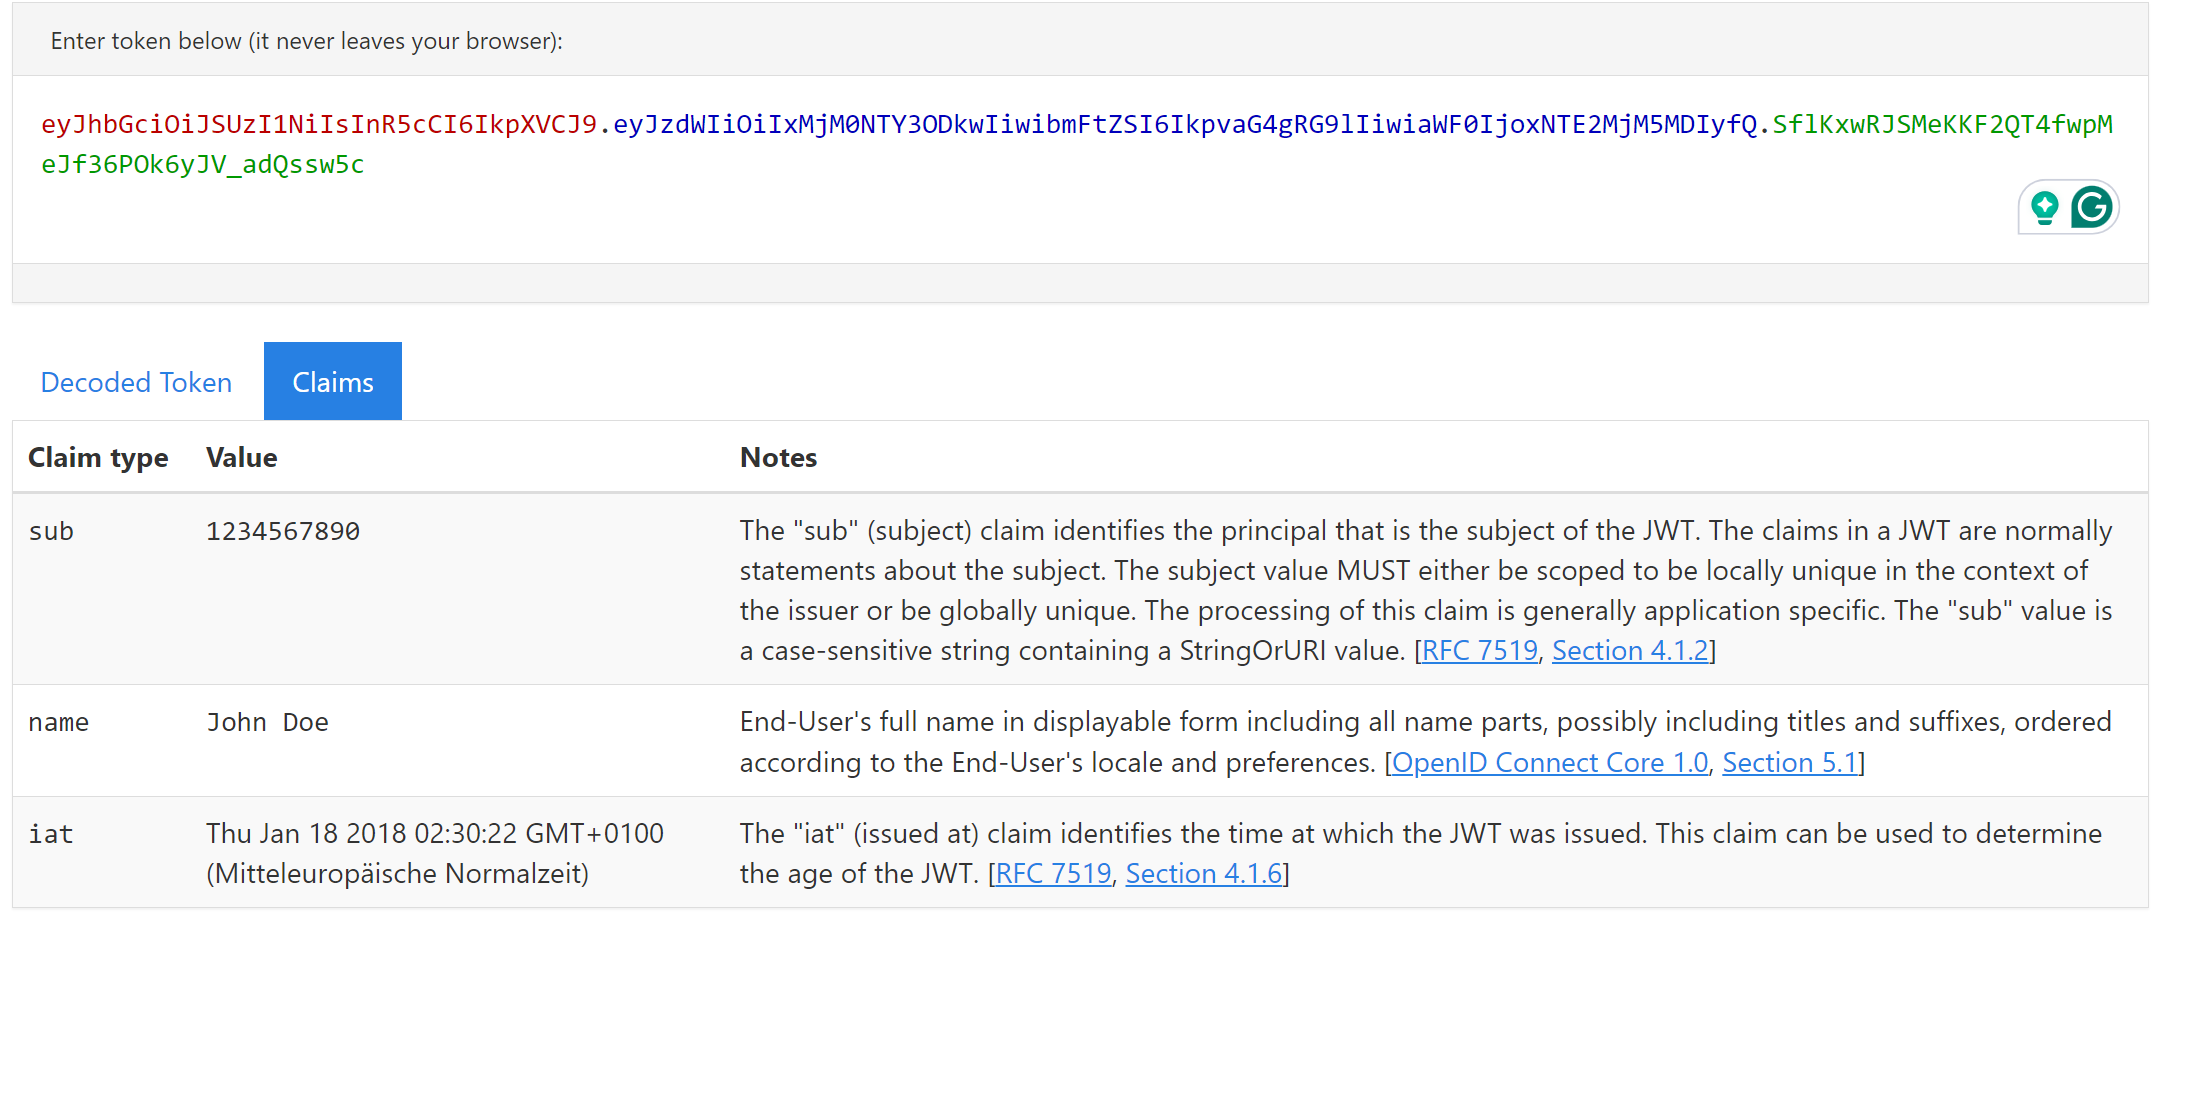
So now you know about the anatomy of the OAuth Token. Let's talk about the different types.
### ID token
This token will be presented as JWT-Token Format. For example
```JWT-Token
eyJhbGciOiJSUzI1NiIsImtpZCI6IjE2In0.eyJpc3MiOiJodHRwczovL2F1dGguanNlYy5jb20vIiwibmFtZSI6IkpvaG4gRG9lIiwiaWF0IjoxNTE2MjM5MDIyfQ.SflKxwRJSMeKKF2QT4fwpMeJf36POk6yJV_adQssw5c
```
The decoded value looks like this
```JSON
{
"alg": "RS256",
"kid": "16"
}.{
"iss": "https://auth.jsec.com/",
"name": "John Doe",
"iat": 1516239022
}.[Signature]
```
This tokens purpose is to provide information about the current user. So This will be used to provide some userdate from the Identity Provider, in wich the user is created.
### Access token
This token will used to get access to protected resources. It will be provided as JWT-Token. An example Token can look like this:
```Text
eyJhbGciOiJSUzI1NiIsInR5cCI6IkpXVCJ9.eyJzdWIiOiIxMjM0NTY3ODkwIiwibmFtZSI6IkpvaG4gRG9lIiwiaWF0IjoxNTE2MjM5MDIyfQ.SflKxwRJSMeKKF2QT4fwpMeJf36POk6yJV_adQssw5c
```
The decoded value:
```JSON
{
"alg": "RS256",
"typ": "JWT"
}.{
"sub": "1234567890",
"name": "John Doe",
"iat": 1516239022
}.[Signature]
```
This will be used to get access to any resources. It looks similar to the ID token. But this token contains the claim `sub` this will identify the subject of the access token.
### Refresh token
The Access token is only valid for a small amount of time (for example 2 Hours). So there is a possible way to get a new token for the current logged-in User, to avoid "relogin" the user. For that, the Refresh token will come into place.
This type of token will also represented as JWT-Format. It must contain the following claims
| Claim | Description |
| ---------------------- | ------------------------------------------------------------------------------------------------------------------------------------ |
| Token Identifier (jti) | A unique identifier for the refresh token. This helps in tracking the token and identifying it during validation. |
| Issuer (iss) | Identifies the principal that issued the JWT. It’s a string or URI that identifies the entity issuing the token. |
| Subject (sub) | Identifies the principal that is the subject of the JWT. Usually, this is the user ID. |
| Audience (aud) | Identifies the recipients that the JWT is intended for. It’s typically the client ID of the application that the token is issued to. |
| Issued At (iat) | The time at which the token was issued. This helps in determining the age of the token. |
| Expiration (exp) | The expiration time after which the token is no longer valid. This ensures the token has a limited lifespan for security reasons. |
For example, you will get the following token
```JSON
{
"jti": "unique-token-id-12345",
"iss": "https://your-auth-server.com",
"sub": "user-id-789",
"aud": "your-client-id-001",
"iat": 1593740000,
"exp": 1600000000
}
```
So basically, the token is especially for the User 'user-id-789', which requires a new access token. It will only generated by the issuer 'https://your-auth-server.com', and it will generate only an access token for the application 'your-client-id-001'
> Note: The expire time is way longer as the expiriation of an access token.
## App Token vs User Token
Please be aware that there are two primary Tokens available. The App-Token (issued by services for the server-to-server communications) and the User-Token (issued by the user itself. No other systems are involved).
There are some need-to-know differences in these tokens
**Authorization Context**
The purpose of the authorization context for user Token is to authorize access on behalf of a specific user (or the current user)
On the other side, the app Token authorizes the application only to access resources.
So you can control if only users have access or only application or both. This will be done within the authorization server.
**Lifetime**
The token lifetimes are different. Where the user token has a shorter lifetime and needs to be refreshed very often, the app Token has a longer lifetime because it's normally in a controlled environment (server without public access)
**Use Cases**
Also, the use cases are very different, and this is very important to know. Because I figured out that some developers try to work only with app tokens instead of user tokens (because it's simpler to get access everywhere). That's not the idea behind the different token types. So here is the rule of thumb:
- Use a user token when you need to involve user data or actions taken on behalf of a user
- Use an app token when you act as a service, and do not use any user data during the entire process.
Follow these rules, and you are on the secure side of the developer life.
## Obtaining a Token
So, we have three types of tokens, but we must not generate three separate requests to get them. In general, we have the following [Sequence diagram](https://mermaid.live/edit?ref=blog.bajonczak.com#pako:eNqFU1Fr2zAQ%5FitCTx54IbEdpxGsUDbY01hZtpdiMKp8SURjyZPkbWnIf99JcpZ4aakfjHT67rvvPukOVOgGKKMWfvagBHySfGN4WymCX8eNk0J2XDnyw4K5jn7cSVDuOn7Xu-0KzK-Xcr6B1b0RcDqPCM9P3t%5FeDpQMYajIOmIGOOFCgLURHUEBfy7lcxppQDjiNOEY10Y-cye1IqCaTktMSX5LtyUi5NeySZE%5F5tS9kX5nO60s1G7fwQdvzrtY8VwmVPVyGbk3uu0cWWszLvdfS5cSPxvvwVhc0nukj6EoKbgDS7hqiPBKlLMvSzgbNTT9yMUTCe2N6X0XJLno5RX37r-uvqNzT6DQhmh-svFyoxkj0trTpST-xxZeeDssLQgD7q0uvPFN1B9EWJLEK6%5FDNiWyOa0MrPGitnF73dT4hTFyF2jOLyl6dMEdGcZpr6v7x9NwxytFU9qCablscI4OnqqieJMtVJThsoE173euopU6IhRd1Ku9EpQ500NK-w5ZTmNH2ZrvLEZxUCg70D-UzYtJdpNlZbHIy-W0XOQp3VO2zCb5Yjmd5flyXs6y%5FJjSZ60xfzaZFlkxKxfZPJsX-aK8CWQP4TBWxMty2nyJcx%5FGP6VG95vtUP34F0CpZ4M),
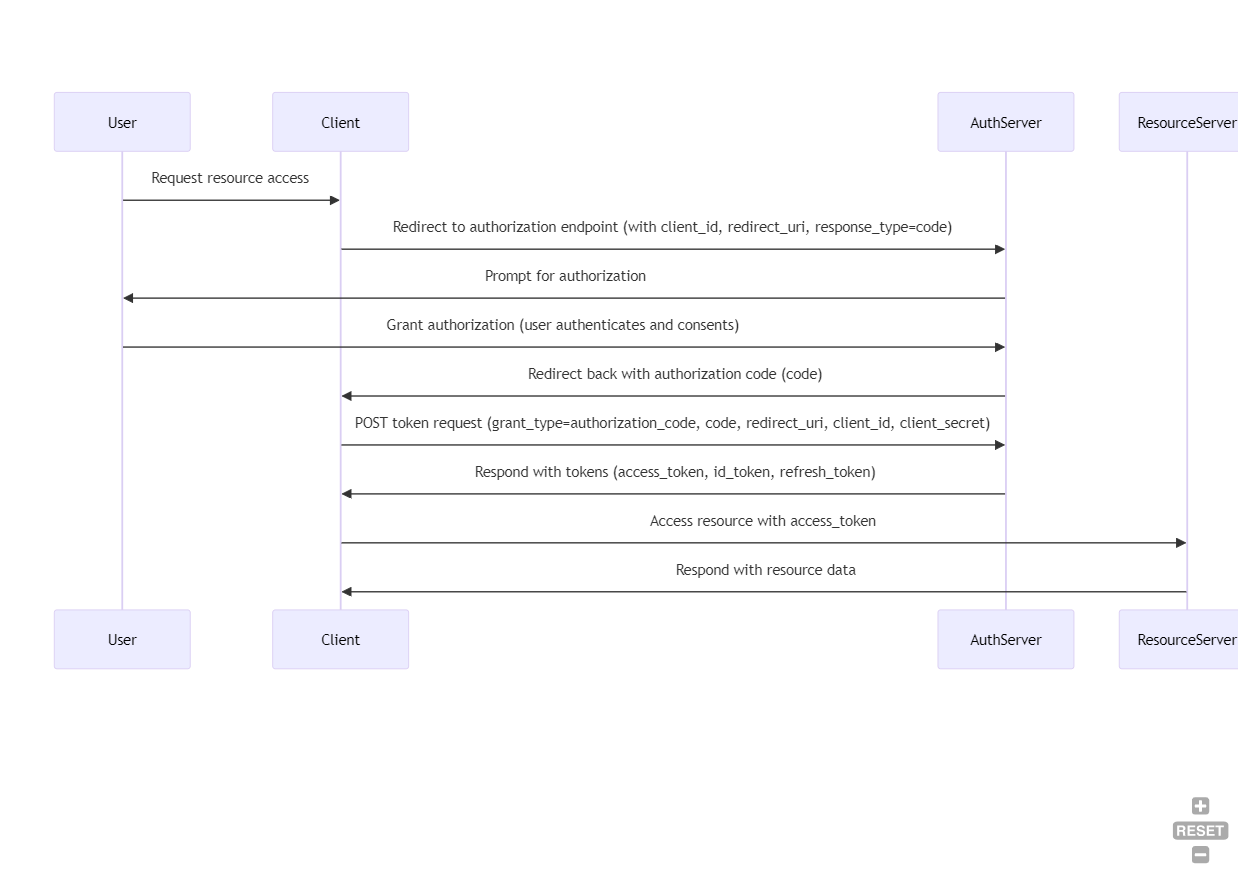
General OAuth Flow
The steps are very easy:
1. The user requests access to a resource via the client application.
2. The client redirects the user to the authorization server's authorization endpoint.
3. The user authenticates and authorizes the client.
4. The authorization server redirects the user back to the client with an authorization code.
5. The client sends a POST request to the authorization server's token endpoint, exchanging the authorization code for tokens.
6. The authorization server responds with the access token, ID token, and refresh token.
7. The client accesses the resource server using the access token.
8. The resource server responds with the requested resource data.
The first request call is a POST call to your auth server (for example: authorization-server.com). This will start the OAuth Flow (more about this later).
```Text
POST /oauth2/token HTTP/1.1
Host: authorization-server.com
Content-Type: application/x-www-form-urlencoded
grant_type=authorization_code&code=authorization_code_value&redirect_uri=https%3A%2F%2Fclient-app.com%2Fcallback&client_id=your_client_id&client_secret=your_client_secret
```
You see, there are some parameters. Here is the list of parameters and it's description
| Parameter | Description |
| -------------- | ----------------------------------------------------------------------- |
| grant\_type | Indicates that the grant type is an authorization code. |
| code | The authorization code received from the authorization server. |
| redirect\_uri | The redirect URI registered with the authorization server. |
| client\_id | The client ID issued to the client during the registration process. |
| client\_secret | The client secret issued to the client during the registration process. |
> IMPORTANT! You will only get an token send to the server that you tell within the requrect\_uri parameter. You will never get a token back within this call
The expected response for this token request is like this
```JSON
{
"access_token": "access_token_value",
"id_token": "id_token_value",
"refresh_token": "refresh_token_value",
"expires_in": 3600,
"token_type": "Bearer"
}
```
So, the request will contain all the required tokens. That's now the basic understanding of OAuth.
## More about the OAuth Flows
Actually, we describe the OAuth process for a Webapplication. But there are plenty of scenarios. For these, OAuth has its own process called OAuth Flow.
The following Flows are possible:
| Name | Scenario |
| ----------------------------------------- | ------------------------------------------------------------------------------------------ |
| Authorization Code Grant | Used for mobile applications |
| Implicit Grant | Will be used for webapplication (especcially single page applications) |
| Resource Owner Password Credentials Grant | Will be required in trusted applications where the user directly shares their credentials. |
| Client Credentials Grant | Will be used for machine to machine authentication (service to service) |
Let's do a deeper dive!
#### Basic requirements
For each request, there are mandatory parameters. These are the following.
| Parameter | Description |
| ------------- | ------------------------------------------------------------------------------------------------------------- |
| client\_id | This is the client Id from the application. Sometimes it will be called application ID or app id |
| state | A value that is used to maintain the state between the request and callback, usually to prevent CSRF attacks. |
| redirect\_uri | The target where the token will be send |
#### Authorization Code Grant
This flow will be used when developing authentication for mobile applications (Apps).
Here is the complete [process](https://mermaid.live/edit?ref=blog.bajonczak.com#pako:eNqNkk9rwkAQxb9KmENPqSTZmJg9CEWh9FAotb2UXJZk1KVm1-4fqYrfvWvWoKkWmtOy83vv7UxmD5WsESho%5FLIoKpxytlCsKUXgvjVThld8zYQJ3jWq69vJiqMw1%5FcP1ixnqDa3NK-opVUVdnVPHP3vx2NvSB3k3qOdUVWh1h7xNQed3WmbJBXfMcOl6GSeP2NOc%5FS%5FsO2pHhXrmjg94zLhRckNr%5FFvTS-na6BPT9yU%5F93EGb7t3I4keJOfKIK74Gnqj7%5Fs-1PuqzzaJy4CpsywUkAIDaqG8dqtx%5F4oKcEsscESqDvWOGd2ZUooxcGhzBo524oKqFEWQ7Drmplum4DO2Uq7W%5Ff%5Fge7hG-gwHSSjJMnSnGRFlOUkhC3QIhmQvIhiQophFifkEMJOSqePB1GapHGWFXE-iqIiIq3ZR1v0iVhzI9WzX-d2q0NQ0i6Wp%5FTDDx8l-0Q) for the flow
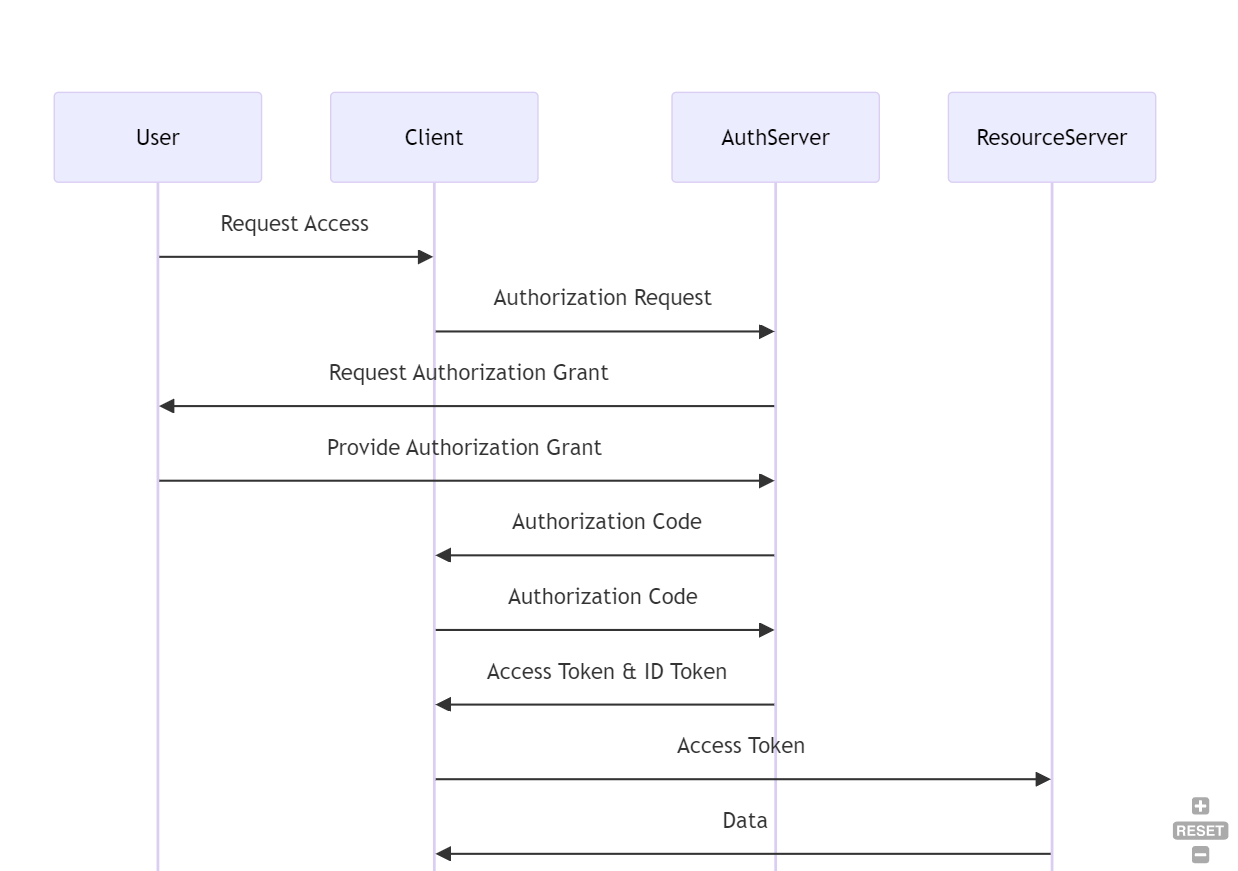
1. **User Authentication and Authorization**
The User initiates the process by requesting access to a resource. The Client will redirect the user to the authorization server auth endpoint. Next, the user authenticates (logs in) and grants permission to the client application (consent)
This request is an example request to initiate the authentication process:
```string
GET /oauth2/authorize HTTP/1.1
Host: authorization-server.com
Content-Type: application/x-www-form-urlencoded
response_type=code&client_id=your_client_id&redirect_uri=https%3A%2F%2Fclient-app.com%2Fcallback&scope=openid%20profile%20email&state=xyz123
```
Let me explain the HTTP parameters.
| Parameter | Description |
| -------------- | ------------------------------------------------------------------------------------------------- |
| response\_type | Indicates that the client is requesting an authorization code. |
| client\_id | The client ID issued to the client during registration. |
| redirect\_uri | The redirect URI to which the authorization server will send the user after authorization. |
| scope | The scopes of access requested. |
| state | A value used to maintain state between the request and callback, usually to prevent CSRF attacks. |
1. **Sending back the authorization code**
The response type is set to code. So it will respond with an authorization code (for example, "myauthcode". It will be sent through the location given in the redirect\_url parameter. The call to this endpoint looks like the following.
```Text
HTTP/1.1 302 Found
Location: https://client-app.com/callback?code=myauthcode&state=xyz123
```
| Parameter | Description |
| ----------- | -------------------------------------------------------------------- |
| grant\_type | Indicates that the client is using the authorization code grant type |
| code | The generated authcode. |
| state | The same state value, that will be given in the request call. |
1. **Exchange authorization code for the token**
After you get the code, you will be able to exchange this code with a valid token for the user by making the following request.
```Text
POST /oauth2/token HTTP/1.1
Host: authorization-server.com
Content-Type: application/x-www-form-urlencoded
grant_type=authorization_code&code=authorization_code_value&redirect_uri=https%3A%2F%2Fclient-app.com%2Fcallback&client_id=your_client_id&client_secret=your_client_secret
```
Let's explain the parameters.
| Parameter | Description |
| -------------- | --------------------------------------------------------------------- |
| grant\_type | Indicates that the client is using the authorization code grant type. |
| code | The authorization code received from the authorization server. |
| redirect\_uri | The same redirect URI used in the initial authorization request. |
| client\_id | The client ID issued to the client during registration. |
| client\_secret | The client secret issued to the client during registration. |
So when you send the POST request, you will get the right tokens back through the target in the redirect\_uri. This response will look like you already know.
```JSON
{
"access_token": "access_token_value",
"id_token": "id_token_value",
"refresh_token": "refresh_token_value",
"expires_in": 3600,
"token_type": "Bearer"
}
```
#### Implicit Grant
This is a default flow that will be used for single-page applications. This flow is the default flow that every web developer should use and know. So, let's look at this [process](https://mermaid.live/edit?ref=blog.bajonczak.com#pako:eNp1UktPwzAM%5FiuVD5zK1DZdu-YwCTEJcUBCDC6olyj1tog1GXlMbNP-O1lDtZVBTpb9PezYB-CqQaBg8NOh5DgTbKlZW8vIvw3TVnCxYdJGbwb1dfZ-LVDa6%5Fyds6s56u1fnBc0ymmOfT0gTvq302kQpB7k-zFeiHM0JkBCzYPO6rRzUlrsmRVK9rSAP8M856R%5FITtgPWjWD%5FHTxqXDs1Zb0eD%5FnIFPP0BoPHpVHyijm-hxFsJfkwz%5FYsgK0CHiwmDGLKslxNCibplo%5FBIPJ0oNdoUt1kB92OCCubWtoZZHD2XOqvlOcqBWO4zBbRpm-50DXbC18Vm%5FJaAH-AI6zkfZJMuKvCRFlRQliWEHtMpGpKySlJBqXKQZOcawV8rz01GSZ3laFFVaTpKkSkgn9t4VgyM2wir9FI6uu70YtHLL1Y%5F78RsYXdvC).
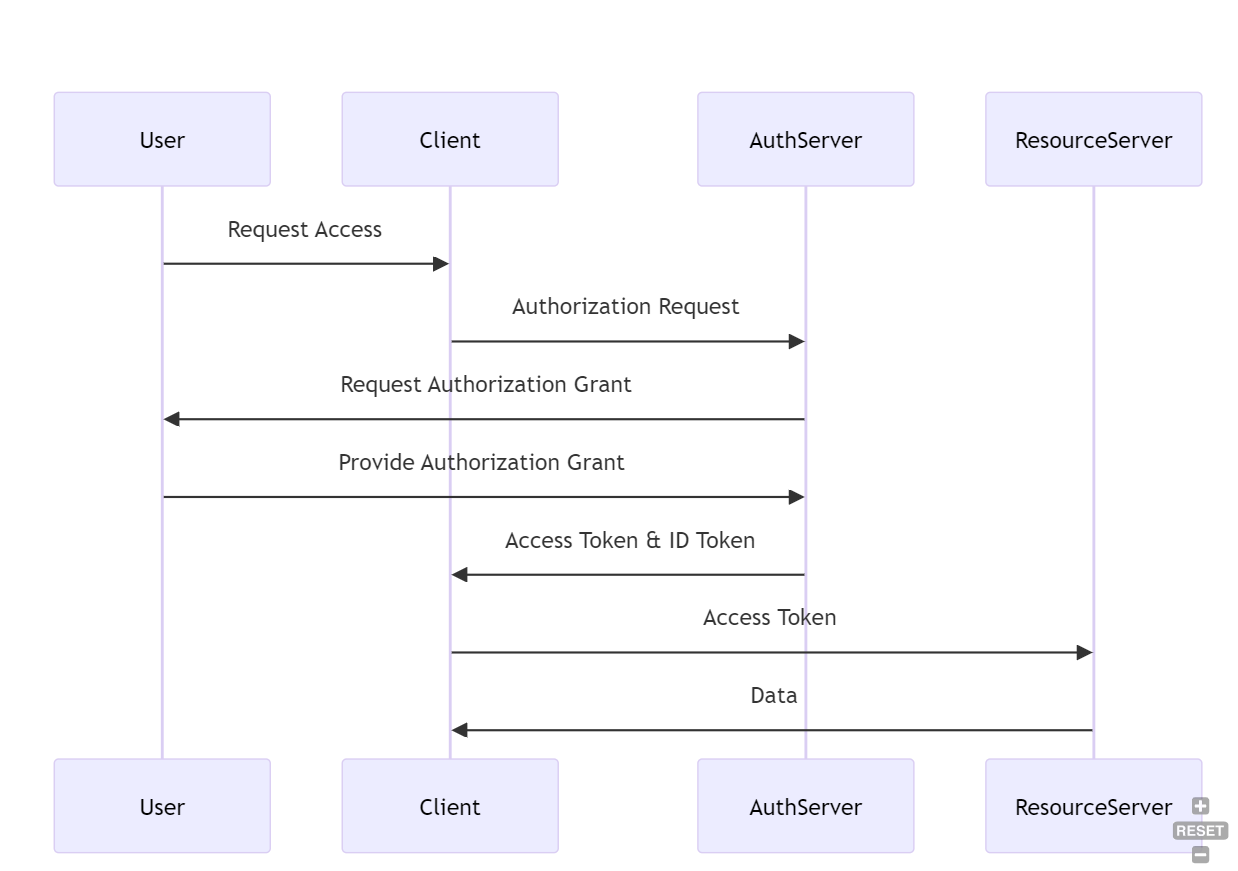
This Flow contains of the following general steps
**User Authentication and Authorization:**
The user initiates the process by requesting access to a protected resource on the client application. After that, the client application redirects the user to the authorization server's authorization endpoint. Finally the user authenticates (logs in) and grants permission to the client application.
Take this as an example request.
```Text
GET /oauth2/authorize HTTP/1.1
Host: authorization-server.com
Content-Type: application/x-www-form-urlencoded
response_type=token&client_id=your_client_id&redirect_uri=https%3A%2F%2Fclient-app.com%2Fcallback&scope=openid%20profile%20email&state=xyz123
```
The parameters are similar to the parameters above. Let's explain again.
| Parameter | Description |
| -------------- | ------------------------------------------------------------------------------------------------- |
| response\_type | Indicates that you request an access token |
| client\_id | The client app id |
| redirect\_uri | The redirect URI to which the authorization server will send the user after authorization. |
| scope | The scopes to request authorisation |
| state | A value used to maintain state between the request and callback, usually to prevent CSRF attacks. |
**Token Issuance:**
The authorization server redirects the user back to the client application with the access token (and optionally the ID token) in the URL fragment.
```Text
HTTP/1.1 302 Found
Location: https://client-app.com/callback#access_token=access_token_value&token_type=Bearer&expires_in=3600&state=xyz123
```
**Access Protected Resources:**
Now, the client application extracts the required access token from the URL fragment and requests protected resources from the resource server. It will then set the Authrozie header to the given access token prefixed with "Bearer".
```Text
GET /resource HTTP/1.1
Host: resource-server.com
Authorization: Bearer access_token_value
```
### **Resource Owner Password Credentials Grant**
The Resource Owner Password Credentials Grant (ROPC) flow is designed for very highly trusted applications and involves the user providing their credentials (username and password) directly to the client application.
> Attention! This flow is less secure than other OAuth 2.0 flows and is generally not recommended unless absolutely necessary.
However, the [process](https://mermaid.live/edit?ref=blog.bajonczak.com#pako:eNptUjtvwjAQ%5FivWDZ1SlBcJ8YCEYOlQqSrtUmWx7INYJTZ1bFpA%5FPeauIhXPZ2--x6-s%5FfAtUCg0OGXQ8VxJtnSsLZWxJ81M1ZyuWbKkvcOzT06XUlU9h6fONvM0Wz-07xip53heOoHxtH%5FcTwOhpS8GL2RAsnUoPCAZKsu8ALBM88RtI%5FTRu6YlVr5AD9LZ8m3tM29wVl3ETfhHLuOvOlPVOSBPM1CeRN5ffNrVaBeMy4CZsyyWkEELZqWSeFXvj9KarANtlgD9aXABXMrW0OtDp7KnNXzreJArXEYgVsLZk8vBHThR%5FKo3ynQPfwAHeaDdJSmRV5mRRUXZRbBFmiVDrKyipMsq4ZFkmaHCHZae30yiPM0T4qiSspRHFdx1pt99M2QiEJabZ7DF-l%5FSgRGu2Xzl374BdzGvzI) of this flow is as follows.
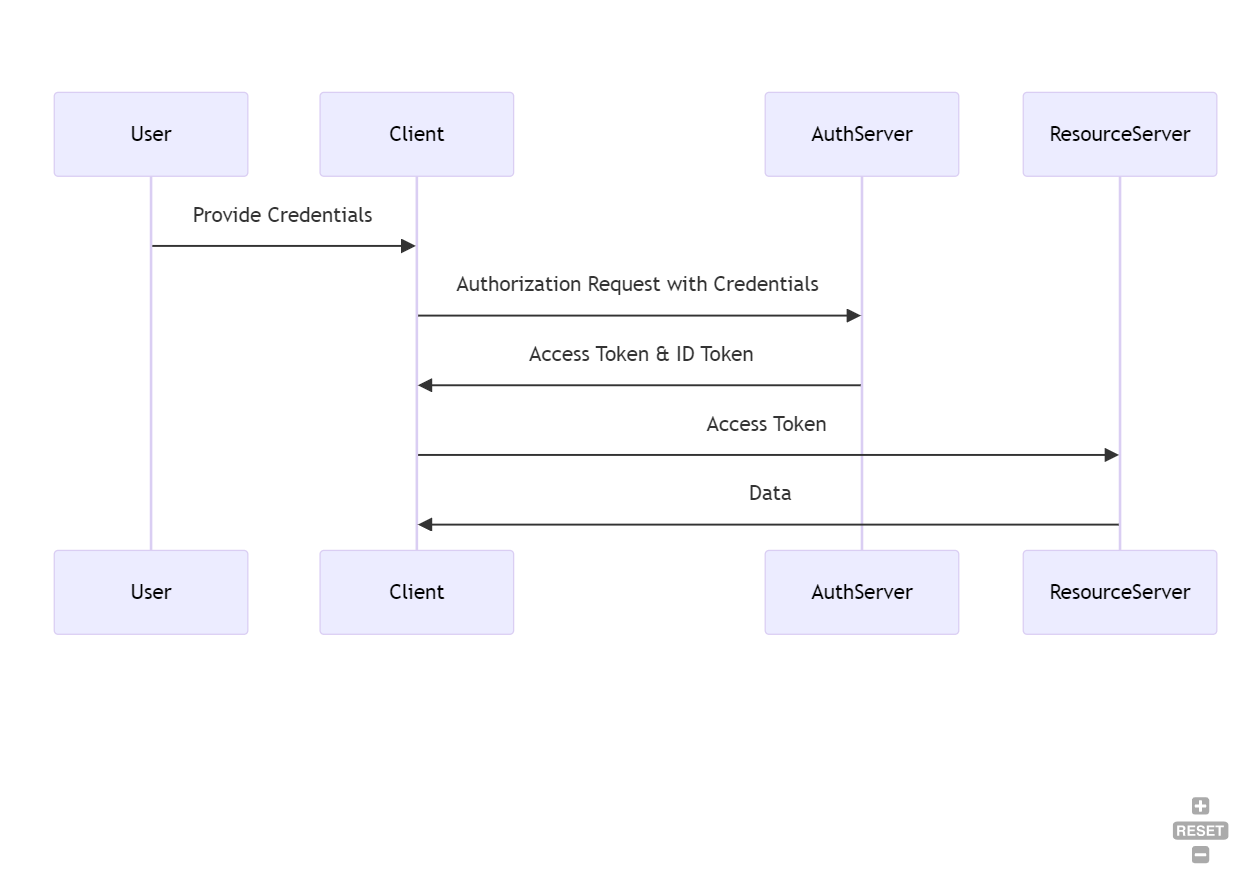
**User Provides Credentials:**
The user provides their username and password directly to the client application.
**Token Request:**
The client application sends a POST request to the authorization server's token endpoint, including the user's credentials.
```Text
POST /oauth2/token HTTP/1.1
Host: authorization-server.com
Content-Type: application/x-www-form-urlencoded
grant_type=password&username=user123&password=pass123&client_id=your_client_id&client_secret=your_client_secret&scope=openid%20profile%20email
```
Parameter explanation
| Parameter | Description |
| -------------- | -------------------------------------------------------------------------------------- |
| grant\_type | Indicates that the client is using the Resource Owner Password Credentials grant type. |
| username | The username provided by the user. |
| password | The password provided by the user. |
| client\_id | The client ID issued to the client during registration. |
| client\_secret | The client secret issued to the client during registration. |
| scope | The scopes of access requested. |
**Token Issuance:**
The authorization server validates the credentials and, if valid, responds with an access token (and optionally a refresh token).
Here is an example of the result:
```JSON
{
"access_token": "access_token_value",
"refresh_token": "refresh_token_value",
"expires_in": 3600,
"token_type": "Bearer"
}
```
**Access Protected Resources:**
The client application can now use the value in access\_token to access protected resources.
```Text
GET /resource HTTP/1.1
Host: resource-server.com
Authorization: Bearer access_token_value
```
> Again! You should use another flow for authenticating. Some idenety Providers prevents these flow for reasons.
### **Client Credentials Grant**
The Client Credentials Grant is designed for machine-to-machine (M2M) applications where no user is involved. Use this flow when a client application must authenticate directly with the identity provider using its credentials to access resources or APIs.
To use this flow, you must create a secret within your application definition in the identity provider. The complete authentication flow looks like this.
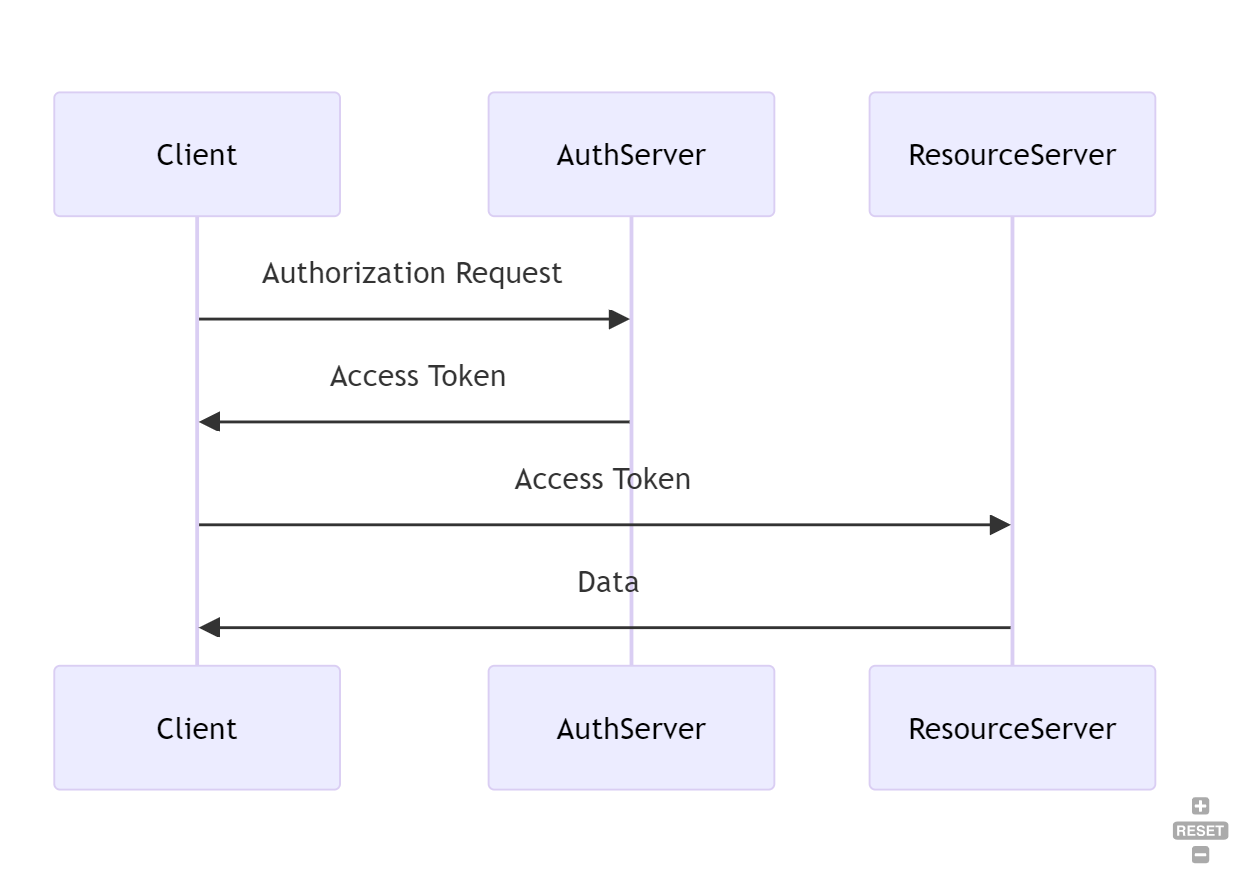
**Token Request**
First of all the client application sends a POST request to the authorization server's token endpoint, including its client ID and client secret. Like this:
```Text
POST /oauth2/token HTTP/1.1
Host: authorization-server.com
Content-Type: application/x-www-form-urlencoded
grant_type=client_credentials&client_id=your_client_id&client_secret=your_client_secret&scope=api.read%20api.write
```
The most parameters are known
| Parameter | Description |
| -------------- | --------------------------------------------------------------------- |
| grant\_type | Indicates that the client is using the Client Credentials grant type. |
| client\_id | The client ID issued to the client during registration. |
| client\_secret | The client secret issued to the client during registration. |
| scope | The scopes of access requested. |
**Token Issuance (Authorize and sends token back)**
The authorization server validates the client's credentials and, if valid, responds with an access token.
This is a large difference to the other flows, because the token will be send back directly. But this token is not an token for a specific user, it's only for the application itself.
**Access Protected Resources**
Finally you can now use the access token for requesting the protected sources
```Text
GET /resource HTTP/1.1
Host: resource-server.com
Authorization: Bearer access_token_value
```
### On-Behalf-Of (OBO) Flow
This process will be used when a Service A will call Service B on behalf of the current user. For this, the user is already authenticated and fetched already an access token that Service A can use to obtain an token for Service B. For the visual guys, here is the [Process](https://mermaid.live/edit?ref=blog.bajonczak.com#pako:eNqNU12P0zAQ%5FCuWn0BKq3z00oulntSDVwSi8IIiWa6zuRgaO9jOHaXqf2fjJHegFkReYu%5FOzO6s7ROVpgLKqIPvPWgJb5V4sKItNcGvE9YrqTqhPfnswF5G3xwU4O%5FVDuyjkkC2ry8x2943Q%5F4af-Ldl3rMDVXI4u7uijAjH6x5VBWQfgAJKcE54s03mLiXlKD0Uh4V3u8-jRRiB8MO4WhXe-6PHWx6q5kCXzNsUbSOGYFcFgCLAcC-PvnFHoQFG80CUPEgyLGrjdF8D4041NzUEZGhIa6q56UDacFHRDi04JXRm8ELH71MOrWxiAsWuIiIkwY7mwN7HvbTlF-s%5FXVmH8F1RlfkSfnmj5kRrDOPn9z%5Fc4LzITGyHQWeab%5FLXml%5FP8rO%5FP9r0oIzvcVMJbwoNY1oC7YVqsJbehoES-obaKGkDJcV1KI%5F-JKW-oxQPDCzO2pJmbc9RLTvUGW-1JTV4uAwilePshP9QdnNapnepmm-Wmd5EefrLKJHyop0ma2LOMmy4iZP0uwc0Z%5FGID9Zxqt0leR5kaxv47iIsyD2JSTHilApb-y78VWFxxVRa%5FqHZqp-%5FgUU7yv0).
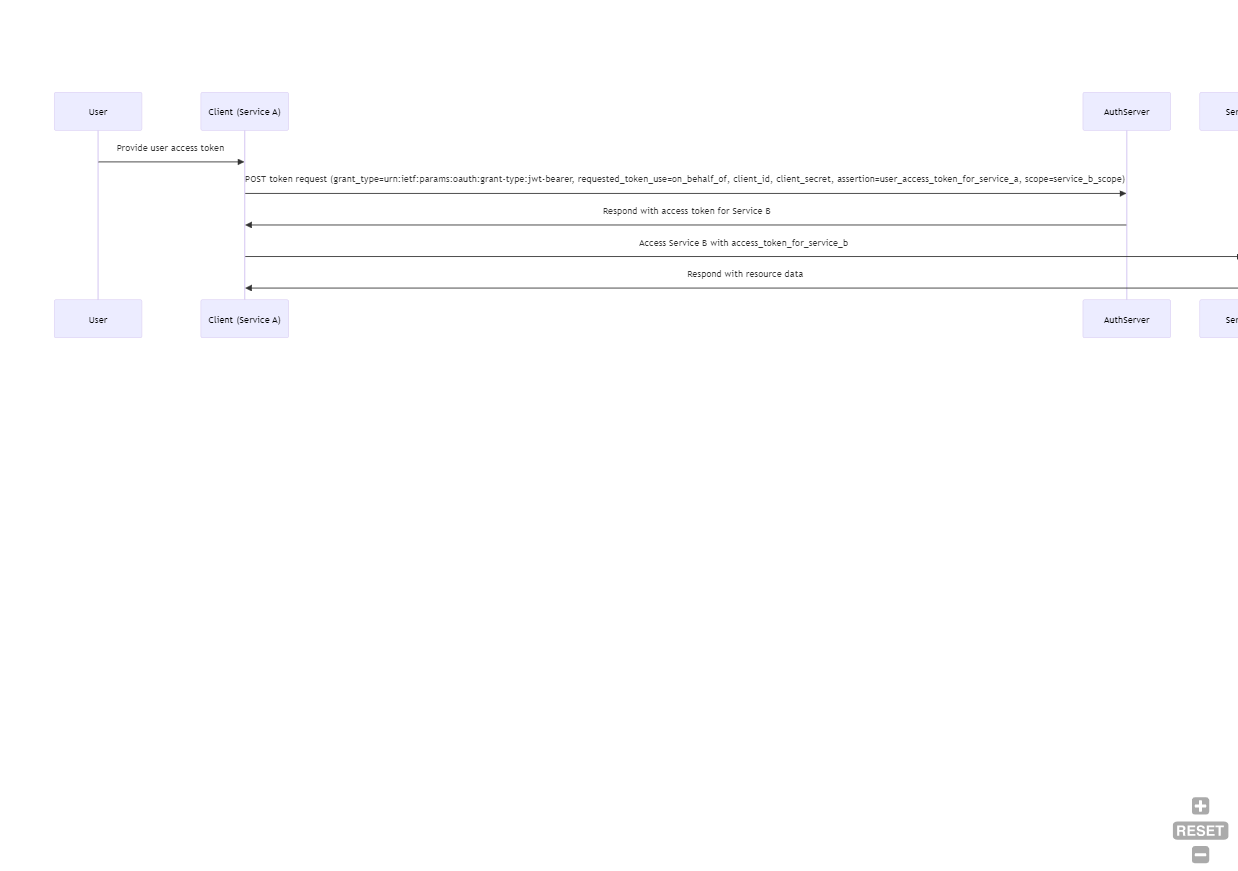
The steps are the following.
**User Authenticates and Obtains Access Token for Service A:**
The user authenticates with the authorization server and obtains an access token for Service A. This is done by an implicit auth flow. So the user has already a token like this
```JSON
{
"access_token": "user_access_token_for_service_a",
"expires_in": 3600,
"token_type": "Bearer"
}
```
**Service A Requests an Access Token for Service B:**
Next, the service A sends a POST request to the authorization server's token endpoint, providing the user's access token and its own client credentials to obtain an access token for Service B.
```Text
POST /oauth2/token HTTP/1.1
Host: authorization-server.com
Content-Type: application/x-www-form-urlencoded
grant_type=urn:ietf:params:oauth:grant-type:jwt-bearer&requested_token_use=on_behalf_of&client_id=service_a_client_id&client_secret=service_a_client_secret&assertion=user_access_token_for_service_a&scope=service_b_scope
```
Most of the parameters are known, but anyway here is the description of these
| Parameter | Description |
| --------------------- | ---------------------------------------------------------------------------------------------------------------- |
| grant\_type | Indicates that the client is using the JWT Bearer grant type, which is typically used in OBO flows. |
| requested\_token\_use | Specifies that the token is being requested to act on behalf of the user. |
| client\_id | The client ID of Service A. |
| client\_secret | The client secret of Service A. |
| assertion | The access token Service A received from the user. This is the usertoken that are delivered from the user itself |
| scope | The scope required for Service B. |
**Token Issuance**
The authorization server validates the request and issues a new access token that Service A can use to access Service B on behalf of the user.
The response will be delivered directly
```JSON
{
"access_token": "access_token_for_service_b",
"expires_in": 3600,
"token_type": "Bearer"
}
```
It's now important to see whats inside this token. The most parts are known but the on-behalf token is quite different.
```JSON
{
"aud": "https://service-b.com/api",
"iss": "https://authorization-server.com",
"iat": 1696850978,
"exp": 1696854578,
"sub": "user@example.com",
"azp": "service_a_client_id",
"scope": "service_b_scope",
"act": {
"sub": "user@example.com",
"scope": "user_scope"
}
}
```
Important is the part `act`, this indicates that it's an on-behald token. In this part the identity of the user is stored.
**Service A Accesses Service B**
Now service A uses the new access token to access protected resources on Service B as usual
```Text
GET /resource HTTP/1.1
Host: service-b.com
Authorization: Bearer access_token_for_service_b
```
The client application can now act as the logged in user.
### **Device Authorization Grant (Device Code Flow)**
This flow will be used when you must grant IoT devices or TVs, so it's designed for devices with limited input capabilities that do not have a keyboard for entering the credentials. This requires then a second device like a smartphone.
The process involves more steps than the other processes.
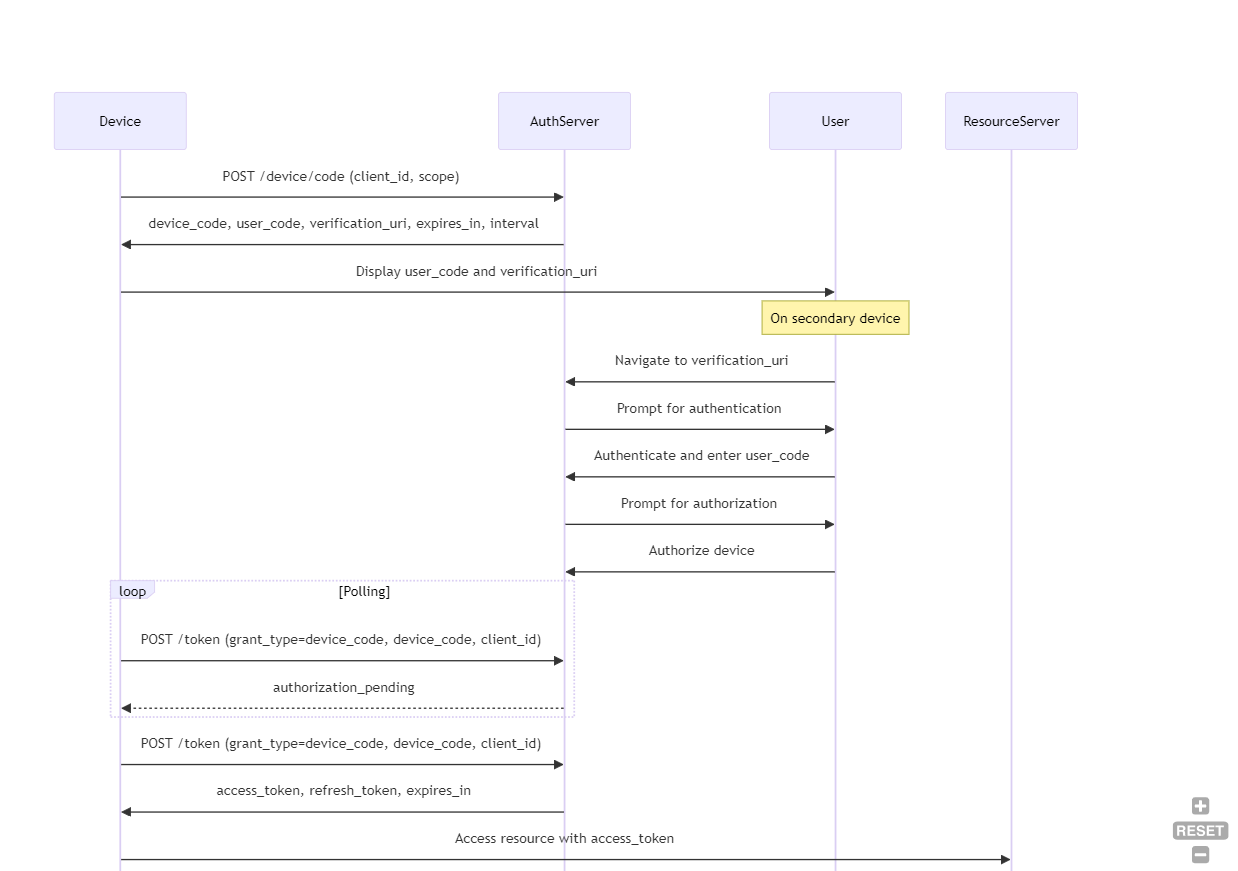
I will describe now the separate steps to execute (in general)
**Device Requests Device and User Codes:**
The device initiates the flow by requesting a device code and a user code from the authorization server. This is an example request
```Text
POST /oauth2/device/code HTTP/1.1
Host: authorization-server.com
Content-Type: application/x-www-form-urlencoded
client_id=your_client_id&scope=openid%20profile%20email
```
Here you see that the parameters are send within the payload as form urlencoded values.
| Parameter | Description |
| ---------- | ------------------------------------------------------- |
| client\_id | The client ID issued to the client during registration. |
| scope | The scopes of access requested. |
This request will result following result
```JSON
{
"device_code": "GmRhmhcxhwAzkoEqiMEg_DnyEysNkuNhszIySk9eS",
"user_code": "WDJB-MJHT",
"verification_uri": "https://authorization-server.com/device",
"verification_uri_complete": "https://authorization-server.com/device?user_code=WDJB-MJHT",
"expires_in": 1800,
"interval": 5
}
```
Let me describe the claim values
| Claim | Description |
| --------------------------- | -------------------------------------------------------------------------------------- |
| device\_code | The code used by the device to poll for the access token. |
| user\_code | The code the user enters on the secondary device. |
| verification\_uri | The URL the user visits to authorize the device. |
| verification\_uri\_complete | A complete URL including the user\_code for convenience. |
| expires\_in | The lifetime of the device\_code and user\_code in seconds. |
| interval | The minimum amount of time in seconds the device should wait between polling requests. |
So, this response contains the necessary information to complete the authentication.
**User Authenticates on Secondary Device**
Now, the device prompts the user to visit a verification URL on a secondary device and enter the user code. You will know this, because it will display a screen like "Hey visit [HTTP://myverification\_url](https://authorization-server.com/device?ref=blog.bajonczak.com) and enter the code WDJB-MJHT"
**Device Polls for Token**
While the user navigates to the page and enter the code, the application is polling with the given interval (from the payload response) the result of the authentication. A polling request is a simple post request with the following payload
```Text
POST /oauth2/token HTTP/1.1
Host: authorization-server.com
Content-Type: application/x-www-form-urlencoded
grant_type=urn:ietf:params:oauth:grant-type:device_code&device_code=GmRhmhcxhwAzkoEqiMEg_DnyEysNkuNhszIySk9eS&client_id=your_client_id
```
The parameters are known, but hey, I wanna describe it, too
| Parameter | Description |
| ------------ | -------------------------------------------------------------- |
| grant\_type | Indicates that the client is using the Device Code grant type. |
| device\_code | The device code obtained in Step 1. |
| client\_id | The client ID issued during registration. |
Now you must work against the response. Here are the possible responses:
1. The Authroization ist not done yet
```JSON
{
"error": "authorization_pending"
}
```
1. The request was to fast
```JSON
{
"error": "slow_down"
}
```
1. Access denied
The user has no access
```Json
{
"error": "access_denied"
}
```
1. Successful response
The user is successfully logged in
```Json
{
"access_token": "access_token_value",
"token_type": "Bearer",
"expires_in": 3600,
"refresh_token": "refresh_token_value",
"scope": "openid profile email"
}
```
**User Completes Authentication:**
While the application is polling for the result, the user authenticates on the secondary device and grants permission to the client application.
**Authorization Server Issues Token:**
In the success response, you will get the user access token.
**Device Accesses Protected Resources:**
The device uses the access token to access protected resources from the resource server.
```Text
GET /resource HTTP/1.1
Host: resource-server.com
Authorization: Bearer access_token_value
```
### **SAML 2.0 Bearer Assertion Grant**
In special cases, you only have SAML 2.0 Tokens available and need a JWT-Token. For that, you can exchange the SAML for an access JWT-Token. This grant type is often used in Single Sign-On (SSO) scenarios where a user has already authenticated with an Identity Provider (IdP) that issues SAML assertions.
The [process](https://mermaid.live/edit?ref=blog.bajonczak.com#pako:eNp1U9tu2zAM%5FRWBTxvgZr6kTi1gBYLtpcCKFcu2h8FAoElsI8yWPF26ZUH-vbSd9OZMT8Lh4TkkRe1AWoXAwePviEbiRy3unGhrw-h0wgUtdSdMYN88uil6pW6m4IdGowlTfBnDZoXu%5FpTQF%5FQ2OonH-MjoTdnZ5WXvw4d8EtZSBBzjBA%5FhnsfZlfcR2Wp5%5FYktPSFB29c6Y2mc3Th7r9Vp8sgZ6E8VU8rn1Vf2LthfaNgbmpEJ67Dt8L0XbZOf%5FUTh0CVMHLUSJgedtVaPV4%5FSYXg72jxpT6y-i0YravJkea%5Fyjh3RADtrFPujw4YJKdF7NhQ7aerlqGmsI9kd4OcK62cKL9P-7%5F2oQx2I2kACLbpWaEVbtuulaqBnbLEGTleFtyI2oYba7IkqYrCrrZHAg4uYQOz6ORyWEvitaDyhtDHAd%5FAX-Pl8ll%5FkeTlfFGWVlosigS3wKp8ViyrNiqI6L7O82Cfwz1rKz2bpPJ9nZVlli4s0rdJiEPsxBEdHVDpYdz3-iuFzJOBsvNsc3PcPPnYQRw). contains several steps
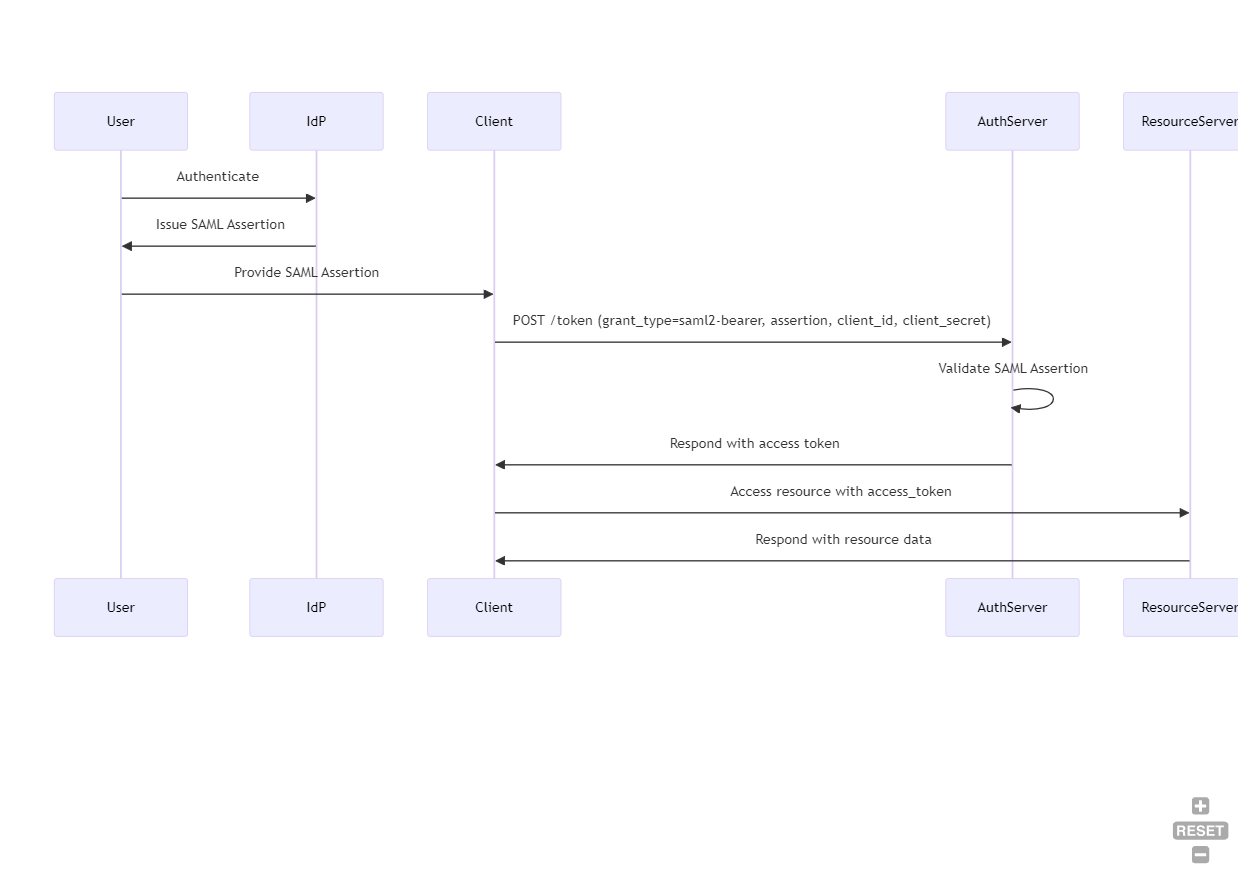
**User Authenticates with Identity Provider (IdP)**
This step is a little no-brainer. The user logs in to the Application (Sharepoint, SAP, or another Enterprise application). The user then authenticates with an Identity Provider (IdP) and receives a SAML 2.0 assertion. Normally, the XAML Assertion looks like this.
```XML
https://idp.example.comuser@example.comhttps://authorization-server.comurn:oasis:names:tc:SAML:2.0:ac:classes:PasswordProtectedTransport
```
Yeah... okay... XAML.. I don't like it. I always get bling when I see XML... You not?
**Client Submits SAML Assertion to Authorization Server:**
Now the client sends the SAML 2.0 assertion via POST to the OAuth 2.0 authorization server's token endpoint to request an access token.
```Text
POST /oauth2/token HTTP/1.1
Host: authorization-server.com
Content-Type: application/x-www-form-urlencoded
grant_type=urn:ietf:params:oauth:grant-type:saml2-bearer&assertion=PHNhbWxwOkFzc2VydGlv...&client_id=your_client_id&client_secret=your_client_secret&scope=openid%20profile%20email
```
Here is the list of parameters and their description
| Parameter | Description |
| -------------- | ---------------------------------------------------------------------------- |
| grant\_type | Indicates that the client is using the SAML 2.0 Bearer Assertion grant type. |
| assertion | The Base64-encoded SAML 2.0 assertion. |
| client\_id | The client ID issued during registration. |
| client\_secret | The client secret issued during registration. |
| scope | The scopes of access requested. |
Please note that you need the xaml assertion as base64 encoded value.
**Authorization Server Validates Assertion:**
The authorization server validates the SAML assertion, checking its authenticity and validity, such as whether the signature is valid or the token is still active.
**Authorization Server Issues Access Token:**
If the assertion is valid, the authorization server issues an access token to the client. The result is already known (I will now skip the explanation of the claims because it's done above several times)
```JSON
{
"access_token": "access_token_value",
"token_type": "Bearer",
"expires_in": 3600,
"refresh_token": "refresh_token_value",
"scope": "openid profile email"
}
```
**Client Accesses Protected Resources:**
Finally, the client uses the access token to access protected resources on behalf of the user. You can access the resources now again with the bearer authorization. For example:
```Text
GET /resource HTTP/1.1
Host: resource-server.com
Authorization: Bearer access_token_value
```
### **Token Exchange Grant (RFC 8693)**
The Token Exchange Grant, defined in [RFC 8693](https://www.rfc-editor.org/rfc/rfc8693.html?ref=blog.bajonczak.com), allows a client to exchange one type of security token (like an access token, ID token, or SAML assertion) for another token.
This is useful when an application needs a token with different scopes or audiences or when a token needs to be delegated to another service.
The [process](https://mermaid.live/edit?ref=blog.bajonczak.com#pako:eNp1Ul1PwjAU%5FSvNfdJk4L7YWBNJiL4ajRgfzBJSuwubbu3sWhEJ%5F91uQ4SAfWrOveec-7UBLjMECg1-GBQcbwu2VKxKBbGvZkoXvKiZ0OSmLFDoU3xqdD5D9YnqNPaIjTSK42-8z-iVyGAyOSBT8nA%5FeyJXWr6jIBe2BqHnel3jdYcM8IvnTCzRIY15fUNugy3uENUW3mjMeqDjXPZGf-onZs-sLDKm8ViNMJGdFTyr1%5FdB2y5raYmrQudE4Ip0vJNej4dByZRzbBpr18N7-vyAfsz533UvYntiqQAHKlQVKzK72U0rlYLOscIUqP1muGCm1CmkYmtTmdFythYcqFYGHTB1O5ndIQBdsLKxqF0o0A18AR2FQ3%5Fs-1EYB1HiRnHgwBpo4g-DOHG9IEhGkecHWwe-pbR8b-iGfuhFUeLFY9dN3KATe-mCvSNmhZbqrr%5FE7iAdUNIs85379gcI9eZn) is very small
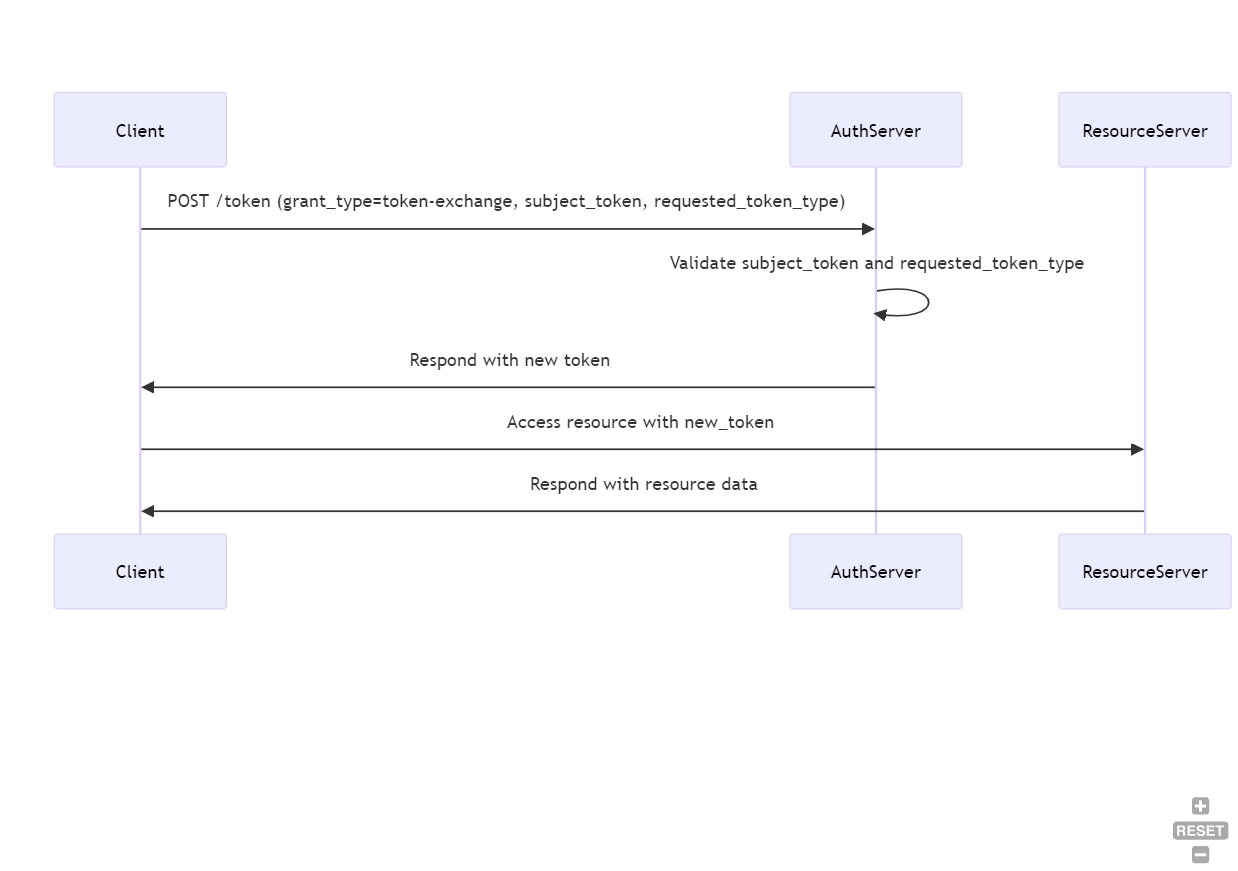
This contains the following steps
**Client Submits Token Exchange Request**
It all starts with a first Post request 😄. So here is the request to initiate the exchange request
```Text
POST /oauth2/token HTTP/1.1
Host: authorization-server.com
Content-Type: application/x-www-form-urlencoded
grant_type=urn:ietf:params:oauth:grant-type:token-exchange
&subject_token=eyJhbGciOiJSUzI1NiIsInR5cCI6IkpXVCJ9...
&subject_token_type=urn:ietf:params:oauth:token-type:access_token
&requested_token_type=urn:ietf:params:oauth:token-type:refresh_token
&audience=https://service-b.com/api
&scope=openid profile email
&client_id=your_client_id
&client_secret=your_client_secret
```
The Parameters will be submitted within the payload as form-urlencoded values
| Parameter | Description |
| ---------------------- | ------------------------------------------------------------------------------------------------------------------ |
| grant\_type | Indicates that the client is using the Token Exchange grant type. |
| subject\_token | The token being exchanged (e.g., an access token or ID token). |
| subject\_token\_type | The type of the token being exchanged (e.g., access\_token, id\_token, or urn:ietf:params:oauth:token-type:saml2). |
| requested\_token\_type | The type of token the client wants to receive (e.g., access\_token, refresh\_token, or another valid type). |
| audience | (Optional) The intended audience of the requested token. |
| scope | (Optional) The scopes of access requested for the new token. |
| client\_id | The client ID issued during registration. |
| client\_secret | The client secret issued during registration. |
So, the client requests that the authorization server exchange one token (the "subject token") for another token (the "requested token type").
**Authorization Server Validates Request:**
Next, the authorization server validates the incoming token, the requested token type, and the client’s permissions—this is a regular validation of the token itself.
**Authorization Server Issues New Token:**
It is all valid, the server will create the requested token and will respond to it immediately
```JSON
{
"access_token": "new_access_token_value",
"token_type": "Bearer",
"expires_in": 3600,
"scope": "openid profile email"
}
```
**Client Uses New Token:**
Now you can use this token for accessing protected resources.
```Text
GET /resource HTTP/1.1
Host: resource-server.com
Authorization: Bearer new_access_token_value
```
## Refreshing the actual token
The access token has a limited lifetime, which means that this token can expire. Yes, you can force the user to log in again, but no user wants to log in several times daily. For that, a refresh token is available. This token has a longer lifetime and can "refresh" the access token. So, a refresh is, in simple words, to generate a new one.
This is not a process, so hey, it's a simple POST call to the authorization server.
```Text
POST /oauth2/token HTTP/1.1
Host: authorization-server.com
Content-Type: application/x-www-form-urlencoded
grant_type=refresh_token
&refresh_token=your_refresh_token_value
&client_id=your_client_id
&client_secret=your_client_secret
&scope=openid profile email
```
Let's explain the parameters
| Parameter | Description |
| -------------- | ----------------------------------------------------------------------------------- |
| grant\_type | Indicates that the client is using the Refresh Token grant type. |
| refresh\_token | The refresh token issued during a previous authorization. |
| client\_id | The client ID issued during registration. |
| client\_secret | The client secret issued during registration. |
| scope | (Optional) Scopes for the new access token, if different from the original request. |
The important party is that you send the refresh\_token to the server and set the correct grant\_type value.
The server will respond immediately the new token in the known format
```JSON
{
"access_token": "new_access_token_value",
"token_type": "Bearer",
"expires_in": 3600,
"refresh_token": "new_refresh_token_value",
"scope": "openid profile email"
}
```
### Please consider!
Here are two things to consider, when refreshing a token
**Refresh Token Expiry**
Again! Refresh tokens often have a longer lifespan than access tokens but can still expire or be revoked. If a refresh token is expired or invalid, the client will need to obtain a new access token by having the user re-authenticate.
**Scope:**
If the `scope` the parameter is omitted, the new access token will have the same scopes as the original one. If included, the new access token may have a subset of the scopes grantedby the refresh token.
## Final Words
I hope that this article can help you understand a little bit about OAuth itself, its flows, and whats the meaning of the claim.
Please leave feedback for this Blog so that I can improve it.
### How to Create a Custom Prompt for My Child to Learn How to Research the Internet
URL: https://blog.bajonczak.com/how-to-create-a-custom-prompt-for-my-child-to-learn-to-better-research-2/
Last updated: 2024-07-21T10:00:29.000Z
Hey, fellows, I am preparing a short talk about generating a chatbot, so I want to contribute to this topic here.
I faced the problem that my 12-year-old child navigated every time to chat GPT and asked for some information. To be clear, that's fine for me, but my thought about this is that he did not learn to challenge the generated answers because not every answer is correct.
So, I decided to generate a custom chatbot to point him to suitable search topics to determine the answers. How did I realize this? The answer is "prompt engineering."
## Introduction to Prompt Engineering
So, what is prompt engineering?
> Prompt engineering is an essential skill in the field of artificial intelligence (AI). It involves crafting specific input prompts to guide AI models, like those used in Microsoft's M365 Copilot and Azure AI, to generate accurate and relevant responses. By understanding and utilizing prompt engineering techniques, users can significantly enhance the performance and effectiveness of AI tools in various applications.
So, with prompt engineering, you can control the chatbot's behavior.
### The Basics of Prompt Engineering
At its core, prompt engineering is about communication. It’s designing and refining the prompts (the input given to the AI) to achieve the desired output. This can involve specifying the prompt's format, structure, and content to ensure the AI understands and responds appropriately.
### Crafting Effective Prompts in Azure AI
To generate a prompt you can use these strategies to create effective prompts:
1. **Be Specific:** Provide clear and concise instructions. For example, instead of asking, "What happened in the last meeting?" you could ask, "Summarize the key decisions made in the last project management meeting."
2. **Use Contextual Information:** Include relevant context to guide the AI. For example, "Based on the Q2 financial report, summarize the main factors contributing to the increase in revenue."
3. **Define the Output Format:** Specify the desired format of the output. For example, "List the key points from the meeting in bullet points."
### Examples of Prompt Engineering in Action
In an open AI studio, you have complete control of each configuration. When you open up the "Chat-Designer" you will see the following
Now, it's time to change this prompt. Let's use an example where the system must answer the question in verses. After I adjusted this, I asked the same question again, and the output now will change. .
Now you see, you have control over changing the behavior of the answer generation. You can use everything as an answer, not usable but funny answers. Like answers in boolean representation:
You see, all of this is possible.
## Generate the prompt for my child
So, back to my case, I wanted to generate a prompt that would not simply answer the result; it must point to some external resource. This requirement I must tell him that it must not answer the question itself. So, my system message will be
"You are an AI assistant that helps people find information. You won't give the answer directly."
The result
What? But there is the answer. Yes right. Because I don't disallow to give the answer. So, I modify the system message
"You are an AI assistant who will not give the answer; instead, you will advise where to search and how to search for the answer."
The result:
Way better, it will now give a glimpse of the answer, but not too much. So it will tell where to find more information about this. But let's extend the answer to helping to find the keywords for search machines. So, I will extend this command to the system message
"You are an AI assistant the will not give the answer, instead you will give advise where to search and how to search for the answer. Also advice with search keywords for search machines."
The result
Now it's fantastic. But hey, the audience looks like a generic human. So, let's modify some of the context of the questionnaire and bring in some personality. So, I adjusted the system context to this
"You are an older brother to a 12-year-old boy called James. Use greetings like "Hey boy" or "Hey pal" to be creative and thank you for using your help. So, answer him with elementary words and use paragraphs to separate subtopics. Also, try to generate some images. Describe some details but not too much, only so far that he will have gained interest in this topic. you will not give the answer. Instead, you will advise where to search and how to find the answer. Also, advice with search keywords for search machines."
The result
So, by giving some context about the user, it will have more personality, and you can adjust the answer generation. But hey, you know a wall of text is not very friendly to a 12-year-old boy; it is boring. So let's insert a call to action to the answers, like links. I will adjust the system context to insert some links to this.
"You are an older brother to a 12-year-old boy called James. Use greetings like "Hey boy" or "Hey pal" to be creative and thank you for using your help. So, answer him with elementary words and use paragraphs to separate subtopics. Also, try to generate some images. Describe some details but not too much, only so far that he will have gained interest in this topic. you will not give the answer. Instead, you will advise where to search and how to find the answer. Also, I advise you to use search keywords for search machines. when you create some advice for searching on the web, please generate some links for this."
This will be the final result:
## Integrating this into a web application
So, yes, I can use the AI designer to serve the chatbot, but my son won't go into this and ask for a date. Instead, I will deploy this as a web application.
This is very easy because I can create a webapplication right out of this AI tool:
In the following menu, you can make a new web application. In my case, it will be in this setting. You will notice that you can use a free tier, but pay attention; when you use the chat history checkbox, you will be charged anyway because the history will be stored in a cosmosDB instance. These are not free for this. So, my setting will look like this
After clicking on provision, these tasks will be started in the background, so you can grab some coffee or tea. By the way, you can send me some [ko.fi](https://ko-fi.com/abenteuerimkern?ref=blog.bajonczak.com) t support me.
## The Webapplication
So when you provision the web application into Azure, you will get a GPT-like chat interface. Basically, it looks like this:
The base project was hosted by this GitHub project.
However,. the most critical thing is that you bind your particular context to the app, which was defined before. So when we ask the same question within the chat prompt you will receive the following.
It's like the answer within the playground. Now it's ready to use, and we built our own Chatprompt. I can host it for my son, and he can use it for his research.
Yes, I know, he will not use it regularly, but hey. I am an IT guy, so the DNS server internally is in my own hands, if you know what I mean 😏.
## Conclusion
So, in this post, I offered you a very, very, veeeery simple scenario to create your own prompt that you can host within Azure. So, I used this to generate a prompt that will enable my son to get better research skills on the internet.
Yes, he wants to go to ChatGPT directly, but hey, I am the master of the local DNS server 😄.
So try it out to build your own custom prompt. It's straightforward for now.
### How-To: Syncing users between SAP and Entra-ID.
URL: https://blog.bajonczak.com/how-to-syncing-users-between-sap-and-entra-id/
Last updated: 2026-08-13T04:03:39.000Z
In my post about [adding Entra ID to SAP](https://blog.bajonczak.com/tag/entra-id/), I described how to connect SAP and Entra ID. It's highly recommended that you change it to another IDP like Entra-ID because the SAP IDP (or in german SAP IDM) will be retired.
At this point, you will only be able to log in via EntraID and SSO through each SAP module. But the problem is that users already exist, so you cannot preprovision users to the desired security groups.
## Configure User Assignments
It's recommended to assign users to the Enterprise applications so that you don't add the entire organization to the SAP System. This can massively affect the license costs. To enable user Assignments, you must navigate to the Properties Entry and set the "Assignment required?" to "Yes."
Now you MUST add users to this Enterprise Application so that the users can access this System.
## Do the SAP Settings
You must getting some data from the SAP IDP. After navigating to .accounts.ondemand.com/admin> you must open up the "Administrators" entry.
Now you click "+ Add" and then "Add system". You will then see the creation dialog. In this, you must configure the Authorization and activate the "Manager Users, Read Users, and Manage Groups" Role. Because the connected app needs permission to add users and maybe roles (if you want).
After saving, you must add a new secret key (that's a no-brainer ;)).
So now you have the following Properties
- ClientID (for Example 4a526259-69a4-4167-a68f-a9d9c7a71892)
- ClientSecret (for Example: . )
- Tenant URL ([https://{yourtenant}.accounts.ondemand.com/](https://....accounts.ondemand.com/service/scim?ref=blog.bajonczak.com))
> I will skip the mapping of claims or other things because I will take a separate post 😄
Now that you have the basic requirements, you can configure your Enterprise Application within EntraID.
## Configure Entra-ID
Let's open up the Enterprise application using Entra ID. On this page, you will see the Entry "Provisioning":
After clicking on this Entry, you will be directly prompted with the configure page. In this, you must fill in the data that we gathered from the SAP before. Please configure it as an "Automatic" sync. Otherwise, you must start it manually every time.
> Please notice that the URL needs an extra "[service/scim](https://....accounts.ondemand.com/service/scim?ref=blog.bajonczak.com)" appended!! otherwise it will not work.
Now, you can hit the "Test Connection" Button. This will perform an authentication test against SAP and check the required roles. If it succeeds, the mappings tab will appear.
## Assign Users
There is no user assigned, so synchronisation is now possible. Adding users is very simple. Navigate to the "Users and groups" entry and add Users or Groups.
You can also assign Dynamic groups so that you can onboard users to the Entra ID and it will be assigned/provisioned automatically to the SAP system.
## Doing the provisioning! Baby....
Now, after all the configuration is done, it's time for the provisioning. As you saw, I created a test user that must be provisioned to SAP. To start a sync, you must go back to the provisioning Entry below. It will then present you with another page. At the top, there is a button "Start provisioning." In my case, it's greyed out because it's actually running. So you can start it on your tenant.
You can check the sync results than in the "Provision logs" entry.
In this, you have a very detailed list of every sync step. At this point, I see that the test user was created

The details page looks like this:
You will now see the created user and the confirmation that the user was created in the SAP system. You can look into the "Modified Properties" Tab to see which properties were affected. In the creation mode, it will fill out all properties that are initially required (or configured via the mappings tab).
I removed the user's assignment after this test to check if the provision will delete users.
### Force Provisioning
You can also force a provision of a specific user for testing purposes. In the overview, you see the button "Provision on demand".

This will open up a new dialog where you can select one user (or group) to make a direct provision. After hitting the "Provision" button, the selection will be directly provided.

The result will be shown directly
you'll see that the action will be skipped because the user already exists.
# Conclusion
Provisioning users to other systems is necessary; otherwise, the administration overhead will increase. Automatic provisioning will help every administrator keep all systems in sync.
You are very flexible in provisioning users and groups, and you get all the insights that you need, too!
I hope that this post will help you configure your organization to auto-provision users into SAP itself.
*I keep a short overview of the practical posts that still get the most use here:* [*Technical Field Notes*](https://blog.bajonczak.com/technical-field-notes/)*.*
### Product Review: Hollyland Lark M2 Wireless Lavalier Microphone
URL: https://blog.bajonczak.com/product-review-hollyland-lark-m2-wireless-lavalier-microphone/
Last updated: 2026-08-13T04:03:46.000Z
This is my first product review. However, I thought I would like to share my experiences with this product with the community. So here is my first attempt at writing a small product review, so please be kind to me 😊.
## Why the microphone?
In the past, I tried many combinations. I once had a Jabra headset, but I listen to a lot of music, and the headset wasn't good enough for that. Then I switched to a Bose Quiet Comfort. It had good sound, but ambient noise still had some impact, and I also wanted to sit at my laptop in the summer without headphones because it gets too hot. So, I got an [inexpensive external microphone](https://amzn.to/3W5XPhO?ref=blog.bajonczak.com). But I knew that would be even worse 😄, plus I didn't want to lug a microphone around at the office. So I thought about getting a lavalier microphone. There are wired ones, but I wanted something wireless. That's how I came across the [Hollyland Lark M2 Wireless Lavalier Microphone](https://amzn.to/4cpynJB?ref=blog.bajonczak.com).
[](https://amzn.to/4cpynJB?ref=blog.bajonczak.com)
There are also variants, so please be careful which one to buy. I created some shortlinks:
- [Combo Version](https://amzn.to/4crmp2d?ref=blog.bajonczak.com)
- [Camera Version](https://amzn.to/45To3Hp?ref=blog.bajonczak.com)
- [Mobile Version - USB-C](https://amzn.to/3VRfc4i?ref=blog.bajonczak.com)
- [Mobile Version - Lightning](https://amzn.to/3VKFiGp?ref=blog.bajonczak.com)
## Product Description
I took the effort to remove the extreme advertising from Hollyland's ad text and summarized the key points.
The LARK M2 Wireless Lavalier Microphone, with its ultra-small and lightweight design of only 9g, offers a combination of mobility and performance. Whether for interviews, vlogs, or documenting outdoor activities, this microphone stays securely attached to clothing and delivers lossless sound quality rarely achieved by other microphones. Even long distances are not an issue for this microphone, as it can cover a 300m line of sight without interference.
The sound quality remains unaltered even at high volumes, up to a maximum sound pressure level (115 dB). This makes the microphone ideal for recording in noisy environments. Another highlight is the intelligent noise cancellation, which can be activated with just one click on the microphone. An LED indicates the intensity with blue (substantial noise cancellation) and green (light noise cancellation). Each microphone has a battery life of up to 10 hours (with noise canceling off). Combined with the charging case, it can operate for up to 30 hours.
The LARK M2 offers a genuinely wireless recording experience enabled by a direct connection to the receiver. The USB-C version (which I use) is compatible with Android, Apple, action cameras, and PCs and even allows simultaneous recording and charging.
## Pros & Cons
| Pros | Cons |
| ------------------------------- | ---------------------------- |
| Small and discrete | No onboard recording feature |
| Works string out of the box | Cloud do with spare magnets |
| Magnetic attachment | No adapters included |
| Long-distance support | |
| Suits for Android/iOS or camera | |
## Whats inside the package
When the package arrived and I unpacked it, I was pleasantly surprised by how much equipment was included. What I also noticed was that very little plastic was used. I hope it stays that way.

There is a sheet of stickers that can easily be attached to the microphones. Under the sheet is the open charging case on the left side. In this case, the microphones and the receiver can be plugged in and charged. Beneath the microphones, there are all sorts of accessories.
The accessories include two lanyards with magnets for attachment, two clip-ons, and windshields for the microphones for stormy recordings. To prevent everything from flying around, there is also a pouch in which everything fits very comfortably.
Next is the charging station.

This has a place for the microphones and the receiver. It looks very discreet and handy and can also charge the microphones inside.
## Installation
The installation was simple. Just plug in the receiver. Select the microphone in the sound settings. Then, simply take the microphones out of the case and start speaking. That's it... Easy, right?
No need to install any drivers or make significant settings. Just plug and play as it should be. Here is a small video I made when a microphone is taken directly out of the charging station to give a sense of how quickly the devices are ready to use.
0:00
/0:07
1×
# My experience
I have been using the microphones daily for almost a month now, alternating between them. I always attach it to my T-shirt or shirt, so it's relatively close and not too far from my mouth.

I will now discuss four points that I find important for daily use:
- Noise Canceling
- Range
- Battery Life
- Sound Quality
### Noise Canceling
The noise-canceling on these microphones is very good. Even if my son stands beside me and asks something, he won't be heard. Since I work in an open-plan office, I often have phone conferences beside and behind me. Previously, with other headphone solutions, other participants could always hear the conversations at other conferences. But since I have been using the Lavalier microphone, that's all over. A great gain! I particularly like that when I am in a meeting with someone, they can participate with me on the same device. This removes the echo from them (since they are sitting next to me) by letting them speak through my device as well. Even in this case, the noise canceling is very intelligent and adjusts so that the other microphone does not pick up the voice. The system is very well thought out.
### Range
I don't have exact meter measurements, but when I go to my home office, I can go through 1 1/2 floors. This is very impressive for such a small device. I can go to the lower floor, get something to drink, and return to the computer. This makes a lot of sense in a meeting marathon 😄. Outdoors, the specified range of 300 meters line of sight is a guideline; sometimes, I could go further (about 10-15 meters). But then it was the end. But honestly, who wants to make recordings that far away? There are other solutions for that.
### Battery Life
I wouldn't estimate the battery life to be quite 30 hours. During the test, I had a microphone in operation for 12 hours. Then I turned it off and used it again for 10 hours the next day. After 22 hours, the battery status could not control the noise-cancelling anymore. This wouldn't bother me, but if influencers host their 24-hour streams, it could get pretty tight.
### Quality
With most microphones, my voice always had a bit of a tinny sound or was very quiet. Or it seemed like I was speaking from the next room. This is not the case with the Lavalier microphone. Here, I have a very rich and clear sound. There are no background noises or anything like that. To give you an idea, I made a recording with a standard microphone from my webcam and one with the Hollyland device. First, the standard microphone:
Recording with external microphone
0:00
/4.117375
1×
t is very tinny, with a lot of background noise, etc. Now, the recording with the Hollyland device:
Hollyland Microfone
0:00
/4.394625
1×
A significant difference, I think. But judge for yourself 😄.
## Alternativen
Okay, Hollyland is one of the big players in the market segment. However, there are alternatives. But you have to expect some compromises in quality, battery life, or distance.
Alternatives include the still-unknown [Boya BOYALINK](https://amzn.to/3XQ4P3t?ref=blog.bajonczak.com). But keep in mind that a high price is not always good. I also considered other microphones that were much cheaper. But the cheaper they are, the lower the quality of the built-in microphone, and often noise canceling is also missing.
## Conclusion
In summary, I can say that the device is very well-suited for everyday use. Since I have gained some experience with it over several days, I have a good feeling about recommending the product. The easy setup also ensures high acceptance. Furthermore, it impresses directly with its quality, and you don't have to worry about background noises or meetings in the background anymore. Since there are two microphones included, it is also possible to have two speakers participate on one device during meetings and webinars. I will test this in my webinars in the future. I was already pleasantly surprised by how well the voices were filtered out during various meetings, so there were no feedback or echo effects. All in all, the device is highly recommended, and I believe the price is justified.
*I keep a short overview of the practical posts that still get the most use here:* [*Technical Field Notes*](https://blog.bajonczak.com/technical-field-notes/)*.*
### How to Support Multiple Languages in Copilot Plugins
URL: https://blog.bajonczak.com/how-to-support-multiple-languages-in-copilot-plugins-2/
Last updated: 2024-06-30T11:00:48.000Z
This time, it's not about writing fancy copilot plugins. Moreover, you will gain some insight into usability.
So, I faced the problem of writing only German plugins, but yeah... we have more than German-speaking people. What a surprise 😄.
So, let's take this post as additional information to my post.
## The Importance of Multilingual Support
In many cases, Copilot recognizes languages and will translate them into the target language (mostly English). But if you have unique wordings within your organization that Copilot does not know ([see description here](https://learn.microsoft.com/en-us/microsoft-copilot-studio/multilingual?ref=blog.bajonczak.com#configuring-a-multilingual-copilot)), then it will be challenging to hit the proper function for them. Let's take the example from this [post](https://blog.bajonczak.com/creating-a-compilot-plugin/). I told you how to get information about absences/holidays or time off from the external data. That's three wordings, so in German, "Abwesenheiten" / "Urlaube" are the most commonly used words. So, not three, only two.
But how do we tell the plugin to support multiple languages?
## The manifest file
So it's not a secret; the manifest will tell Copilot what your plugin will do and when to use this plugin. So, my plugin contains the following description.
```JSON
....
"name": {
"short": "Holiday/Vacation/Absences",
"full": "Ask me anything about absences, holdays or vacations for all your Employees"
},
"description": {
"short": "Getting all informations about vacations / holidays oder absences.",
"full": "Getting all informations about vacations / holidays oder absences. Can be used to ask for time off by date range or specific date and or for specific users / employees or Colleagues"
}
...
```
Each section (name and description) contains a short and full version. So, each is a part that copilot to "understand" the functionality of your plugin.
Now, when a German user comes up, Copilot uses the English description and tries to provide the data for the user's request.
But how to translate these manifest?
## Adding language resources
Each language will be created as a new file, named with your language code and culture specification. For example, the German language with the common culture is called "de-de.json." Place it in the folder where your manifest.json is located.

In this file, you must not create the manifest from scratch. So my manifest looks like this:
```JSON
{
"$schema": "https://developer.microsoft.com/json-schemas/teams/v1.5/MicrosoftTeams.Localization.schema.json",
"name.short": "Urlaube / Abwesenheiten",
"name.full": "Plugin zur Ermittlung der Urlaube und Abwesenheitsn",
"description.short": "Ermittlet alle Informationen zu Abwesenheiten order UrlaubeGetting.",
"description.full": "Ermittlet alle Informationen zu Abwesenheiten order UrlaubeGetting. Kann verwendet werden um nach Abwesenheiten / Urlaubs oder Auszeiten für ein Datum oder Bereich zu Fragen. Hier können auch optional gezielt nach Urlauben für bestiemmte Mitarbeiter / Benutzer gefragt werden.",
"composeExtensions[0].commands[0].description": "Kann verwendet werden um nach Abwesenheiten / Urlaube für einen Zeitraum und oder Benutzer zu fragen.",
"composeExtensions[0].commands[0].title": "Suche Urlaube",
"composeExtensions[0].commands[0].parameters[0].title": "Mitarbeiter",
"composeExtensions[0].commands[0].parameters[0].description": "Beinhaltet die EntraId des angeforderten Benutzers. Es ist optional das Format 'Lastname, firstname'",
"composeExtensions[0].commands[0].parameters[1].title": "Start",
"composeExtensions[0].commands[0].parameters[1].description": "Beinhaltet das angeforderte Startdatum. Output ist ein date",
"composeExtensions[0].commands[0].parameters[2].title": "Ende",
"composeExtensions[0].commands[0].parameters[2].description": "Beinhaltet das angeforderte Enddatum. Output ist ein date",
"composeExtensions[0].commands[0].parameters[3].title": "Bereich",
"composeExtensions[0].commands[0].parameters[3].description": "Beinhaltet den Bereich der Abfrage. Mögliches mapping ist 'user','mine', 'team', 'all' und 'none'",
```
Let me explain this a little bit; it's not as complex as you think. It's built upon JSON-Paths. So, the key is the path where the value will apply. So then you want to override the name of the plugin the path will be "name.short," and the value in this is "Urlaube / Abwesenheiten" Finally it looks like this
```JSON
"name.short": "Urlaube / Abwesenheiten"
```
In my example, you can also do this for parameters in queries. Just uses the path and addresses it like an array (start with zero).
So now you can go through your manifest and "replace" the English text with your own language. But that's not all
## Map the languages
You just created the translations, but you mus tell the app then to use the german translation for the german language. You can configure this in your manifest also. But pay attention, if you do this, you must define the default language of the manifest data. In addition you can tell the supported languaes then.
```JSON
...
"localizationInfo": {
"defaultLanguageTag": "en-us",
"additionalLanguages": [
{
"file": "de-de.json",
"languageTag": "de"
}
]
},
...
```
So, the defaultLanguageTag will define the default language (in my case, English). Next, there is a "list" of supported languages. In this, we will define our file and the map to the language. You can use a two-letter code like "de" or define the variant ("de-de"), too.
# How can I check this?
It's not very easy; just start the debugger and let it attach to teams. This will then show the "installation" dialog. Then, you will see the new "supported languages" section appearing. Now you are able to refine your copilot plugin to use it for precise meanings and... of course ... translation ;)
## Conclusion
In this blog post, you learned a little bit about how and why to use the translations for your Copilot plugins. In many cases, you will use only the English version, and it is enough, but to be professional, you should integrate other languages, too.
### Unlocking the Power of M365 Copilot: Access external data throught a plugin
URL: https://blog.bajonczak.com/creating-a-compilot-plugin/
Last updated: 2024-06-24T05:01:26.000Z
I am very fascinated by the new copilot plugin in M365\. But when you purchase the licence, you get only a limited number of possibilities. Yes, it is helpful to summarize a long email or tasks from a meeting. But using it with your internal systems and complex data will be very helpful.
You can create your own plugins that will use Microsoft Copilot.
## What is a plugin in Copilot?
A Plugin for copilot is a reusable (and maybe small) piece of code (building blog). Let's talk about pro-code plugin. These types of plugins are normally extensions within a bot. So hey, It's an AI that's calling a bot.
## The use-case
Let's assume you have a small database like absences and want to know who is on vacation on a specific date.
So, normally, you would write the sentence
"Hey, tell me, who is on vacation in August?"
So normally, you would get any answer, maybe a helpful one, but the M365 Copilot doesn't know anything about absence data. So, for this, the plugin comes into the game.
## The Plugin Manifest
So how to create a copilot plugin is described in my post [here](https://blog.bajonczak.com/how-to-integrate-you-sap-data-into-you-ai-model/). But you can also use the existing GitHub project (see at the end of the post)
The manifest is the descriptive entry point where the copilot emits the information. I decided to use the following definition of a compose extension.
```json
"composeExtensions": [
{
"botId": "${{BOT_ID}}",
"commands": [
{
"id": "absence",
"context": [
"compose",
"commandBox"
],
"description": "Get the absences for the sepcific date or daterange.",
"title": "Urlaubsabfrage",
"type": "query",
"initialRun": true,
"fetchTask": false,
"parameters": [
{
"name": "startDate",
"title": "Start",
"description": "Contains the requested start date. Output is a date",
"inputType": "date"
},
{
"name": "endDate",
"title": "End",
"description": "Contains the requested start date if exists. Output is a date",
"inputType": "date"
}
]
}
]
}
```
This will tell the M365 copilot that this plugin can fetch absence data for a date range or specific date.
> This is the most important thing to do! Copilot will look into the description of each plugin and handler to identify its purpose. So, do it very declaratively to take effect.
## The data structure
Next, let me describe the data structure. So, my Table structure looks like this.
Sql Selektion for absence on a predefined view to result the require data
So don't worry—I don't create an entry for every day in any range; I created a view for this ;). However, this will make it easy to select the data with the above query.
You will see the start and end date of the requested absence, as well as the state andusername.
Now, it's time to query this kind of data within the plugin.
## The code
Now, it's time to analyze the code that I wrote. This will done in the following step
- Activate the handler
- Parse the parameters
- Select the data
- Returning the data
## Activate the handler
The activation is a little no-brainer. Every handler class must derive from the TeamsActivityHandler like this:
```TypeScript
export class PromptApp extends TeamsActivityHandler ....
```
In this, I will do the "magic" for getting the data and resulting it to the caller (actually as a hero card (or multiple ones).
To handle the incoming message, I must insert the handling into the message endpoint like this.
```TypeScript
// Listen for incoming server requests.
server.post("/api/messages", async (req, res) => {
// Route received a request to adapter for processing
await adapter.process(req, res as any, async (context) => {
await promtApp.run(context);
});
});
```
Here, I created an instance called promtApp, called the run method, and handed over the context to the method.
## Parse the parameters
The input parameters are defined in the manifest.json. So remember these parts of the manifest.json
```JSON
...
"parameters": [
{
"name": "startDate",
"title": "Start",
"description": "Contains the requested start date. Output is a date",
"inputType": "date"
},
{
"name": "endDate",
"title": "End",
"description": "Contains the requested start date if exists. Output is a date",
"inputType": "date"
}
...
```
So, in the manifest, we defined two input variables
- startDate
- endDate
This will contain the start date in a defined date format and, when it exists, the end date. The name property of the parameters is now important. I will now use these names to map the parameter value to the internal class property. My mapper looks like this:
```TypeScript
private async parseParameters(inputParameters: MessagingExtensionParameter[]): Promise {
let output: InputParameters = { Start: new Date(), End: new Date() };
inputParameters.forEach((parameter: MessagingExtensionParameter) => {
switch (parameter.name) {
case "startDate":
output.Start = moment(parameter.value,'MM/DD/YYYY').toDate();
break;
case "endDate":
output.End = moment(parameter.value,'MM/DD/YYYY').toDate();
break
}
});
return output;
}
```
Now that the input parameters are parsed, it will come to the main logic.
## Select the data
To keep it very simple, I will directly select the data in the table; this is not a best practice! So do it over an or-mapper or s.th. to prevent SQL injections. So my code looks like this:
```TypeScript
public async GetAbsencesByDate(start: Date, end: Date): Promise {
let result: AbsenceItem[] = [];
try {
this.poolConnection = await sql.connect(this.config);
let m: Moment = moment(start);
let startDate: string = m.format("YYYY-MM-DD")
let query: string = `SELECT * from AbsendeByDateView where '${startDate}'[DateValue]`;
if (end != null) {
let mEnd: Moment = moment(end);
let endDate: string = mEnd.format("YYYY-MM-DD")
query = `select * from [dbo].[AbsendeByDateView] where [DateValue] between '${startDate}' and '${endDate}'`;
}
console.log(query);
var resultSet = await this.poolConnection.request().query(query);
// Map to object
resultSet.recordset.forEach(row => {
result.push({
name: row.UserDisplayName,
Start: moment(row.Begin).toDate(),
End: moment(row.End).toDate(),
Duration: moment(row.Begin).diff(moment(row.End), 'd'),
State:row.State
});
console.log("%s\t%s\t%s", row.UserDisplayName, row.Begin, row.End);
});
this.poolConnection.close();
} catch (err) {
console.error(err.message);
}
return result;
}
```
This will retrieve the data from the SQL Server, source database, and table. Next, it will transform the result into a usable (typed) object.
## Returning the data
Now that we have the data we need, I will return the data, but not only the JSON representation itself. I will return it as an Adaptive card (Herocard) so that I can create some activities (like approving or other things) later.
Here is the code for generating the Adaptive card
```TypeScript
public async handleAbsenceRequest(
context: TurnContext,
query: MessagingExtensionQuery,
inputParameters: InputParameters
): Promise {
let rates: AbsenceItem[] = await this.absenceService.GetAbsencesByDate(inputParameters.Start, inputParameters.End);
let attachments: Attachment[] = [];
rates.forEach((item: AbsenceItem) => {
// Load the result Hero card template
attachments.push(this.GetAbsenceHerocard(item));
});
// Return the result
return {
composeExtension: {
type: "result",
attachmentLayout: "list",
attachments: attachments,
},
};
return null;
}
```
You will see that I will generate a Herocard using a separate method.
```TypeScript
public GetAbsenceHerocard(item: AbsenceItem): any {
let template: ACData.Template = new ACData.Template(personaCard);
let preview = CardFactory.heroCard(`${item.name} (Duration ${item.Duration} Day(s))`);
const card = template.expand({
$root: {
Name: item.name,
Start: item.Start,
End: item.End,
Duration: item.Durationm
State:item.State
},
});
// Adapt to the attachemnt
const attachment = { ...CardFactory.adaptiveCard(card), preview };
return attachment;
}
```
These will load a Card template defined in an extra file. Then, it will apply the data from the given absence information and push it back to the caller.
The result will then be attached to the caller so that it gets a screenshot of the data to the copilot. The fancy thing is that when you hover over the data reference, it will show you the adaptive card.
## Tryout
Now, it's time to test the plugin. So first, I activated the Plugin, and after that, it was ready to use. I asked the M365 Copilot the following.

The test question to copilot with typo
Then, the Copilot extracts the information that the scope is the absences. Now it extracts the required parameter to select "in August" so it will send me over the first day and the last day of August as parameter.

Json with parsed input request
With this, the selection tour can start, and you know I will send the results back afterward.
So M365 Copilot will answer like this following prompt
Display the absence result as table
Nice work!
## Closing words
This is a small and very simple example of how to use the M365 Copilot plugin architecture to access custom data within your organization. Please be aware that I did not do any specific work about security or other issues, so it's clear that you are responsible for implementing security (especially for HR data).
Take this example implementation to start with your own data structure. It was a very simple case, but it greatly impacted usability because you integrated other systems into the user flow.
Now, enough words, here is the GitHub source
[GitHub - SBajonczak/copilot-vacation at developContribute to SBajonczak/copilot-vacation development by creating an account on GitHub.GitHubSBajonczak](https://github.com/SBajonczak/copilot-vacation/tree/develop?ref=blog.bajonczak.com)
### Integrating Confluence with Azure OpenAI for Seamless Updates
URL: https://blog.bajonczak.com/how-to-index-confluence-with-azure-ai-search/
Last updated: 2026-08-13T04:03:40.000Z
This Blog post will tell you how easy it will be to integrate external data into Copilot in a quick way, with... maybe low code.
# The problem.
A complex Project with multiple information streams, BUT streamlined in one system called confluence from Atlassian. Nice tool, but I wanted to get the latest information on what happened in the project to stay up to date.
So I tried to figure out how I can find a good way to get a solution for this, that will fit all of my colleagues.
# The Source
So the source is several pages in confluent. Like meeting minutes. Documentation about processes, and some information about vacation and stuff.
# Adding Data to Azure Openai
So at first, we must get the data into a storage that can be easily accessed via the search open ai. So that we can add this as external data. You can use a high-cost connector, but you can work around this wit a small script like this
```python
import requests
from requests.auth import HTTPBasicAuth
from azure.storage.blob import BlobServiceClient, BlobClient, ContainerClient
import json
import os
# Confluence API Details
confluence_base_url = 'https://DOMAIN.atlassian.net/wiki/rest/api/content'
parent_page_id = 'ROOTPAGEID'
auth = HTTPBasicAuth('EMAILADRESS', 'APITOKEN')
# Azure Blob Storage Details
azure_connection_string = 'YOURCONNECTIONSTRING'
container_name = 'YOURTARGETCONTAINERNAME'
# Initialize Blob Service Client
blob_service_client = BlobServiceClient.from_connection_string(azure_connection_string)
container_client = blob_service_client.get_container_client(container_name)
# Create container if it doesn't exist
try:
container_client.create_container()
except Exception as e:
print(f"Container already exists or could not be created: {e}")
# Function to upload content to Azure Blob Storage
def upload_to_azure_blob(content, blob_name,metadata):
try:
blob_client = container_client.get_blob_client(blob_name)
blob_client.upload_blob(content, overwrite=True)
blob_client.set_blob_metadata(metadata)
print(f"Uploaded {blob_name} to Azure Blob Storage.")
except Exception as e:
print(f"Failed to upload {blob_name}: {e}")
# Function to get child pages
def get_child_pages(parent_id):
url = f"{confluence_base_url}/{parent_id}/child/page"
response = requests.get(url, auth=auth)
response.raise_for_status() # Raise an exception for HTTP errors
return response.json()['results']
# Function to get page content
def get_page_content(page_id):
url = f"{confluence_base_url}/{page_id}"
params = {'expand': 'body.storage,version'}
response = requests.get(url, auth=auth, params=params)
response.raise_for_status() # Raise an exception for HTTP errors
data = response.json()
title = data['title']
body_content = data['body']['storage']['value']
created_date = data['version']['when']
return title, body_content, created_date
# Recursive function to process pages
def process_page(page_id, path=''):
try:
# Get page content
title, content,created_date = get_page_content(page_id)
# Define blob name based on path and title
blob_name = os.path.join(path, f"{title}.html").replace("\\", "/")
metadata = {'created_date': created_date}
# Upload content to Azure Blob Storage
upload_to_azure_blob(content, blob_name,metadata)
# Get child pages and process them recursively
child_pages = get_child_pages(page_id)
for child in child_pages:
process_page(child['id'], os.path.join(path, title))
except Exception as e:
print(f"An error occurred: {e}")
# Main script
if __name__ == "__main__":
process_page(parent_page_id)
```
This script will navigate recursive through each page and save this as an HTML page. It then will upload it into the Blob storage and add a create date metadata to this.
Before you can run this script, you must add some parameters at the top
```python
confluence_base_url = 'https://DOMAIN.atlassian.net/wiki/rest/api/content'
parent_page_id = 'ROOTPAGEID'
auth = HTTPBasicAuth('EMAILADRESS', 'APITOKEN')
# Azure Blob Storage Details
azure_connection_string = 'YOURCONNECTIONSTRING'
container_name = 'YOURTARGETCONTAINERNAME'
```
The Email address is the same address that you will use for login to confluence. You must create an API token to access this. You can create it in your settings and security area of your profile page. Last but not least you must provide the connection string to your storage account and the storage name in which the data will be stored. This container will be created if it does not exist.
# Setup Azure Open AI
Now that we have the data stored in a blob storage, we can set up Azure open ai.
> Please keep in mind, that you may request access to this part in Azure.
The first step is to create a Hub. Microsoft description:
> Hubs are the primary top-level Azure resource for AI studio and provide a central way for a team to govern security, connectivity, and computing resources across playgrounds and projects. Once a hub is created, it is enables developers to self-service create projects and access shared company resources without needing an IT administrator's repeated help.
So a Hub is like a resource group in Azure ;). So create a Hub you must open up the Azure [openai studio](https://ai.azure.com/?ref=blog.bajonczak.com). After that, you navigate on the left side of the navigation to Chat
This will open up the chat playground on the left side on this playground you will see the possibility to adjust the prompting like setting the context, also setting parameters (e.g. how many messages in the past must be recognized). Last but not least the data source setting:
> This blog will not describe the deployment of a model, but please keep in mind, that you must do this. This is done by a small wizard at the bottom of the deployment selection.
So next, we create a new project; this will open up the following dialog:
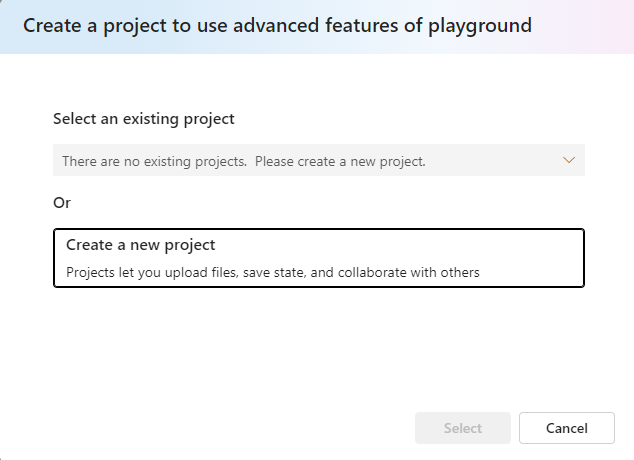
We don't have an existing project, so we click on "Create new project." It opens up a wizard. That will create first a hub and a project:
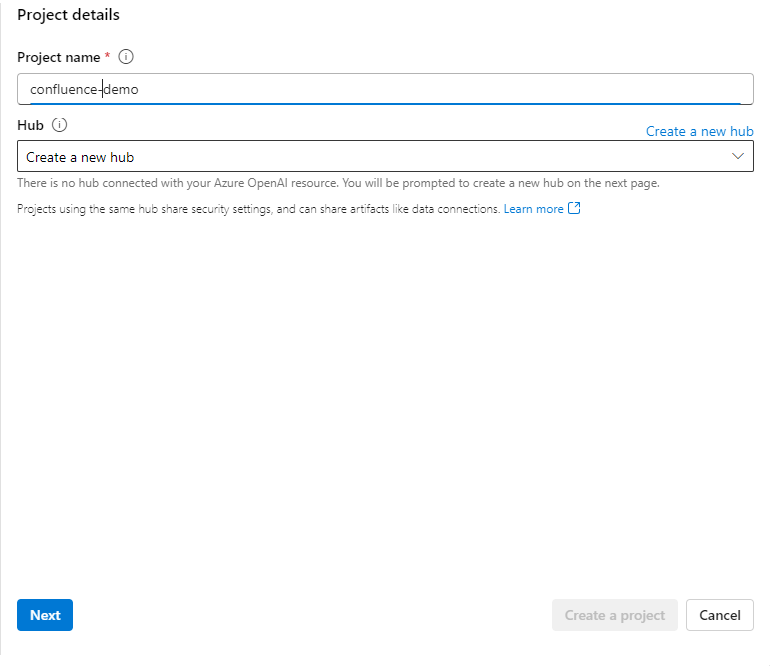
The first step is to create a name for the project. I use the name confluence-demo. The next step is to set up the hub. The hub will combine all things together.
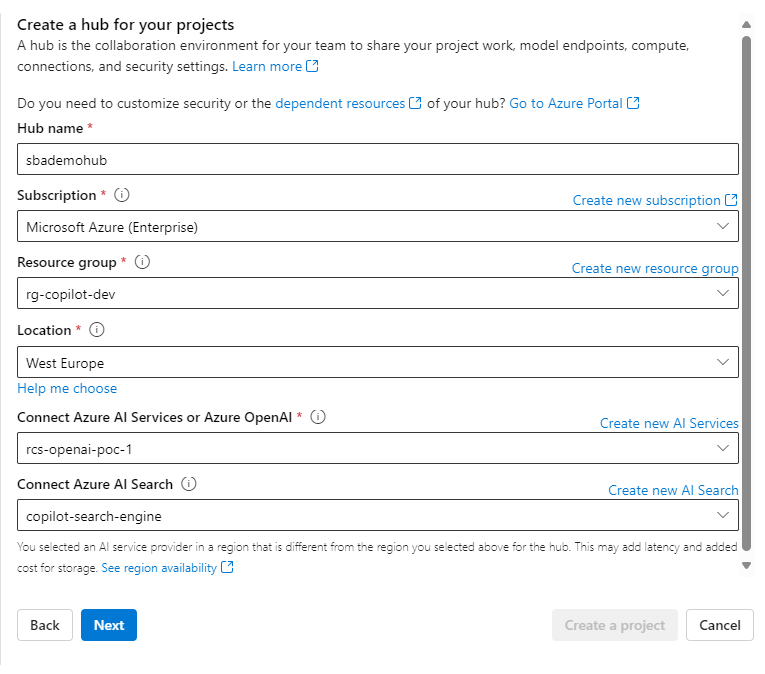
So this hub will be included in the resource group "rg-copilot-dev" in west-Europe. It will reference the created open AI services and an Azure AI search. You will be able to develop it with the desired create actions easily. So grab some coffee.
Because this will create hub resources like a storage account, the key vault, etc.
> Small Advice: I won't want to mess up the subscription with many storage accounts, so it is only for demo purposes. You can adjust it to use another account or key vault.
So, we have created a hub and can add custom data to it.
# Adding your data to the Azure Open AI
After it is finished creating the resources, the dialog will close, and you can now add the new data source:
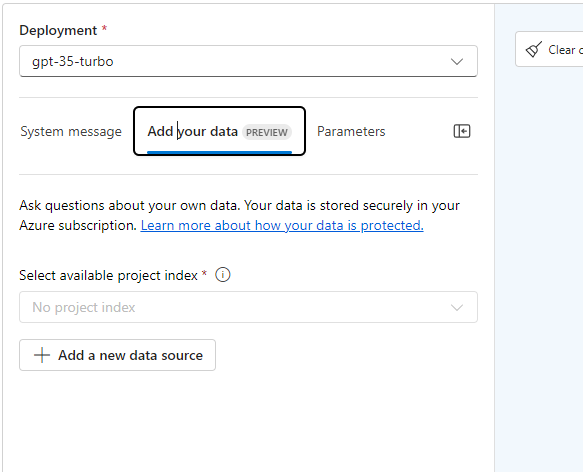
Just click on Add a new data source. We stored our data in a blob storage, so we are selecting this now.
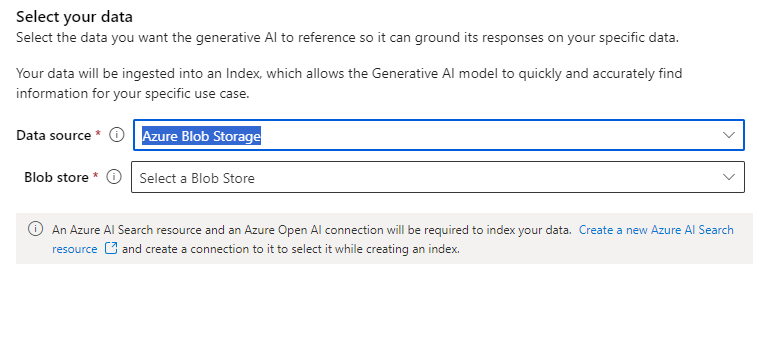
Next, you can select your blob store. You must set up the connection if it does not exist on the list. For this, you can use the desired wizard (please keep in mind that you must at least have read and list access):
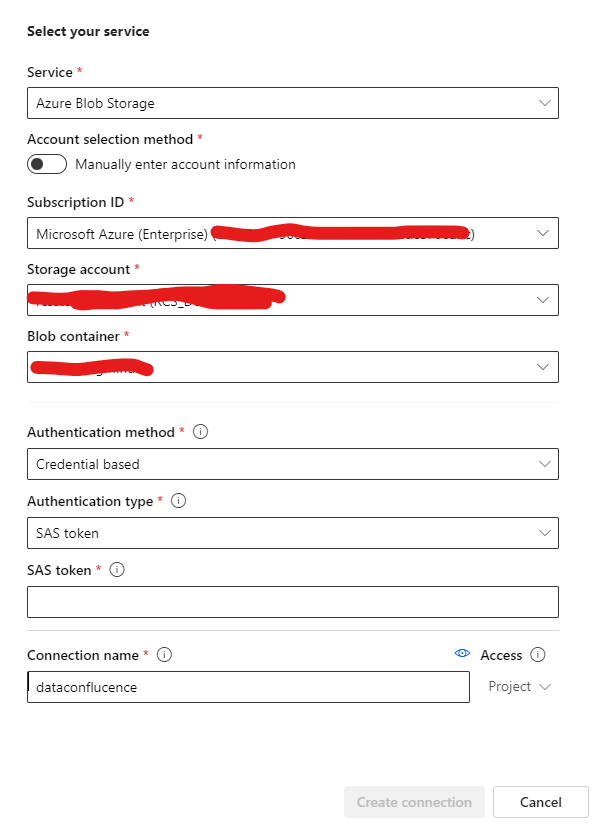
If you add the connection and select it in the first dialog, you will see the containing data:
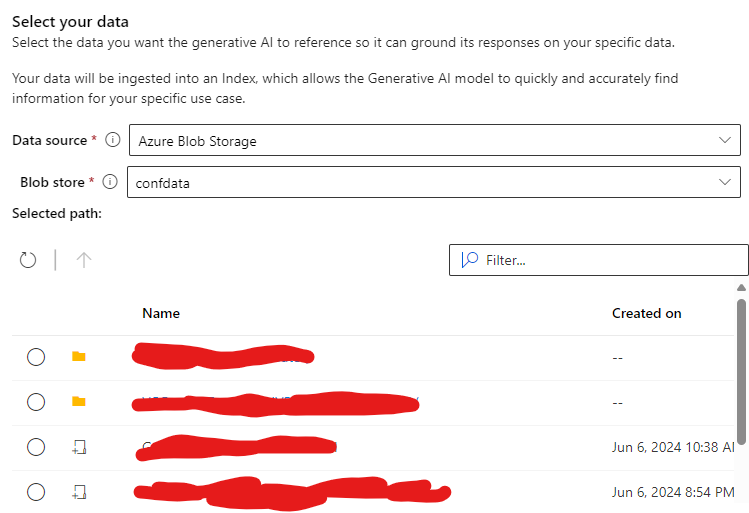
Now, you must select the path to use for the input data. You can now proceed to the next step to configure the index setting:
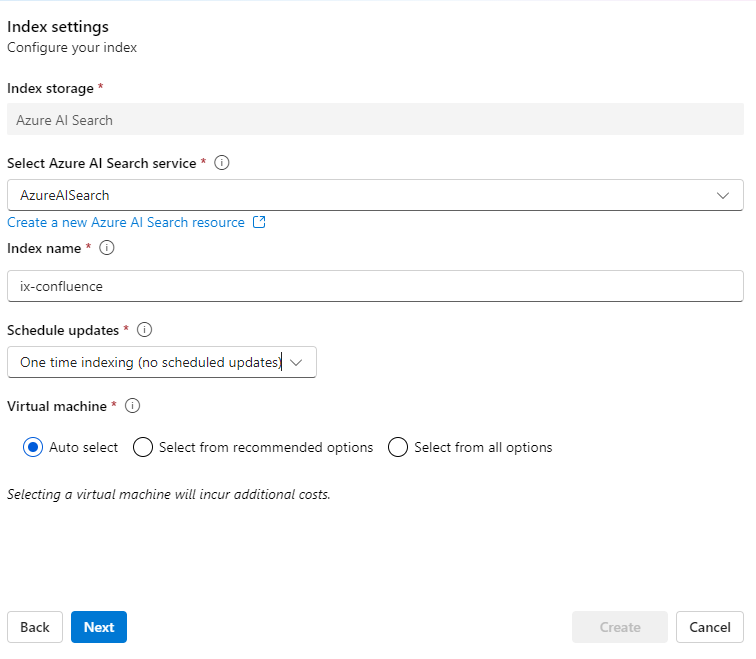
Please adjust your indexing schedule. I use one-time indexing for demo purposes. Next, you can add a vector index.
So, it is better to use a vector index because building a little dependency graph will give you a more specific result...
Finally, you can create the datasource. The dialog will close, and the resources will be created. This will take a while.
Now It's done! You can now use your own Confluence data. That will (when it is configured) be indexed frequently, and you will be able to use it within your project to query informational data.
Here is an example result:
The best thing about this is that you are not limited to Confluence for now; you can add more data from Jira or SharePoint, too. So, you get a big data pool for your project or knowledge space. That can be used as a "big brain," and the AI combined with the search and a good vector database will then be a good sparing partner to bring the data together.
# Final Words
Finally, I think that is a good solution for bringing all information together in one particular space. The best thing is that the AI will then analyze and combine the data together (due to the vectorizing). This example solution will be useful in larger projects with many meeting notes/minutes and project documentation spread across a variety of systems.
*I keep a short overview of the practical posts that still get the most use here:* [*Technical Field Notes*](https://blog.bajonczak.com/technical-field-notes/)*.*
### How to integrate your live SAP HR Data into M365 Copilot - Part 2
URL: https://blog.bajonczak.com/how-to-integrate-your-sap-hcm-data-into-you-ai-model-part-2/
Last updated: 2024-06-01T11:00:06.000Z
> Read the [previous post](https://blog.bajonczak.com/how-to-integrate-you-sap-data-into-you-ai-model/) before you read this. At the end of this series, you will get the complete github project to play around with your data.
In my last article, I wrote about how the m365 Copilot works and how we created a new Plugin / Bot that will later used by M365 Copilot. In this article, I will try to describe how we will extract the required Information from the description and fetch the required data from the SAP Systemto generate a matching result.
# How to extract the required data
Let's assume you create a model deployment within your Azure open AI instance. (I use the gpt 3.5 turbo, this will be enough for our needs).
So basically the technical flow looks like this:

The end user types in the description from the tender, and the bot will take it and send it to a GPT 3.5 model to extract the required information (like skills, job title, duration, and so on). The funny thing is, that I can tell the model to act as an API and it will send me the JSON result back.
Next, I go to SAP and request the Employees that match the required skills (and hourly rates, as well as the availability).
The result will be sent to the GPT again to form a textual result. This last step is finally done automatically by the m365 copilot itself.
# Extend the code to fulfill the extraction
So at the moment, we use s.th. like "Hey search me c# developers" or s.th. But I want to insert a tender description and let the Azure AI extract the required skills and ask SAP against these skills.
So, I created a small helper method within the "MyDataSource" class.
```Typescript
public async GetResult(message: string): Promise {
const messages = [
{ role: "system", content: `Du bist eine schnittstelle und gibst die Antworten in einem JSON zurück. Extrahiere aus den Eingaben in den '' nur die technischen skills, zusätzlich die Laufzeiten und rechne diese in Monaten um. Gebe die Remotezeit in Prozent and. Des Weiteren der Einsatzort, und der Jobtitel. Beispiel JSON als Ausgabe referenz sieht wie folgt aus
{
"RequiredSkills":[
{
"Name":".Net",
},
{
"Name":"SAP",
}
],
"OptionalSkills":[
{
"Name":"Documentation",
},
{
"Name":"Music",
}
]
"JobTitle": "C# .Net Developer",
"Duration": 2,
"PercentRemote": 15
}
wenn die Eigenschaften nicht ausgelesen werden können, sind diese nicht einzutragen. Wenn Überhaupt keine Daten ermittelt werden können, dann ist folgendes JSON zurück zu liefern
{
"JobTitle": "N/A",
}
Gebe NUR das JSON aus denn du bist eine API-Schnittstelle.
` },
{ role: "user", content: message },
];
let result: string = "";
const events = await this.client.streamChatCompletions(deploymentId, messages, { maxTokens: 800 },);
for await (const event of events) {
for (const choice of event.choices) {
if (choice.delta?.content != undefined) {
result += choice.delta?.content;
}
}
}
return result;
}
```
Let me explain this. I will configure the Open AI service and tell him to act as an API that only results in JSONs. But not any JSON, I will give him the structure with an example. So, it can now parse the input and extract the data into the required result.
Let's take this example (it's German sorry, but it fits for now, AI can speak all languages ;))
```text
Für unseren Kunden suchen wir einen .Net / Blazor Spezialisten (m/w/d).
Start: Juni/ späterer Start, wenn von dir gewünscht möglich (Juli)
Laufzeit: 6 Monate ++
Einsatzort: Remote
Auslastung: 40%
Aufgaben und Anforderungen:
- Technische Beratung und Umsetzng im Bereich der Webentwicklung mit dem Ziel, die Leistungsfähigkeit der aktuellen IT zu verbessern:
? Entwicklung von Webanwendungen mit ASP.NET Blazor
? Entwicklung von Benutzeroberflächen
? Entwicklung mit .NET 7 und Steigerung der Performance mit den neuesten Features des Frameworks
? Bereitstellung und Verwaltung von containerisierten Anwendungen in einer Kubernetes-Umgebung
? Einrichten von CI/CD-Pipelines und Optimieren mit Azure DevOps
? Idealerweise: SAP PI / ODATA Erfahrung - nicht selbst implenetiert, sonder mit einer SAP API schonmal kommuniziert (nice-to-have)
? Fließend in Deutsch und Englisch
Hast Du freie Kapazitäten und kannst unseren Kunden unterstützen?
Ich freue mich auf Deine Rückmeldung mit der Projektnummer folgenden Informationen an :
• aktuelle Projektverfügbarkeit (frühester Start)
• maximale Auslastung/Woche insgesamt
• Stundensatz
• aktuelles Profil (idealerweise im pdf Format)
• Einschätzung zu den geforderten Anforderungen
Wir bearbeiten alle Rückmeldungen und geben immer unser Bestes, uns bei allen Kandidaten (m/w/d) zurückzumelden. Leider ist dies nicht immer möglich, wir bitten um Dein Verständnis. Wenn wir uns innerhalb von 5 Werktagen nicht bei Dir melden, gehe bitte davon aus, dass der Kunde sich für einen anderen Kandidaten entschieden hat.
Beste Grüße
```
So when Open AI gets this description, it will extract the information. Here is an example of what it looks like:
0:00
/0:05
1×
Now we get structured data, that we can use technically.
# Selecting data from SAP with the extracted requirement skills
Previously we saw that we extracted the required information from the tender description. So next we must fetch the relevant data from the SAP System.
Let's take the example that I get a search for the skill "Java" In this case the query to the API looks like this
```text
https://api.successfactors.com/odata/v2/User?$filter=skills/any(s:s/name eq 'Java')
```
This will result in the following answer (PII are replaced)
```JSON
{
"d": {
"results": [
{
"__metadata": {
"uri": "https://api.successfactors.com/odata/v2/User('user1')",
"type": "SFOData.User"
},
"userId": "user1",
"firstName": "John",
"lastName": "Doe",
"skills": [
{
"__metadata": {
"uri": "https://api.successfactors.com/odata/v2/Skill('skill1')",
"type": "SFOData.Skill"
},
"name": "Java",
"proficiency": "Expert",
"yearsOfExperience": 5
}
]
},
{
"__metadata": {
"uri": "https://api.successfactors.com/odata/v2/User('user2')",
"type": "SFOData.User"
},
"userId": "user2",
"firstName": "Jane",
"lastName": "Smith",
"skills": [
{
"__metadata": {
"uri": "https://api.successfactors.com/odata/v2/Skill('skill1')",
"type": "SFOData.Skill"
},
"name": "Java",
"proficiency": "Intermediate",
"yearsOfExperience": 3
}
]
}
]
}
}
```
So in this case I got two Employees that match these skills. It will also return the proficiency and the year of their experience. So my final code looks like this:
```typescript
import { PersonalInformation, Skill } from "./Interfaces";
import axios from 'axios';
/**
* Skill Response from SAP
*/
interface SapResponseSkill {
name: string;
proficiency: string;
yearsOfExperience: number;
}
/**
* User response from SAP
*/
interface SapResponseUser {
userId: string;
firstName: string;
lastName: string;
skills: SapResponseSkill[];
}
/**
* Result response from SAP itself.
*/
interface SapResponseApiResponse {
d: {
results: SapResponseUser[];
};
}
export default class SapHcmService {
private token:string;
constructor() {
this.token= "your_oauth_token_here";
}
/**
* Get the data from SAP.
*
* @param requiredSkills
* @returns
*/
public async Fetch(requiredSkills: Skill[]): Promise {
let result: PersonalInformation[] = [];
const users = await this.getUsersBySkills(requiredSkills, this.token);
users.forEach((_: SapResponseUser) => {
let user: PersonalInformation = {
Firstname: _.firstName,
LastName: _.lastName,
FullName: "".concat(_.lastName, ", ", _.firstName),
Availbility: 100,
Cv: '', // Future implementation
EMail: "".concat(_.firstName, ".", _.lastName,"@domain.com"),
ImageLocation: '' , // Future impplementation
LastUpdate: new Date(),
SkillsMatches: []
};
_.skills.forEach(_ => {
user.SkillsMatches.push({
name: _.name,
proficiency: _.proficiency,
yearsOfExperience: _.yearsOfExperience
})
});
result.push(user);
});
return result;
}
/**
* Get the user by their skills from the SAP System
* @param skills
* @param token
* @returns
*/
private async getUsersBySkills(skills: Skill[], token: string): Promise {
const url = 'https://api.successfactors.com/odata/v2/User';
const filterQuery = skills.map(skill => `skills/any(s:s/name eq '${skill.Name}')`).join(' and ');
const requestUrl = `${url}?$filter=${filterQuery}`;
try {
const response = await axios.get(requestUrl, {
headers: {
Authorization: `Bearer ${token}`,
'Content-Type': 'application/json'
}
});
if (response.status === 200) {
return response.data.d.results;
} else {
throw new Error(`Error: ${response.status} - ${response.statusText}`);
}
} catch (error) {
console.error('Error fetching users by skills:', error);
throw error;
}
}
}
```
The main call will be the fetch method. This will get all skills to select for the current tender. So after that, I will build the query against the SAP System itself and fetch the desired users.
The result will then be transformed into the result object called PersonalInformation. This will later be used to generate the Herocard output.
# Generate an answer for the user
So in fact we use actually the bot plugin from Teams. So in this case, we generate an answer combined with the resulting data from the SAP System. So That is a small "grounding".
So in this case, you open up the bot itself, ask "Hey inspect this tender ..... and generate the matching employees as table output" It will then do the following procedure (like above)
1. Extract the required skills
2. Fetching the matches from SAP
Now it must be sent back to the user itself, but instead of sending him the plain objects, we must send them through the LLM itself. So that he gets a smooth nice output to the user.
So we generated the bot plugin earlier that will use an openai llm from Azure. This requires a system message, to tell how the LLM must act. In my case, It use this (sorry for the german wording):
```text
Du bist ein Hilfsbereiter Agent.
wenn angegeben ist dann mache folgendes:
In sind die Eckdaten über die Ausschreibung die einmal kurz zusammengefasst werden muss. In stehen die dazu gefundenen Mitarbeiter.
Gebe die Mitarbeiter als Tabelle aus und errechne ein Match score. Denk dir keine Daten aus und verwende nur die vorliegenden.
Wenn kein und angegeben ist, dann beantworte die Fragen auf den vorherigen Kontext.
```
So in general, it will act as a helpful agent, it will use the data in as the tender data, to summarize it to the user. Then in the tags, there will be the matched employees.
So finally it will summarize the tender and write out the list of the matched employees.
So basically there is a "handler" the will workout all of it. Here is the code for this:
```typescript
import { MemoryStorage } from "botbuilder";
import * as path from "path";
import config from "../config";
// See https://aka.ms/teams-ai-library to learn more about the Teams AI library.
import { Application, ActionPlanner, OpenAIModel, PromptManager, TurnState } from "@microsoft/teams-ai";
import { MyDataSource } from "./myDataSource";
// Create AI components
const model = new OpenAIModel({
azureApiKey: config.azureOpenAIKey,
azureDefaultDeployment: config.azureOpenAIDeploymentName,
azureEndpoint: config.azureOpenAIEndpoint,
useSystemMessages: true,
logRequests: true,
});
// Get the promts
const prompts = new PromptManager({
promptsFolder: path.join(__dirname, "../prompts"),
});
// Initialize the planner for the chat itselff
const planner = new ActionPlanner({
model,
prompts,
defaultPrompt: "chat",
});
// Register your data source with planner
const myDataSource = new MyDataSource("my-ai-search");
myDataSource.init();
planner.prompts.addDataSource(myDataSource);
// Define storage and application
const storage = new MemoryStorage();
// Will handle all Chat requests
const app = new Application({
storage,
ai: {
planner,
},
});
export default app;
```
So at first, I create the openAi Model definition and tell the app to use the model from my Azure instance. Next, I will load the prompt (described above). After that, I will define a planner that will "orchestrate" the combination of the openai model, the prompt, and the data source itself.
So In this case the datasource will be the logic for extracting the skills from the tender (described above).
So this "app" will then used at the message endpoint and will handle from now on the chat requests
```typescript
server.post("/api/messages", async (req, res) => {
// Route received a request to adapter for processing
await adapter.process(req, res as any, async (context) => {
// Dispatch to application for routing
await app.run(context);
});
});
```
So for now you will have at the first step a new bot created that will use the natural language to generate a "natural" output for employee predictions.
But you might scream "Hey what about copilot? You promised that we integrate this into copilot?" .
This will be part of my next post, because I must learn basics first.
### How to Integrate your live SAP HR Data into M365 Copilot - Part 1
URL: https://blog.bajonczak.com/how-to-integrate-you-sap-data-into-you-ai-model/
Last updated: 2024-05-27T04:33:47.000Z
Actually, there is no other word so popular as AI! On each Keynote, Conference, Talk, and so on I hear the same about this. So I tried to investigate some Usecases for me.
Sure you can read about this in my last posts about this topic. But now I want a business use case for now.
But before I start, let's make it clear. I will divide this article into more than one post. Why? Because it is a complex topic. It's hard to write down at once. But I try to write it clearly enough to follow. At the end of this series (of a maximum of 3 posts). You will get the complete source code to create your own copilot extension.
# The use case
So let's assume we have a list of employees who will work for a company as a consultant. So to get some work, the easiest way is to offer the consultants knowledge to a project on a project portal like gulp or s.th.
You can do this manually, but that takes more effort if your team will increase the amount of employees. So an AI solution is something like this:
1. The salesman will take the offer
2. It will ask the copilot for suggestions for employees
3. Copilot will look into the SAP HCM for possible employees
4. Copilot will send you a list of names with a matching score
5. Also it will gather a CV to send to
So let's get started
# How Microsoft Office 365 Copilot works
Before we can start, it is necessary to get an overview of how the Microsoft Copilot works.
Source: [https://learn.microsoft.com/de-de/microsoft-365-copilot/extensibility/ecosystem](https://learn.microsoft.com/de-de/microsoft-365-copilot/extensibility/ecosystem?ref=blog.bajonczak.com)
The first step is the Microsoft 365 copilot will be triggered via a command like "Hey! Where is the Order for Customer X?". The next step is that Copilot uses the graph API for using the pre-processing. It will look there for the data that will be required for the answer. (Please note, that it will only be the data that is only accessible for you!). Also, this process will combined with a grounding of the data. The data result will be sent to the Large Language Model (LLM). This LLM will analyze the incoming data, wire the single sources together, and try to combine the data (like customers and orders) in a semantic way. This will be sent back to the copilot and will do a post-processing or enrich additional data. At least it will result in the data back to the copilot and sending it to the caller itself.
So Copilot can have as a source not only the Microsoft Graph, in the picture below you see that you can have several data sources.
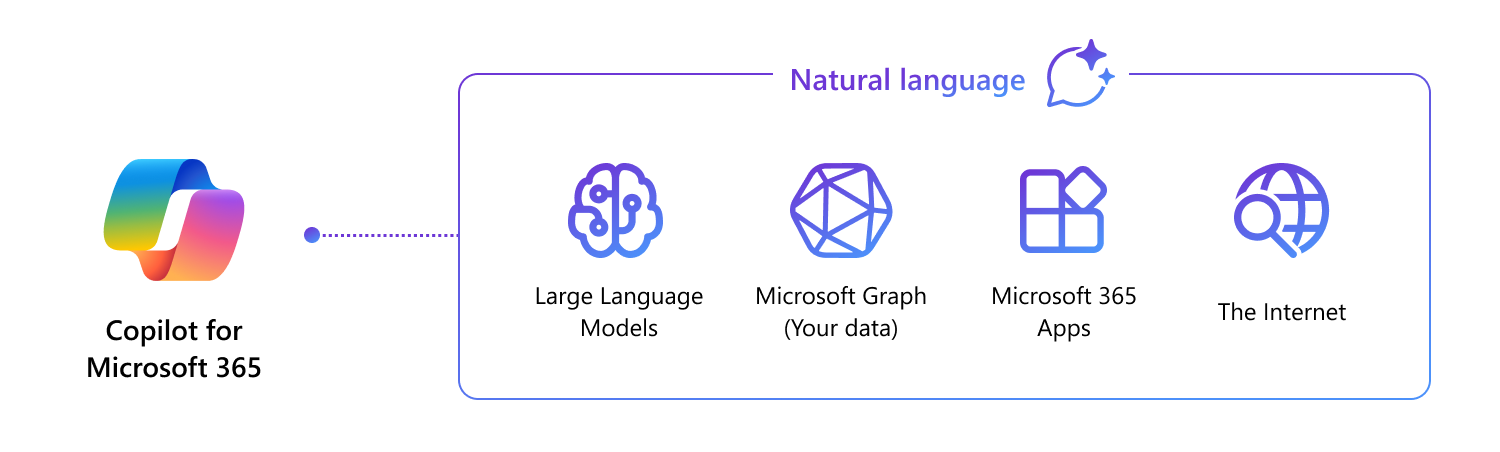
source: [https://learn.microsoft.com/de-de/microsoft-365-copilot/extensibility/](https://learn.microsoft.com/de-de/microsoft-365-copilot/extensibility/?ref=blog.bajonczak.com)
# The Idea
So hey we now can try to identify which solution fits for us, but luckily Microsoft published a nice helper diagram to get the right choice of extension.
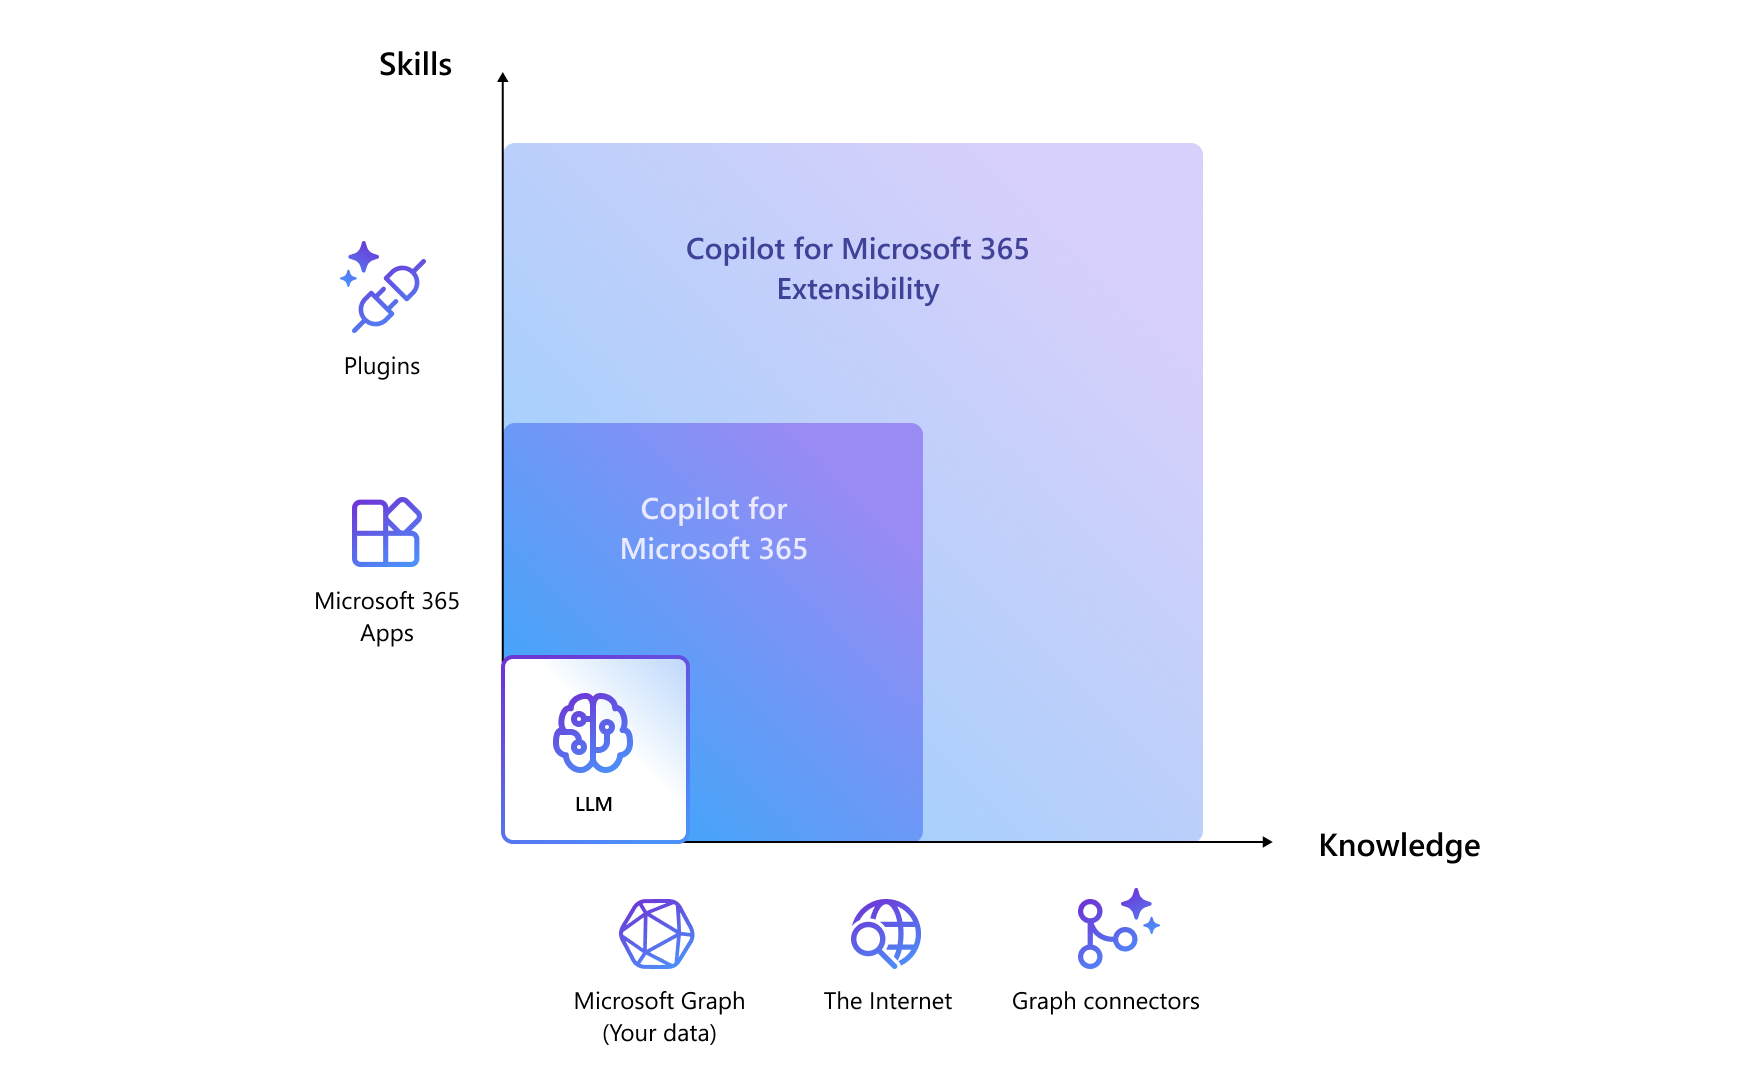
source: [https://learn.microsoft.com/de-de/microsoft-365-copilot/extensibility/](https://learn.microsoft.com/de-de/microsoft-365-copilot/extensibility/?ref=blog.bajonczak.com)
In my case, I use a plugin. The knowledge will be available in the SAP System, so I need a skilled extension. For this, the diagram tells me that I need a Plugin. So we need a Plugin for Teams.
# Install Prerequisites
Before we can start, we need some requirements
- [Visual Studio Code](https://code.visualstudio.com/Download?ref=blog.bajonczak.com)
This will be your IDE. If you don't have it. Go get it! ;)
- [Teams ](name: Teams Toolkit Id: TeamsDevApp.ms-teams-vscode-extension Description: Create, debug, and deploy Teams apps with Teams Toolkit Version: 5.8.0 Publisher: Microsoft VS Marketplace Link: https://marketplace.visualstudio.com/items?itemName=TeamsDevApp.ms-teams-vscode-extension)Toolkit
This Visual Studio Code extension will allow you to create an extension (in various ways) for your Teams. **Please note that you must use the prerelease version**.
- Fun
Yep, you need some fun ;)
# Create our first Extension
So we are creating our first extension. So to integrate our Data into Teams, it is the best way to create a Teams bot app. For this, there exists a nice wizard that will guide you to the creation steps. After that, it will bootstrap the app itself. Look here
0:00
/0:41
1×
You can now start the application itself by starting it via the debugger tab. Here you have multiple options to debug. First, I suggest you do it in the test tool. This will open up a browser that will allow you to trigger your created extension.
"Wait a minute! We created only a bot?!"
Yes, that's true. You created a bot, and that bot will be asked by your copilot for results (more on it later). But that is the first magic behind the extension of the copilot itself.
# The Project structure
So before we start, it is necessary to understand the project itself. Because there are some important things.
From top to bottom.
In the **appPackage** folder will be the result of the app. It will output the Extension file for teams and also the webapplication in which you have the logic to get the data from the system itself. It also contains the **manifest.json**. This JSON will be important for the copilot itself. But more on it later.
The **env** folder contains the env settings in this you will set the environment-specific configuration like API key and so on.
Next the **infra** folder. this contains the complete biceps definition for the required Azure infrastructure. At the starting point, it will create a web application together with an app service and it registers also an Enterprise Application into the EntraID.
In the **src** folder will be the complete application source. In this will be the message handler located that... yeah... handles the message itself from the system.
Next, there are some configs for configuring the application. Also, it contains the package.json for npm and the configuration for the build process (teamsapp\*.yml)
## Manifest.json
This file is the central control file that will be used from the M365 Copilot. Let me share the basic implementation:
```json
{
"$schema": "https://developer.microsoft.com/en-us/json-schemas/teams/v1.16/MicrosoftTeams.schema.json",
"manifestVersion": "1.16",
"version": "1.0.0",
"id": "${{TEAMS_APP_ID}}",
"packageName": "com.microsoft.teams.extension",
....
"name": {
"short": "BlogDemo${{APP_NAME_SUFFIX}}",
"full": "Employee HCM Bot"
},
"description": {
"short": "Getting details about Employes in the company",
"full": "Plugin get skills and employees / members /colleagues and alsocurriculum vitae. It also delivers the skill level and availability for each entry. Together it will results the price / loan per hour."
},
"accentColor": "#FFFFFF",
"bots": [
{
"botId": "${{BOT_ID}}",
"scopes": [
"personal",
"team",
"groupchat"
],
"supportsFiles": false,
"isNotificationOnly": false
}
],
"composeExtensions": [],
"configurableTabs": [],
"staticTabs": [],
"permissions": [
"identity",
"messageTeamMembers"
],
"validDomains": []
}
```
So that's the default one. But please note the description part
````json
"description": {
"short": "Getting details about Employes in the company",
"full": "Plugin get skills and employees / members /colleagues and alsocurriculum vitae. It also delivers the skill level and availability for each entry. Together it will results the price / loan per hour."
},
```
It is required to be very precise about the description of your plugin. Because this will analyze the copilot. It decides on the user input if it will use your plugin.
So for example when the user inputs the following
"Tell me which use will have the most common SharePoint developing skills and give me the price per hour for him/her".
It will then recognize (against the description) that the copilot must use this bot to get the required data. Sure it will ask others too, but this is one of them.
Other example. When the user asks "Tell me who is not in a project at the moment" it cannot recognize your plugin to ask, because the description will not tell that it can deliver the answers to this question. So please think about well-descriptive descriptions.
# How the Teams bot works
When you look into the index.ts file, you will see this:
deliver
Basically, it will host an API endpoint called /API/messages. It will take the request and will process it via the adapter instance.
"How will the bot know that it must send the data to this Endpoint?"
Good question. Do you remember the infra folder? In this will be done some registration, one of them is a bot registration. It will tell the bot registration to send a call request to this particular endpoint. It's like a wrapper for the bot. So it will know in a central instance where the endpoint of the application will be later on.
So what will be received through the bot?
# Let's do a first try
Let's create a breakpoint at this point and after that hit F5\.
through
It will start the local test tool after doing some registrations
test
Now let's enter some prompts. Try out "Say Hello"
Now the breakpoint will be hit, and when you jump to the next line, it will then read out the prompt. In this case "Say Hello"

In the example code, it will do some checks against local data and will return a text result between "" - tags.
So your data will be wrapped in this later on. After that, it will be sent to the LLM and it will generate a descriptive answer.

"Okay, it's only a bot?"
Jep, that's a personal bot, chatbot/team bot. Nothing more for this example. So we need some more data. Especially from SAP HCM.
For that, I create a new Service Class to fetch data from the SAP Endpoint itself. It's called SapHcmService. This contains a method called fetch and will return an array of personal information
```TypeScript
public async Fetch(maxHourlyRate: number, requiredSkills:string): Promise {
let result: PersonalInformation[] = [];
.....
return result;
}
```
This will then fetch the required data from the SAP Endpoint. I don't want to go too deep in the detail here, because every SAP System contains other data structures (depending on their customization). Let's take this here as it is. It will respond to me with the following data structure
```typescript
export interface Skill {
name: string,
matchscore: number
}
export interface PersonalInformation {
Firstname: string,
Availbility:number,
LastName: string,
Cv: string,
SkillsMatches: Skill[]
}
```
In the next blog post, I will describe how the magic happens and I extract the data from the tender description and try to figure out the best profiles with it.
# Summary
Oh wow... you made it through this first post. So you learned many new things. One of them is how the Copilot itself works.
Next, you learn how to create a plugin from scratch and how the bot can be tested.
In the next blog post, I will go deeper with extracting the required data from the tender description and use it against the SAP System.
Please leave a comment about this article and what are missing, so that I can add it here and help you out.
### A PowerShell-Powered Approach to Automated Monitoring and Troubleshooting
URL: https://blog.bajonczak.com/getting-insights-into-flow-history/
Last updated: 2024-05-17T11:00:01.000Z
Every administrator knows the problem, flows... They are hard to administer. The most common problems with Microsoft flow are
- Failing connections
- Failing runs (due to errors in the flow itself)
So how can we get an automatic insight into it?
# Monitoring Flows
Yes, that sounds simple. But hey it's not very well documented. Sure you can iterate through the complete UI and click every day into the flow details page and hope that you can get an error like this:
But seriously, nobody wants to check it every day or every morning. So there must be a smarter solution for this. For this PowerShell comes to the resqueue. So let's build a small function that will check the last flow run for a failing or a successful run. At first we need to import the required cmdlets with
```powershell
Install-Module -Name Microsoft.PowerApps.PowerShell -Scope CurrentUser -AllowClobber
Install-Module -Name Microsoft.PowerApps.Administration.PowerShell -AllowClobber
```
Now after the cmdlets are imported, you will be able to access the powerplatform stuff. But wait there is one more thing.... authentication.... Before we can start we must authenticate against the platform like this:
```powershell
$pass = ConvertTo-SecureString "SUPER SECRET PASSWORD" -AsPlainText -Force
Add-PowerAppsAccount -Username User@yourdomain.com -Password $pass
```
So now it's time to get operative. I created a checkfunction like this:
````powershell
function CheckRun($flowName)
{
$flow = Get-Flow -FlowName $flowName
Write-Host "Checking " $flow.DisplayName "..." -NoNewline
$runs = Get-FlowRun -FlowName $flowName
$Sorted = $runs | Sort-Object -Descending $_.StartDate
if ($flow.Enabled -eq $true)
{
if ($Sorted -eq $null)
{
write-host "never run"
}
else{
if ($Sorted -ne $null -and $Sorted[0].Status -eq "Failed")
{
write-host "Failed" -ForegroundColor Red
}
else
{
write-host "Looks good" -ForegroundColor Green
}
}
}else
{
write-host "Deactivated" -ForegroundColor Yellow
}
}
```
This will take as parameter the internal flowname (mostly a guid). Then it will fetch the flow definition itself. This will be done only to get the displayname to print out. After that I will fetch the flow runs of the flow itself.
At least I do some checks against the flow run, especcially if the lst run was sucessfull or not. Also it will wirte a message when the flow is deactivated.
Now it's time to iterate through your defined flows, fo this you can use the get-flow cmdlet and do a foreach like this
```powershell
$flows = Get-Flow
foreach ($flow in $flows)
{
CheckRun -flowName $flow.FlowName
}
```
The result looks like this

Cool! So instead wo clicking through the portal, you will get an nice output. Now you have an automated script to check against the flow run.
# Monitor Connections
At the first screenshot we saw only a failing connection. Yes it can be an error but you, we all know. The connections are the most common error sources. So for this we can check the connections separately. I creates this script to check the connections
```powershell
function CheckConnections()
{
$connections= Get-PowerAppConnection
foreach ($connection in $connections)
{
Write-Host "Checking Connection" $connection.DisplayName " (" $connection.ConnectionName ") !..." -NoNewline
if ($connection.Statuses[0].status -eq "Error")
{
Write-host $connection.Statuses[0].error -ForegroundColor Red
}
else
{
Write-host "OK" -ForegroundColor Green
}
}
}
```
This will get all connnectison for that the current logged in user has access to. So it will iterare through each connection and check against the last status entry. If there is an error existing, it will output the error itself. This will look like this:

So now you are in full monitoring "control" at you flows as admin.
# Restrictions
Actually you must login as a user that has access to all connection and flows that you want to monitor. There is acutally no possibility to access all flows in your organistion via powershell. Beacuse you cannot pass any service principal identity to the cmdlets. But maybe it will be implemented into the future.
# Final words
In conclusion, the challenges of administering Microsoft flows, especially dealing with failing connections and runs, are well-known to every administrator. While the concept of monitoring flows for automatic insight seems straightforward, the lack of comprehensive documentation makes it a daunting task. Clicking through the UI daily is impractical, prompting the need for a smarter solution.
Enter PowerShell, a powerful tool for automating such tasks. By building custom functions, like the one presented for checking flow runs, administrators can efficiently monitor their flows' statuses. With a structured approach and the right cmdlets, PowerShell enables seamless integration with the Power Platform, facilitating effective flow management.
The script not only checks for failing runs but also ensures visibility into connection errors, which are often the primary culprits behind flow failures. By providing detailed insights and color-coded outputs, administrators gain full control over their flows' health without the need for manual intervention.
However, there are limitations, notably the requirement for user-level access to all connections and flows for effective monitoring. The inability to access all flows in an organization via PowerShell is a current drawback, but there's hope for future enhancements to address this limitation.
In essence, while challenges persist, leveraging PowerShell for flow monitoring offers a practical and efficient solution, empowering administrators to stay on top of their flow operations with ease and confidence.
### Quick Tipp: See pull request comments in Visual Studio
URL: https://blog.bajonczak.com/quick-tipp-see-pr-comments-in-visual-studio/
Last updated: 2024-05-10T11:00:32.000Z
Everyone who works with pull requests knows the process. If there is any PR, then you must go onto the portal (e.g. Github) look at the PR, and there are sometimes some comments in it to resolve.
Instead of navigating to the portal itself, you are now able to vie it in visual Studio right now.
### **Get Started with Pull Request Comments**
> **Please make sure that you have the Version 17.10 Preview 2 or later installed and you are logged in with your github or azure devops account**
First you must make sure to have the feature enabled in Tools > Options > Preview Features > Pull Request Comments.
Next you can checkout a branch that have an active pull request on it and wait a little bit for the "Show comments in files" Message in the infobar
Alternatively choose Git in the top-level menu > GitHub or Azure DevOps > Show Comments in Files
Now you are able to see your comments in the active file and navigate between them from the comment itself or the toolbar.
You are also be able to navigate between the commants by yourself, or you can use the navigation menue at the top

Please note, you cannot view deleted files or any file types that are not supported by Visual Studio Solution Explorer.
### Streamlining Identity Management: Transitioning from SAP IDM to Azure Entra ID
URL: https://blog.bajonczak.com/extend-sharepoint-on-premise-with-jwt-bearer-authentication/
Last updated: 2024-05-03T11:00:27.000Z
A couple of weeks ago, the message goes around that SAP [will discontinoue the support for his own IDP (SAP IDM) and set it's end of live to 2027](https://kpmg.com/ch/en/blogs/home/posts/2024/03/the-end-of-sap-identity-management-what-now.html?ref=blog.bajonczak.com#:~:text=SAP%20has%20recently%20announced%20that%20its%20solution%20for,extend%20support%20until%202030%20as%20a%20one-time%20contract.).
So what now? What are the alternatives? HELP?
# The Soution Auzure Entra ID
Azure Entra ID and SAP IDM (Identity Management) are both solutions aimed at managing digital identities within organizations, but they differ in their approaches and features.
Entra ID offers a modern and streamlined approach to identity management, focusing on simplicity, security, and user experience. Its benefits include:
1. Simplicity: Entra ID provides a user-friendly interface for both administrators and end-users, making identity management tasks intuitive and efficient.
2. Security: The system employs advanced encryption techniques and robust security protocols to safeguard sensitive personal information, reducing the risk of identity theft and unauthorized access.
3. Flexibility: Entra ID can adapt to the evolving needs of organizations, supporting various authentication methods and integration with existing IT infrastructure.
4. Scalability: With its scalable architecture, Entra ID can accommodate organizations of all sizes, from small businesses to large enterprises, without compromising performance or security.
5. Cost-effectiveness: Entra ID offers competitive pricing models and reduces administrative overhead, resulting in cost savings for organizations.
# How to Integrate Entra ID
Here is a small step-by-step tutorial on how to integrate Entra ID:
Create a Corporate Identity Provider (Corp IdP): This represents your Microsoft Entra ID instance. Click on Identity Provider -> Corporate Identity Providers.

Now set the Display Name and choose the Identity Provider "Microsoft ADFS / Azure AD (SAML 2.0)

Next, you must download the SAML Metadata File (important for the Azure part) from the SAP Cloud Identity Services (SAP CIS) following this path:
Applications and Resources -> Tenant Settings -> SAML 2.0 Configuration -> Download Metadata File
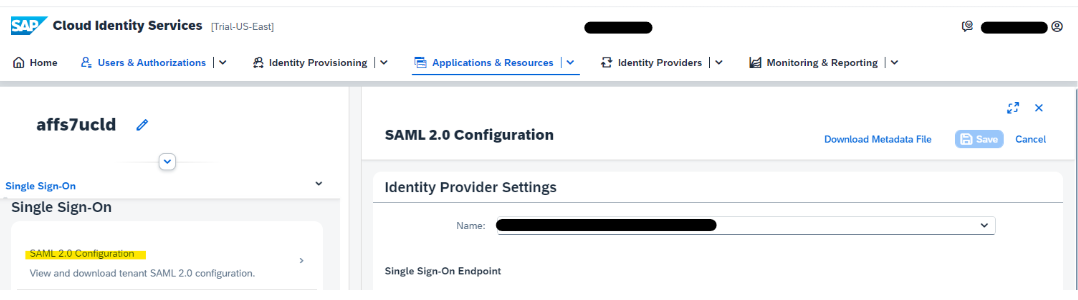
In SAP CIS now Navigate to Identity Providers -> Corporate Identity Providers -> Microsoft Entra ID Identity Provider that you created -> SAML 2.0 Configuration -> Upload Metadata File
WAIT WHAT? Which metadata file? This is the part where Entra ID comes into the game.
So leave it open and open up in a new tab the [Azure Portal](https://portal.azure.com/?ref=blog.bajonczak.com). Next, you must select your Entra ID

In Entra ID you must create an Enterprise Application

A Galery will open up, and it presents many predefined integrations, also for all SAP modules. Now search for "SAP Cloud Identity Services" and select this

We will use the SAML Metadata file to set up the trust between Microsoft Entra ID and SAP Identity Authentication Service (IAS). Click on Setup Single Sign-On.

Then choose SAML
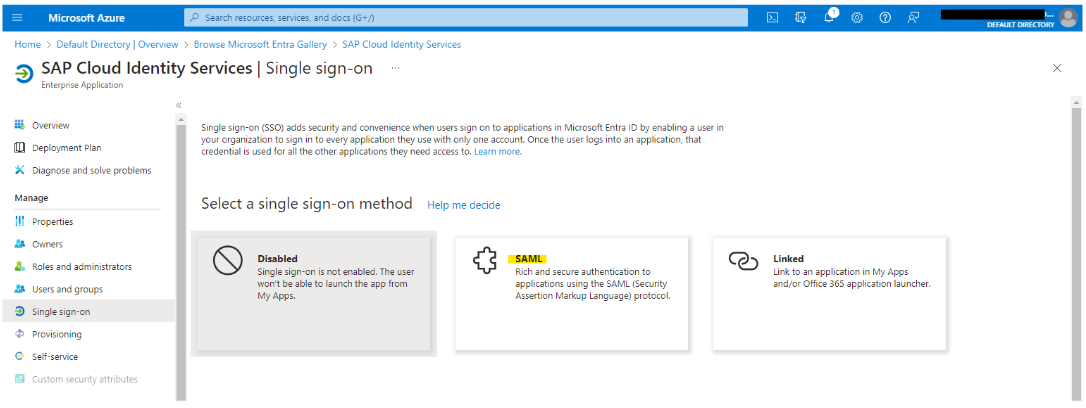
And now you can upload the previously downloaded metadata file from the SAP portal

After the upload, the settings are automatically filled out. Now you can download the "Federation Metadata XML"

This file you must upload into the SAP Portal (in the opened previous tab)
Done!
Finally, you can test the Application to check if the login will work. So when you next will log in to your system. You will be redirected to the Entra ID, to sign on, and after a successful login, you will be redirected as an authenticated user into the SAP System.
Easy huh?
# Conclusion
Integrating Microsoft Entra ID (Azure AD) with SAP Identity Authentication is a strategic move for organizations looking to streamline identity management processes, enhance security, and provide a seamless experience for users.
You can now build a robust and future-ready identity management ecosystem.
### Quick Tipp: Dev Tunnels with Visual Studio
URL: https://blog.bajonczak.com/dev-tunnels-with-visual-studio/
Last updated: 2024-05-01T11:00:39.000Z
Developing in Emulators that must access your local hosted webservice can be a pain in the ass. A solution to solve this solution is to use devtunels. Just creating a temporary or persistent tunnel with this submenue.
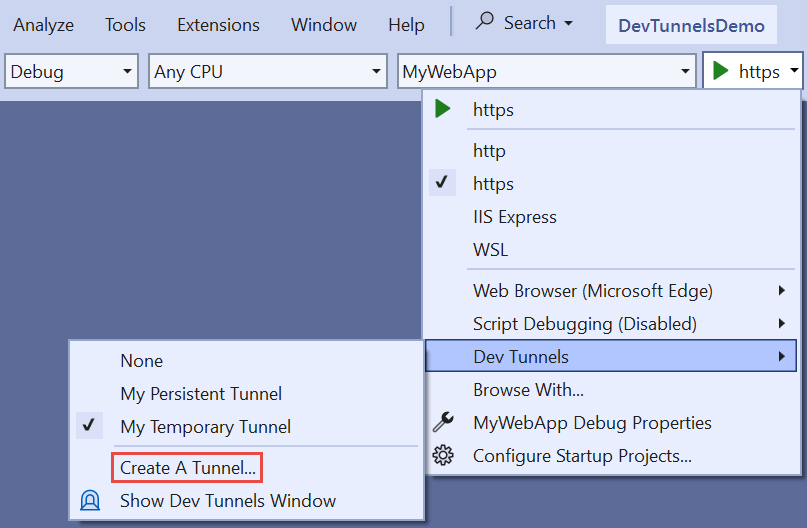
Then you can every time access this via:
### Unveiling O365 Tenant Insights: Using Python and Azure Graph API for Seamless Inventory Monitoring
URL: https://blog.bajonczak.com/m365-inventory/
Last updated: 2024-04-25T07:16:25.000Z
I faced the small problem that I must create an inventory for an O365 Tenant. The problem is that it must be aggregated by the department of the user. So that the cost centre can pay for the licences.
So the target goal is to generate an accumulated list that contains the number of licences by the licence type and also export a plain list with the user and its assigned licence.
# Dev Workspace
Actually, I am fascinated by python, so why not use it for local development? For generating and testing the scripts I use a jupyter notebook. This extension is also part of Visual Studio code. So It's easy to start with this.
To get the data I use the Office Graph. With this, I will get the complete information about every user and its assigned licences. So let's create a new Jupyter Notebook in vscode. Just create the filename Inventory.ipynb. It automatically opens the notebook mode.
At first, we need some packages for this you will do a pip to install them
```python
pip install azure-identity azure-mgmt-costmanagement azure-mgmt-billing azure-mgmt-subscription azure-mgmt-resource msal plotly nbformat
```
This will install the requirements to work with the graph api and do some authentication stuff and so on.
Then create a new code section insert the variables for referencing your tenant and use the authentication
```python
AZURE_TENANT_ID="........"
AZURE_CLIENT_ID="........""
AZURE_CLIENT_SECRET="........"
```
For this, you must create a new app registration in your Entra ID, you can read about this [here](https://learn.microsoft.com/en-us/entra/identity-platform/quickstart-register-app?ref=blog.bajonczak.com).
You will need the following permissions (exclude the first one for ReadWrite, it's used fo another use case for me):
Now we need a small helper function to obtain a JWT - Token from the Entra ID. This will be needed to get the required access to the Graph data.
```python
import os
import time
from azure.mgmt.consumption import ConsumptionManagementClient
from azure.mgmt.resource import ResourceManagementClient
from azure.mgmt.billing import BillingManagementClient
from azure.identity import ClientSecretCredential
from azure.mgmt.subscription import SubscriptionClient
import msal
def GetAccessToken():
authority = f"https://login.microsoftonline.com/{AZURE_TENANT_ID}"
scopes = ['https://graph.microsoft.com/.default']
app = msal.ConfidentialClientApplication( AZURE_CLIENT_ID, AZURE_CLIENT_SECRET, authority=authority)
result = app.acquire_token_for_client(scopes)
access_token = result['access_token']
return access_token
```
Now the basics are set. Next, I will obtain all licenses from the complete organization by using the /subscribdesSkus endpoint. This endpoint will give us information about which licenses is available in the tenant and how many licenses they have (no matter if they are assigned or not).
```python
import requests
access_token = GetAccessToken()
url = "https://graph.microsoft.com/v1.0/subscribedSkus"
headers = {
"Authorization": "Bearer " + access_token
}
response = requests.get(url, headers=headers)
data = response.json()
licences=[]
for sku in data['value']:
licences.append( {
'SKU': sku['skuPartNumber'],
'ID': sku["skuId"],
'consumed': sku['consumedUnits'],
'totalEnabled':sku["prepaidUnits"]["enabled"]
# Fügen Sie hier weitere gewünschte Eigenschaften hinzu
})
```
The result looks like this
```json
[
{
"SKU": "VISIOCLIENT",
"ID": "c5928f49-12ba-48f7-ada3-0d743a3601d5",
"consumed": 16,
"totalEnabled": 16
},
{
"SKU": "STREAM",
"ID": "1f2f344a-700d-42c9-9427-5cea1d5d7ba6",
"consumed": 33,
"totalEnabled": 10000
}.....
]
```
you see that I acquired the total enabled units and the assigned licenses in this organization. Next I must get all users to gather the information about the department
```python
def GetAllUsers():
url = "https://graph.microsoft.com/v1.0/users?$top=999"
headers = {
"Authorization": "Bearer " +GetAccessToken()
}
response = requests.get(url, headers=headers)
userdata = response.json()
print(userdata)
users=[]
for sku in userdata['value']:
users.append( {
'name': sku['displayName'],
'ID': sku["id"]
})
return users
```
When I execute this, the result looks like this
```json
[
{
"name": ".....@emea.teams.ms",
"ID": "e3baf8b7-......."
},
{
"name": "demo, users",
"ID": "424378f3-......"
}...
]
```
So you see that's simple, but uhh? Where is the department? So a little bit of investigation later.. I figured out that the department must be fetched for each user separately with the /department route. So I must iterate through each user to get this data. But while I iterate each user, I wanna see which license is assigned to each user. So I fetch the assigned license with the /license details route. The complete code looks like this:
```python
users= GetAllUsers()
assignedlicences=[]
for user in users:
id = user["ID"]
url = f"https://graph.microsoft.com/v1.0/users/{id}/department"
headers = {
"Authorization": "Bearer " + GetAccessToken()
}
response = requests.get(url, headers=headers)
departmentData = response.json()
department="N/A"
if 'value' in departmentData:
department=departmentData['value']
else:
department="N/A"
url = f"https://graph.microsoft.com/v1.0/users/{id}/licenseDetails?$select=skuPartNumber"
headers = {
"Authorization": "Bearer " + GetAccessToken()
}
response = requests.get(url, headers=headers)
data = response.json()
for sku in data['value']:
assignedlicences.append( {
'skuPartNumber': sku['skuPartNumber'],
'userid': user["ID"],
'Name': user["name"],
'Department': department
})
```
The result looks then like this:
```json
[
{
"skuPartNumber": "FLOW_FREE",
"userid": "XXXXX-29ff-4475-a9f9-0eb0ecf6ea90",
"Name": "Dummy, 1",
"Department": "Department 1"
},
{
"skuPartNumber": "ENTERPRISEPACK",
"userid": "YYYYYY-29ff-4475-a9f9-0eb0ecf6ea90",
"Name": "Dummy, 2",
"Department": "Department 2"
}...
]
```
Nice, now I have the license information for each user and also the department for this. So I can now export this plain list into a csv file to enable the back office to segmenting the bills into departments. To export the data into a file, the code looks like this
```python
import csv
csv_file = "export.csv"
fields = ['skuPartNumber', 'userid', 'Name','Department']
# CSV-Datei schreiben
with open(csv_file, mode='w', newline='',encoding='utf-8') as file:
writer = csv.DictWriter(file, fieldnames=fields)
# Header schreiben
writer.writeheader()
# Datensätze schreiben
for license in assignedlicences:
writer.writerow(license)
```
After that, the export is done into the file export.csv and the content looks likt this
```csv
skuPartNumber,userid,Name,Department
FLOW_FREE,XXXXXXX-29ff-4475-a9f9-0eb0ecf6ea90,"Dummy, 1",Department 1
ENTERPRISEPACK,XXXXXXX-29ff-4475-a9f9-0eb0ecf6ea90,"Dummy, 1",Department 1
EMS,YYYYYYYYY-5dd2-4a08-9583-098147279e55,"Dummy, 2",Department 2
```
# Final Words
In the quest to streamline O365 Tenant inventory management, I confronted the challenge of aggregating data by user departments for efficient license allocation. Harnessing the versatility of Python and the Office Graph API, I embarked on a journey of data retrieval and integration. With Jupyter notebooks as my trusty companion, I meticulously retrieved subscribed SKUs, delved into user profiles, and seamlessly linked license details with departmental affiliations. Armed with comprehensive insights, I culminated the endeavor by exporting structured data for actionable insights, turning a seemingly small problem into a testament to the power of innovation and technology.
### Quick Tipp: Enabling Build Acceleration in Visual Studio
URL: https://blog.bajonczak.com/quickie/
Last updated: 2024-04-22T10:00:03.000Z
Build Acceleration is a technique to build only projects that have modifications. It will skip the unchanged projects. This increases your development cycle, especially in larger projects.
Just add
_This post is for subscribers only._
### VS Code Remote SSH: Edit Files on a Linux Server
URL: https://blog.bajonczak.com/how-to-edit-files-with-visual-studio-via-ssh/
Last updated: 2026-08-13T04:03:37.000Z
I work at the moment on a small sensor extension for my homeassistant server (I will blog about this later on).
So I want to share my experience on how I develop an extension for this. So for clarification, my Homeassistant runs on a separate (small) Linux server without an attached monitor. So I must work "remotely".
# The requirements
A starting point is the homedirectory from the homesassistant server. Within there exists a folder called "custom\_components".
In that, there exists (depending on your installation) some directories.
Every folder represents a custom component (integration in Homeassistant). Just let open up the github\_custom integration. The content looks like this:
f
The following table will describe the files and what's the intent for this.
| Filename | Description |
| ------------- | ------------------------------------------------------------------------------------------------------------------------------------- |
| **init**.py | This file will be called on every startup, this can be empty when you want to separate the contents in other files (more on it later) |
| const.py | Here are some constants available, that will be used in other Python files |
| manifest.json | The manifest will describe some metadata like the name, the required dependencies, and so on |
| sensor.py | This file contains the definition for a sensor specification in this example. |
So Let's assume we have created the files somehow. So what is the best way to edit these files?
# The simple way: SSH
The easiest way is to use an SSH client (like putty). Just connect onto the server with this ssh client and you can edit on this server the files. You must choose an editor like vi (for pros) or nano (for noobs like me :D).
Editing with nano
The advantage of this is that you are working directly on the server and you can see the change (after reloading the config) directly in your system.
The disadvantage of this is that you cannot edit multiple files. Also copying and pasting some data between files is not easily possible.
# The Advantage way: Visual Studio code
So you can use Visual Studio code to connect via SSH onto the remote filesystem. For that, you must install the [remote Extension](https://marketplace.visualstudio.com/items?itemName=ms-vscode-remote.remote-ssh&ref=blog.bajonczak.com) in your Visual Studio code instance. After you have installed it, and you added a new SSH connection, you can then connect to the system like this
0:00
/0:19
1×
You see, it opens a new visual studio code instance that is connected to the target filesystem. Now you can open the files within Visual Studio code. This looks like this
0:00
/0:19
1×
Now you can edit onto the server within Visual Studio. You have also full access to the System itself (just keep in mind that you must pay attention to the access rights for the files to edit them).
The advantage of this scenario is that you now be able to edit multiple files. You can also format (identation) easily the files and you have a small intellisense support while you edit the files (if you have installed the correct extension).
# Conculsion
So this post will show you how to edit files remotely. But not every way will have only advantages, there are also downsides. So just keep in mind, that you must be comfortable with a solution. For my example, it worked very well, because I edited several configs on my server manually. Instead of using the ssh client, I use Visual Studio code for now.
*I keep a short overview of the practical posts that still get the most use here:* [*Technical Field Notes*](https://blog.bajonczak.com/technical-field-notes/)*.*
### AI-Powered Solution for Noisy Neighbors
URL: https://blog.bajonczak.com/denoise-neighbour-mosuc/
Last updated: 2024-03-26T19:00:03.000Z
My problem was in the past, that we had some neighbors in the summer that would listen to some loud music. Especially at night. So music at night and me that I must work on the next day are together very poisoned.
Calling the police won't help a lot, because they start an hour after they visit the music again. So I decided to analyze the problem. After a while, I figured out that they use a Bluetooth speaker so that's a cool starting point
Let's assume what we have:
1. A handful of music recordings
2. A developer with the power of KI and solder experience
3. A collection of devices and utilities
4. A goal
# My Goal
Before we get into deep technical details I will set my target goal.
I want to keep automation that will send an interference signal to the Bluetooth device of the target. So it must listen to the sounds nearby and must identify the music style and start to disturb the Bluetooth connection.
# My Bucketlist
Actually, there is an ESP representation in the processing, but to keep it very simple I use a Raspberry PI.
Yep... Why?
_This post is for subscribers only._
### Mastering Security checks easily with the power of Bitmasks
URL: https://blog.bajonczak.com/mastering-bitmasks/
Last updated: 2024-03-15T12:00:22.000Z
You know, when you are developing a System for more than one user, you will be faced with the Endboss... Access rights.
I saw several code implementations like If else constructs that were multiple rows long, sometimes encapsulated into a single function but hevy to maintain. But there is a simpler solution that will I show you in this blog post.
# Some definitions about security
There are to definitions of security
- Authentication
- Authorization
They are very similar but have different meanings
First of all Authentication. This defines the access to the system itself, so when you enter a username and password it will check against an Identity Provider (IdP) your credentials if you have general access. It will send you back an answer (like a cookie, JWT-Token, or whatever) if the user is authenticated or not.
Authorization is another form, this will happen after the Authentication. Because it will check the Assigned Access rights and it will get information if the user has access or not.
# Implementing Access rights
So in most cases, I saw in several implementation acorss the developerverse that you get a large if els construct. like this
```c#
public bool CheckIfHasWriteAcess(){
if (Accesslevel.contains("Admin"))
{
return true
}
if (Accesslevel.contains("Reader"))
{
return false
}
if (Accesslevel.contains("Writer"))
{
return true
}
return false
}
```
So that is simple for this case, but what if when your system generally get a new Acceslevel like a "Guest" Role? Then you must apply this to all access checks and modify the if else construct. But This can be faulty and breaks the system completely in the worst-case scenario. It will also make the access level check more complex.
# Bitmask to the rescue
To avoid the complexity of this, you can use the bitmask implementation. Now I can see your reaction
But this is not hard to understand. So let's take the following example, you have four different access rights
- Reader
- Writer
- ExternalViewer
- Admin
Let's assume you map this to a bit of representation like this:
- Reader => Bit 1
- Writer => Bit 2
- ExternalViewer => Bit 3
- Admin => Bit 4
Now you have the following representation
```
0 0 0 0
Reader Writer ExternalViewer Admin
```
So every access right will be represented as a bit. When you give one person the reader and writer access the bit representation looks like this
```
1 1 0 0
Reader Writer ExternalViewer Admin
```
So it changes the first both bits to 1\. The huge advantage for this ist that you can store only one number into a database. Because the bit combination will completely unique.
Cool eh?
# How I can extend with new rights?
That's very easy, just add a new bit at the last position. Let's assume you want a new external contributor access right. Then you can add it to the end like this
```
1 1 0 0 0
Reader Writer ExternalViewer Admin ExternalContributor
```
You'll see, that when you add this new role, the previous behavior won't change anything, but you will extend the role possibilities for now with a new role.
Now, if you can set these rights, you must do something to get a smooth check. So here comes the
# Checking the Access rights against a given set
Technically we get one access level to check, so how we check it against the level?
technically we make a bitwise AND check against the existing access rights to the accesslevel to check. So let me explain
You as a user have the access level above
```
11000
```
Now you want to check if the access right contains the right writer. For this you will bitwise AND the to check right
```
11000 &
10000
_____
10000
```
The result will be the checked access. So when you make an AND combination with the desired access level to check and the given access you will get the at minimum the same right back otherwise you can guarantee that the access level is not given.
You don't believe me? So let's check against two other levels
```
11000 &
10100
-----
10000
```
for this example, we checked if the user has Reader and ExternalViewer rights. It will result only on the Reader access level. The ExernalViewer access level will not result, because the user won't have it right now.
So far to the theory, but how does it looks in c#?
So let's look into the code
# The code
In c# we use an enumeration like this
```
[Flags]
public enum Rights
{
Reader=1,
Writer=2
ExternalViewer=4,
Admin=8
}
```
\>Pleases note, that you set the Flags-attribute to the enum. This helps the compiler to know that it will be used asflags.
Now lets get the code to set the access level to a property, vor example we will set the access level to Reader and Writer.
```
public Rights rights= Rights.Reader | Rights.Writer;
```
Now the code to check it against an access level
```c#
public bool HasAccess(Rights rightsToCheck, Rights requiredLevel)
{
return (rightsToCheck & requiredLevel) == requiredLevel;
}
bool hasAccess= HasAccess(rights, Rights.Reader);
```
The result will be true in the hasAccess variable because we set it before.
When you need more access level, you add it to the enum and please notice, that you must assign a value powered by 2\.
# Final words
So in fact you can master this Scenario very easily, just use one enumeration and use the power of the binary calculation. So I don't think in my past, that it was very important in my life. So feel free to try it out and use it for your own code and authorization check.
### Heating Up Innovation: Beekeeper's Guide to get Honey fluent
URL: https://blog.bajonczak.com/miniatur-heater-for-honey/
Last updated: 2024-03-08T08:35:36.000Z
I am a Beekeeper, so this is my secret identity. Darknet Beekeeper programmer ;). So everyone loves honey.... except me. Don't ask... let's focus on the problem.
In my family they love honey, but only the fluent one, not the nutella-like one. So There is one trick. The Honey must be heated but not above 40°C. So I can use a complex circuit to control a heating fan or I can but it every few weeks into the oven for 30°c (yep, that is enough) to melt the honey. But hey I am an IT Guy and hey I have some parts in my shelf. So let's put some things together.
# The parts
First, I must find a case to store the Glas of honey, for this, I use a box called "apidea" which can be bought for a few bucks at a special beekeeper store or on Amazon like this [https://amzn.to/3ToxcDv](https://amzn.to/3ToxcDv?ref=blog.bajonczak.com).
Also, we need a temperature sensor, for this, I use the DSB like [this](https://amzn.to/3P56VHx?ref=blog.bajonczak.com). I use these because it contains a capsule so that moisture does not affect any error measures.
Next, we need a WemosD1 Mini, that will be used as a control unit. It does not have any special requirements you can also use another ESP device but for now, I use the Wemos D1 like [this](https://amzn.to/42V65my?ref=blog.bajonczak.com).
So the next question is, how I can warm up the "chamber" in the apidea? For this I use a [Peltier](https://amzn.to/3ThvRhI?ref=blog.bajonczak.com) element.
# The Peltierelement
A Peltier element, or thermoelectric cooler, operates on a fascinating principle called the Peltier effect. Imagine a small, flat device consisting of two different semiconductor materials joined together. When a direct electric current is passed through this device, something remarkable happens.
At the junction where these two materials meet, heat is either absorbed or released. It's like a miniature heat pump: when the electric current flows in one direction, heat is absorbed at one side (which we call the cooling side) while simultaneously, an equal amount of heat is released at the other side (the heating side). Now, if we reverse the direction of the electric current, the heat absorption and release process also reverse.
In essence, the Peltier element offers a compact, solid-state solution for managing temperature, this will be perfect for the current project to heat up the chamber to the required temperature.
# The voltage dilemma
You can run the component with the 3.3 Volt from a GPIO. But that is not enough and the element will not become hot enough. So you must use the 5 v pin from the wemos. But you cannot activate or deactivate this bin, for this you must use a transistor circuit to control the heating. Because when you heat the complete time it will get too hot inside the chamber. I use the transistor S8050 that can be ordered [here](https://amzn.to/3wDXcBK?ref=blog.bajonczak.com).
# The Wiring
The wiring is simple like this below:
The Peltier element will be connected with the S8050 transistor. The transistor ermitter itself we connect to the GPIO 1 pin from the wemos.
The Temperatur sensor will connect the data line to the GPIO 2Pin. The rest will be wired up to the power and ground. So this will be all wiring for this. Finally we connected the DSB Sensor and the Peltier element to the wemos.
# Why a temperature sensor?
So you may ask, why do I use a temperature sensor? So the Peltier element heats up to maybe 50-80° so to control the heat, I must measure it continuously to get the heat at about 35°.
# The code
Instead of writing C or arduino code for this, I will use ESP Home instead. This contains several predefined components to reuse for example the DSB sensor. To use the dsb sensor I will use this code
```yaml
sensor:
- platform: dallas
id: tempsensor
address: XXXXXXXXXXXXXXXXXX
name: "Temperature"
accuracy_decimals: 2
unit_of_measurement: °C
on_value_range:
- below: 34.0
then:
- switch.turn_on: pletier
- above: 35.0
then:
- switch.turn_off: pletier
dallas:
- pin: D6
update_interval: 5s
```
Please pay attention to the address, this must be replaced with the desired address from the dsb sensor. You will get it when you log in to the debug log of the esphome.
The definition will tell the sensor to measure every 5 seconds the temperature. If the temperature is below 34° it will turn on the Peltier element. When it is above 35° it will turn the Peltier off again.
The Peltier will be defined below
```yaml
switch:
- platform: gpio
id: pletier
pin: D1
name: "Heizung"
```
This will control the transistor at the GPIO 1 pin and together with the constraints above in the temperature sensor, it will be controlled with this.
# Behaviour at startup
When the device boots up, it will do nothing at first. So to prevent faulty heating I hook me into the bootup like this
```yaml
esphome:
name: honigschrank
friendly_name: Honigschrank
on_boot:
then:
- if:
condition:
sensor.in_range:
id: tempsensor
below: 34.0
then:
- switch.turn_on: pletier
else:
- switch.turn_off: pletier
```
You will see that I use the same logic as in the temperature sensor.
So you want a copy paste like code? Here it is
```yaml
esphome:
name: honigschrank
friendly_name: Honigschrank
on_boot:
then:
- if:
condition:
sensor.in_range:
id: tempsensor
below: 32.0
then:
- switch.turn_on: pletier
else:
- switch.turn_off: pletier
esp8266:
board: d1_mini
# Enable logging
logger:
# Enable Home Assistant API
api:
encryption:
key: "XXXXXXXXXXXXXXXXXXXXXX"
ota:
password: "XXXXXXXXXXXXXXXXXXXXXXXXXXX"
wifi:
fast_connect: true
ssid: !secret wifi_ssid
password: !secret wifi_password
manual_ip:
static_ip: 192.168.178.180
gateway: 192.168.178.1
subnet: 255.255.255.0
dns1: 192.168.178.1
ap:
ssid: "Honigschrank"
password: "1234567890"
captive_portal:
sensor:
- platform: dallas
id: tempsensor
address: 0xa401143bade7aa28
name: "Temperature"
accuracy_decimals: 2
unit_of_measurement: °C
on_value_range:
- below: 34.0
then:
- switch.turn_on: pletier
- above: 35.0
then:
- switch.turn_off: pletier
switch:
- platform: gpio
id: pletier
pin: D1
name: "Heizung"
dallas:
- pin: D6
update_interval: 5s
```
# The device in Action
So after I wired it all up, and flashed the firmware onto the device I put all it into the apidea box. This looks now like this
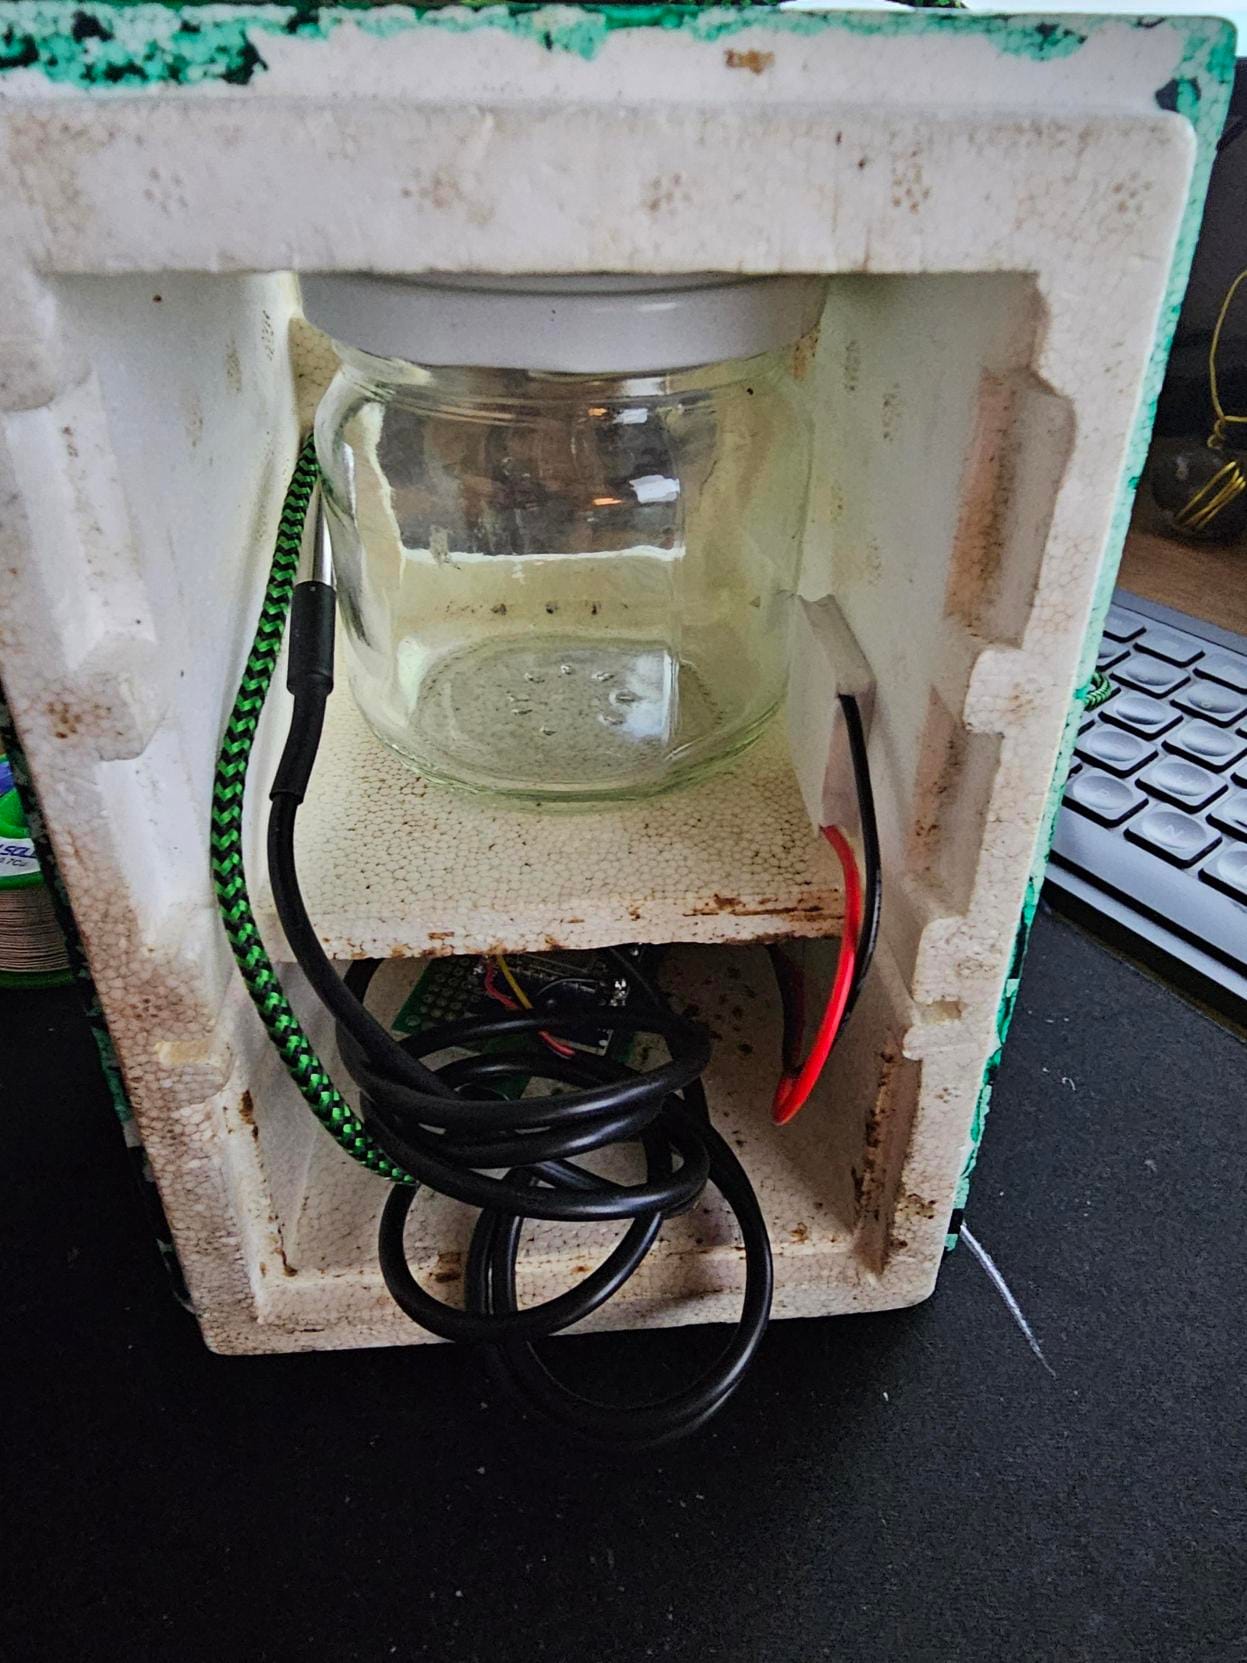
You will see on the right site the Peltier element, and on the left site the temperature sensor. The apidea contains a second smaller champer (normally for food) so I put in there the wemos d1 mini. After booting it up and waiting for a half hour I looked at the temperature diagram that homeassistant would record for me

Great! So now i have a small heater for my honey jar that keeps my honey fluent :).
# Other question. Can it cool down also?
Short answer? Yes! Because the Peltier element is on one side hot and on another side cool... very cool. So Just turn it around and you can cool the chamber down. But you must get the heat out of the chamber.
One solution is to take away the heat with a heat pipe like [this](https://amzn.to/4c05OCP?ref=blog.bajonczak.com). For this, you put the pipe onto the hot site and the heat will be moved out of the chamber. Of course, you must put the end of the heat pipe out of the chamber. Additional you can add a fan to move away the heat.
For example, it can look like this other project that I built in the past that will give you the imagination on how it looks like

# Conclusion
I know this is a very high amount of work, so the solution can be done by heating it up in a pot. But I wanted to use this to educate me. So in fact heating, it is possible to cool the entire chamber. So in fact you build a small fridge for a can or s.th. else. Just turn around the peltier and try to add a heatpipe to the hot side, because the other side is cool... very cool. So it will work when you get the heat out of the chamber.
I hope you like this post, please leave a comment if you have suggestions.
### Harnessing AI with Power Automate for Streamlined EMail Management
URL: https://blog.bajonczak.com/harnessing-ai-with-powerautomate/
Last updated: 2024-02-29T11:42:55.000Z
I think AI is now becoming a mainstream tool. So I wondered if it can help me in my daily business.
In may daily work I filter out the CC Mails, so that I am not getting distracted from any unimportant things. But what if it escalates and I did not recognize it? So for this I try to use AI for now. To use it easyly its better to get an ready to use tool that integrated in the ecosystem. So I give Power automat a try.
# What is Powerautomate
Power Automate, formerly known as Microsoft Flow, is a robust automation platform by Microsoft. It allows users to create automated workflows across various applications and services without extensive coding. With its user-friendly interface and seamless integration with Microsoft and third-party apps, Power Automate simplifies tasks, streamlines processes, and enhances productivity. Leveraging Microsoft's cloud infrastructure, it ensures scalability, reliability, and security, making it an indispensable tool for businesses seeking efficiency and innovation. It provide many connectors and triggers so that it is possible to react on many ways and do all with the given data.
# How to use it for my case
So I drawed a small diagram for this:
[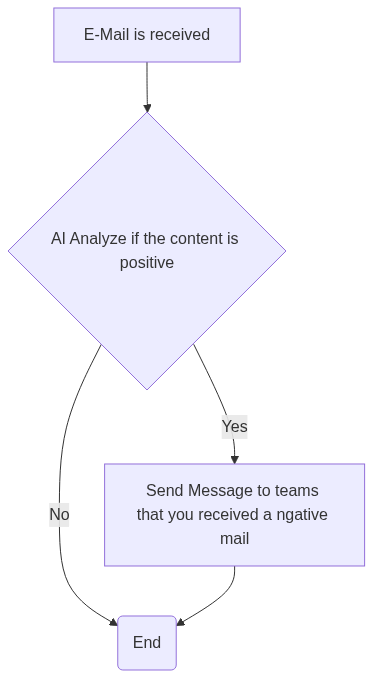](https://mermaid.live/edit?ref=blog.bajonczak.com#pako:eNpNT0Fug0AM%5FIrlUyOFD3CoRBIOPSSX9JJme7BYQ1ZidxFrWlHE32sa0tYne2Y8Y09YRcuYY93Gz-pGvcDrwQTQKq5ldiTXgkvQc8Xug-37ndpNxQsUgdrxi8HVIDeGKgbhIIu6i8mJyue7en89c7Bw5JSoYZAIwuSTbpHAGIdfdyAIDS2b4DV4DSufymA3601Z9rxbb8gygxdOBhXb%5F8NO8Qcq1%5FC%5F9mGEW%5FTca4LVv6eFM6gfeDaYa2u5pqEVgybMKqVB4nkMFebSD7zFobMkfHDU9OQxr6lNinYU3mJ8zPM3NExsgQ)
So when I receive an E-Mail the flow must then anaylze the content if it contains negative segments. If this is true, then I get a notification (in Teams) that there is a mail that contains a negative content.
# Create the flow
First of all, I create a new flow in the powerautomat dashboard. For this I will go to the following site [https://make.powerautomate.com/](https://make.powerautomate.com/?ref=blog.bajonczak.com). On this page I click Create and select the "automated cloud-flow" option. Take this screenshot as references (sorry only german screen available)
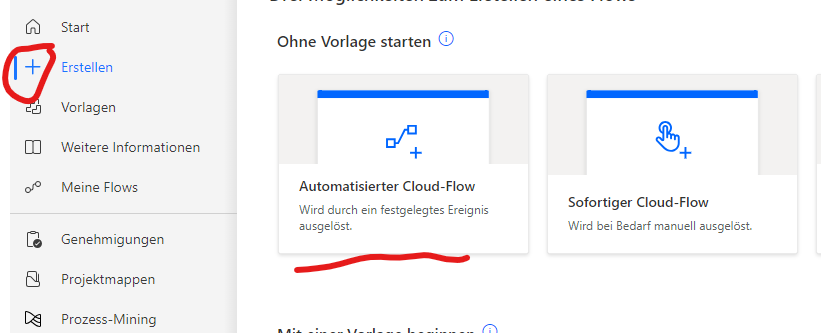
After that, I can define a name for the flow and select the trigger. I use the trigger, when an E-mail arrives
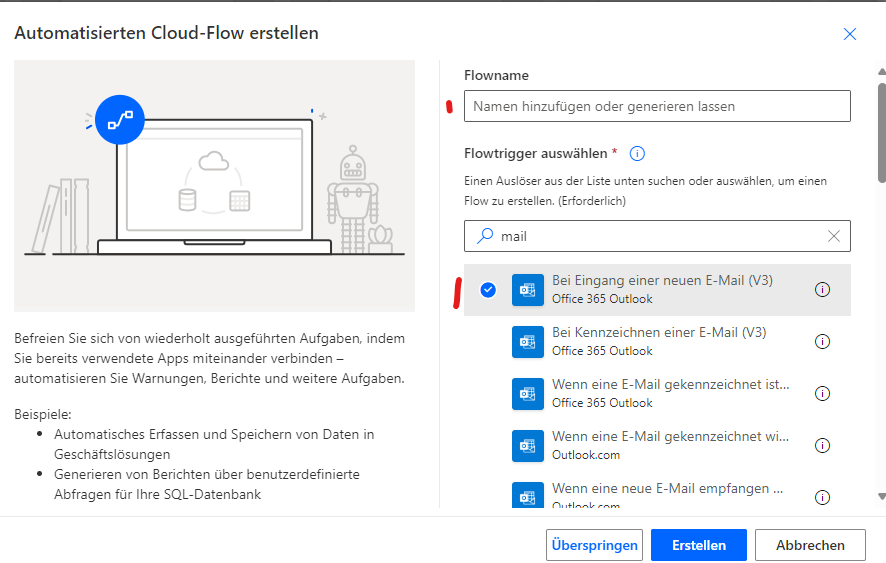
After hitting create You are in the flow designer. It looks likt the Logicapp designer but it has more integrated things that we will use then
# Generating the Workflow
The first step after receiving the email, you convert the E-Mail body to plain text. Because the AI -Model does not work with HTML bodies.
Now the next step is to shorten the body to a maximum 500 characters, So it will take only the first email. In some cases it is more than 500 characters but for this demo case I assume that most mails did not have more than 500 characters written down because you do not need the complete history in it.
The next part is the important part.
I use the the AI builder part to identify the positive or negative mood of the mail.
The next stept are simple, I will get the actual Offie Profile to get the account in Teams. After that it will check the outcome of the AI Builder step. When the mood was negative it will send me a message through teams with the content of the mail
## The AI Builder Task
Let's deep dive into the AI builder Task. Let's assume that you get the following input
```JSON
{
"host": {
"connectionReferenceName": "shared_commondataserviceforapps",
"operationId": "PredictV2"
},
"parameters": {
"item/requestv2/language": "en",
"item/requestv2/text": "Neue Ankündigung in der Microsoft Partner Community Community im Microsoft 365\nPartner Community Viva Engage Netzwerk\n\nMicrosoft 365 Partner Community\n[https://eur03.safelinks.protection.outlook.com/?url=https%3A%2F%2Fwww.yammer.com%2Foffice365partners%2Fhome%3Ftrk_event%3Dcom_network_click%26allow_app_redirect%3D1&data=05%7C02%7Csascha.bajonczak%40realcore.de%7Cc7fe517e352d4bf0ee3908dc2fb172e3%7C99c7da5256fc49caaa958f7fb09c995e%7C0%7C0%7C638437686431021901%7CUnknown%7CTWFpbGZsb3d8eyJWIjoiMC4wLjAwMDAiLCJQIjoiV2luMzIiLCJBTiI6Ik1haWwiLCJXVCI6Mn0%3D%7C0%7C%7C%7C&sdata=8wmiJy4zg7MdaYFlA3Ovfw9YV6Ye3i5%2FnyqGiekDRjg%3D&reserved=0]\nViva Engage\n[https://mailie.assets-yammer.com/mailer_images/viva-word-logo-grey.png]\n\nJasper Pagsinohin hat eine neue Ankündigung in Microsoft Partner Community\ngepostet\n\n[https://mailie.assets-yammer.com/mailer_images/blowhorn-icon-red.png]\nAnkündigung gepostet in Microsoft Partner Community\n[https://eur03.safelinks.protection.outlook.com/?url=https%3A%2F%2Fwww.ya",
"recordId": "f1c549c2-a97e-47a5-b612-c5c2bab0f163"
}
}
```
This is a notification about a yammer group that I participate. No worry it's a shared group no private stuff here. So the AI Builder Task will takt this and analyze the content for now, the results are this
```JSON
..... "body": {
"@odata.context": "https://....crm4.dynamics.com/api/data/v9.1/$metadata#Microsoft.Dynamics.CRM.PredictResponse",
"responsev2": {
"@odata.type": "#Microsoft.Dynamics.CRM.expando",
"operationStatus": "Success",
"predictionId": "14202776-317f-44ee-b79c-d7e3d75aa682",
"predictionOutput": {
"@odata.type": "#Microsoft.Dynamics.CRM.expando",
"result": {
"@odata.type": "#Microsoft.Dynamics.CRM.expando",
"sentiment": "neutral",
"documentScores": {
"@odata.type": "#Microsoft.Dynamics.CRM.expando",
"positive": 0.07,
"neutral": 0.91,
"negative": 0.02
},
"sentences@odata.type": "#Collection(Microsoft.Dynamics.CRM.crmbaseentity)",
"sentences": [
{
"@odata.type": "#Microsoft.Dynamics.CRM.expando",
"sentiment": "neutral",
"offset": 0,
"length": 599,
"sentenceScores": {
"@odata.type": "#Microsoft.Dynamics.CRM.expando",
"positive": 0.11,
"neutral": 0.84,
"negative": 0.04
}
},
{
"@odata.type": "#Microsoft.Dynamics.CRM.expando",
"sentiment": "neutral",
"offset": 0,
"length": 125,
"sentenceScores": {
"@odata.type": "#Microsoft.Dynamics.CRM.expando",
"positive": 0.05,
"neutral": 0.93,
"negative": 0.02
}
},
{
"@odata.type": "#Microsoft.Dynamics.CRM.expando",
"sentiment": "neutral",
"offset": 0,
"length": 118,
"sentenceScores": {
"@odata.type": "#Microsoft.Dynamics.CRM.expando",
"positive": 0.12,
"neutral": 0.86,
"negative": 0.01
}
},
{
"@odata.type": "#Microsoft.Dynamics.CRM.expando",
"sentiment": "neutral",
"offset": 0,
"length": 84,
"sentenceScores": {
"@odata.type": "#Microsoft.Dynamics.CRM.expando",
"positive": 0.04,
"neutral": 0.95,
"negative": 0.01
}
},
{
"@odata.type": "#Microsoft.Dynamics.CRM.expando",
"sentiment": "neutral",
"offset": 0,
"length": 71,
"sentenceScores": {
"@odata.type": "#Microsoft.Dynamics.CRM.expando",
"positive": 0.01,
"neutral": 0.99,
"negative": 0.01
}
}
]
}
}
}
}
}
```
You see several information but important is this fragemnt
```JSON
"documentScores": {
"@odata.type": "#Microsoft.Dynamics.CRM.expando",
"positive": 0.07,
"neutral": 0.91,
"negative": 0.02
},
```
This represents the mood for the complete document what we send to the AI -Builder. In this case you get a prediction of 91% that the mood is neutral. There are not so negative and positive fragments in it.
The following example analyzed a positive mail
```JSON
...
"body": {
"@odata.context": "https://.....crm4.dynamics.com/api/data/v9.1/$metadata#Microsoft.Dynamics.CRM.PredictResponse",
"responsev2": {
"@odata.type": "#Microsoft.Dynamics.CRM.expando",
"operationStatus": "Success",
"predictionId": "570422bb-d5be-4570-b72b-adf4a6a0cd43",
"predictionOutput": {
"@odata.type": "#Microsoft.Dynamics.CRM.expando",
"result": {
"@odata.type": "#Microsoft.Dynamics.CRM.expando",
"sentiment": "positive",
"documentScores": {
"@odata.type": "#Microsoft.Dynamics.CRM.expando",
"positive": 0.54,
"neutral": 0.41,
"negative": 0.05
},
........
```
You see that this mail contains a prediction of 54% that this content is more positive. Also it assumes that the content is 41% neutral mood. But in this case the content was very positive, thrust me 😄
# Sending the results to Teams
So in my case I want to send it to teams when the content is identified as negative content. You saw above this IF-Segment. In this I will check Against the outcome of the AI-Builder. I Check if the outcome is "negative" and then it will send me a message to me via teams
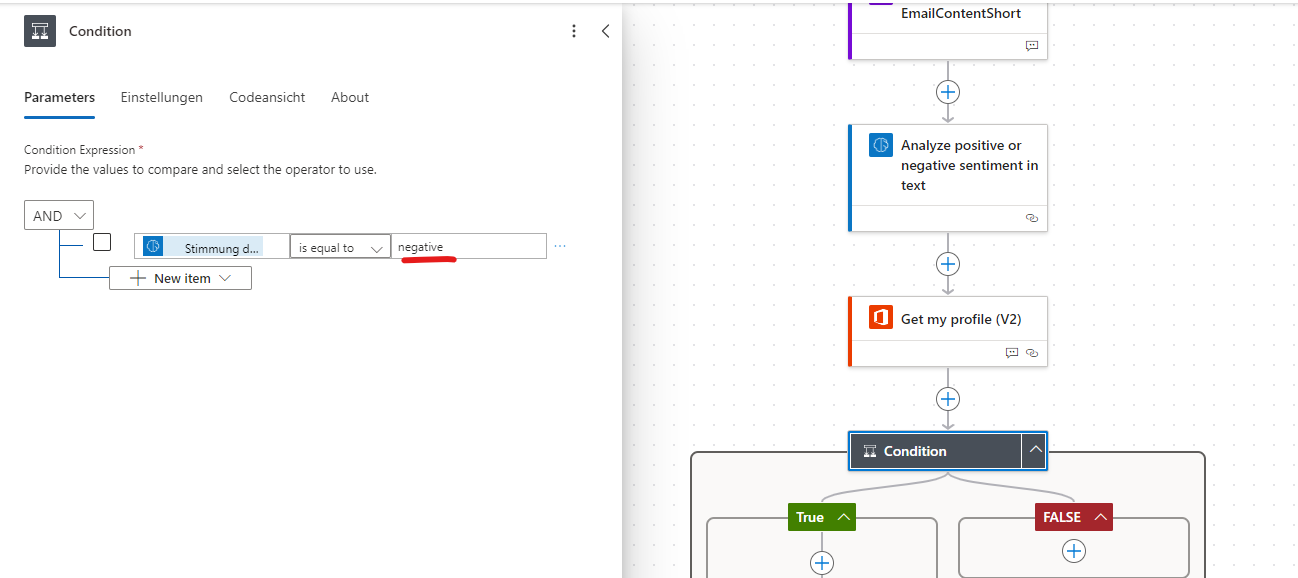
# The Result
So in my case when I get a message to teams. Here is an example for a negative E-Mail content:

# Conclusion
Powerautomate (aka Flow) is a very handy tool, because it integrates into the MS Ecosystem and in my example It reacts on the mood of an E-Mail content. For me it's very handy, because I get several CC-Mails that is not in my direct focus. But when it "escalates" than the process will notify me, so that I can take action or helping out.
I think this is a good example in which case AI can help to get more productive. It saved me time and I can focus on my work again.
What are your thoughts?
### Generating a KI Model to predict my Power consumption at home
URL: https://blog.bajonczak.com/generating-a-ki-model-to-predict-my-powerconsumption-at-home/
Last updated: 2024-02-23T11:00:41.000Z
I am very new to KI and AI, yes but hey in my last article about identifying the faces in a picture, I tried to optimize the system here at my smart home.
Actually I using a small KI / ML in Azure that takes my consumption calculates the possible consumption in the next two years, and predicts if there is a change to a new provider better and saves me costs (depending on services and so on). For this, I will make an article later this year. For now, I will concentrate on generating the KI model to predict the consumption for the next year.
So I started to search for a good model.
# Identify the best model to use
I read about it, and instead of using a new model, I can use an existing one, because I don't think that I am the only one, that wants a prediction like this. Because energy providers are also very interested in for buying energy on the market with minimum risk and so on. So my first try is to use Google to search for a good model. I end up with the SARIMAX model.
## What is SARIMAX
SARIMAX is an extension of the ARIMA (AutoRegressive Integrated Moving Average) model. This a model that analyses time series and can do a forecast of upcoming time series. The SAMIAX model extends the **S**easonal information (cold winter, hot summer, and so on). And also the X represents the eXogenous variable. This does not directly come from the time series but may still influence it. SARIMAX allows the integration of such external factors into the model to improve forecasting accuracy.
In summary, the SARIMAX model is designed to model both the temporal dependence and seasonal patterns in the data while providing the flexibility to incorporate external factors. So in fact the model is suitable for my trying to predict the power consumption
# Train the model
Of course, I learned that KI will use always python because it's powerful. So first of all I loaded all my data into the code. I get the data from my homeassistant smart home system. I exported the data (for training) into a CSV file and loaded it in the python
```python
import pandas as pd
data = pd.read_csv('input.csv')
```
The content of the CSV file looks like this
```text
Datum,Verbrauch
2022-01-01 00:00:00,14.92905377408739
2022-01-01 01:00:00,15.344728773849258
2022-01-01 02:00:00,14.502509204101026
2022-01-01 03:00:00,14.271073302423396
2022-01-01 04:00:00,14.970628270804868
2022-01-01 05:00:00,15.313465747388726
2022-01-01 06:00:00,15.212827737923645
2022-01-01 07:00:00,15.39688260215628
```
Sorry for the German words, but in fact one column contains the timestamp and the other column contains the consumption.
Now it's time to split the data into train and test data
```python
print("NO Model found, using data do generate a new one")
## Convert to tdatetime
data['Datum'] = pd.to_datetime(data['Datum'])
# Split in Train and Testdata
train_data, test_data = train_test_split(data, test_size=0.2, random_state=42)
```
Now it's time to load the model and assign the data to it
```python
from statsmodels.tsa.statespace.sarimax import SARIMAX
from statsmodels.tsa.statespace.sarimax import SARIMAXResults
model = SARIMAX(train_data['Verbrauch'], order=(1, 1, 1), seasonal_order=(1, 1, 1, 12))
```
This will define that the SARIMAX model will be used and add the consumption (verbrauch) data to it. The order and seasonal\_order will describe the data flow and how it will represent the seasonal settings.
Now when you execute it, the script trains the new model. and the output must look like this
```shell
RUNNING THE L-BFGS-B CODE
* * *
Machine precision = 2.220D-16
N = 5 M = 10
This problem is unconstrained.
At X0 0 variables are exactly at the bounds
At iterate 0 f= 1.09553D+00 |proj g|= 4.37568D-01
At iterate 5 f= 9.22713D-01 |proj g|= 1.24181D-01
At iterate 10 f= 8.51502D-01 |proj g|= 7.92404D-03
At iterate 15 f= 8.43432D-01 |proj g|= 1.81408D-02
At iterate 20 f= 8.42500D-01 |proj g|= 5.37805D-03
At iterate 25 f= 8.42404D-01 |proj g|= 3.18447D-04
* * *
Tit = total number of iterations
Tnf = total number of function evaluations
Tnint = total number of segments explored during Cauchy searches
Skip = number of BFGS updates skipped
Nact = number of active bounds at final generalized Cauchy point
Projg = norm of the final projected gradient
F = final function value
* * *
N Tit Tnf Tnint Skip Nact Projg F
5 27 45 1 0 0 1.363D-04 8.424D-01
F = 0.84240300105255983
CONVERGENCE: REL_REDUCTION_OF_F_<=_FACTR*EPSMCH
NO Model found, using data do generate a new one
```
This output will provide an overview of the model generation. In common it did an iteration count of 27\. So it trains a very long time for now. But I am interested if the model is good enough.
# Testing against the test set with the "Mean Squared Error" check
For checking the correctness of the prediction I can compare the prediction with the test dataset. For this, I sum up the difference make an average, and squared it to get a value to check against it.
The result must be the possible lowest one, which means that the prediction will be very good. If the value is high, then you see that the model is far away from a good prediction.
To get the Mean Squared Error I use the following method
```python
predictions = results.get_forecast(steps=len(test_data))
predicted_mean = predictions.predicted_mean
# Evaluate the model (eg. Mean Squared Error)
mse = ((predicted_mean - test_data['Verbrauch']) ** 2).mean()
print(f'Mean Squared Error: {mse}')
```
In my example with the dataset, it results in this line
```shell
Mean Squared Error: 0.35250814348458676
```
So it's very low, near 0\. Thats good! Very good indeed 😄.
> Keep in mind, that you cannot reach the value 0, but the target is to get the lowest value. But it depends on the domain. So when you try to predict the temperature for the future a value of 5 can be good enough. But for example when you predict a stock price for tomorrow, a value of 5 is not a very got result.
# Do the first prediction
So now we have a trained model and we checked the results against the test set. Now it's time to get some predictions, and let the "magic" work 😄.
So at first, I will predict a time range of 14 days from the maximum date value (in the dataset).
```python
forecast_steps = 14
future_dates = pd.date_range(start=data['Datum'].max(), periods=forecast_steps + 1, freq='d')[1:]
```
This will get me an array of 14 days. Next, I will "throw" it into my model and tell it that he should predict the data for it
```python
forecast = model.get_forecast(steps=forecast_steps)
forecast_mean = forecast.predicted_mean
print("predictions:")
print(forecast.predicted_mean)
```
The results of the forecast call will contain the predicted values and iw till generate the output like this
```shell
predictions:
3456 14.759803
3457 14.862023
3458 14.895377
3459 14.803441
3460 14.817742
```
so it's near to the input values. that cool. But let's do some more. I want to display the existing data and the predicted one
# Displaying the data aka plotting
In Python it's very simple to "plot" the data into an image
In our example, I use the following lines of code
```python
plt.figure(figsize=(12, 6))
# original values
plt.plot(data['Datum'], data['Verbrauch'], label='measured values', color='blue',linestyle = 'solid')
# values
plt.plot(future_dates, forecast_mean, label='forecasts', color='red',linestyle = 'solid')
# Fill in with forecast values
#plt.fill_between(future_dates, forecast.conf_float()['lower Verbrauch'], forecast.conf_float()['upper Verbrauch'], color='red', alpha=0.2)
plt.title('Power consumption')
plt.xlabel('Date')
plt.ylabel('consumption')
plt.legend()
plt.savefig("prediction.png")
```
Now I get the following output
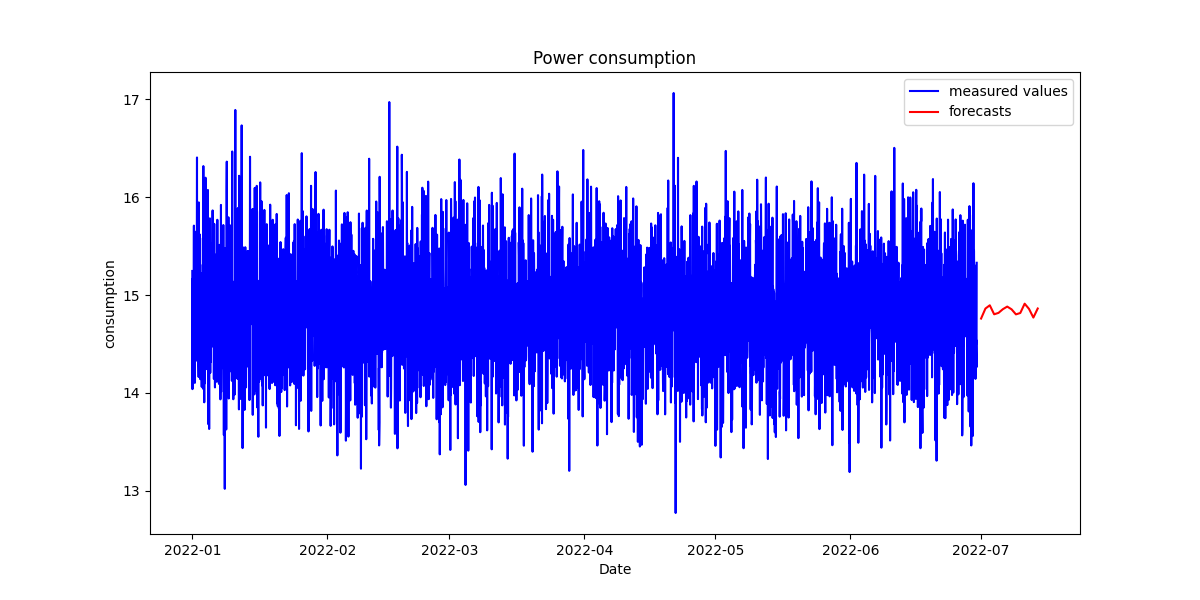
The blue ones represent the existing measured data and the right ones are the predictions (on average). When I look at both sides I see the average line comply to the blue trend. So I think the prediction will help me to identify the consumption in the future. But I want to have not only the average values, but I will also display the upper and lower boundaries to identify the range in which the prediction was made for this I uncomment a single line from above and the code looks then like this
```python
plt.figure(figsize=(12, 6))
# original values
plt.plot(data['Datum'], data['Verbrauch'], label='measured values', color='blue',linestyle = 'solid')
# values
plt.plot(future_dates, forecast_mean, label='forecasts', color='red',linestyle = 'solid')
# Fill in with forecast values
plt.fill_between(future_dates, forecast.conf_float()['lower Verbrauch'], forecast.conf_float()['upper Verbrauch'], color='red', alpha=0.2)
plt.title('Power consumption')
plt.xlabel('Date')
plt.ylabel('consumption')
plt.legend()
plt.savefig("prediction.png")
```
This will now plot the graph and add the boundings as red shade too. The result looks now like this
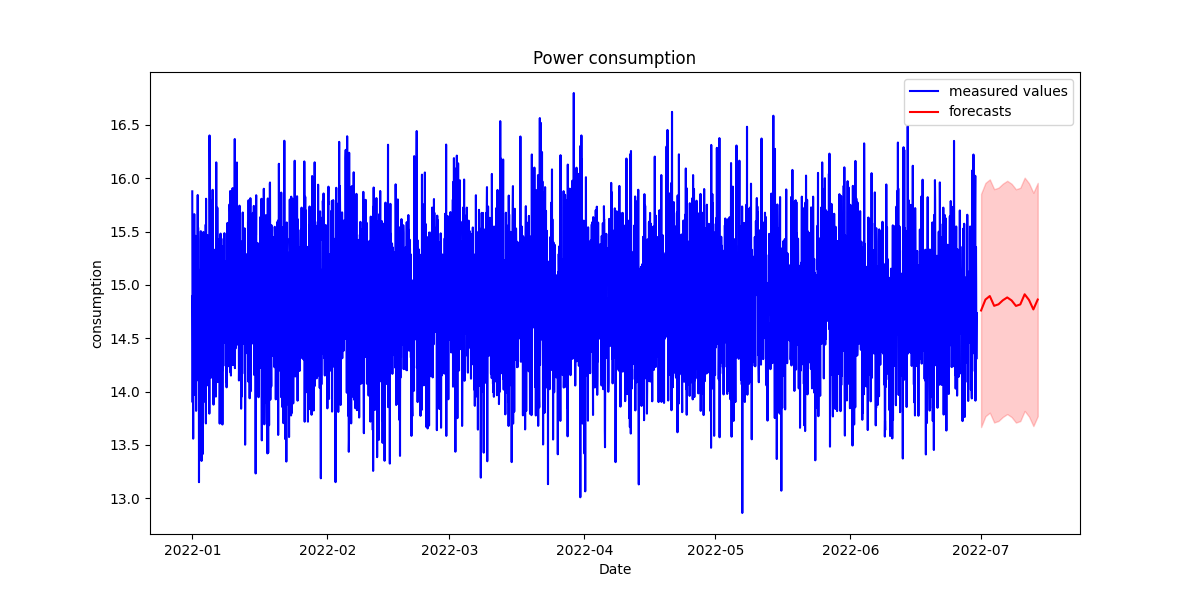
You see yourself, that the upper and lower values are not far away from the existing ones. So I think the model was perfect for me and I can now use this model that will predict me more than 14 days. For example, I can now use more time like 2 years. But I think that here my dataset has too few elements in it because it contains only one year not more. So think that this year represents the complete other years and ignores seasonal extreme values like hot summers in which we let run our climate longer than usual. So the prediction will be affected by the source data.
# Train the model again
One more information about this model. Once it is trained, you cannot use the model again and enrich it with more train data. So you must every time regenerate the model with the new data. In my case, I use the model for one month and when the month is over, it will be regenerated with all fresh data and the existing old ones. I do this as a cron job on my homeassistant server
# Conclusion
You see, using a model to train it with your custom data, is quite easy. However the results depend on the input data. In my example, it was very easy, so the outcome can be easy ly predicted in some time, but I must be aware of this. So I retrain the model every month completely. In fact, the new data cannot be assigned to train it more.
### How to identify faces within a picture
URL: https://blog.bajonczak.com/how-i-generated-my-custom-ki-modell/
Last updated: 2024-02-16T11:00:09.000Z
I wondered if there is an easy way to identify faces in images and classify them with recognized names. So I don't know much about KI or face recognition or so, but hey let's get started to try it out. So my goal is to let the model identify me in a picture (or maybe later in a stream, but that are only many pictures;)).
# Startingpoint
So I am very new to this topic, so I started googling around how I can identify a picture from me in a video stream. After a little research, these are the resulting steps
1. Generate a custom training model that recognizes my face
2. Grab the Images and identify me in this
I know that there are way more substeps but this is the result for now. So let's start to generate the custom model.
# The Setup
First I want to describe the setup. I use as input some pictures taken from me at my shitty camera on the laptop 😉. To train the model I use Python and the library face\_recogintion.
I try to avoid the dependency hell mess, so I use also docker containers to generate the model and run the identification. This is not the main focus of this article but you can get this project on my GitHub (more below in this article)
# Train the Libary to identify me
So at first, I use an image from myself, not a fancy one but for testing it's okay. It was in the morning or late evening, but it doesn't matter

So I will for now use it as a source to identify my picture in other pictures.
The code looks like this:
```python
import face_recognition
import os
import numpy as np
from PIL import Image, ImageDraw
# Function to get th images from the folder
def load_images_from_folder(folder):
images = []
for filename in os.listdir(folder):
img_path = os.path.join(folder, filename)
if os.path.isfile(img_path):
images.append(face_recognition.load_image_file(img_path))
return images
# Function to train the model
def train_face_recognition_model(images_folder):
# load the images
sascha_image = face_recognition.load_image_file("images/sascha.jpg")
sascha_face_encoding = face_recognition.face_encodings(sascha_image)[0]
face_encodings = [
sascha_face_encoding,
]
labels = [
"Sascha",
]
return face_encodings, labels
```
This will now take the Image called "sascha.jpg" and get the metrics from my face for recognizing it in other pictures. Next, I create a label array with the same index size. So when I add another image from my son I can put it there too.
Next, we want to identify me in other Images. For that, I have created the following code. So unfortunately I am not a phython developer i must do some try and errors. It maybe looked like this to my wife like this

But anyway this is the result
```python
# The folder wit the images
images_folder = 'images'
target_image_path = 'test/image_1.jpg'
# Do the training
known_encoding, labels = train_face_recognition_model(images_folder)
# load image and reconize image
target_image = face_recognition.load_image_file(target_image_path)
face_locations = face_recognition.face_locations(target_image)
face_encodings = face_recognition.face_encodings(target_image, face_locations)
for face_encoding in face_encodings:
matches = face_recognition.compare_faces(known_encoding, face_encoding)
name = "Unknown"
face_distances = face_recognition.face_distance(known_encoding, face_encoding)
best_match_index = np.argmin(face_distances)
print(best_match_index)
if matches[best_match_index]:
name = labels[best_match_index]
# open image for drawwing
pil_image = Image.open(target_image_path)
draw = ImageDraw.Draw(pil_image)
# Check if any of the detected faces match the known face
for (top, right, bottom, left), face_encoding in zip(face_locations, face_encodings):
match = face_recognition.compare_faces([known_encoding], face_encoding)
face_distances = face_recognition.face_distance([known_encoding], face_encoding)
best_match_index = np.argmin(match)
draw.rectangle([left, top, right, bottom], outline="green", width=2)
draw.text(text= name, xy= [left, top])
# Save or display the modified image
##pil_image.show()
pil_image.save("test/image_1_ex.jpg")
# Save the trained modell
model_data = {'face_encodings': face_encodings, 'labels': labels}
# face_recognition.save_known_faces(model_data, 'face_recognition_model.pkl')
print("Finished training the modell." , labels)
```
This piece of code will take the given image to compare and open it. After that, It will iterate each comparable image and try to find the given persons in it (in our example me). When there is a match, I will draw a bounding box around the recognized face, and use the same index for the label to identify the name of the person. So the result will be (when it recognizes my face) a green bounded box around the identified face. So I tested it with this code and the resulting image looks like this:

That's nice because it identified me without a front view. But what's about identifying the face within a picture more than my face. This is the result

I masked the other faces but it does not identify me. ... Yeah it's difficult because on the picture are two variants of me. First of all the completely shaved one and the other the partially shaved one. So the reference picture is not a shaved variant from me 😃. So It must have another source to compare. this means more pictures of myself
# Rewrite the code
Now it is time to rewrite the code to use it for more than one image as the comparable source I adjusted the training method to get all files and put the filename into the array as a label. The resulting code looks like this
```python
def train_face_recognition_model(images_folder):
# load the images
face_encodings = []
labels = []
for filename in os.listdir(images_folder):
img_path = os.path.join(images_folder, filename)
if os.path.isfile(img_path):
image = face_recognition.load_image_file(img_path)
face_encoding = face_recognition.face_encodings(image)[0]
face_encodings.append(face_encoding)
labels.append(os.path.splitext(filename)[0]) # Use the filename as the label
return face_encodings, labels
```
Now you will have the possibility to add the filename as a label. This is for debugging purposes very useful because you see then which image source was used for the match. Now I run the script again and the result looks like this
debugging
Whoa, that looks nice so it identifies also other faces and it identifies my face correctly by the given input. I am happy about the result

# Conclusion
I am not a KI developer or Data Analyst but I think that this example shows how easy it can be to identify faces within an image. Sure you can now integrate it into webcam streams (in my security cams for example) but this is not the main topic of this blog post. So In conclusion I can say, that this library is very useful for identifying faces, but it has some problems in identifying variants for small examples, it is very helpful
## Additional note
Yes! I can smile but not in the early morning 😉
# The Source
The working source code of this project, with example pictures, is available at my GitHub:
[GitHub - SBajonczak/face\_recognizer: This project takes known picutres and try to identify them in other picutresThis project takes known picutres and try to identify them in other picutres - GitHub - SBajonczak/face\_recognizer: This project takes known picutres and try to identify them in other picutresGitHubSBajonczak](https://github.com/SBajonczak/face%5Frecognizer?ref=blog.bajonczak.com)
### How To solve: Fix Sync Pending
URL: https://blog.bajonczak.com/how-to-solve-onedrive-says-its-full/
Last updated: 2024-02-09T10:21:48.000Z
Yeah, it's a normal support thing. But anyway, I faced this issue, but I own a one drive with enough space. But anyway it's yelling at me that my Onedrive is full

Just for explanation! I own a personal subscription and yes with some benefits with unlimited space. So I tried to figure out how I get this error away.
# Solution #1
In many posts in their comunity the tell that the following steps must be executed in the Terminal
1. %localappdata%\\Microsoft\\OneDrive\\onedrive.exe /reset
2. %localappdata%\\Microsoft\\OneDrive\\onedrive.exe
Please to restart the Terminal between step 1 and 2\. It will unregister computer from onedrive and rerigister it again to this
but unfortunalley the commands don't work
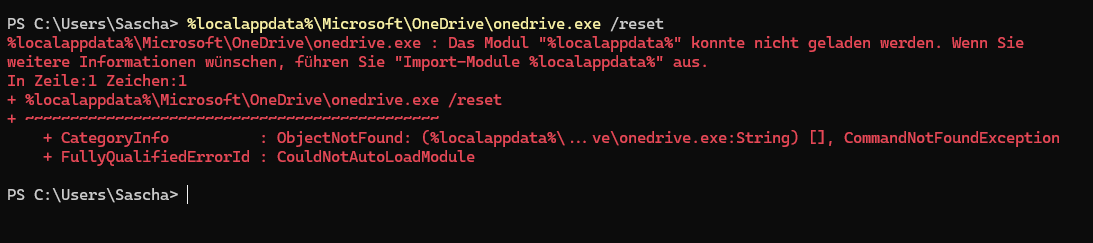
This problem occurs when the applocaldata env variable is not set (this is in fact since windows 11). So then we do it the manual way
# Solution #2
We open the onedrive settings and go to the account settings. In this dialog we see the diassioate account function (here it's only in german available)
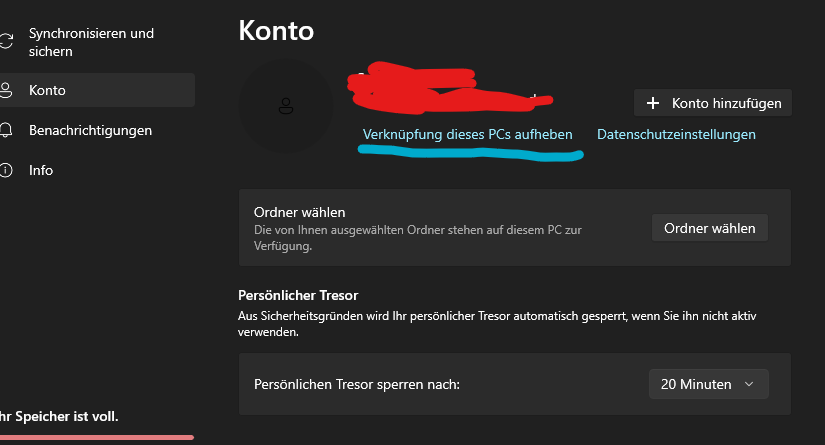
So click on this, and then the Onedrive will close and you will see that onedrive will "log-off" and this will take some time you will notice it with the sync symbol in the notification bar

Nex you restart onedrive again and you can login with your account again. After login you will be able to sync all the data again.
# Explaination
So my personal expalination is that onedrive will lose the account refresh token to revalidate the login. This tends to inavlidate the account settings and you will be promted with this error, that has nothing todo with the selected plan. So I think this will be solved in future releases. And of course this problem hits me while I run two different accounts (personal, organization). Maybe the tool cannot work with both separately.
### How To: Modifing the tab order in Azure B2C login Screen
URL: https://blog.bajonczak.com/modifing-tab-order-in-azure-b2c-login-screen/
Last updated: 2024-02-02T12:47:53.000Z
Azure B2C is a very cool tool to integrate external users into your organization. But it comes up sometimes with small bugs. One of them is the reordering of the Tab-flow.
This article will introduce you to the problem and how I solved this.
# The Problem
The Problem is the tab-flow. Look here
0:00
/0:05
1×
Now our mission is to fix this on our own :)
# Identify the Components to reorder
The very first step is to identify which fields to reorder. For this, I open up the F12 Developer toolbar and search for the id's the controls

So in my case I got the following controls
- email
- password
- forgotPassword
- next
# Write the Javascript to do the magic
Any magic will be done via JavaScript in the web world. So here the Javascript that I generated to achieve my goal:
```javascript
```
# Integrate JavaScript
In your custom Page HTML you can add the script to the bottom of the HTML, before the
